
374
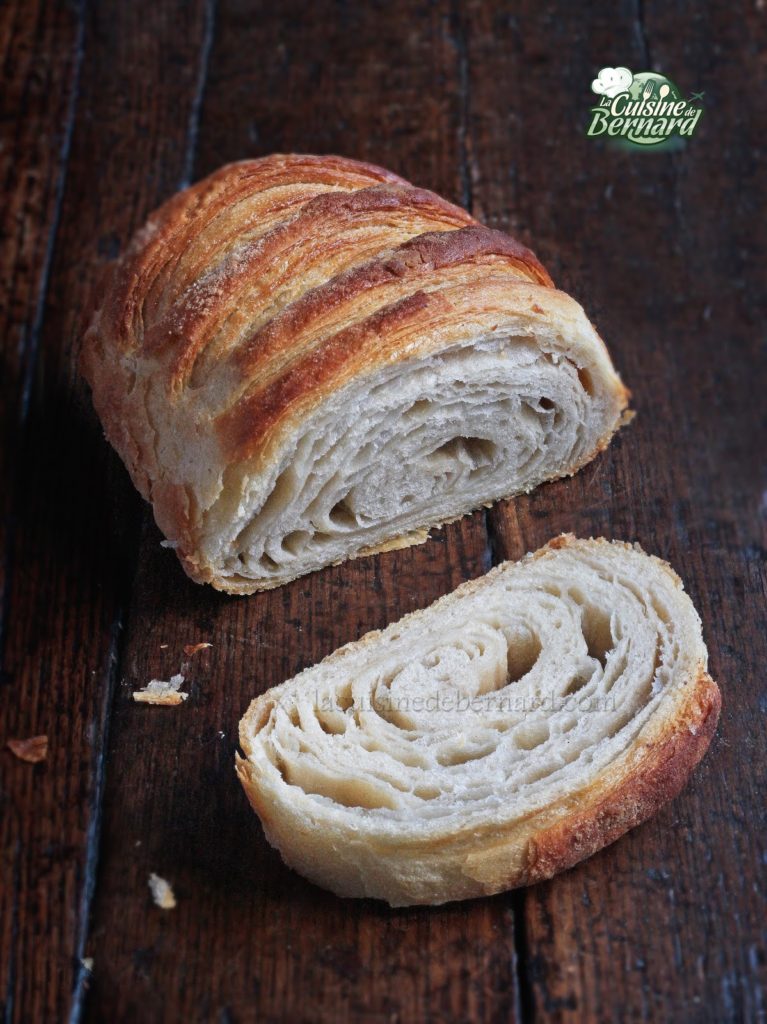


Flaky bread
I have been fascinated by foliage for many years (for as long as I can remember) and it is with a thirst for learning that I have taken advantage of my travels to discover the different styles of foliage in the world. I was introduced to flaky bread not too long ago, especially from the bakery “La Parisienne”. A must of the genre. I wanted to replicate the same bread shape and crispness. It is finally like a kouign amann without sugar and the different methods I learned before clearly helped me to make this bread. A delight that I will be making regularly…
Ingredients
- 500 g flour T55
- 5 g dry baker's yeast
- 8 g salt
- 355 g cold water
- 300 g dry butter (or Charente Poitou PDO butter with at least 82% fat content)
Instructions
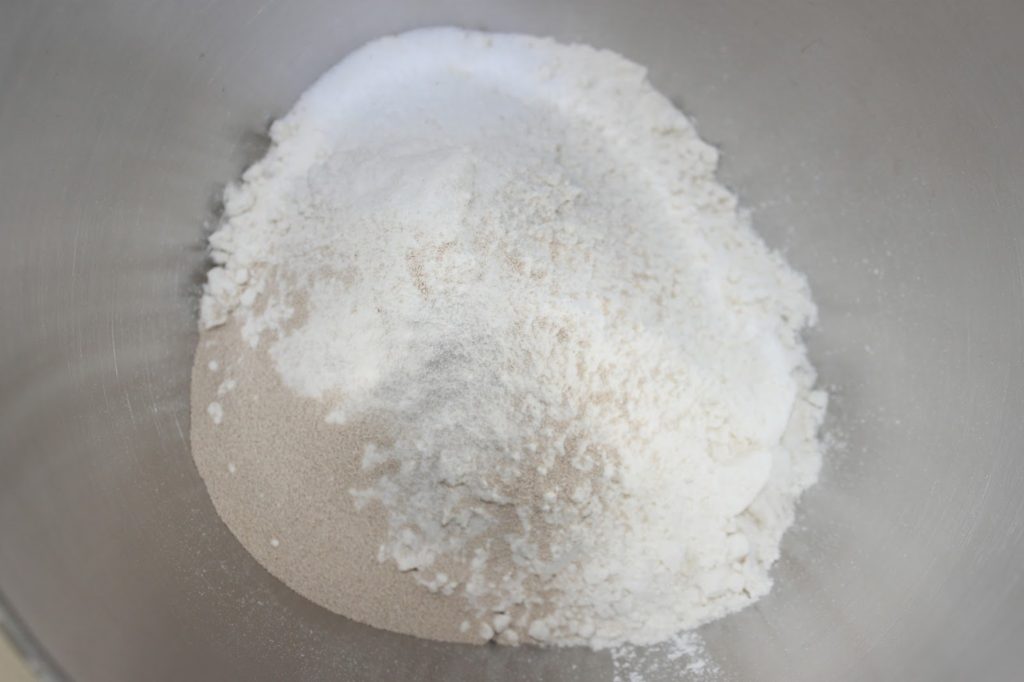
- Pour the flour, salt and yeast into the bowl of a food processor. Put the salt on one side and the yeast on the other, so they don't touch.
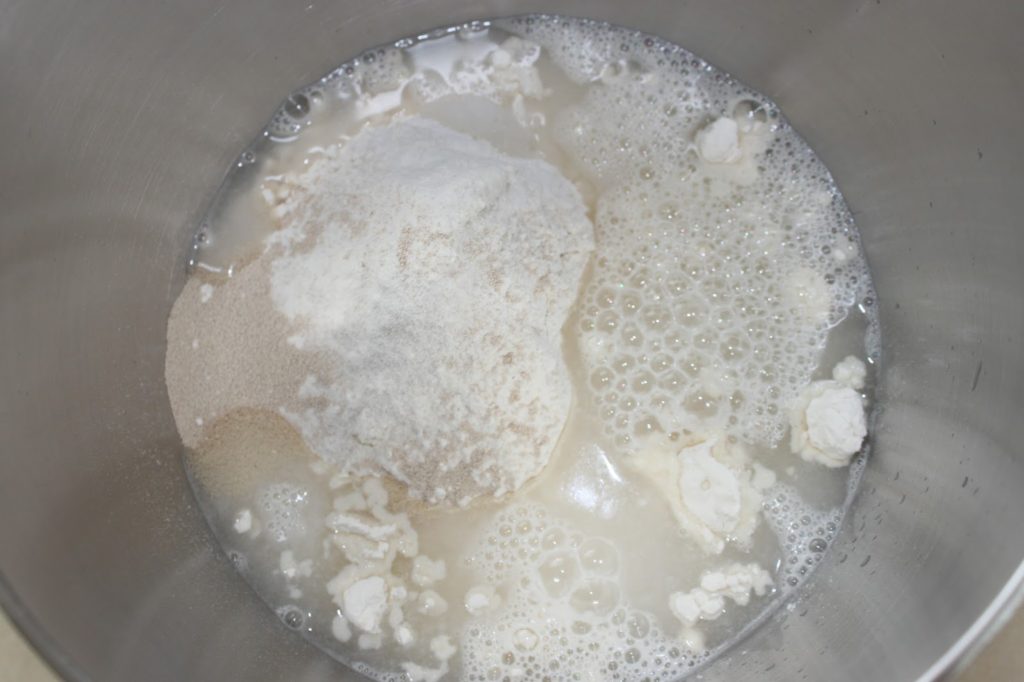
- Pour the water in one go.
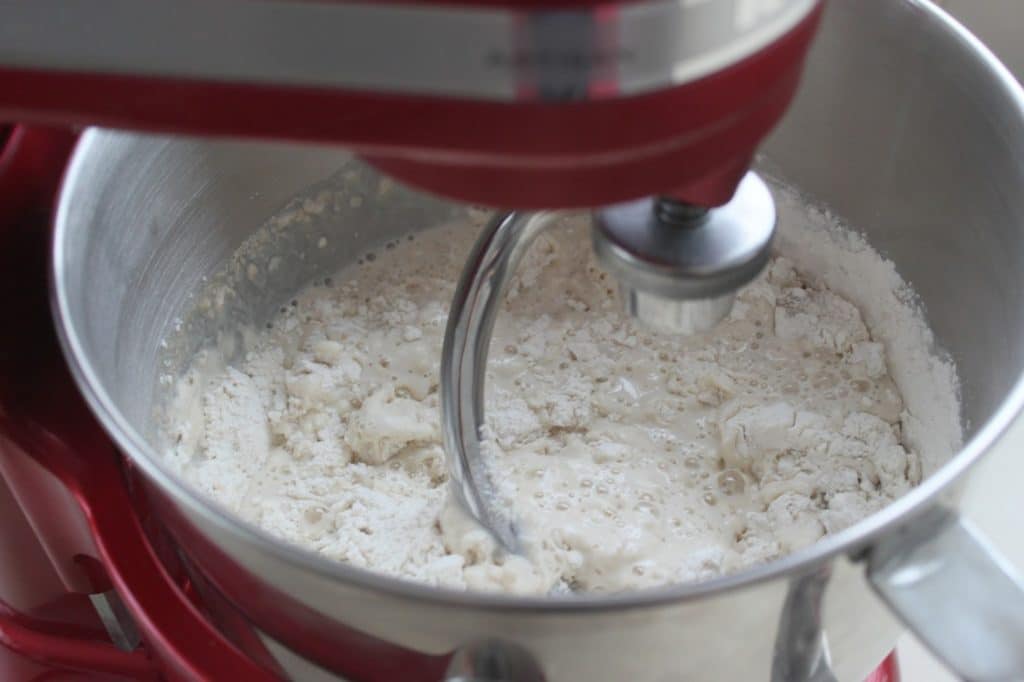
- With the hook, knead for about ten minutes at medium speed at first.
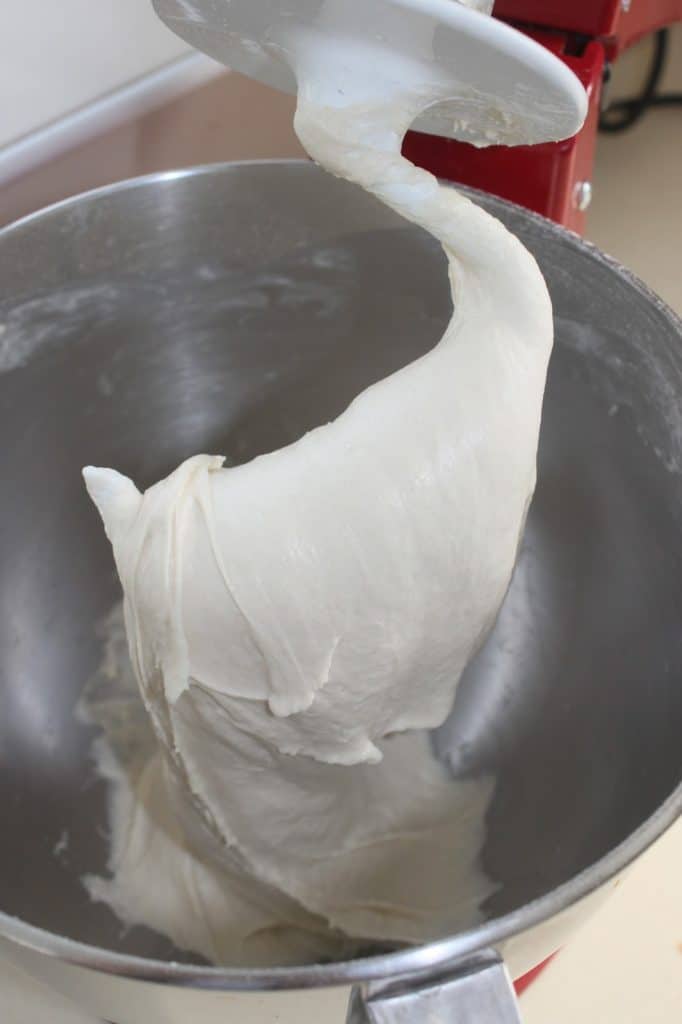
- As soon as the water and flour have combined, knead at high speed. You can stop, when the dough comes off the wall of the bowl. It is very soft and elastic. This is quite normal! No worries. At the beginning the dough is very wet and as you knead it, the yeast becomes active. The dough will increasingly come off the wall of the bowl and "slam". I stop kneading when it almost lifts off the bottom with the hook.
- If you touch it with your fingers, it sticks a lot. But everything is under control!
- Bring it back in a ball. For this, I use a plastic horn (you can use a maryse).
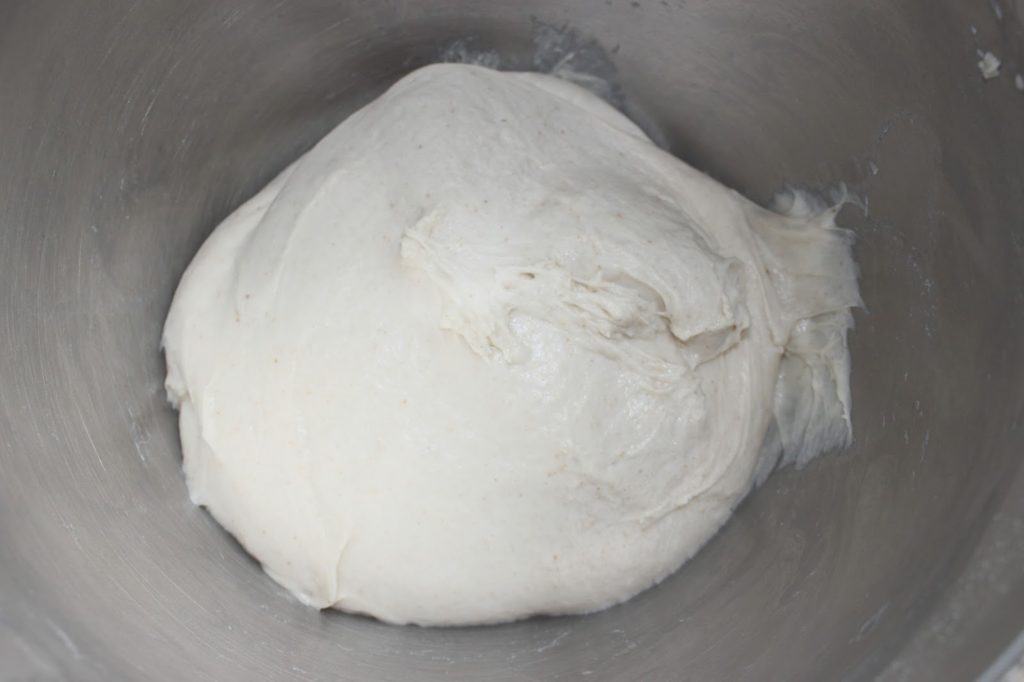
- Put a tea towel over the bowl (not in contact with the dough) and let rise for 1h30. It must be swelling well!
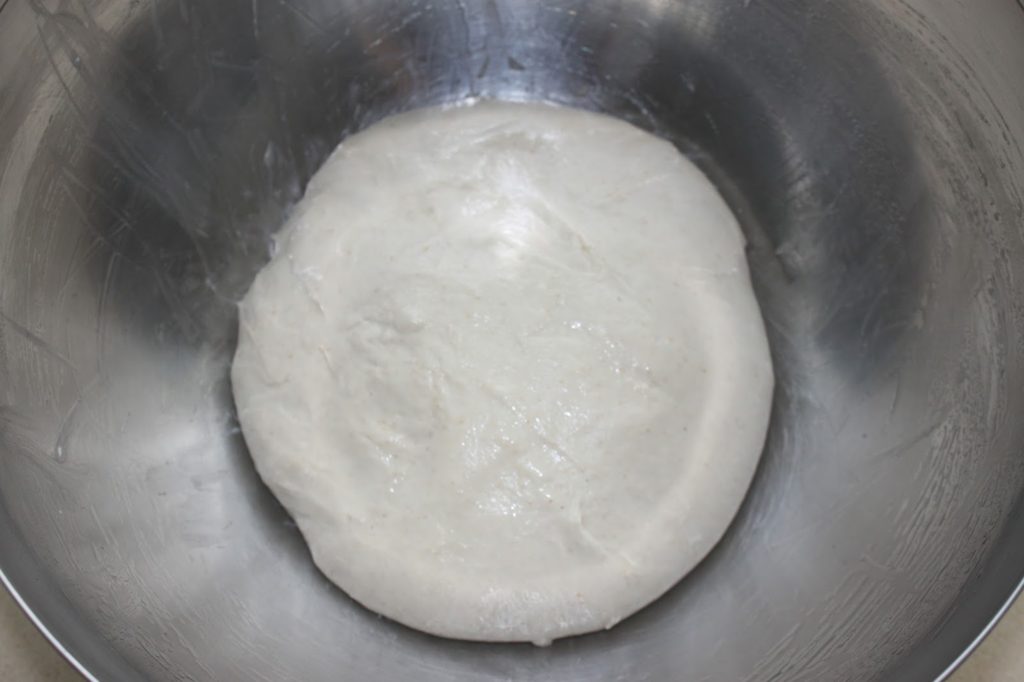
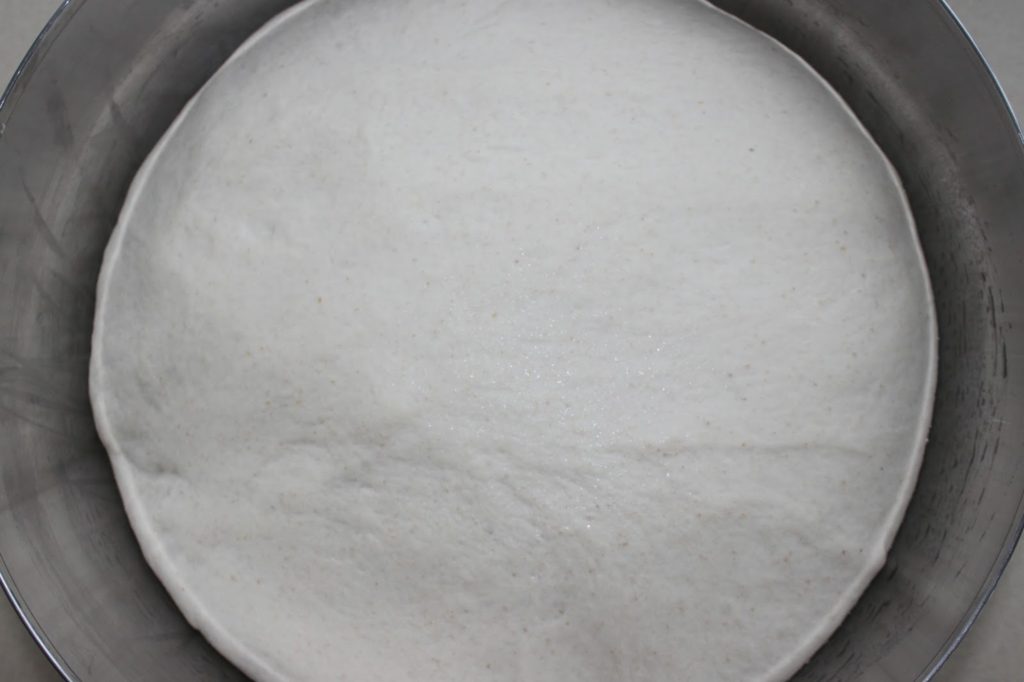
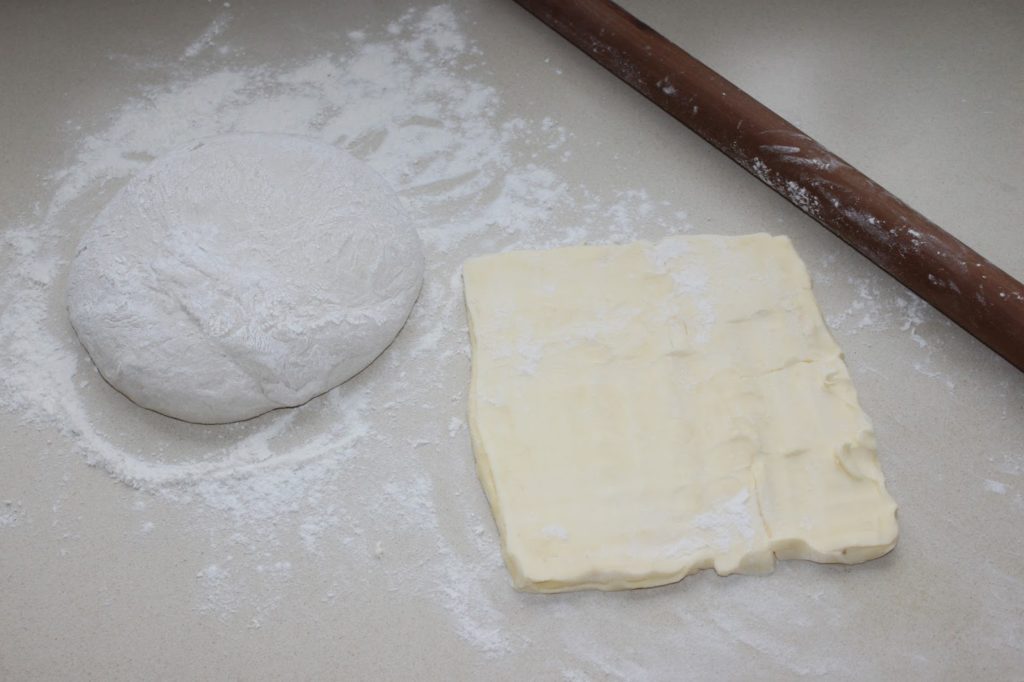
- Press the dough to remove the gas from it. Then put cling film on top of the dough and chill overnight. The dough will slowly swell in the cooler and develop the flavors.The next day, take out the dry butter (also called dry butter or tourage butter) 15 minutes before the dough. Tap the cold butter with a roller to soften it while keeping it fresh (the cold, not the expiration date! ????). Try to type on it as best you can, making it a square shape of about 20cm on each side. Finally, pour the cold dough onto the floured work surface.
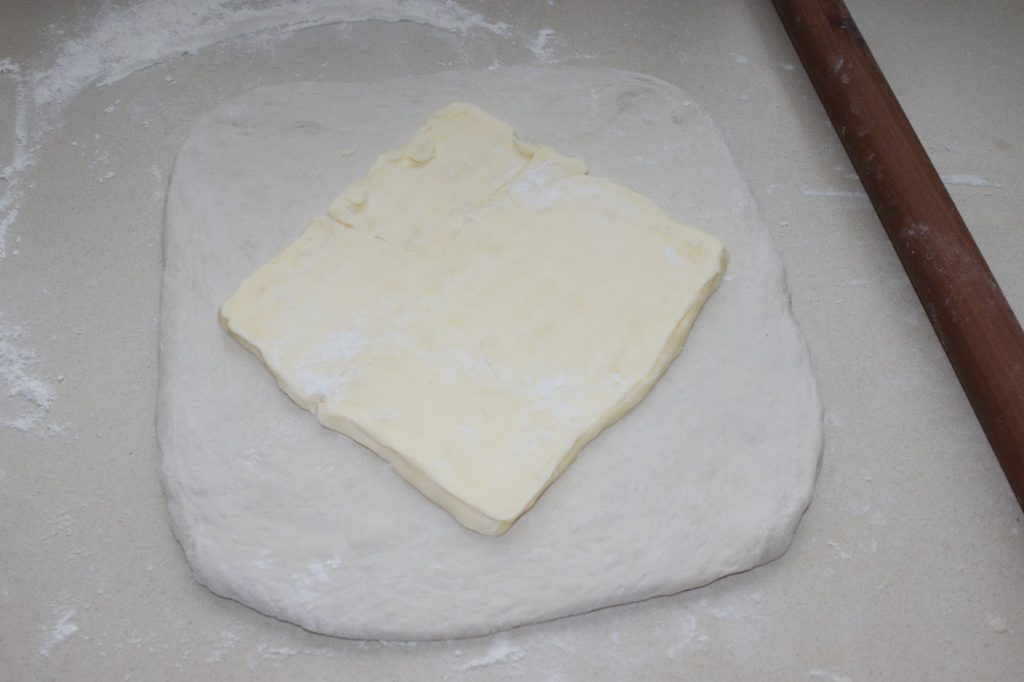
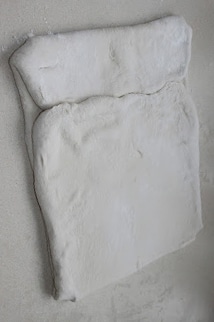
- Roll out the dough into a square shape larger than the butter. By placing the butter as shown in the photo below, you should be able to close the dough around it so that the joints fit perfectly.
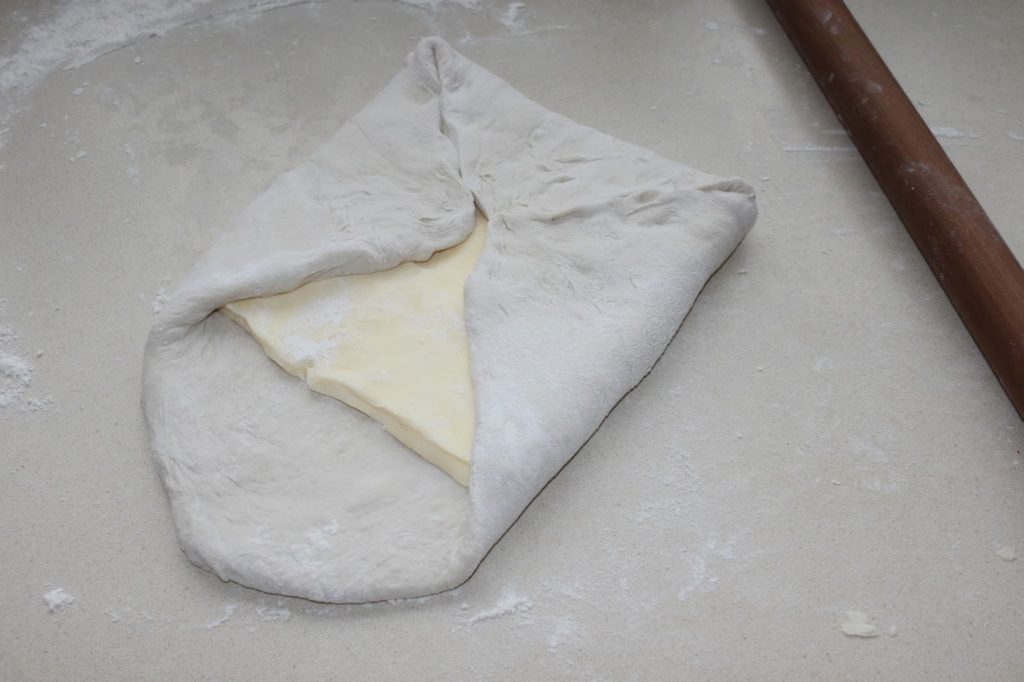
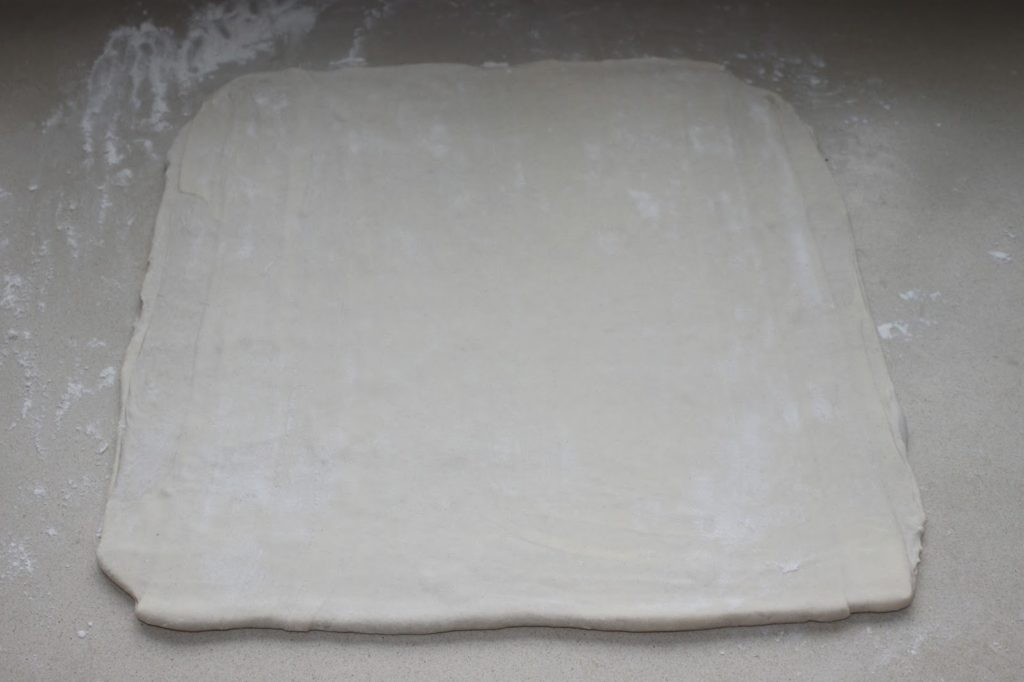
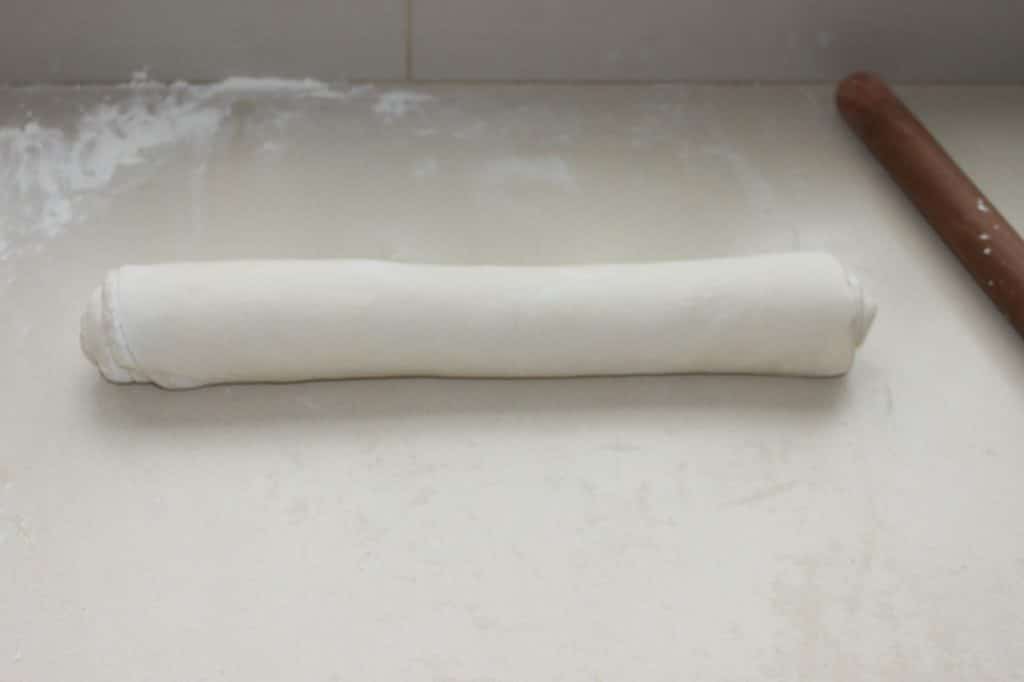
- Close the dough perfectly around the butter. Then roll out the dough into a long rectangle. Roll out the dough lengthwise only, not widthwise. Try to be as regular as possible.
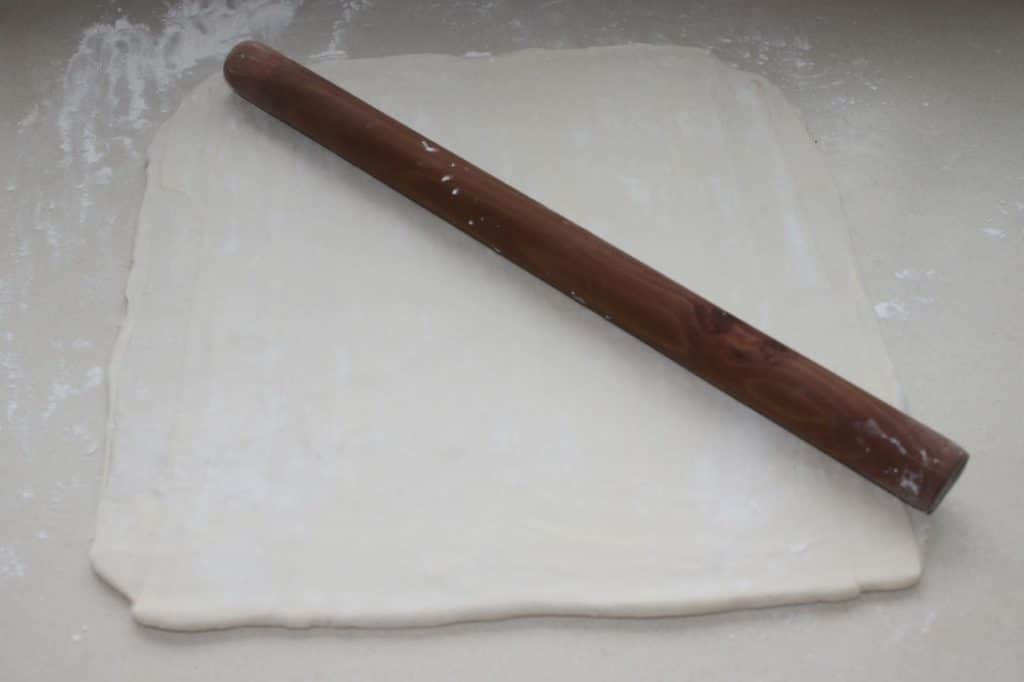
- My photo is badly taken because I turned the dough (and I didn't think I would get it right the first time, so I didn't take all the photos). But read my instructions carefully. Fold over a small piece of the top edge. Join the bottom edge so that the seam is perfect.
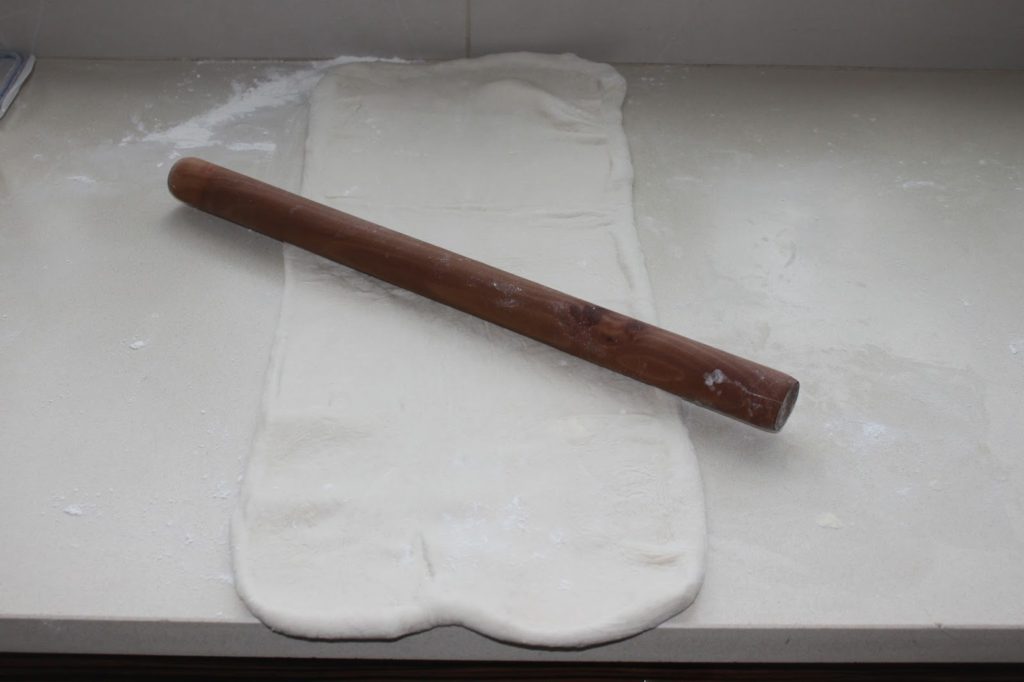
- This time fold it in half to make a first double turn. Turn the dough 90° and roll out into a long rectangle. Make a second double turn. Cover the dough with cling film and let it rest in a cool place for 30 minutes. Finally, roll out into a square of about 40cm on each side. Try to be as regular as possible. You can roll out the dough obviously in one direction and in the other to have this square.
- Wet the dough with a little water on the surface, then remove the excess with a paper towel. The dough should be just sticky on the surface, a bit like the dough for my pastéis de nata (see recipe HERE).
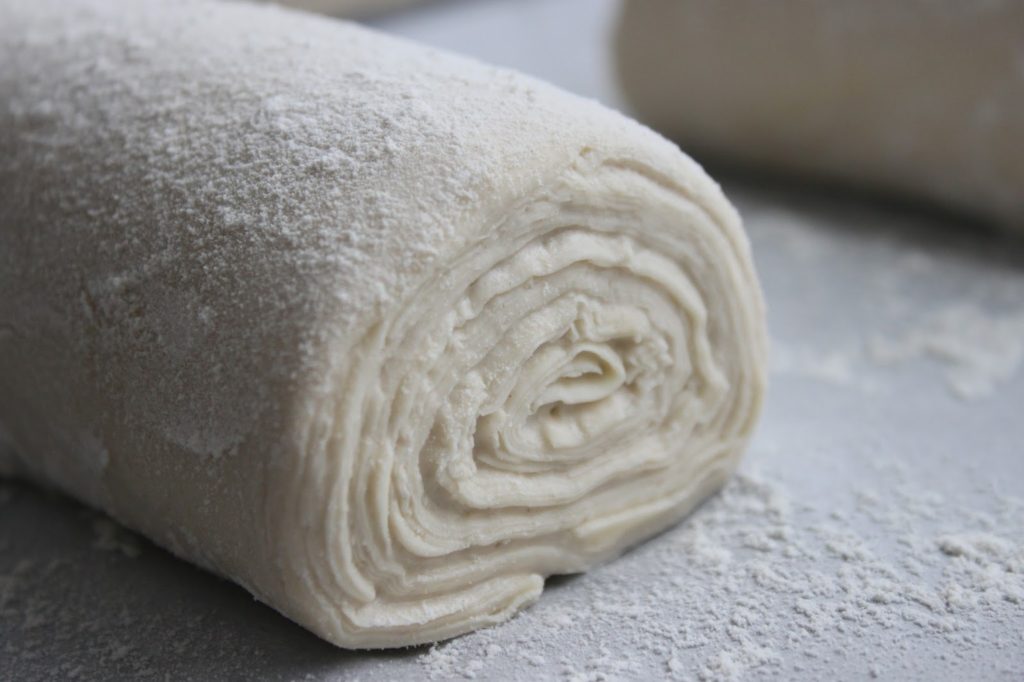
- Then roll the dough into a tight ball.
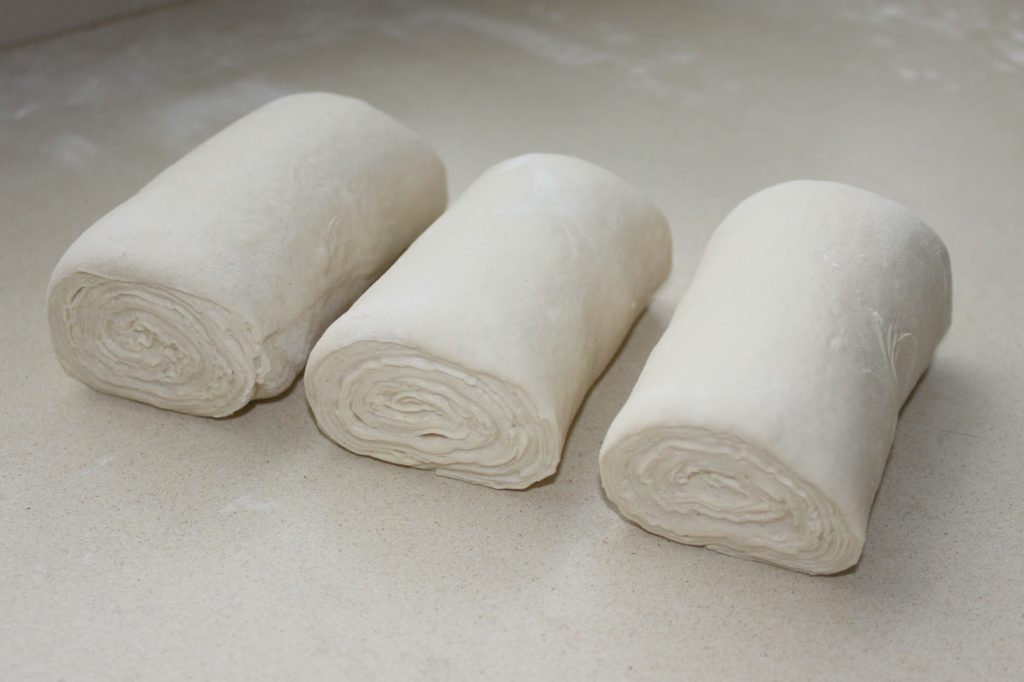
- Trim both ends (you can discard them), then cut the sausage into three equal parts.
- I don't bake 3 loaves of bread at the same time, because I use my steam combi oven for that, which is smaller than the other conventional home oven. If you bake in an oven that takes 30 x 40 cm trays (classic version), you can place the 3 loaves.
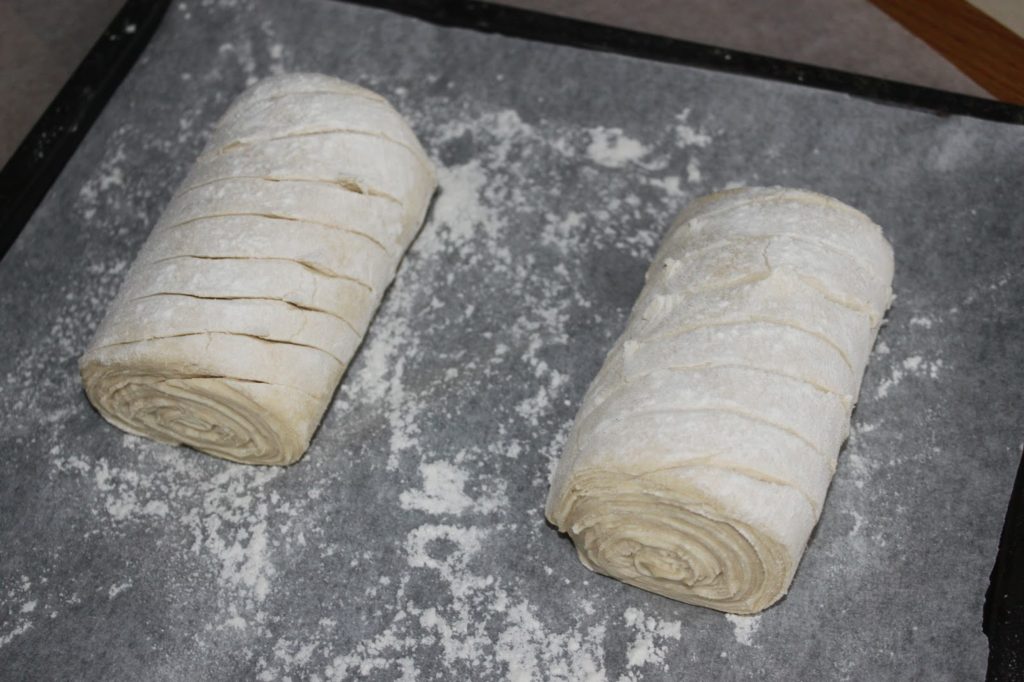
- Let the breads grow for 1 hour at room temperature.
- Before baking, cut the bread with a razor blade or an excellent knife.
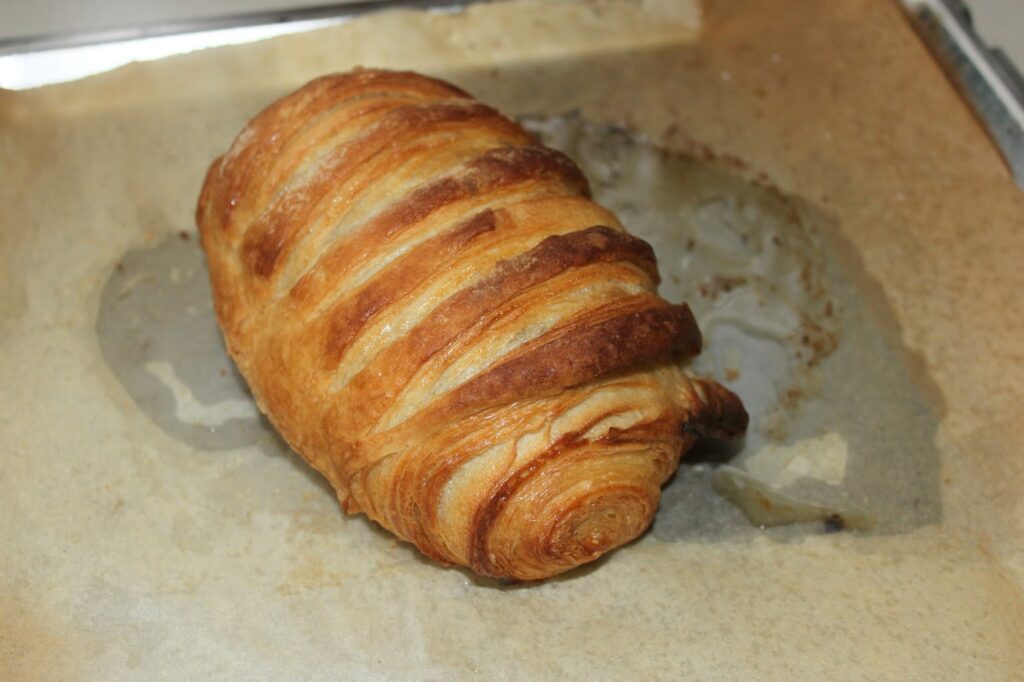
- For cooking.So I've never hidden it, KitchenAid is a partner of the workshop. The steam oven installed in it has a special function for bread. The result is amazing. The crust is perfect. I bake it at 230°C for 30 minutes and put it in the oven when cold with the dedicated function. But without this oven, it is still possible to bake bread. Phew! Preheat the oven to 220°C (the temperature is not the same as with the steam oven). if you have a pizza stone, take advantage of it!Bring a small pot of water to a boil. Pour the boiling water into a dish or tray in the bottom of your oven. The goal is to have water vapor.To slide the bread onto the baking sheet, place it on parchment paper and slide it onto the stone.Some butter will come out during the cooking process, this is quite normal. A delicious smell will fill your kitchen too!
- The bread is delicious as is, still warm or with a little honey or jam.
Nutrition
Serving: 3puff pasry loaves of 250gCalories: 1232kcalCarbohydrates: 83gProtein: 15gFat: 95gSaturated Fat: 56gPolyunsaturated Fat: 7gMonounsaturated Fat: 24gTrans Fat: 3gCholesterol: 215mgSodium: 2910mgPotassium: 248mgFiber: 6gSugar: 6gVitamin A: 2499IUVitamin C: 0.003mgCalcium: 272mgIron: 6mg
Tried this recipe?Let us know how it was!
I have been fascinated by foliage for many years (for as long as I can remember) and it is with a thirst for learning that I have taken advantage of my travels to discover the different styles of foliage in the world. I was introduced to flaky bread not too long ago, especially from the bakery “La Parisienne”. A must of the genre. I wanted to replicate the same bread shape and crispness. It is finally like a kouign amann without sugar and the different methods I learned before clearly helped me to make this bread. A delight that I will be making regularly…
Recipe for 3 puff pastry loaves of 250g:
- 500g of T55 flour
- 5g of dry baker’s yeast
- 8g of salt
- 355g of cold water
- 300g of dry butter (or Charentes Poitou PDO butter) with at least 82% fat content
Instructions:
Pour the flour, salt and yeast into the bowl of a food processor. Put the salt on one side and the yeast on the other, so they don’t touch.
Pour the water in one go.
With the hook, knead for about ten minutes at medium speed at first.
As soon as the water and flour have combined, knead at high speed. You can stop, when the dough comes off the wall of the bowl. It is very soft and elastic. This is quite normal! No worries.
At the beginning the dough is very wet and as you knead it, the yeast becomes active. The dough will increasingly come off the wall of the bowl and “slam”. I stop kneading when it almost lifts off the bottom with the hook.
If you touch it with your fingers, it sticks a lot. But everything is under control!
Bring it back in a ball. For this, I use a plastic horn (you can use a maryse).
Put a tea towel over the bowl (not in contact with the dough) and let rise for 1h30. It must be swelling well!
Press the dough to remove the gas from it. Then put cling film on top of the dough and chill overnight. The dough will slowly swell in the cooler and develop the flavors.
The next day, take out the dry butter (also called dry butter or tourage butter) 15 minutes before the dough. Tap the cold butter with a roller to soften it while keeping it fresh (the cold, not the expiration date! ????). Try to type on it as best you can, making it a square shape of about 20cm on each side. Finally, pour the cold dough onto the floured work surface.
Roll out the dough into a square shape larger than the butter. By placing the butter as shown in the photo below, you should be able to close the dough around it so that the joints fit perfectly.
Close the dough perfectly around the butter. Then roll out the dough into a long rectangle. Roll out the dough lengthwise only, not widthwise. Try to be as regular as possible.
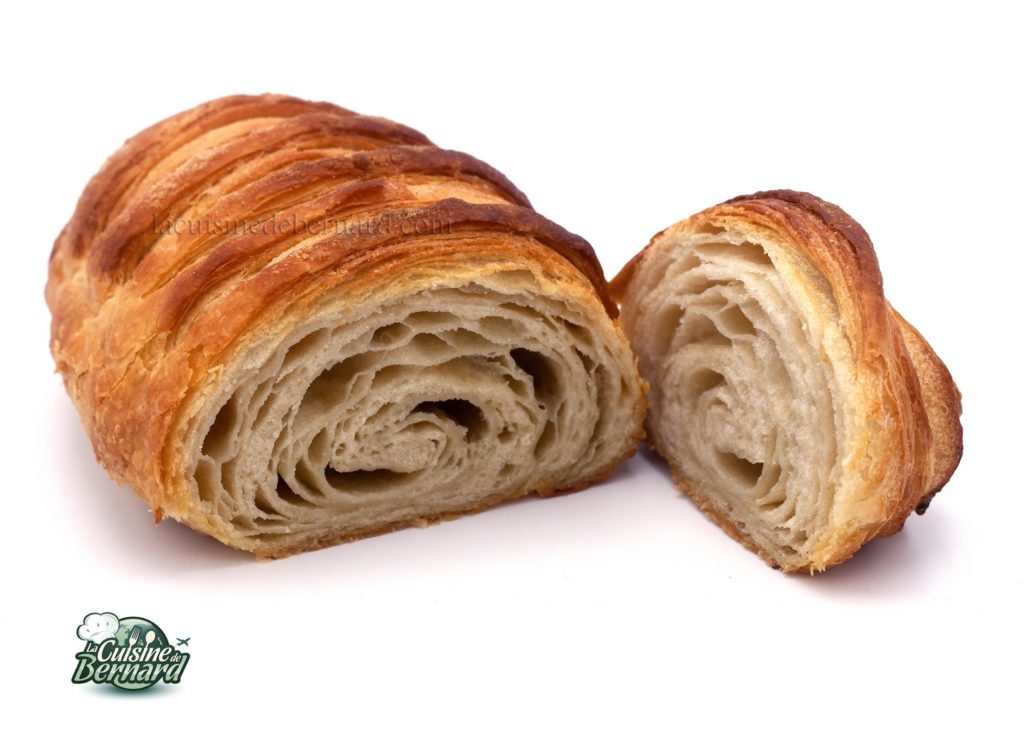
My photo is badly taken because I turned the dough (and I didn’t think I would get it right the first time, so I didn’t take all the photos). But read my instructions carefully. Fold over a small piece of the top edge. Join the bottom edge so that the seam is perfect.
This time fold it in half to make a first double turn. Turn the dough 90° and roll out into a long rectangle. Make a second double turn.
Cover the dough with cling film and let it rest in a cool place for 30 minutes.
Finally, roll out into a square of about 40cm on each side. Try to be as regular as possible. You can roll out the dough obviously in one direction and in the other to have this square.
Wet the dough with a little water on the surface, then remove the excess with a paper towel. The dough should be just sticky on the surface, a bit like the dough for my pastéis de nata (see recipe HERE).
Then roll the dough into a tight ball.
Trim both ends (you can discard them), then cut the sausage into three equal parts.
I don’t bake 3 loaves of bread at the same time, because I use my steam combi oven for that, which is smaller than the other conventional home oven. If you bake in an oven that takes 30 x 40 cm trays (classic version), you can place the 3 loaves.
Let the breads grow for 1 hour at room temperature.
Before baking, cut the bread with a razor blade or an excellent knife.
For cooking.
So I’ve never hidden it, KitchenAid is a partner of the workshop. The steam oven installed in it has a special function for bread. The result is amazing. The crust is perfect. I bake it at 230°C for 30 minutes and put it in the oven when cold with the dedicated function.
But without this oven, it is still possible to bake bread. Phew!
Preheat the oven to 220°C (the temperature is not the same as with the steam oven). if you have a pizza stone, take advantage of it!
Bring a small pot of water to a boil. Pour the boiling water into a dish or tray in the bottom of your oven. The goal is to have water vapor.
To slide the bread onto the baking sheet, place it on parchment paper and slide it onto the stone.
Some butter will come out during the cooking process, this is quite normal. A delicious smell will fill your kitchen too!
The bread is delicious as is, still warm or with a little honey or jam.
Flaky bread
I have been fascinated by foliage for many years (for as long as I can remember) and it is with a thirst for learning that I have taken advantage of my travels to discover the different styles of foliage in the world. I was introduced to flaky bread not too long ago, especially from the bakery “La Parisienne”. A must of the genre. I wanted to replicate the same bread shape and crispness. It is finally like a kouign amann without sugar and the different methods I learned before clearly helped me to make this bread. A delight that I will be making regularly…
Ingredients
- 500 g flour T55
- 5 g dry baker's yeast
- 8 g salt
- 355 g cold water
- 300 g dry butter (or Charente Poitou PDO butter with at least 82% fat content)
Instructions
- Pour the flour, salt and yeast into the bowl of a food processor. Put the salt on one side and the yeast on the other, so they don't touch.
- Pour the water in one go.
- With the hook, knead for about ten minutes at medium speed at first.
- As soon as the water and flour have combined, knead at high speed. You can stop, when the dough comes off the wall of the bowl. It is very soft and elastic. This is quite normal! No worries. At the beginning the dough is very wet and as you knead it, the yeast becomes active. The dough will increasingly come off the wall of the bowl and "slam". I stop kneading when it almost lifts off the bottom with the hook.
- If you touch it with your fingers, it sticks a lot. But everything is under control!
- Bring it back in a ball. For this, I use a plastic horn (you can use a maryse).
- Put a tea towel over the bowl (not in contact with the dough) and let rise for 1h30. It must be swelling well!
- Press the dough to remove the gas from it. Then put cling film on top of the dough and chill overnight. The dough will slowly swell in the cooler and develop the flavors.The next day, take out the dry butter (also called dry butter or tourage butter) 15 minutes before the dough. Tap the cold butter with a roller to soften it while keeping it fresh (the cold, not the expiration date! ????). Try to type on it as best you can, making it a square shape of about 20cm on each side. Finally, pour the cold dough onto the floured work surface.
- Roll out the dough into a square shape larger than the butter. By placing the butter as shown in the photo below, you should be able to close the dough around it so that the joints fit perfectly.
- Close the dough perfectly around the butter. Then roll out the dough into a long rectangle. Roll out the dough lengthwise only, not widthwise. Try to be as regular as possible.
- My photo is badly taken because I turned the dough (and I didn't think I would get it right the first time, so I didn't take all the photos). But read my instructions carefully. Fold over a small piece of the top edge. Join the bottom edge so that the seam is perfect.
- This time fold it in half to make a first double turn. Turn the dough 90° and roll out into a long rectangle. Make a second double turn. Cover the dough with cling film and let it rest in a cool place for 30 minutes. Finally, roll out into a square of about 40cm on each side. Try to be as regular as possible. You can roll out the dough obviously in one direction and in the other to have this square.
- Wet the dough with a little water on the surface, then remove the excess with a paper towel. The dough should be just sticky on the surface, a bit like the dough for my pastéis de nata (see recipe HERE).
- Then roll the dough into a tight ball.
- Trim both ends (you can discard them), then cut the sausage into three equal parts.
- I don't bake 3 loaves of bread at the same time, because I use my steam combi oven for that, which is smaller than the other conventional home oven. If you bake in an oven that takes 30 x 40 cm trays (classic version), you can place the 3 loaves.
- Let the breads grow for 1 hour at room temperature.
- Before baking, cut the bread with a razor blade or an excellent knife.
- For cooking.So I've never hidden it, KitchenAid is a partner of the workshop. The steam oven installed in it has a special function for bread. The result is amazing. The crust is perfect. I bake it at 230°C for 30 minutes and put it in the oven when cold with the dedicated function. But without this oven, it is still possible to bake bread. Phew! Preheat the oven to 220°C (the temperature is not the same as with the steam oven). if you have a pizza stone, take advantage of it!Bring a small pot of water to a boil. Pour the boiling water into a dish or tray in the bottom of your oven. The goal is to have water vapor.To slide the bread onto the baking sheet, place it on parchment paper and slide it onto the stone.Some butter will come out during the cooking process, this is quite normal. A delicious smell will fill your kitchen too!
- The bread is delicious as is, still warm or with a little honey or jam.
Nutrition
Serving: 3puff pasry loaves of 250gCalories: 1232kcalCarbohydrates: 83gProtein: 15gFat: 95gSaturated Fat: 56gPolyunsaturated Fat: 7gMonounsaturated Fat: 24gTrans Fat: 3gCholesterol: 215mgSodium: 2910mgPotassium: 248mgFiber: 6gSugar: 6gVitamin A: 2499IUVitamin C: 0.003mgCalcium: 272mgIron: 6mg
Tried this recipe?Let us know how it was!
")