

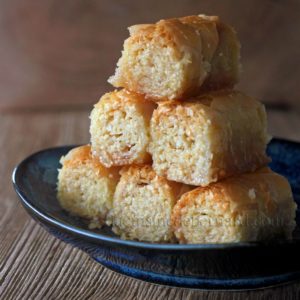
I had tasted these inverted makis in a “fusion” restaurant in Santiago, Chile with two friends. Although not very traditional, they were really delicious. I had proposed you on the blog, Japanese makis with chilli salmon (recipe HERE) and Korean gimbaps with chicken (recipe THERE). Two similar techniques, but with vinegar rice for the first and sesame oil rice for the second. As we are clearly on the “fusion food” here, I wanted to test a rice both vinegared (in lesser proportions) and with sesame oil. The result is perfect for me. Here with crispy shrimp and cooked and smoked salmon, the makis are rich but decadent and appetizing.
Recette pour 5 rouleaux de makis (pour 4 personnes) :
Rice:
- 340g of round rice
- 425g of water
- 10g sesame oil
- 5g of salt
- 15g of sugar
- 5g of mirin
- 20g of white vinegar
Samurai sauce:
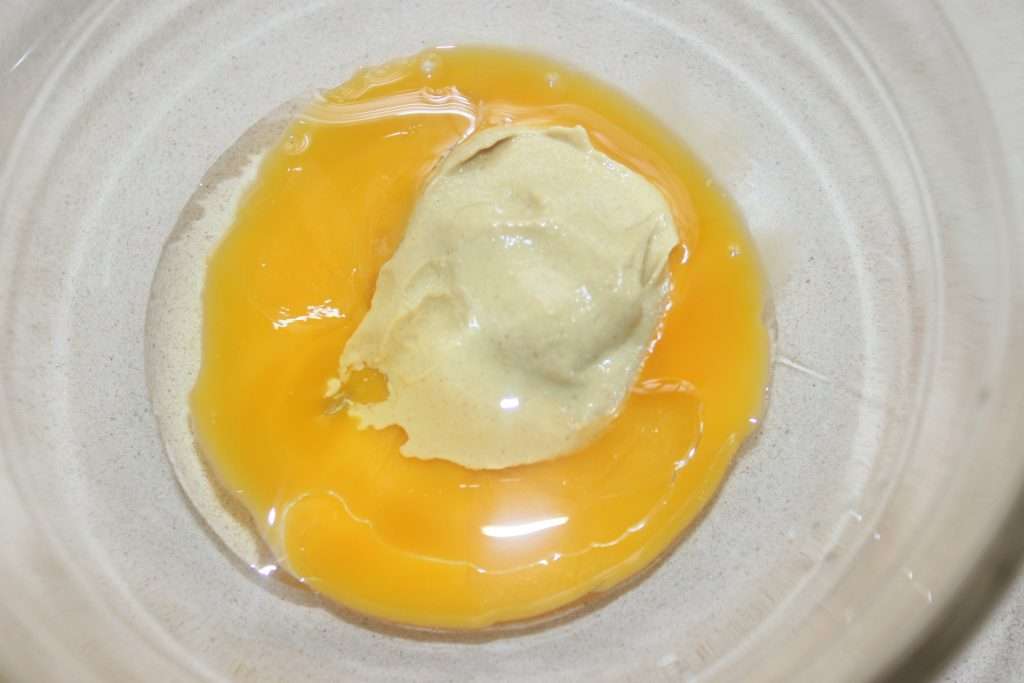
- 1 egg yolk
- 25g of mustard
- 160g of oil
- 50g of ketchup
- 5g of chili paste or tabasco
- 50g of cream
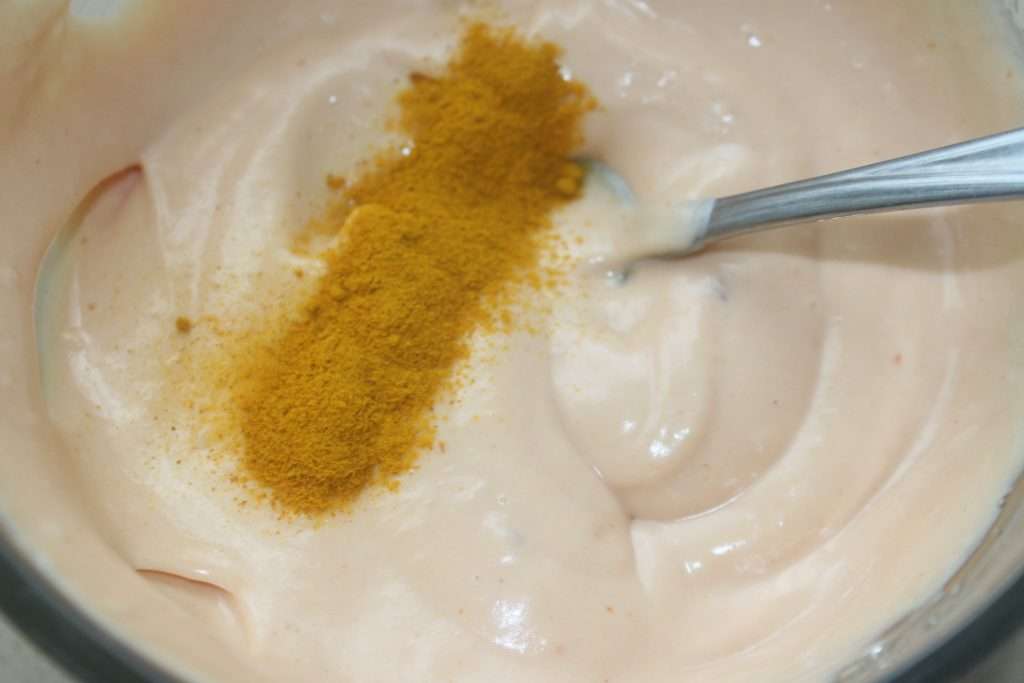
- 1 teaspoon turmeric powder
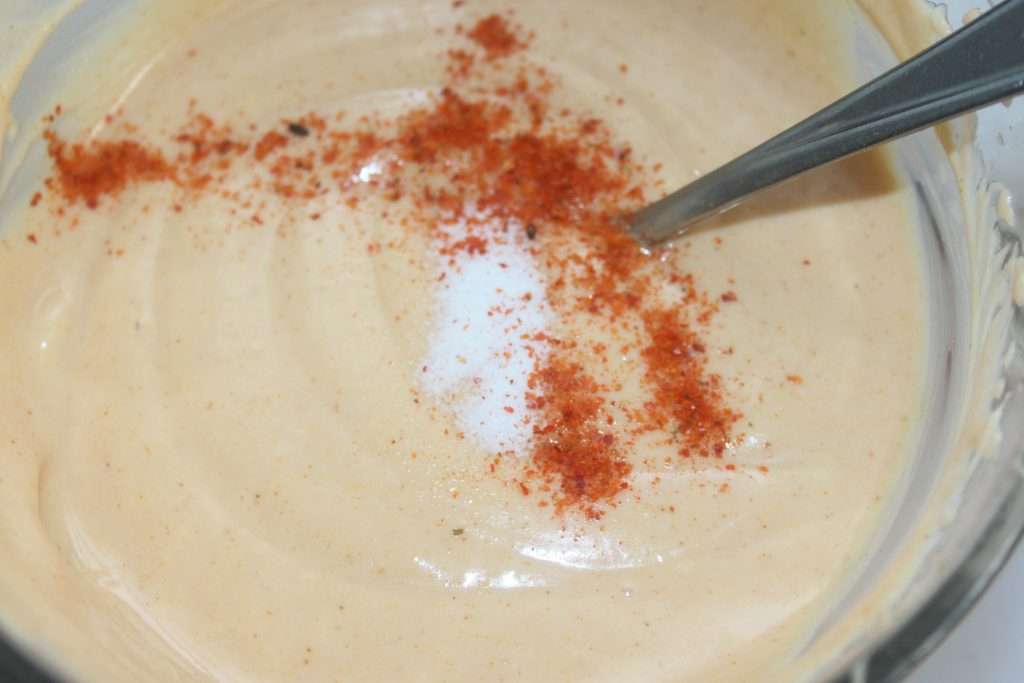
- salt, chili powder
For the rest :
- 1 salmon steak
- 1 lawyer
- 5 sheets of nori for maki
- 10 crispy shrimp (see my recipe HERE)
- 5 to 10 slices of smoked salmon (depending on their size!)
Instructions :
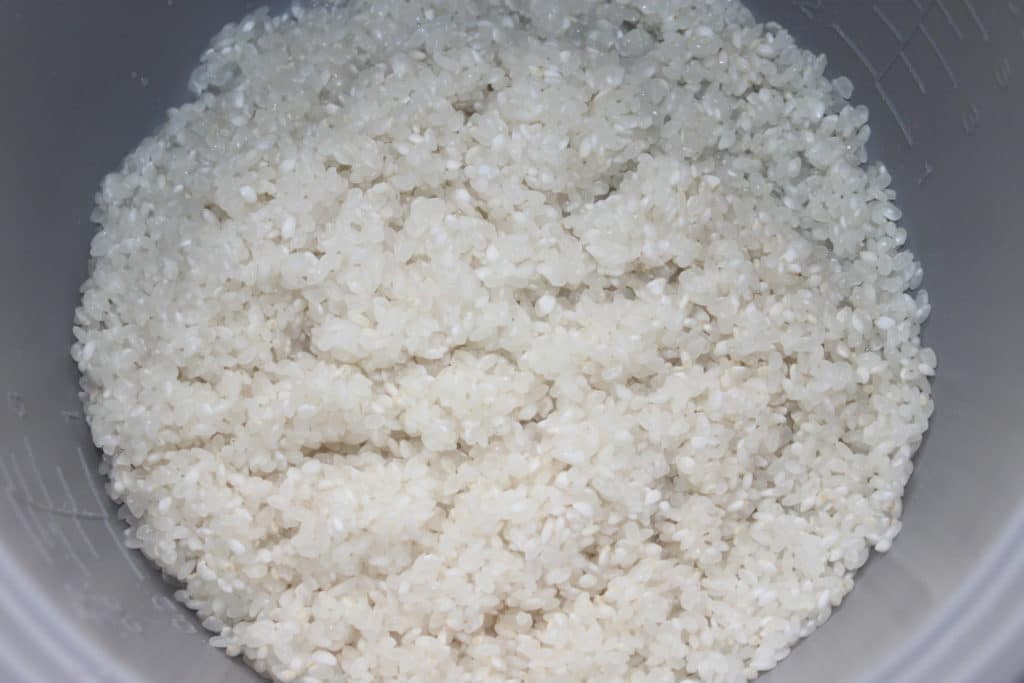
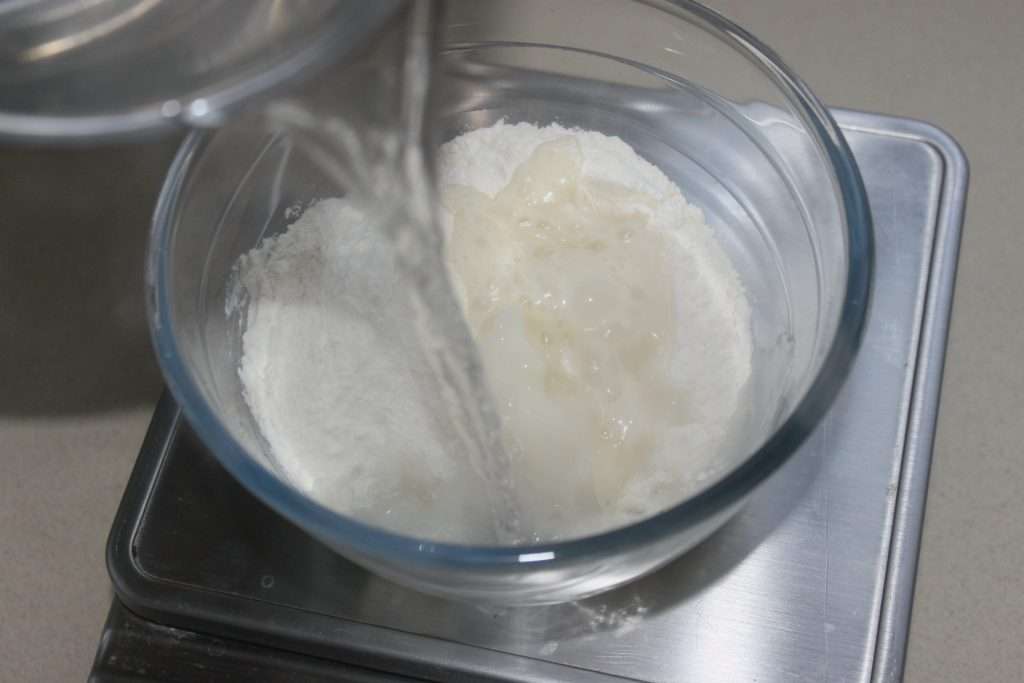
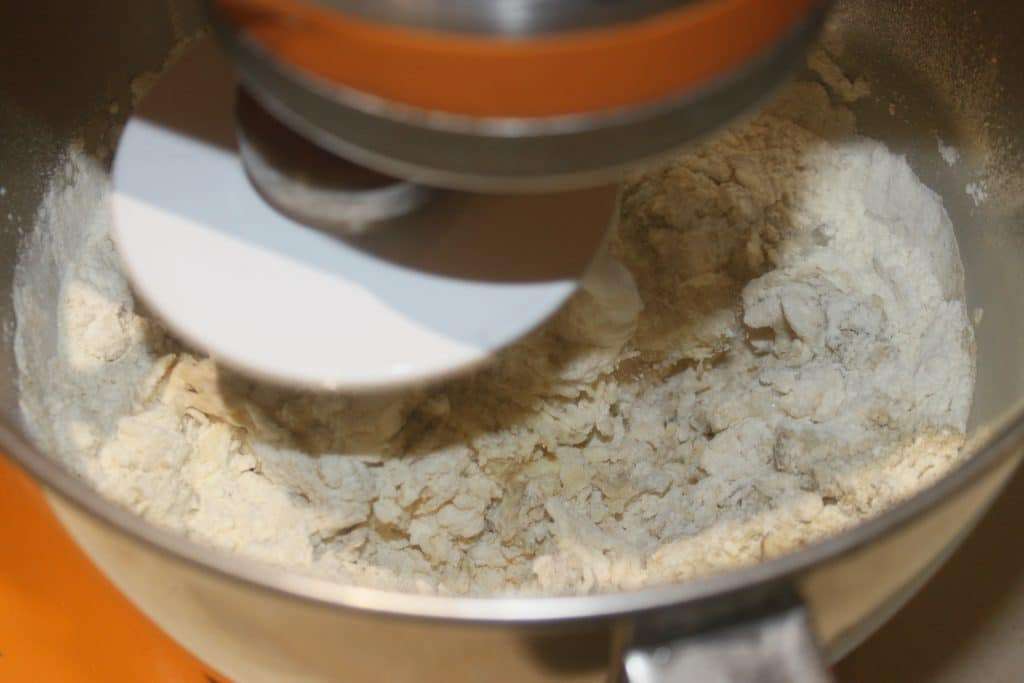
First, prepare the round rice. Sushi rice is a round rice, and frankly you will not see any difference. And as the round rice is cheaper… Rinse it with clean water for 2 minutes and then drain it. Pour it into the rice cooker and add the 425g of water for perfect cooking. You can also do the same thing in a saucepan with a lid over low heat until the water is completely absorbed.
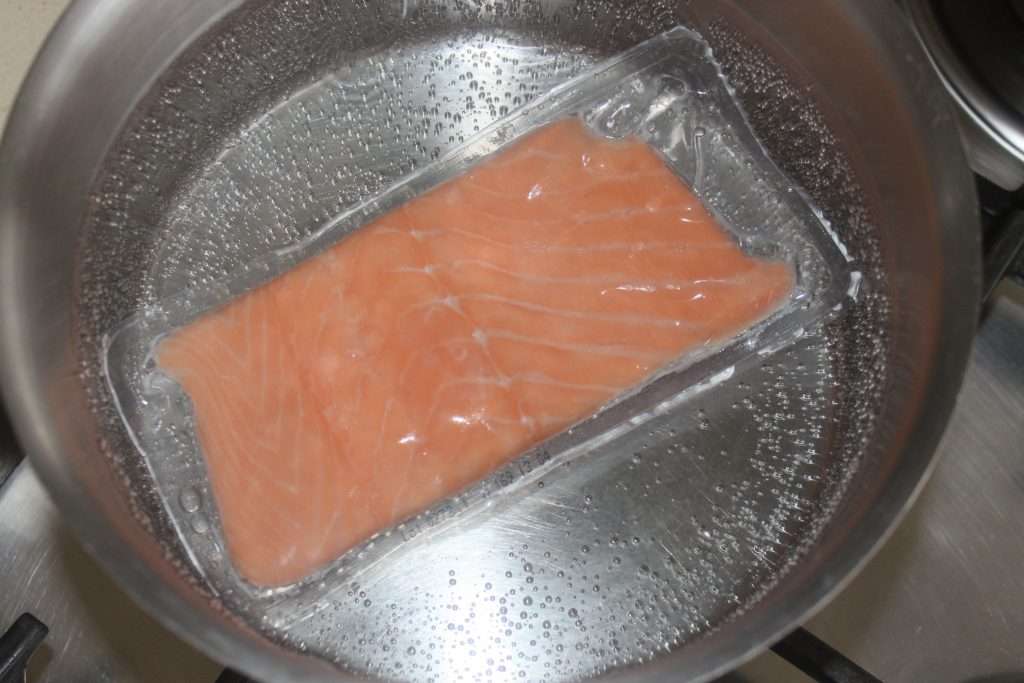
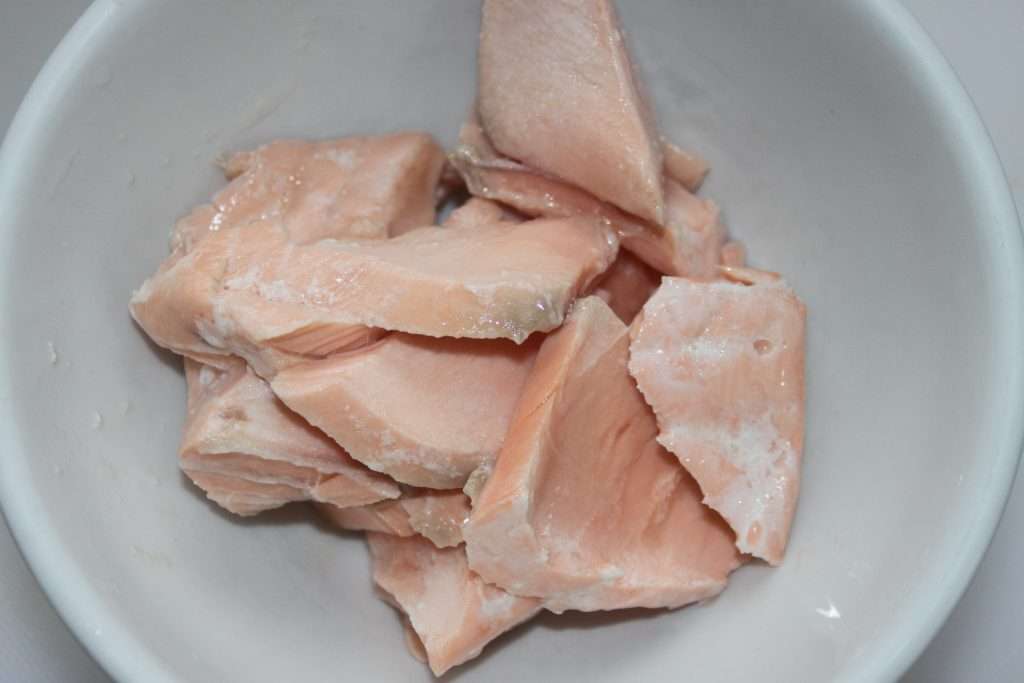
Meanwhile, cook the salmon steak in boiling water for 7 minutes. I took a vacuum-packed salmon here that does the job perfectly.
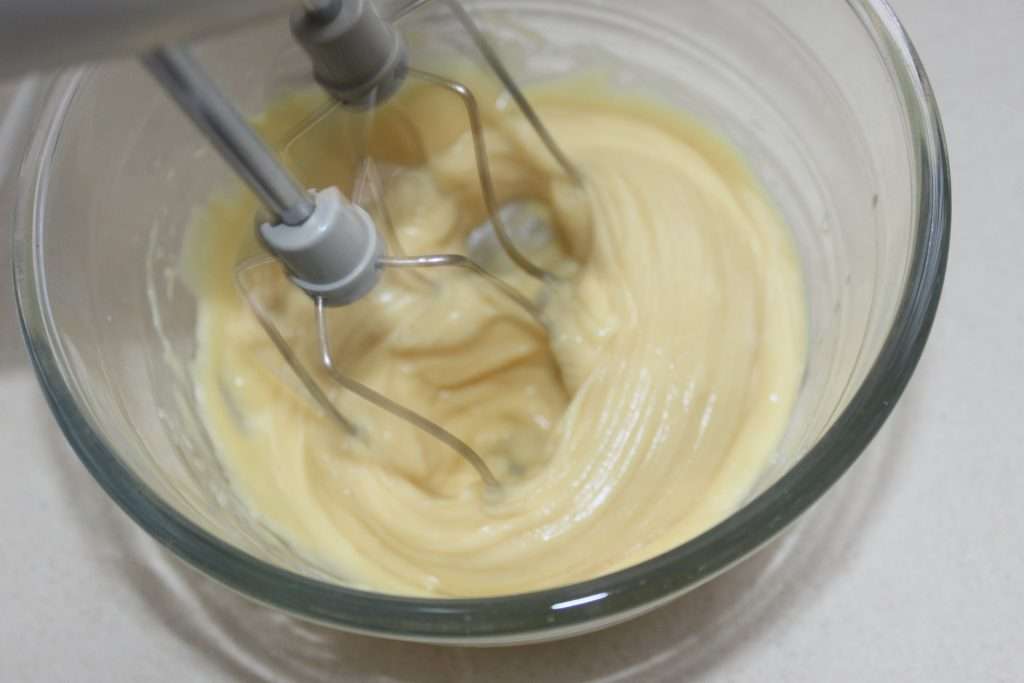
While all this is cooking, make the samurai sauce. Pour the egg yolk, mustard and a little of the 160g of oil into a bowl.
Whisk at high speed, adding the remaining oil in a stream to make a mayonnaise.
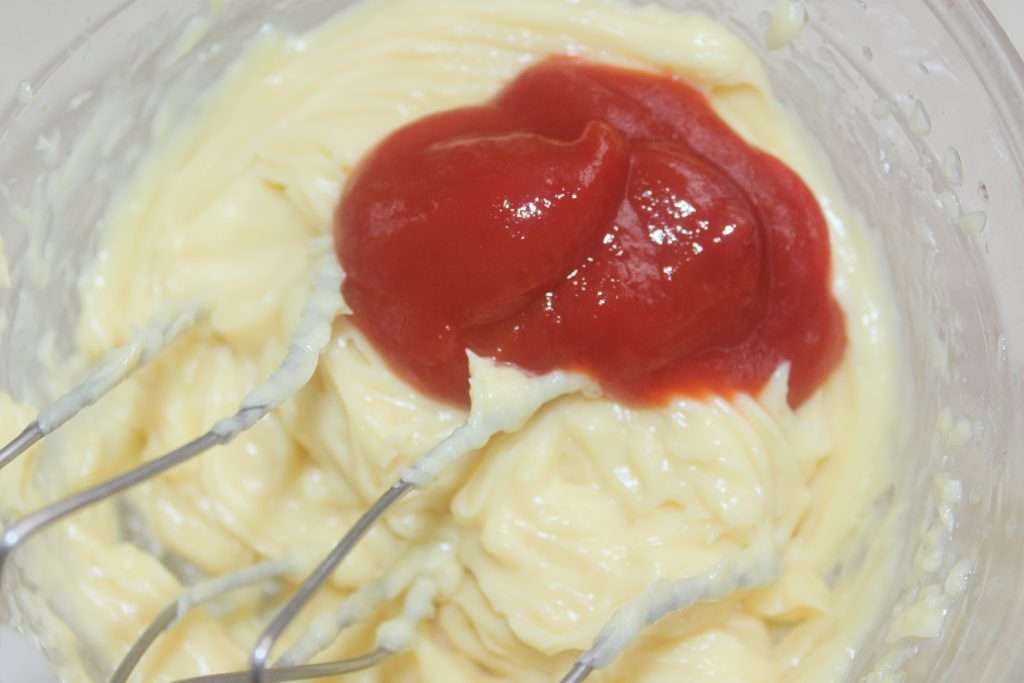
Add the ketchup.
The chili cream (or tabasco) and the cream.
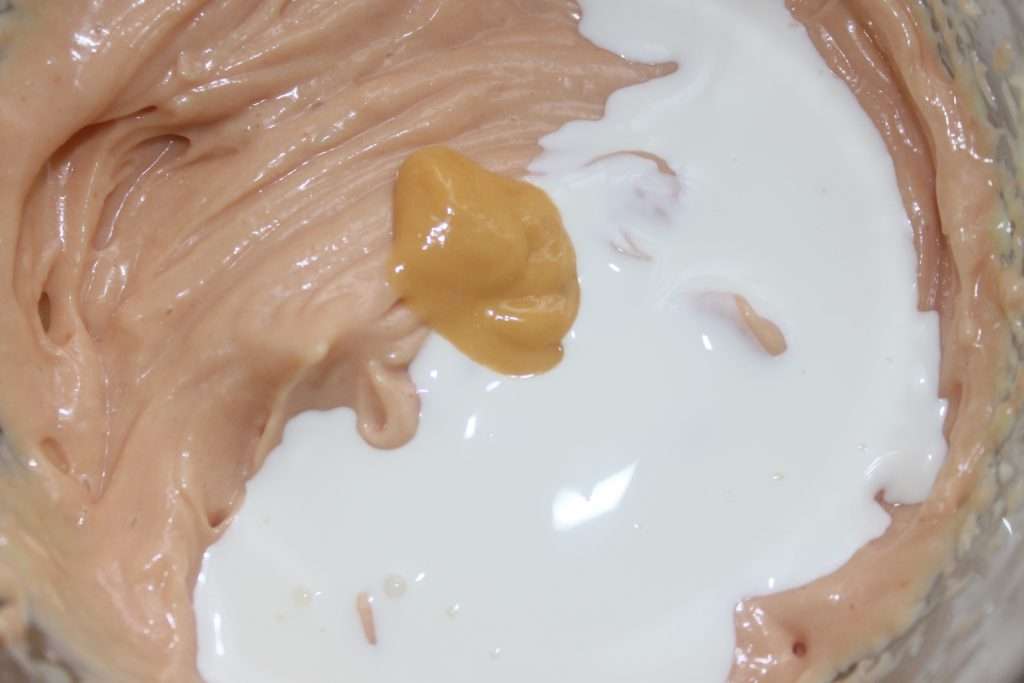
Finish with turmeric, a little chili powder and salt to taste.
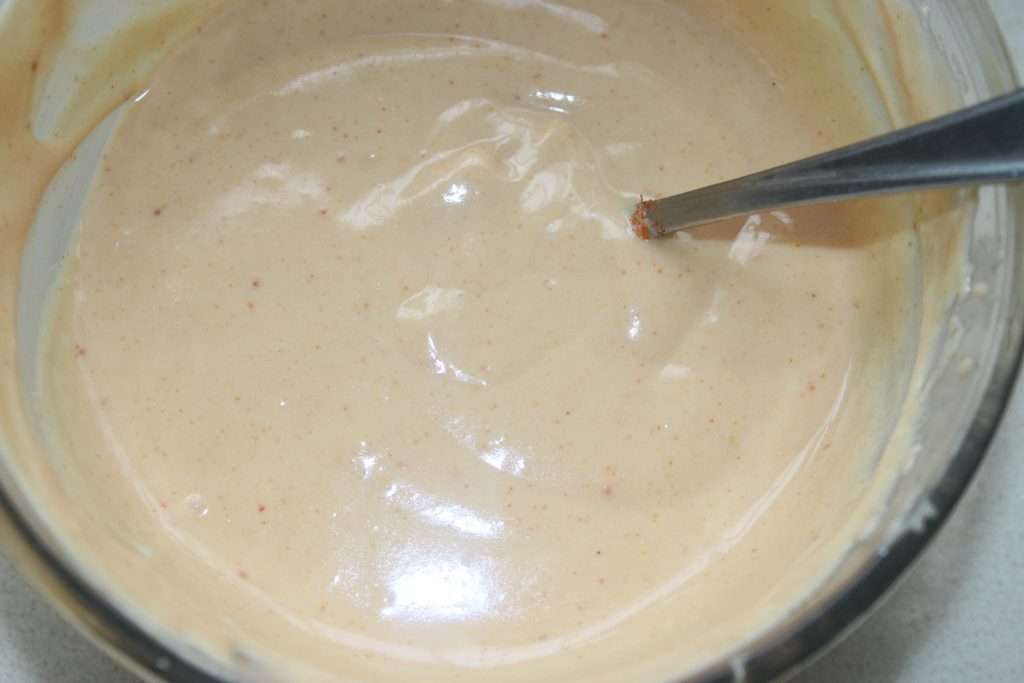
The sauce is ready.
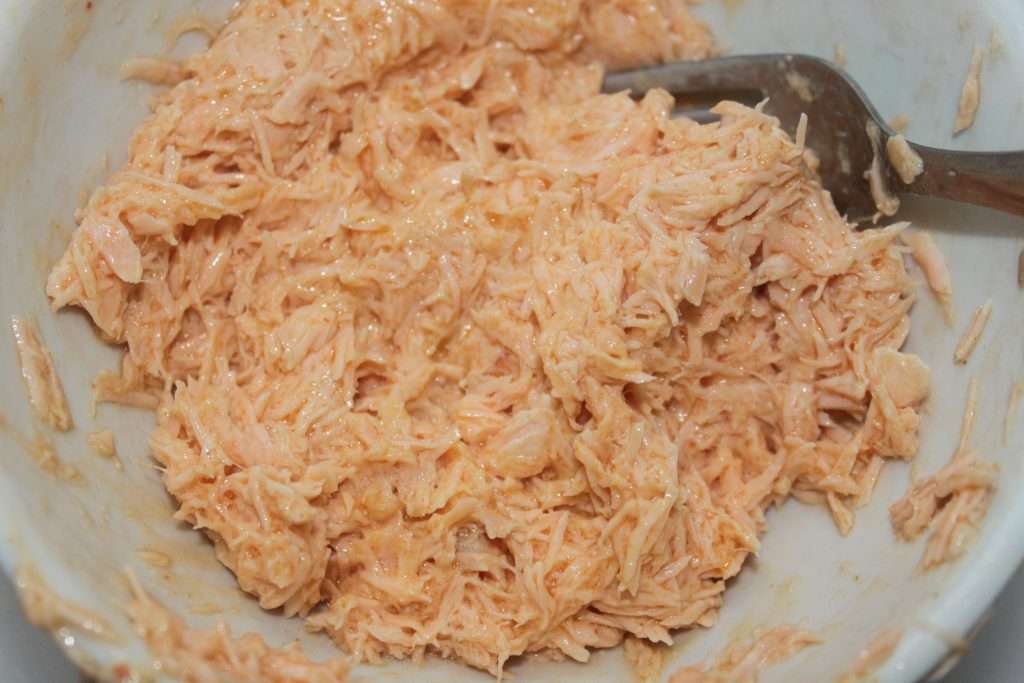
When the salmon is cooked, flake it with a fork and add two teaspoons of sauce.
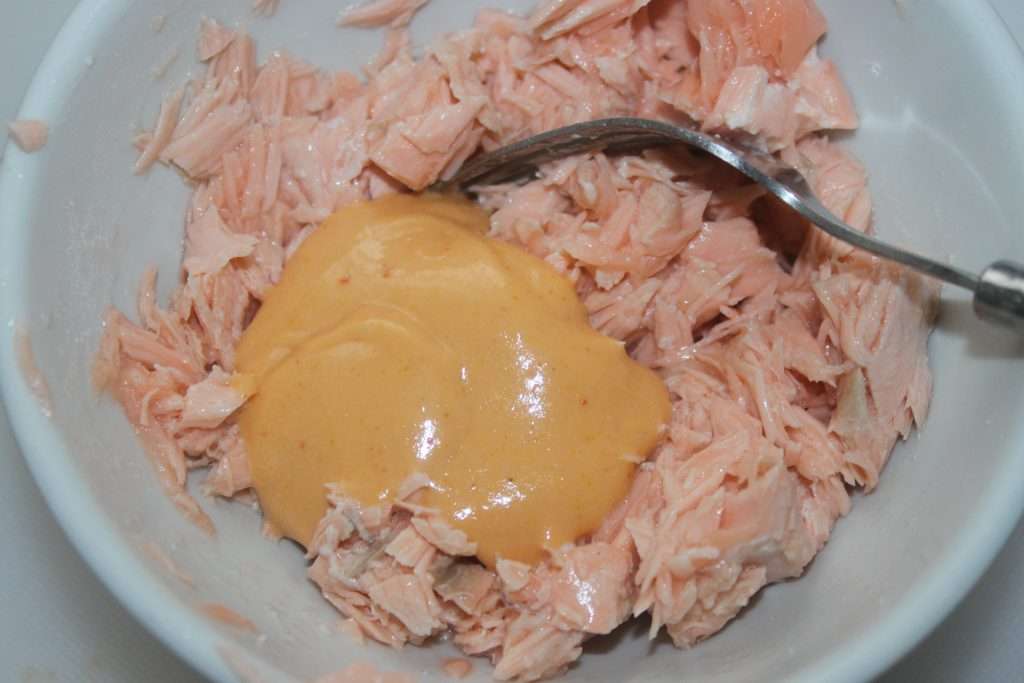
Mix well and set aside.
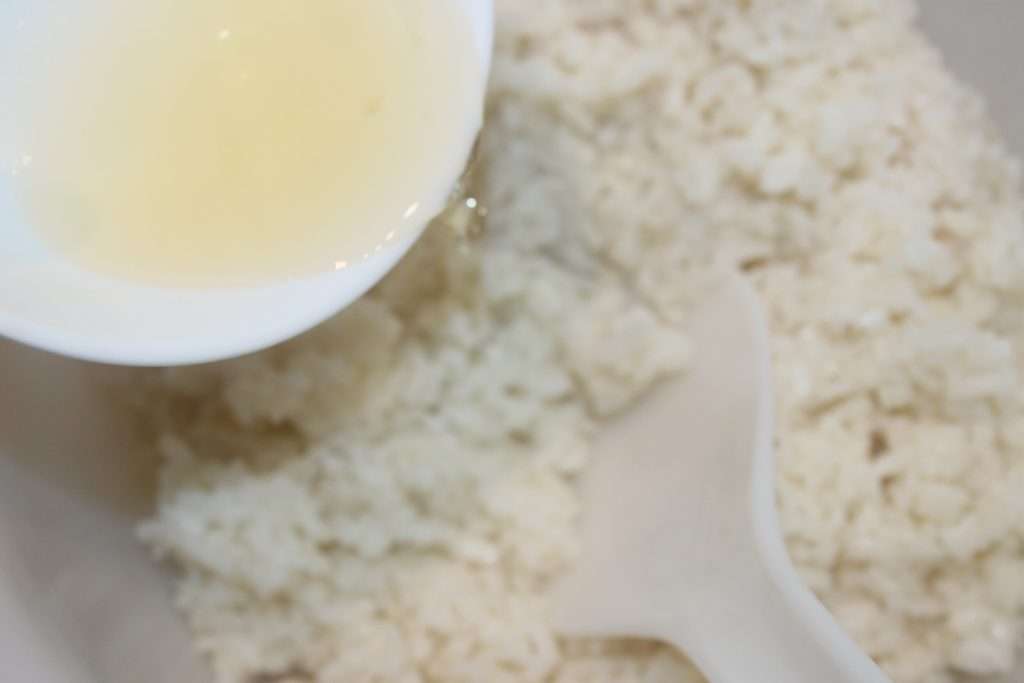
When the rice is cooked, pour it into a bowl and add the sesame oil, mixing gently. In a small bowl, combine salt, sugar, mirin and vinegar. Pour into the rice and mix.
While the rice is cooling, heat the crispy shrimp in the oven at 150°C for 10 minutes. Cut the avocado into 4 wedges, then each wedge into 3.
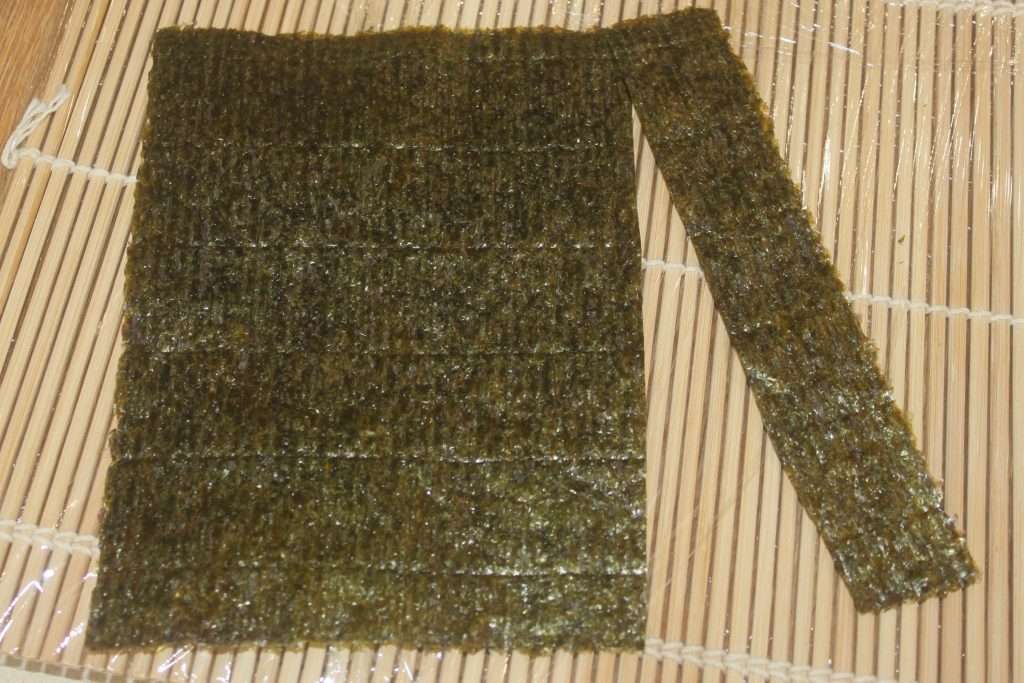
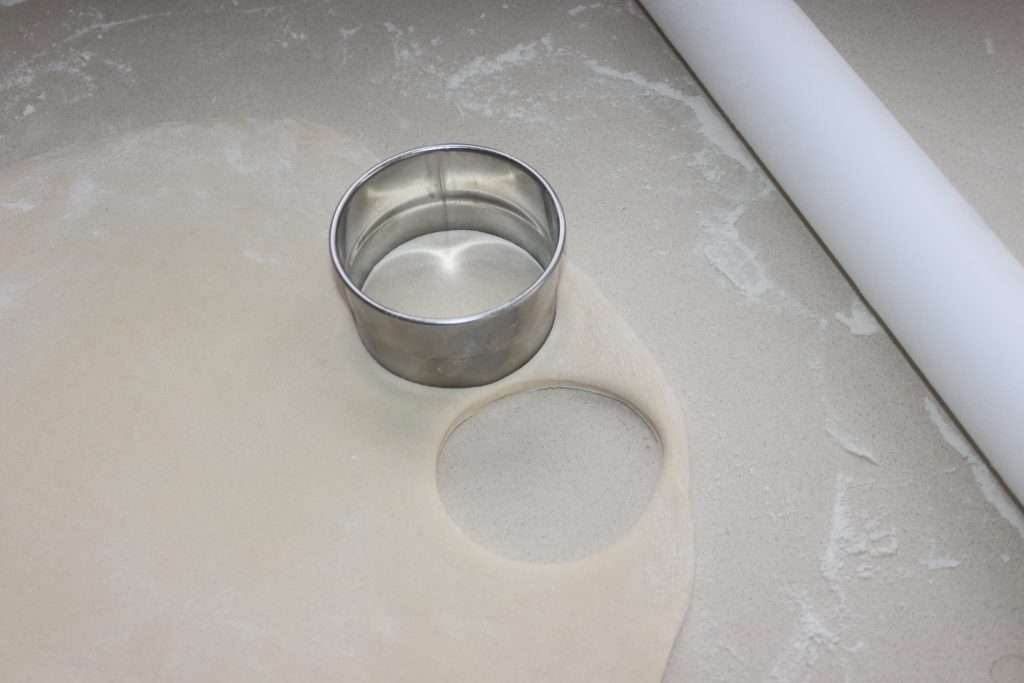
For the leaves, cut them so that they are 20cm by 15cm.
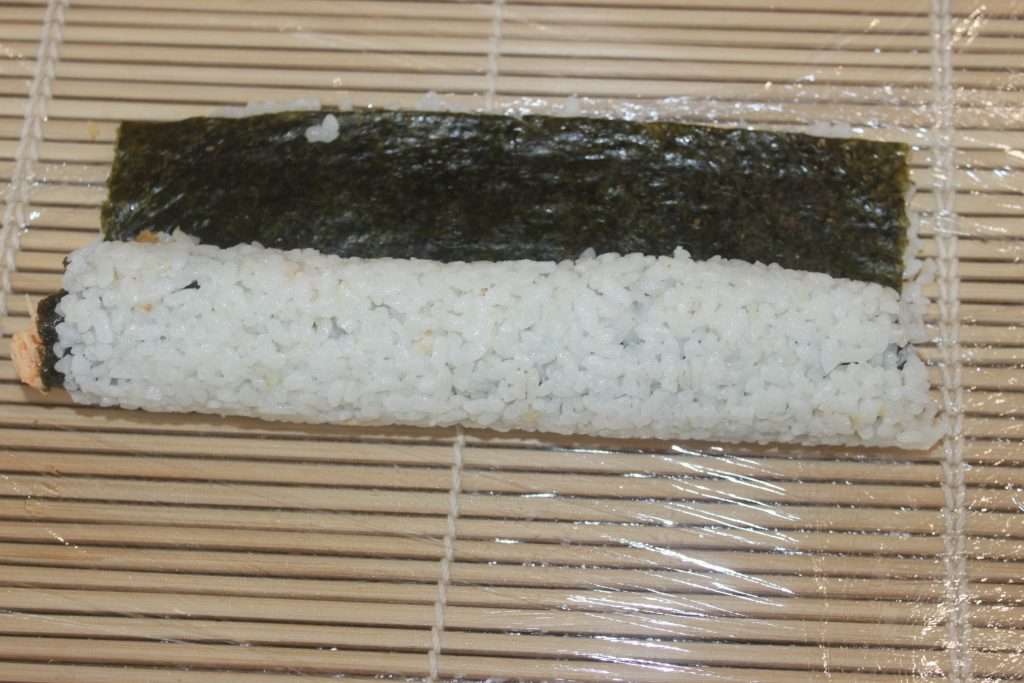
Pour 150g of cooked and warmed rice. You’ll notice that this time I’m using a bamboo mat wrapped in cling film.
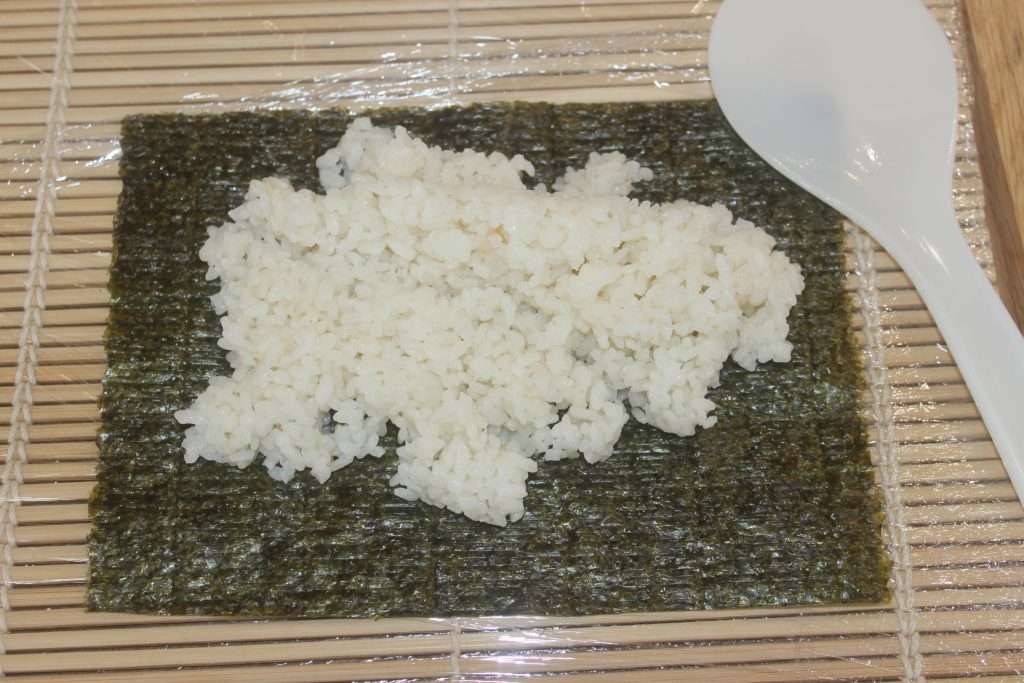
Spread it over the entire surface.
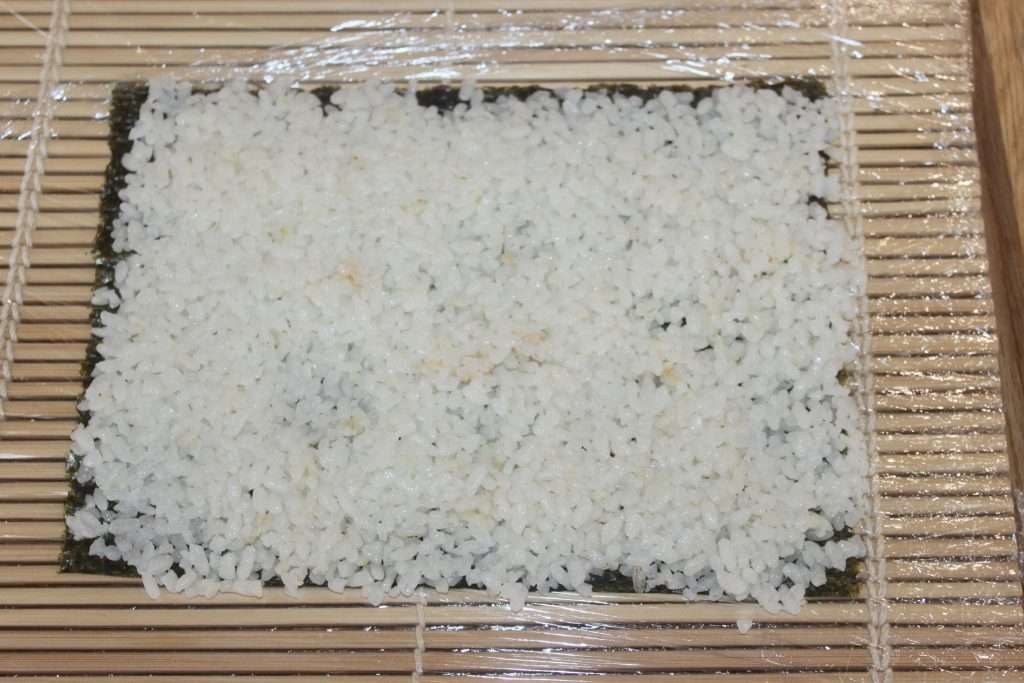
Turn the sheet over gently and press again. The rice is against the stretch film. Add two teaspoons of cooked salmon and two slices of avocado.
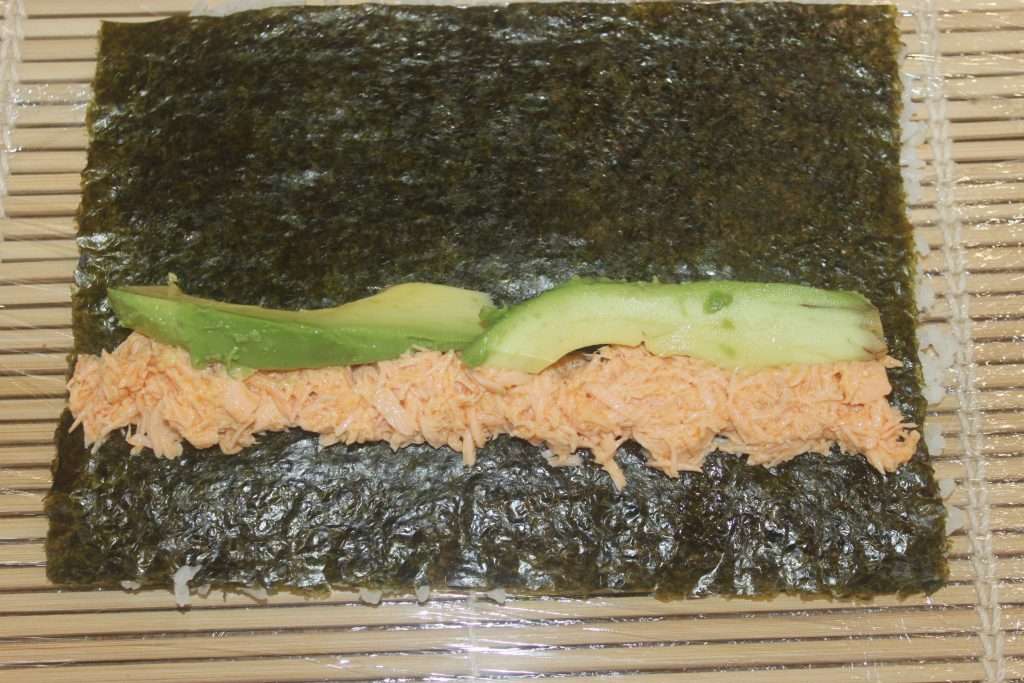
Also place two crispy shrimp on top.
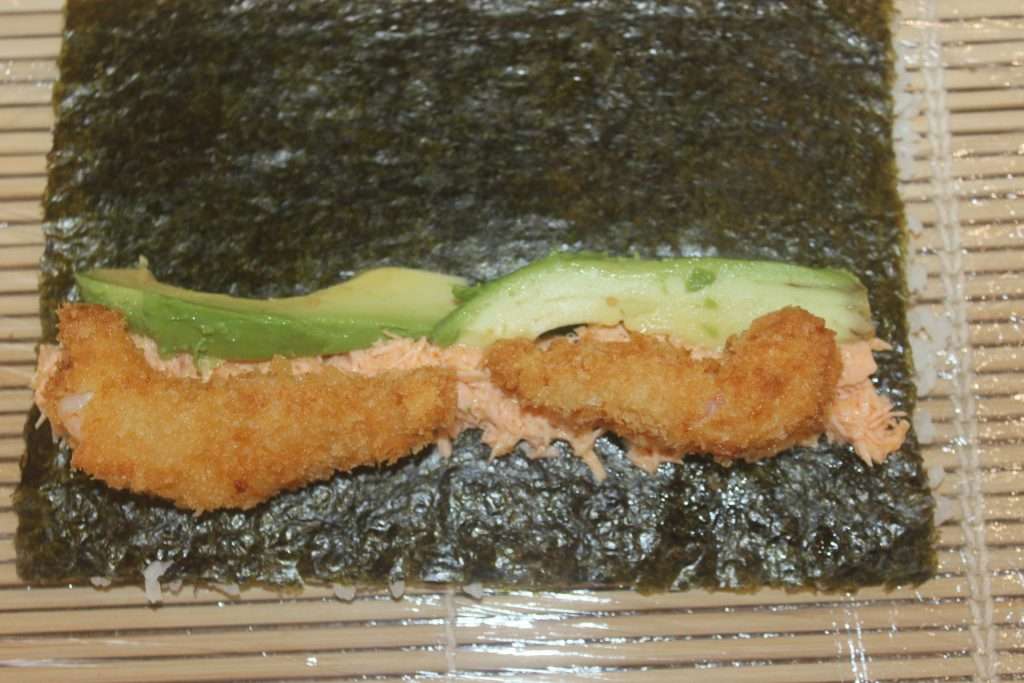
Start to roll up tightly, using the mat if necessary.
And There you go !
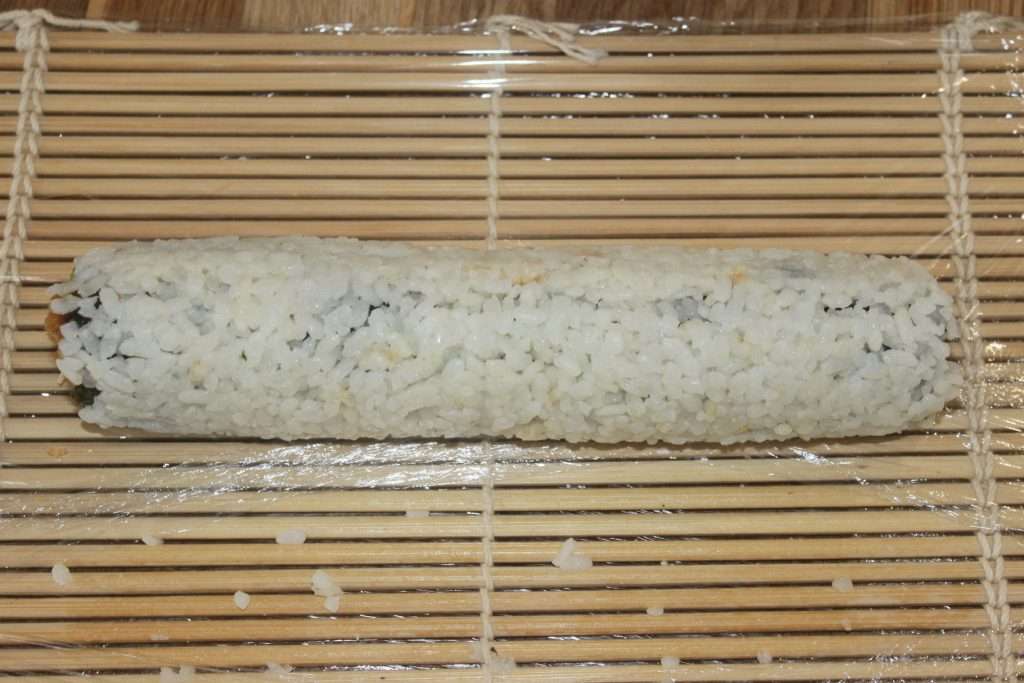
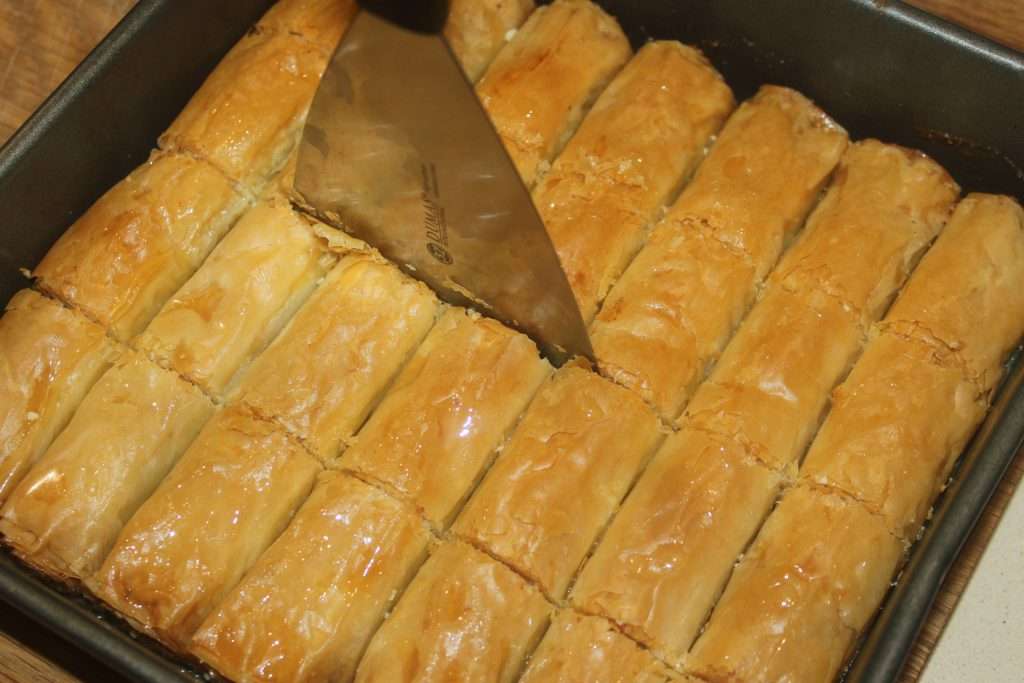
Do the same for the other 4 rolls. Wrap the top with one or two slices of smoked salmon.
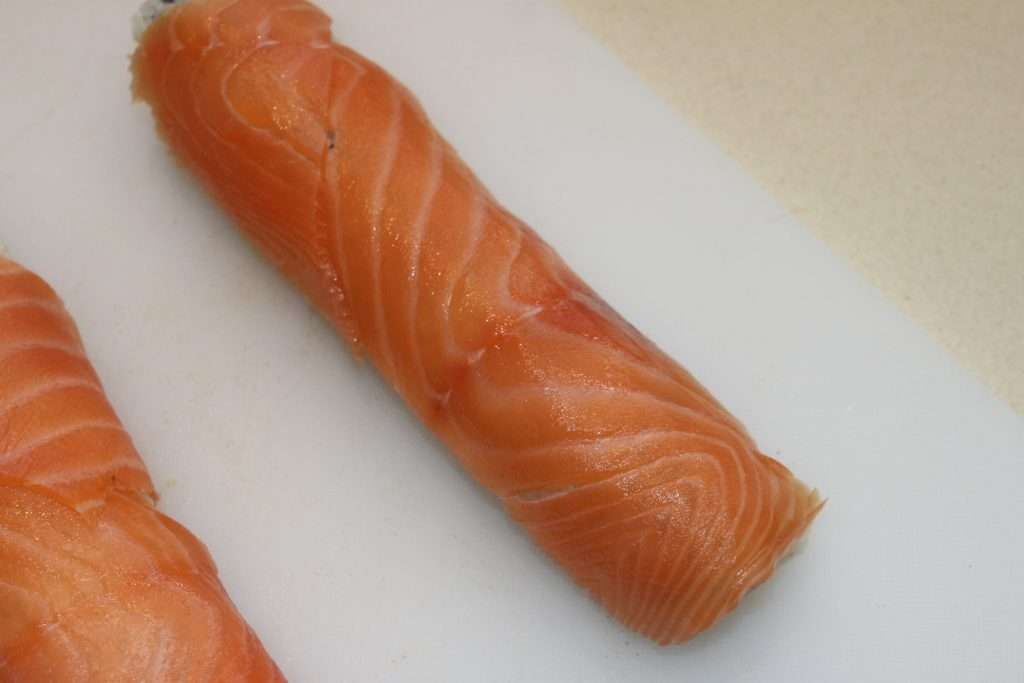
Then with a very good knife, cut each roll in half, then each half into five.

To be enjoyed without delay with soy sauce and samurai sauce!
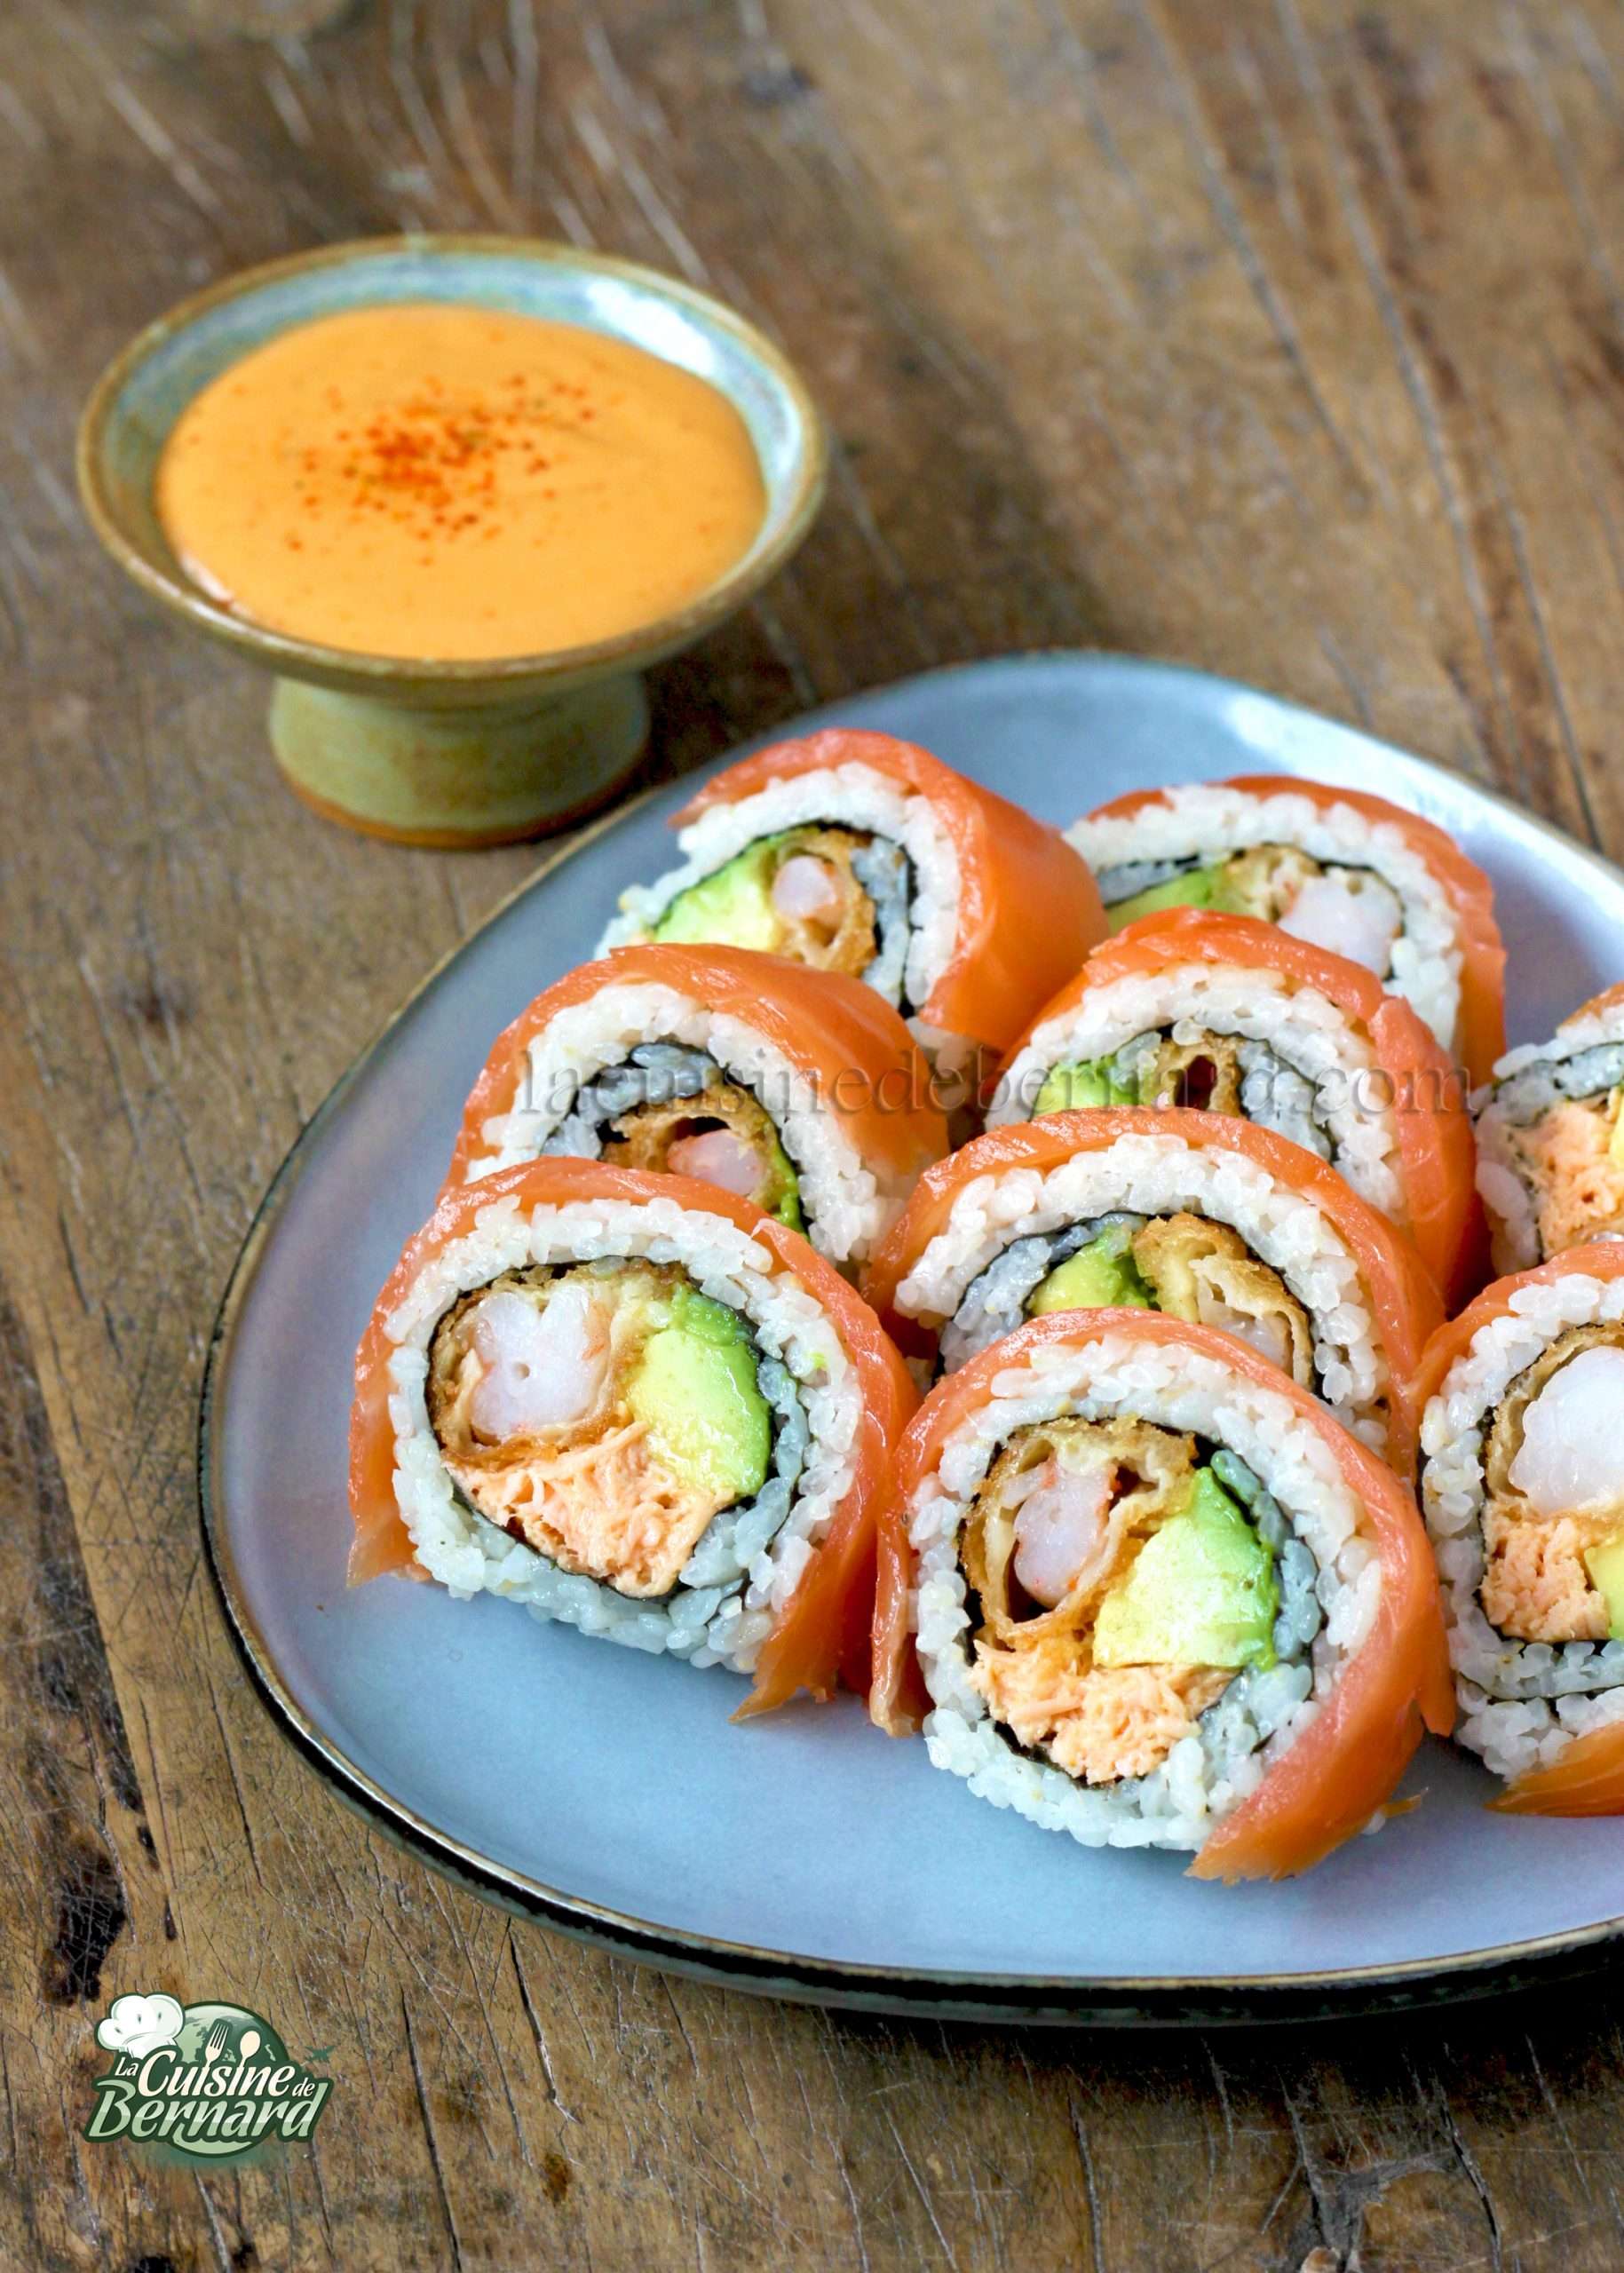

Avocado, salmon and Samurai sauce inverted Makis


Here’s a simple recipe for crispy, golden shrimp. They are perfect as is with the sauce of your choice, or to incorporate into another recipe that I will tell you about very soon here on my cooking blog!
Recette des Crevettes croustillantes :
- a dozen large shrimp, peeled and deveined
- 12 wooden skewers
- 1 beaten egg
- a bowl of flour
- a bowl of fermented milk
- a large bowl of panko or breadcrumbs
- frying oil
Instructions :
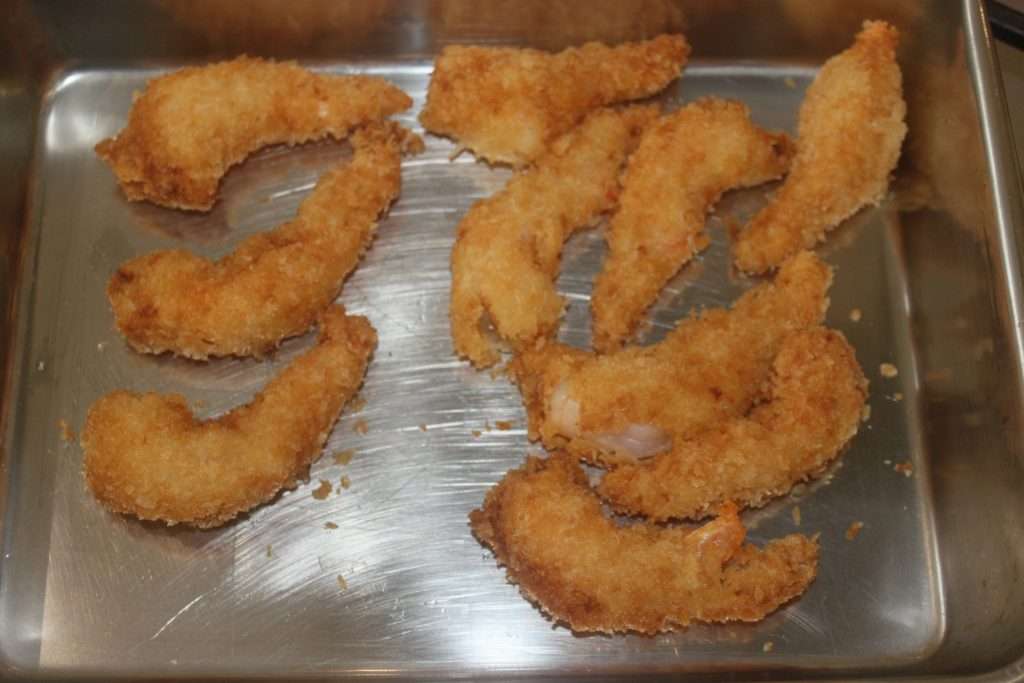
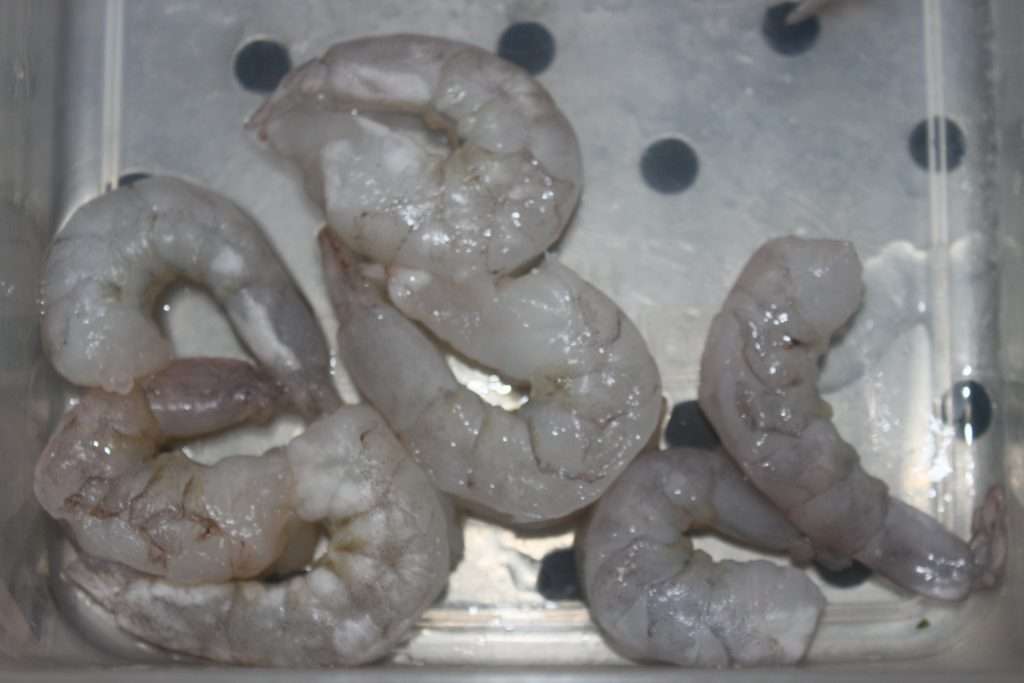
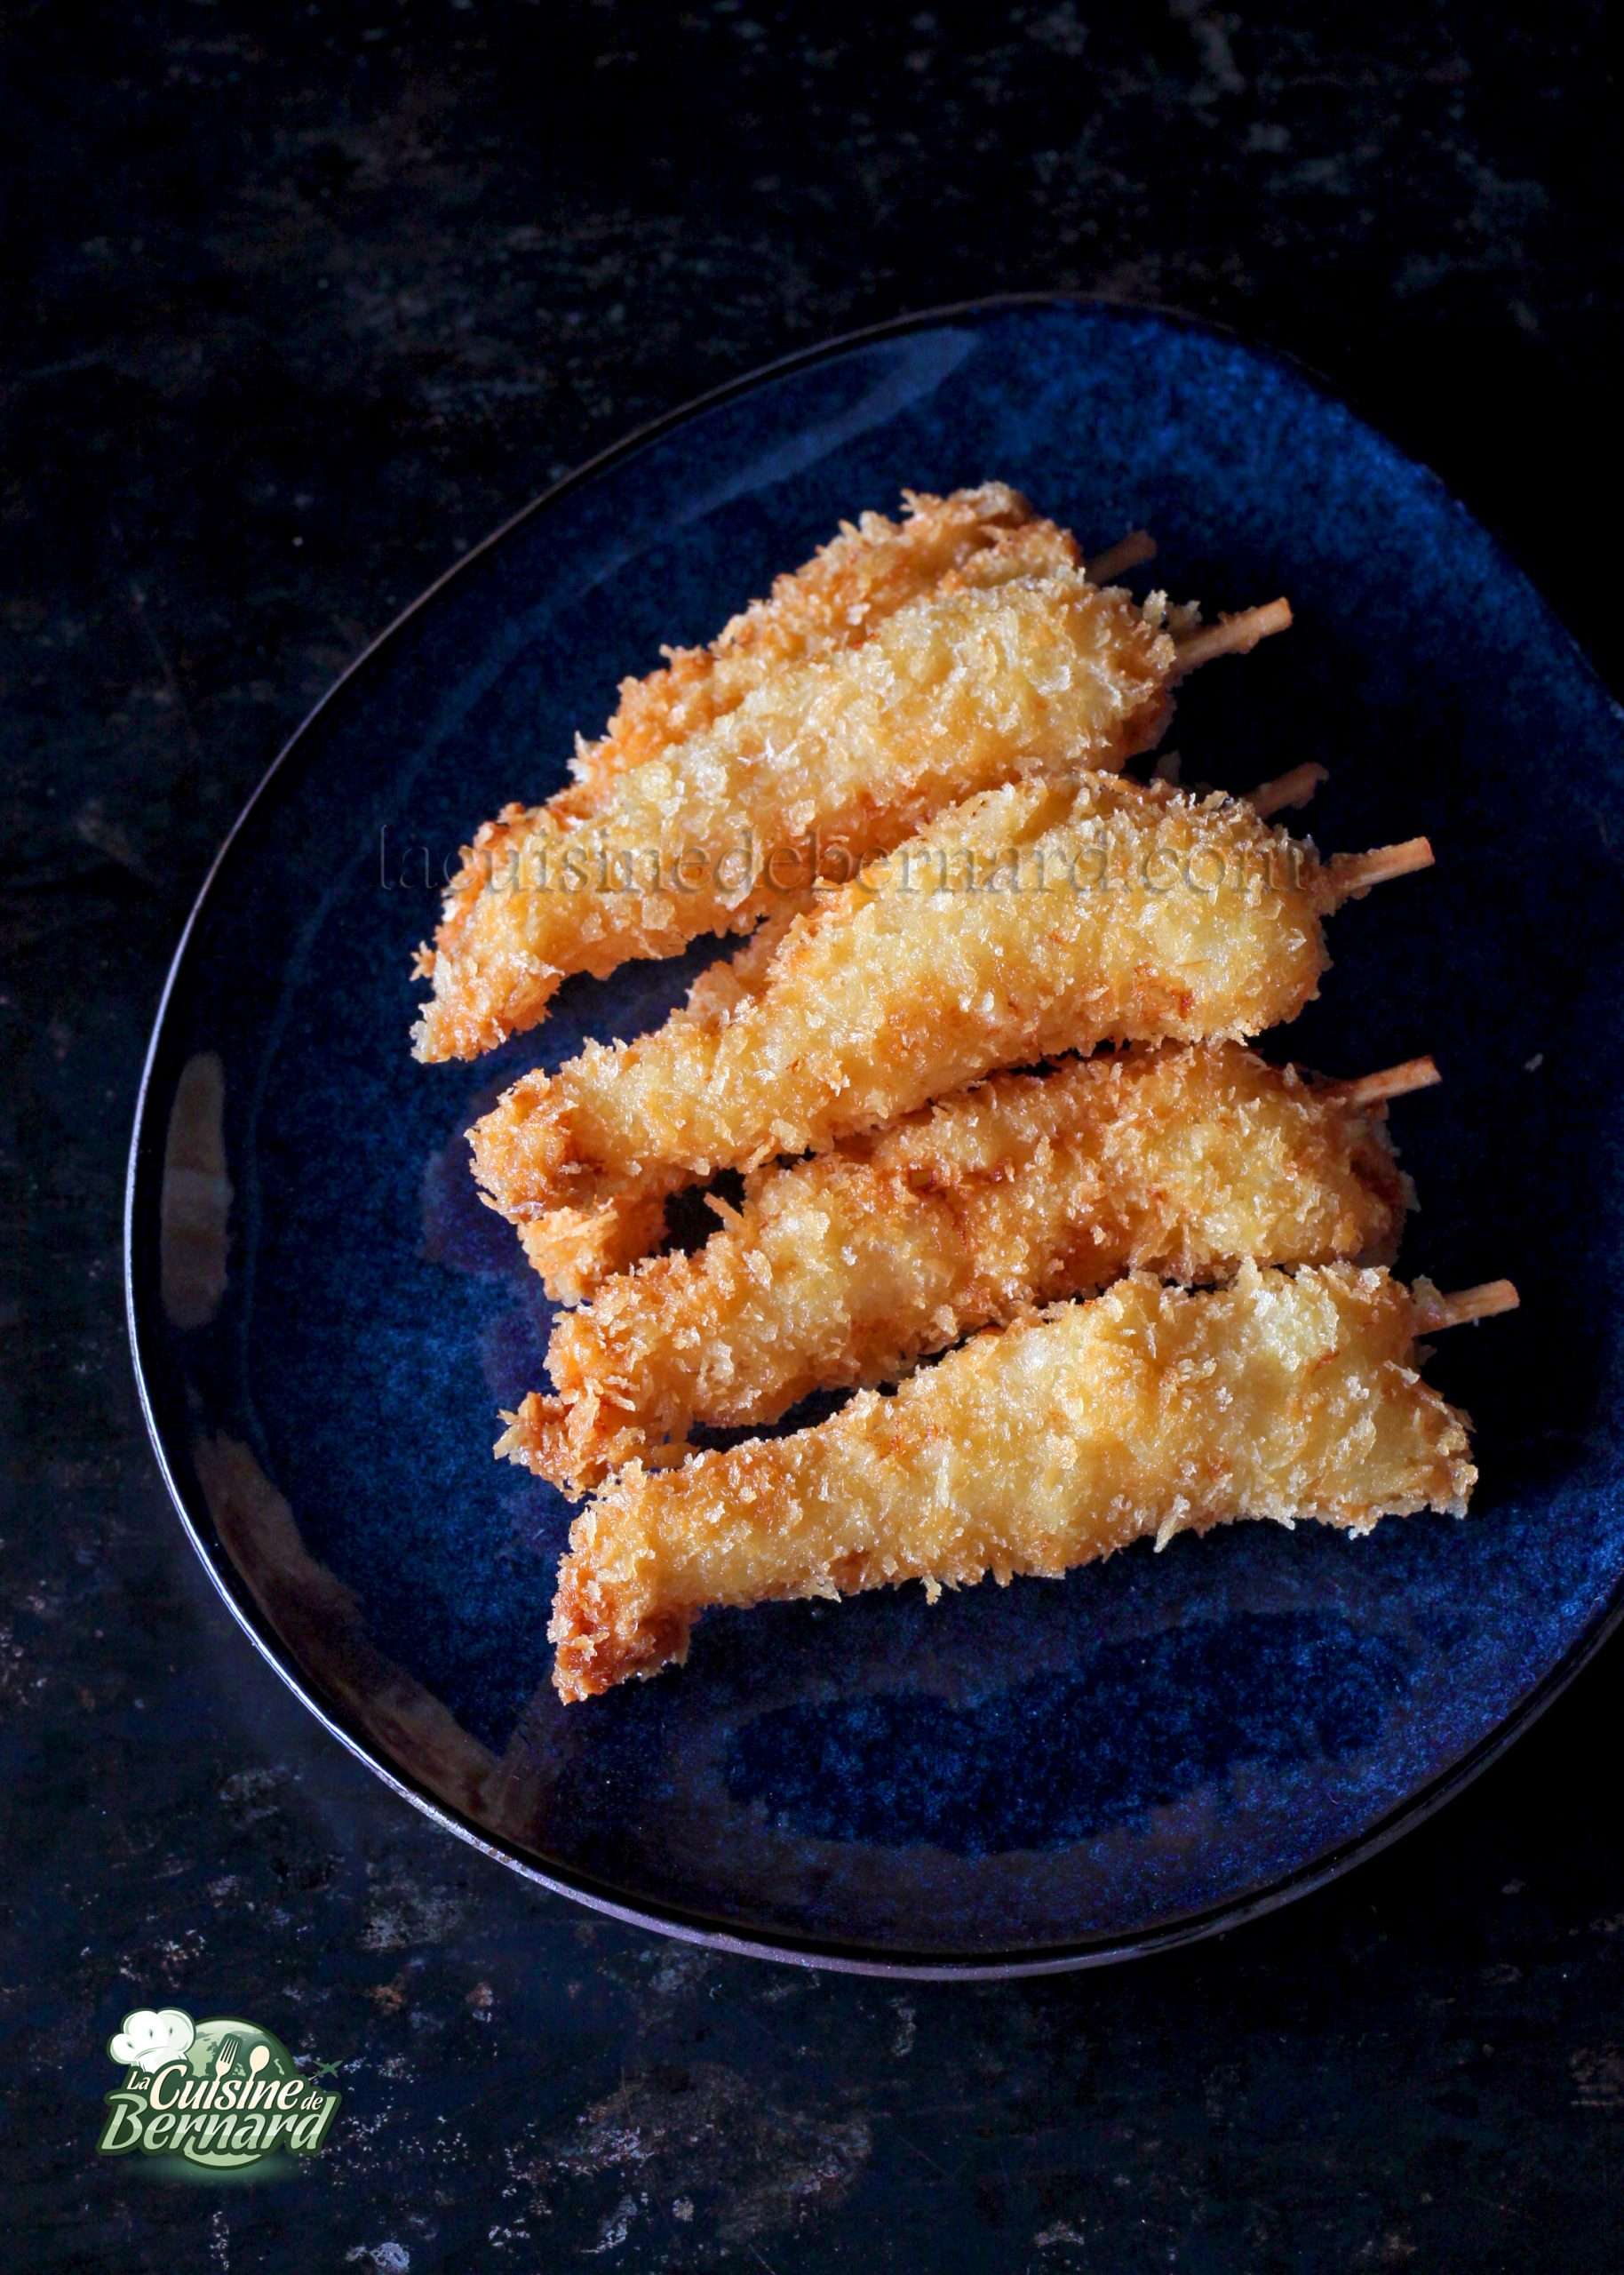
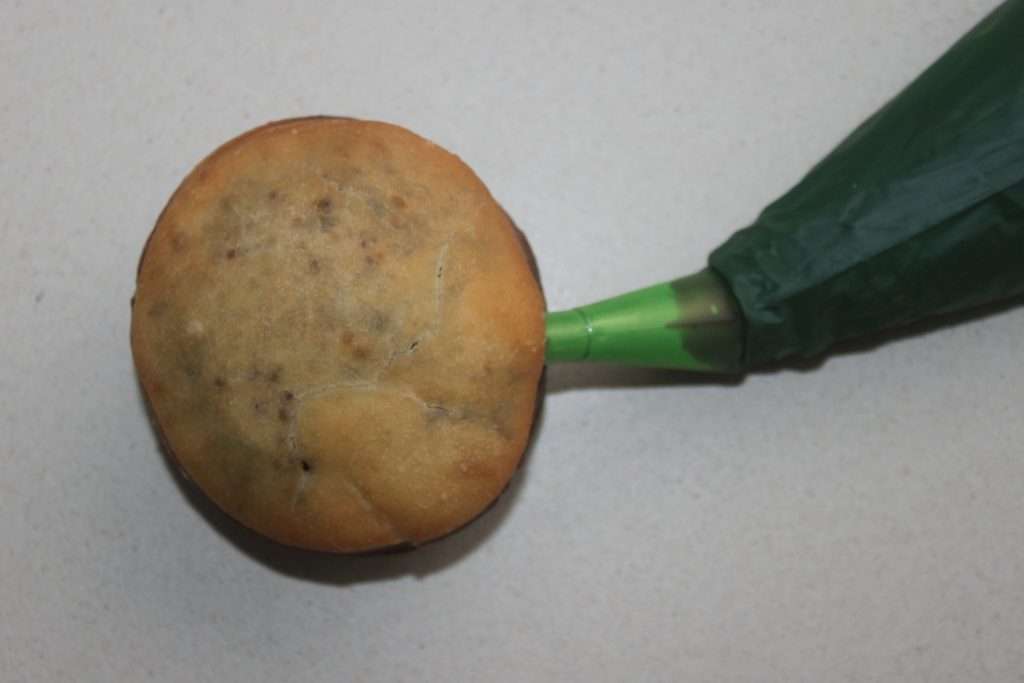
Here are the raw shrimps. Take the size you want.
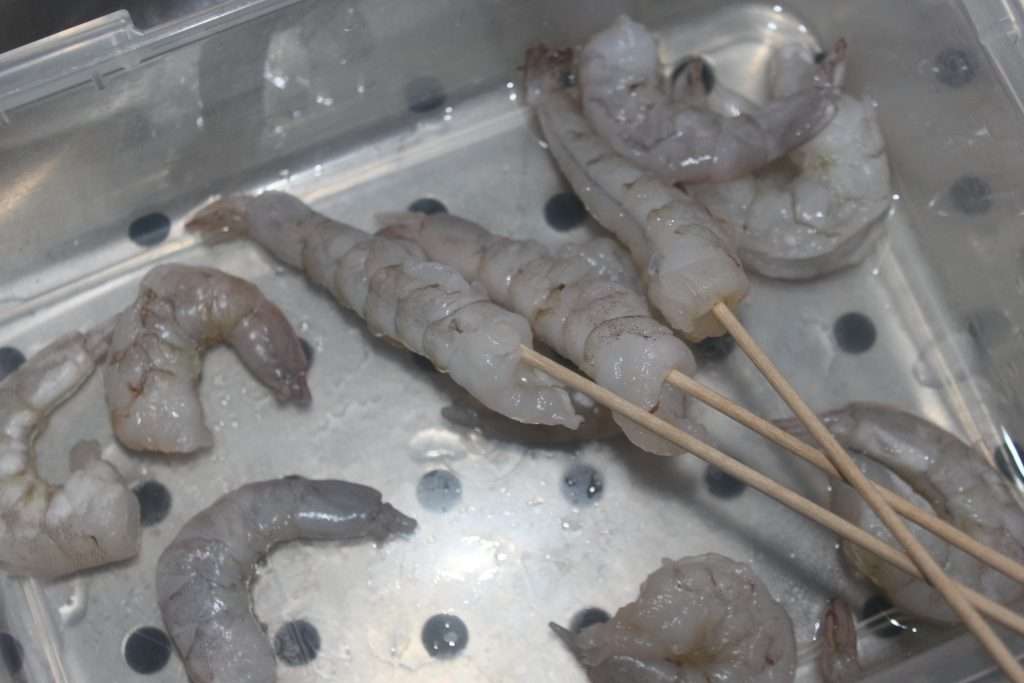
Prick the shrimp into a straight shape. You can then cut the wood to avoid having a too big stem.
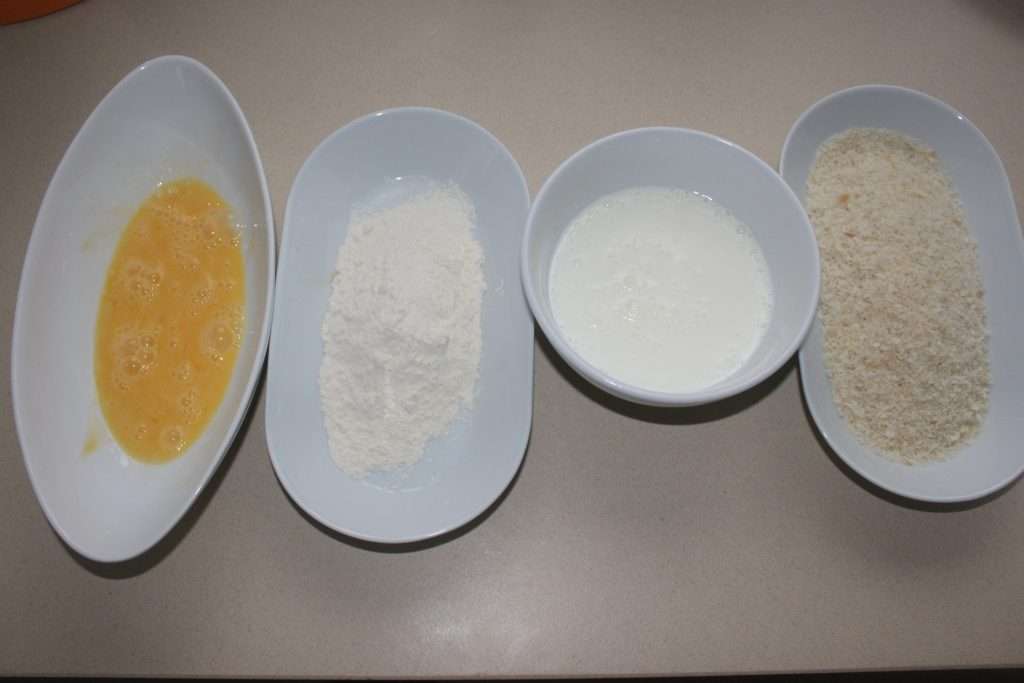
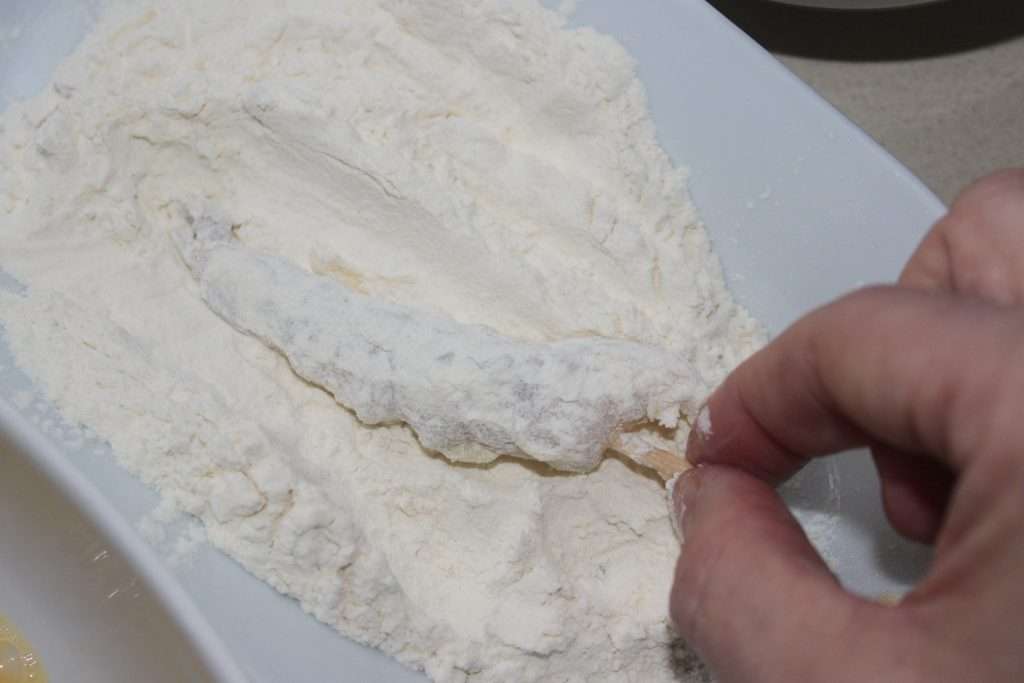
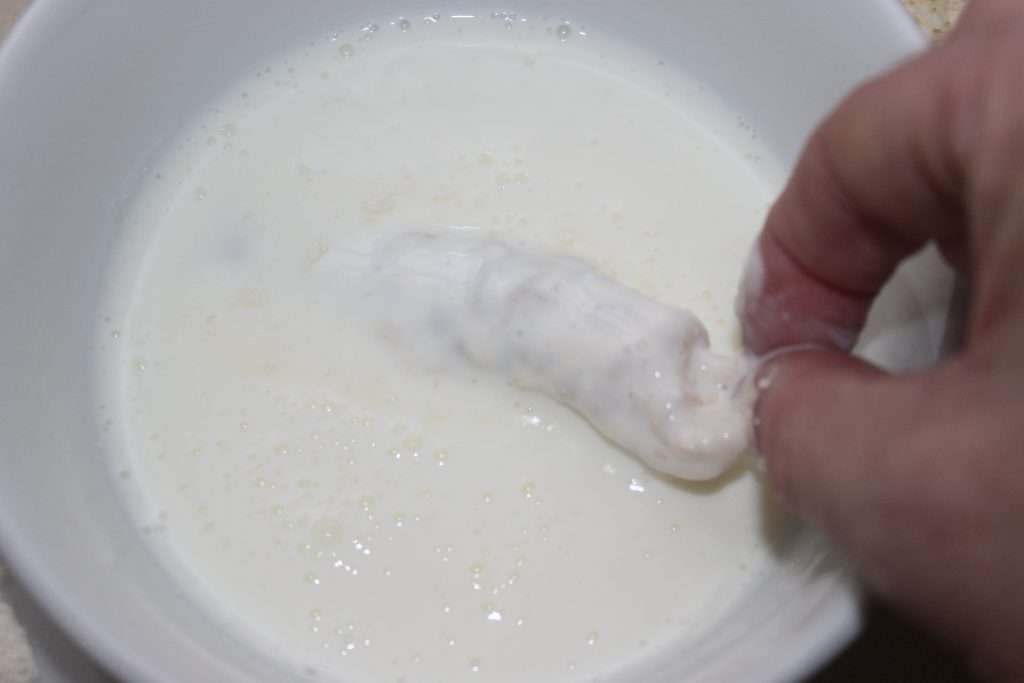
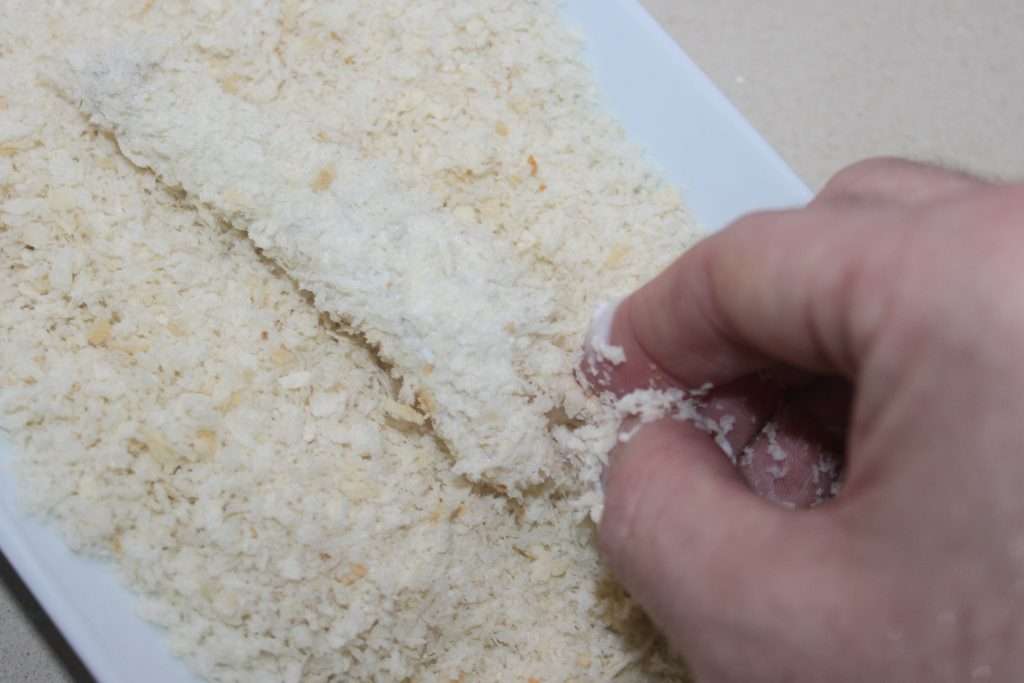
To make a nice crispy crust, here are the egg, flour, fermented milk (or ribot milk) and panko, the Japanese bread crumbs.
Dip a shrimp in the egg and then remove the excess.

Then in the flour.
Dip into the fermented milk. Do not replace here with regular milk. Put the thicker fermented milk that will cover the shrimp.
And hop in the breadcrumbs.
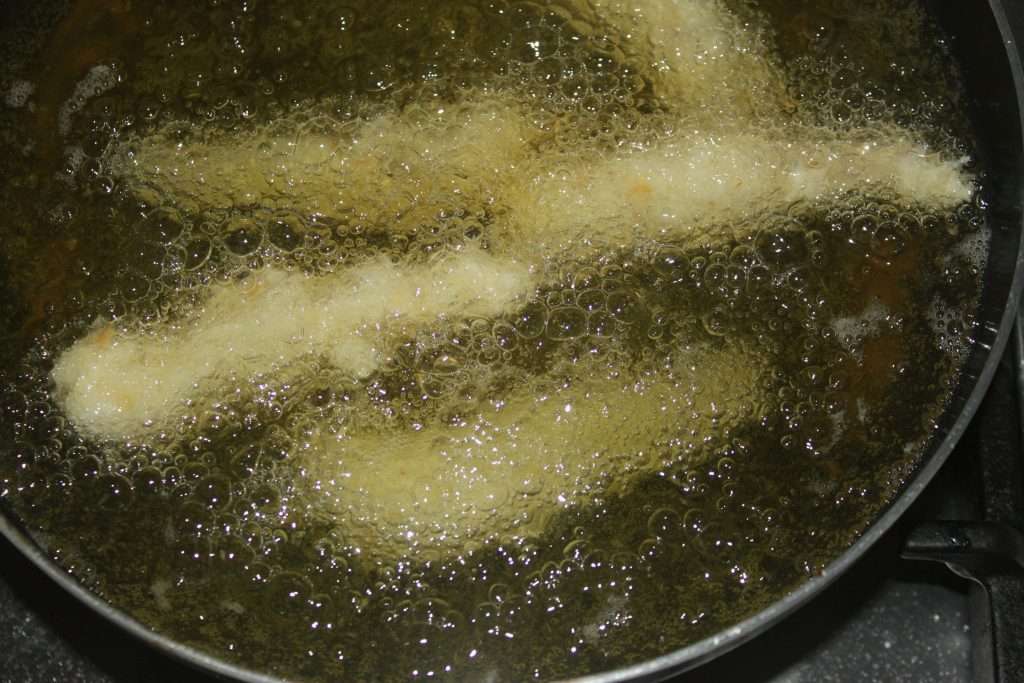
Heat a small pan of oil to 180°C. You need at least 2-3 cm of oil. Fry the shrimp. Without a thermometer, if it’s bubbling right away it’s fine, if it’s coloring too quickly it’s too hot, if it’s not happening it’s not hot enough. Logical in short!
Put the shrimp on a paper towel and brown them well.
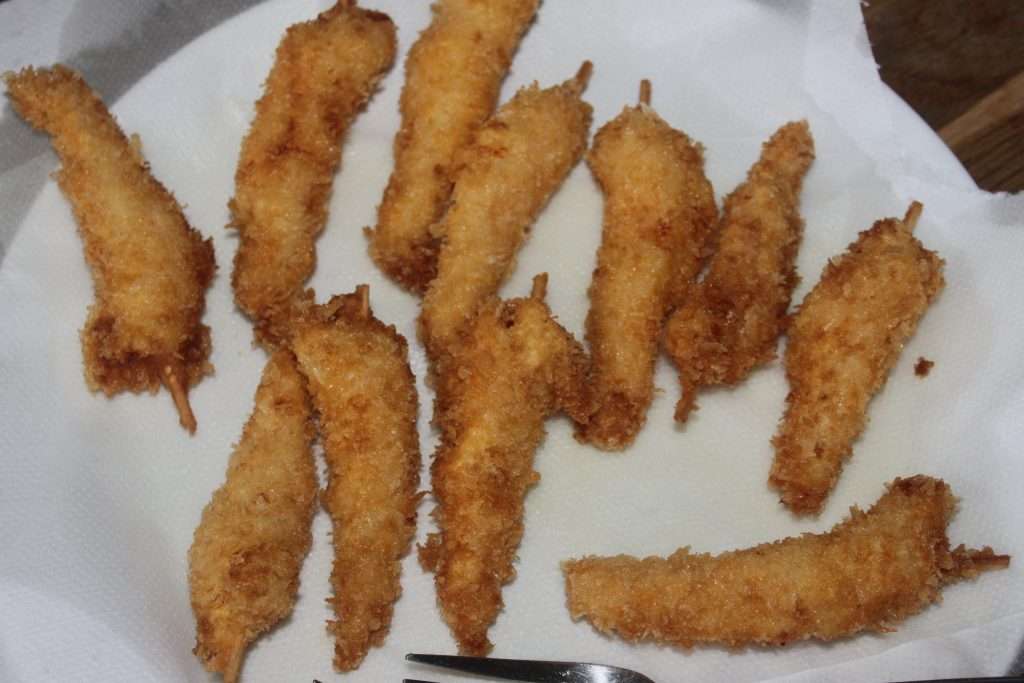
Hold the shrimp firmly and remove the spike. If you don’t hold on tight, the shrimp will come out of its golden crust.
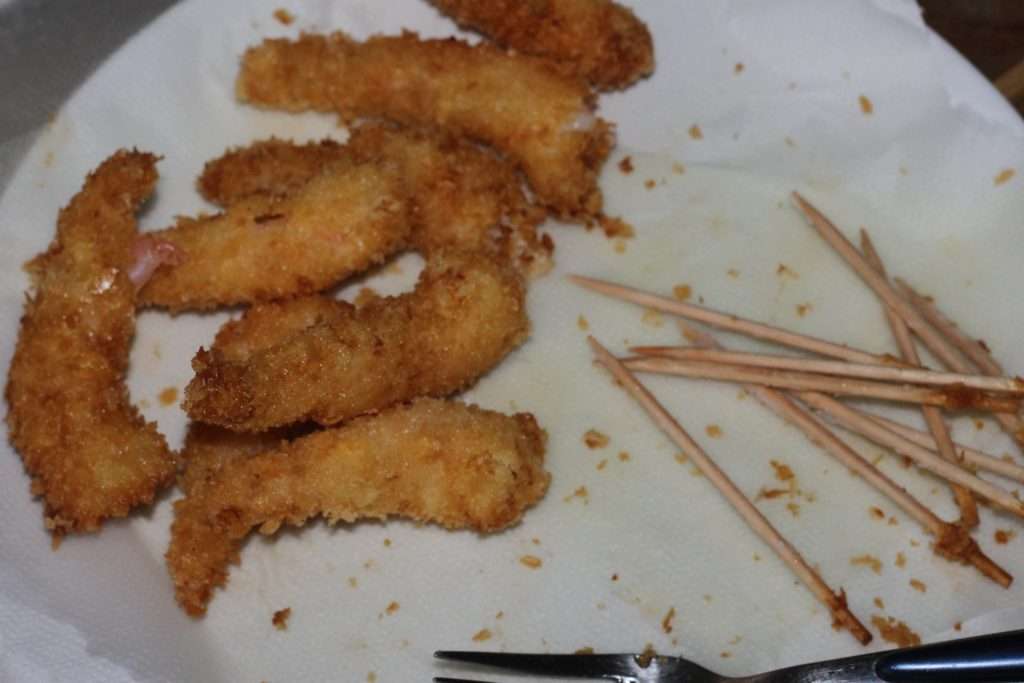
You can either eat them right away, or freeze them in an airtight box. We will use these shrimp in a future recipe!
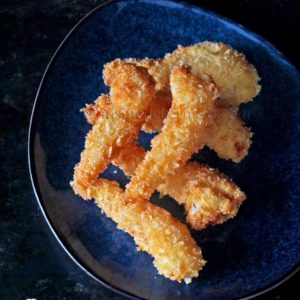
Crispy shrimp


Generous doughnuts, soft and filled with blueberries, not too sweet! If this makes you want to, I’ll tell you all my secrets. I start with a yudane paste that will give an incredible texture, then I offer a filling with a consistency that holds together perfectly, without being a very sweet jam. Of course you can vary the fruits at will and even put some spread on it…
Recette pour une douzaine de beignets :
For the yudane:
- 50g of flour
- 55g boiling water
For the dough:
- 455g of flour
- 1 packet of dehydrated baker’s yeast (6g) or 20g of fresh yeast
- 55g of sugar
- 1/2 teaspoon of salt
- 1 egg
- 240g of fermented milk or ribot milk
- 55g of butter at room temperature
- the yudane
- Oil for frying and powdered sugar for the top
For blueberry filling:
- 400g of fresh or frozen blueberries
- 220g of sugar
- 40g of cornstarch
- 240g (ml) of water
Instructions :
To find out what Yudane is, check out my recipe HERE.
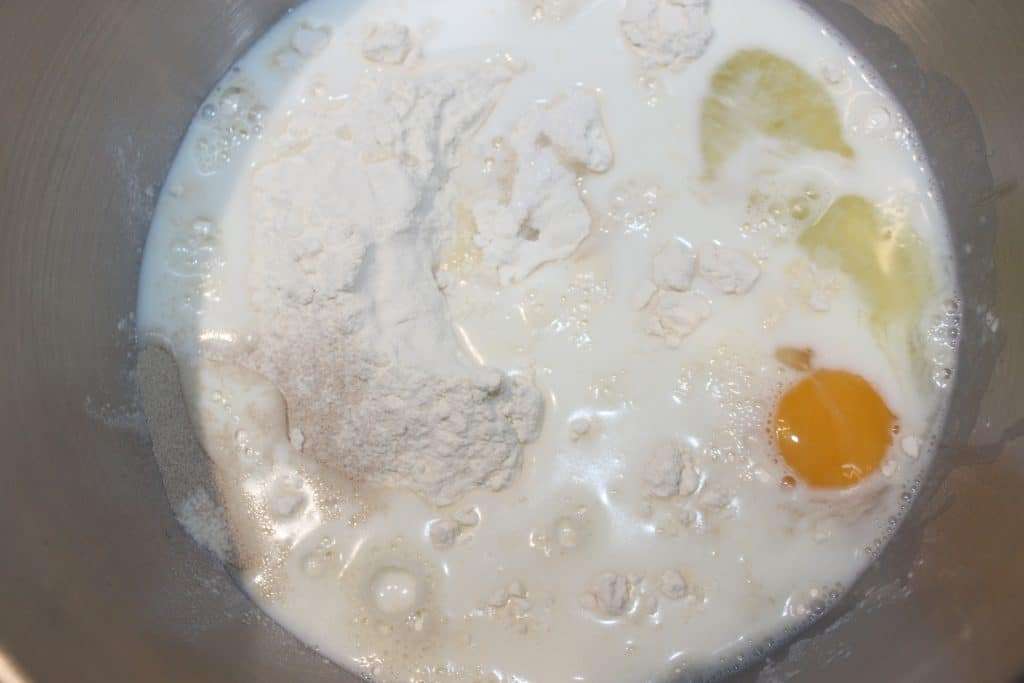
Prepare the dough ideally the day before. Make the yudane at least 2 hours before making the dough. Pour the boiling water over the flour.
Mix with a spoon.
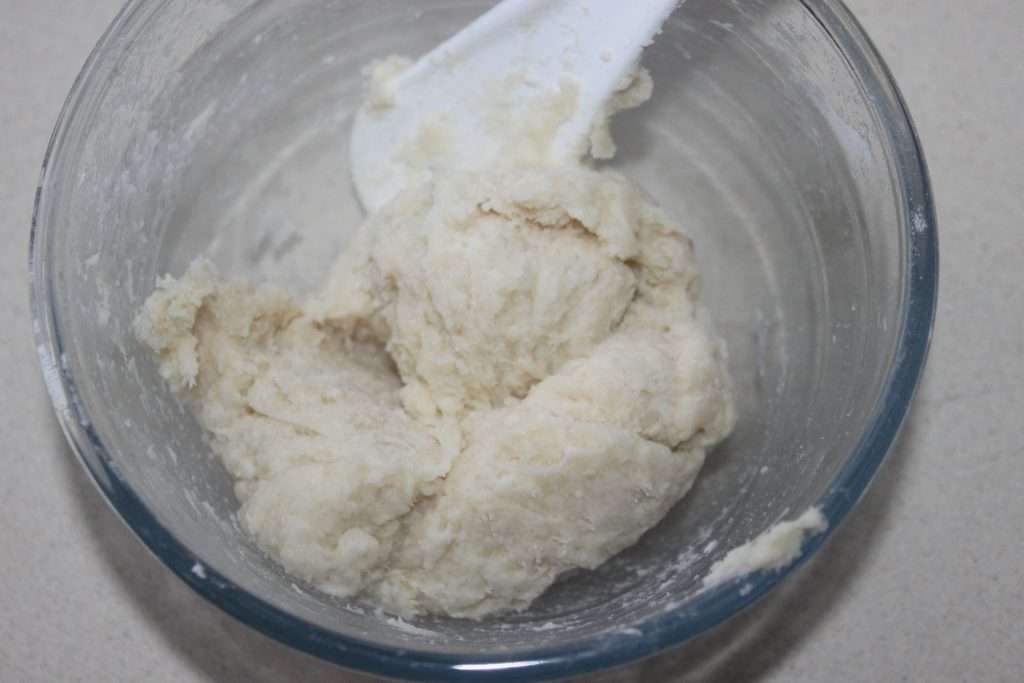
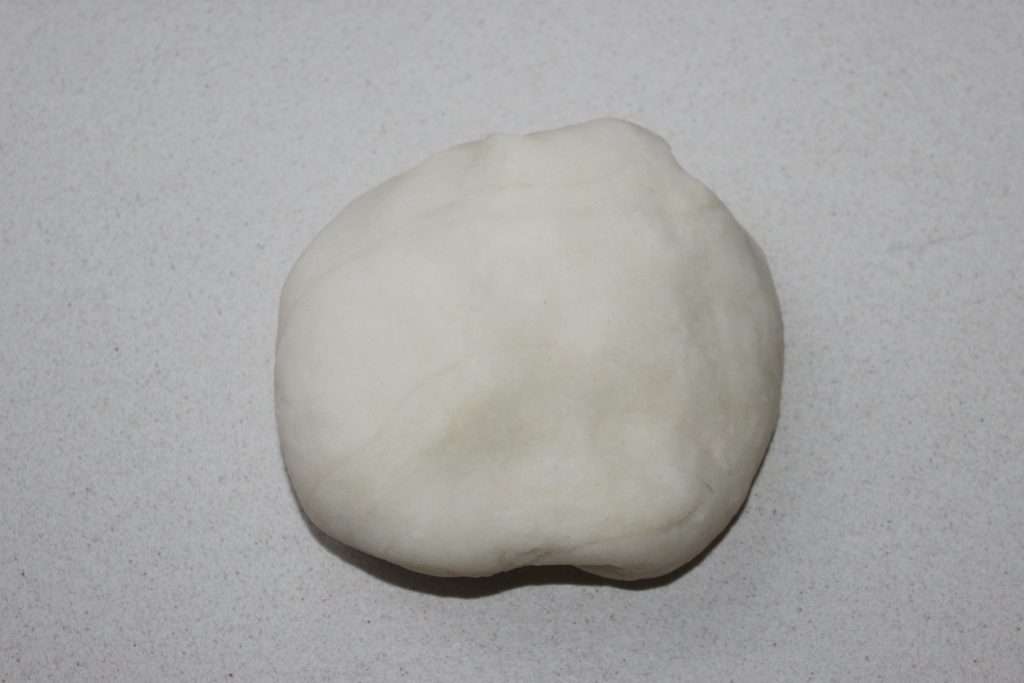
Then knead the dough on an unfloured work surface until it is smooth.
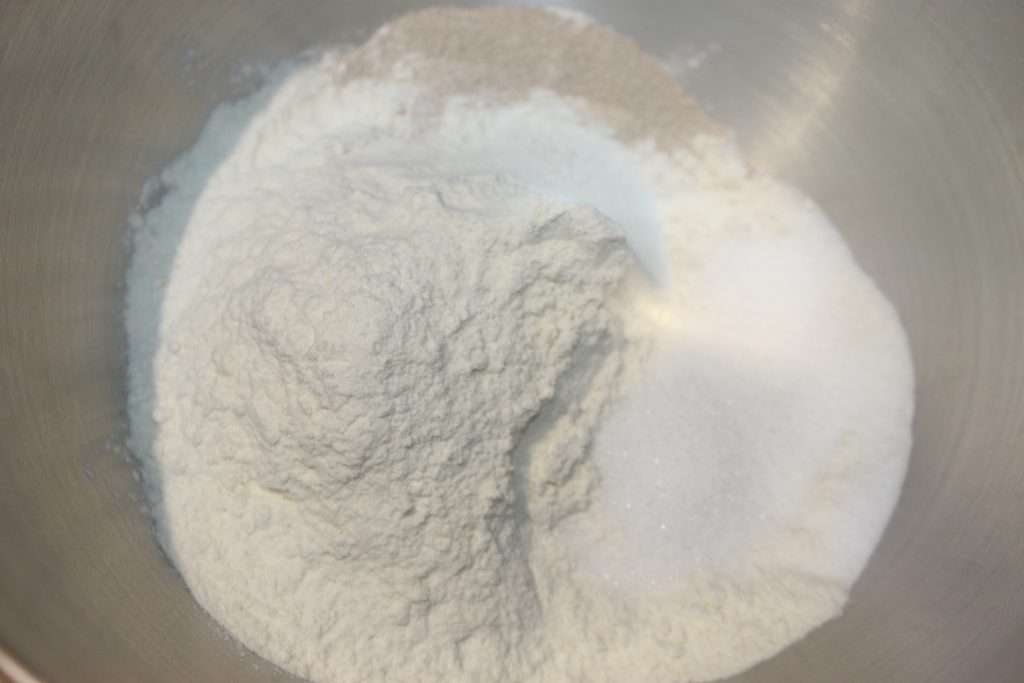
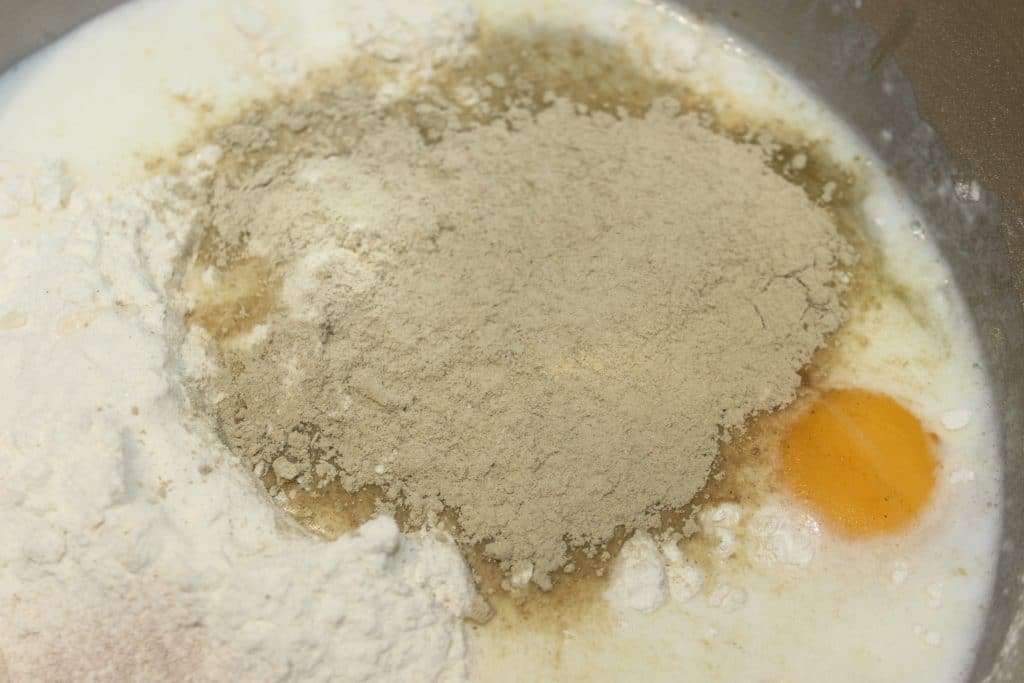
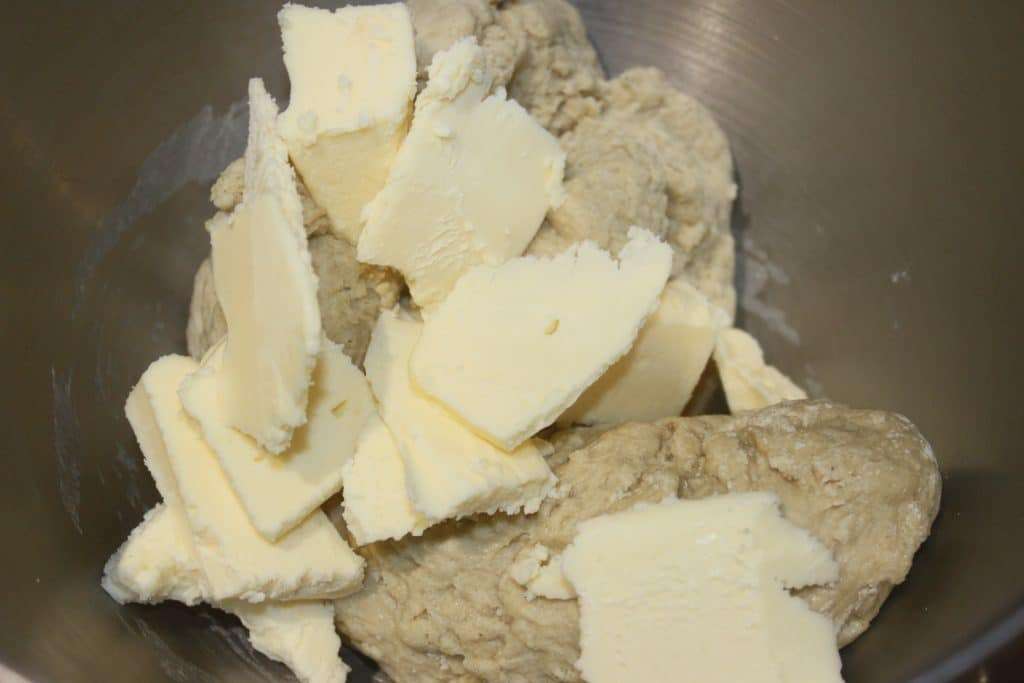
Put the yudane in cling film and cool. Put the flour, yeast, sugar and salt in the bowl of your food processor.
Mix and add the egg and fermented milk.
Knead with the hook for 7-8 minutes before adding the butter and cold yudane.

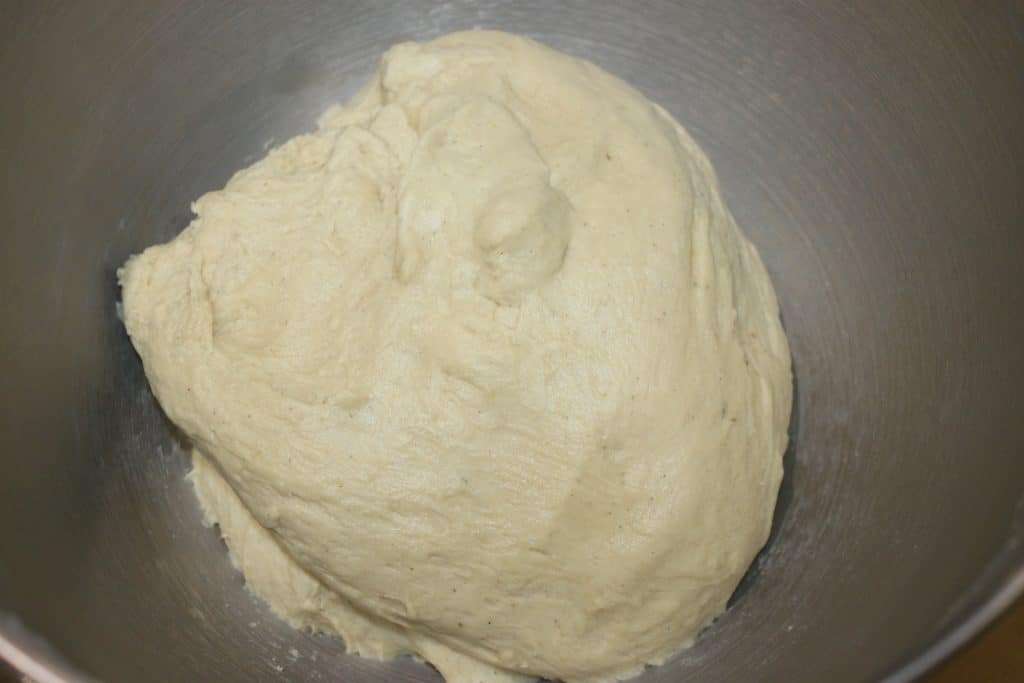
Knead again for 7-8 minutes until you have a nice smooth dough.
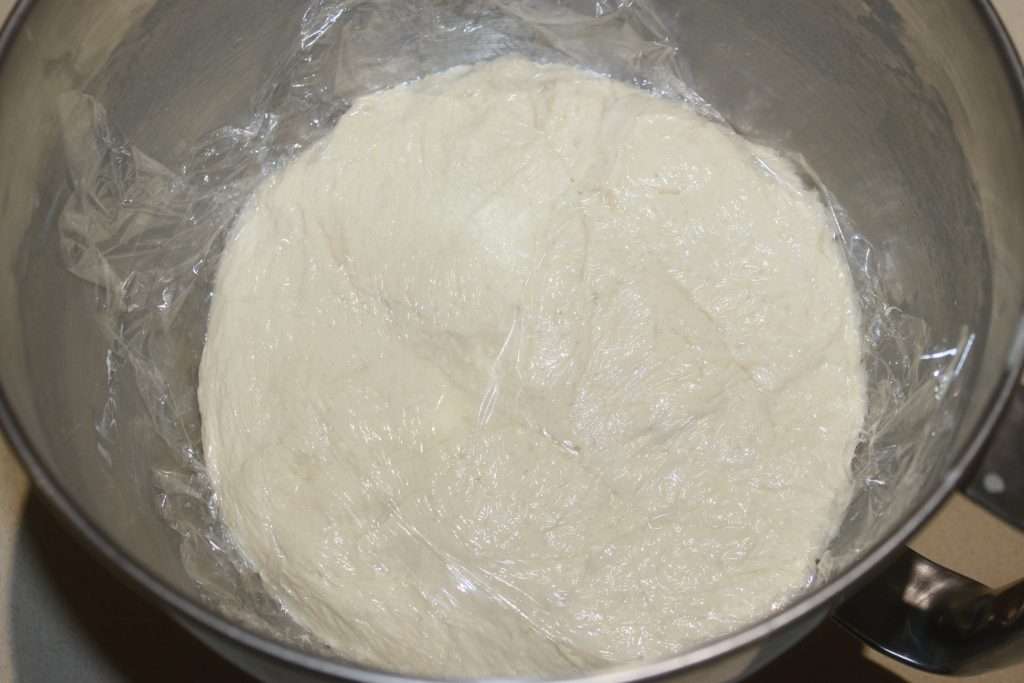
Cover with cling film. Chill overnight. The dough can be stored in the refrigerator for up to 3 days. It will puff up nicely (in the photo, I removed the cling film).
Roll out the dough on a floured work surface to a thickness of 6-7 mm. Cut with a cookie cutter. Here I took 8cm of diameter.
Place on a baking sheet lined with parchment paper.
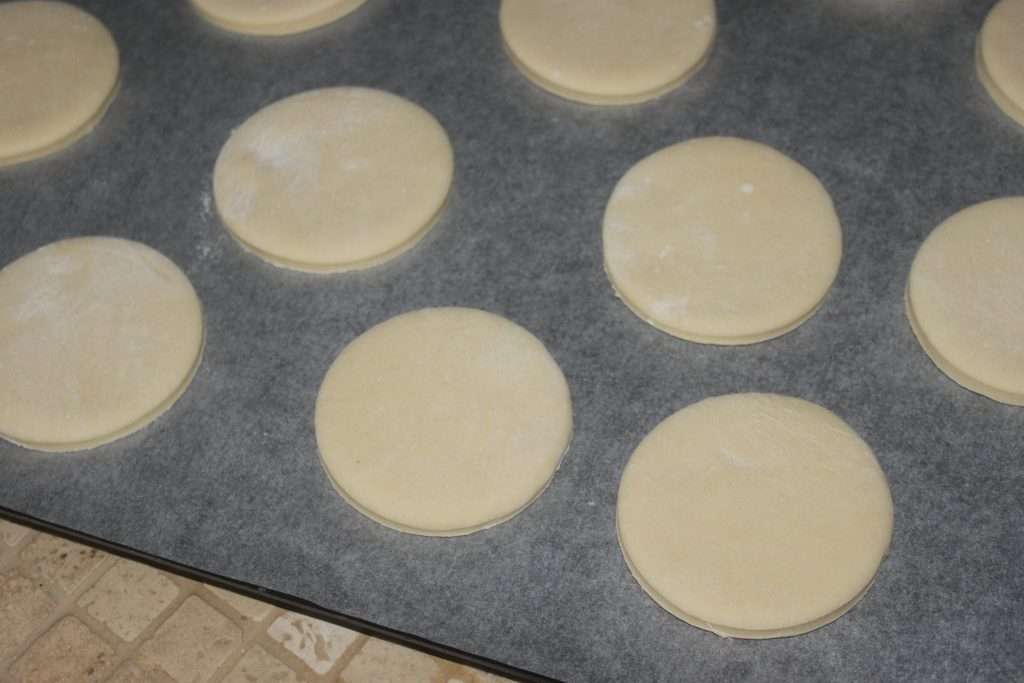
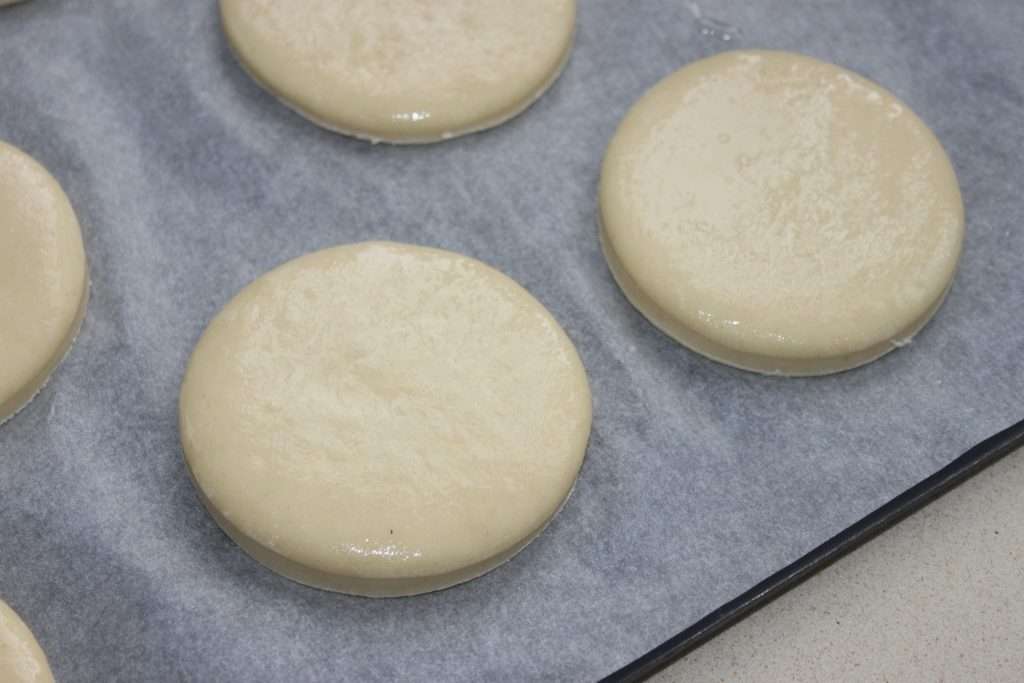
Oil the surface with a brush to avoid drying out, then let it grow for an hour at room temperature.
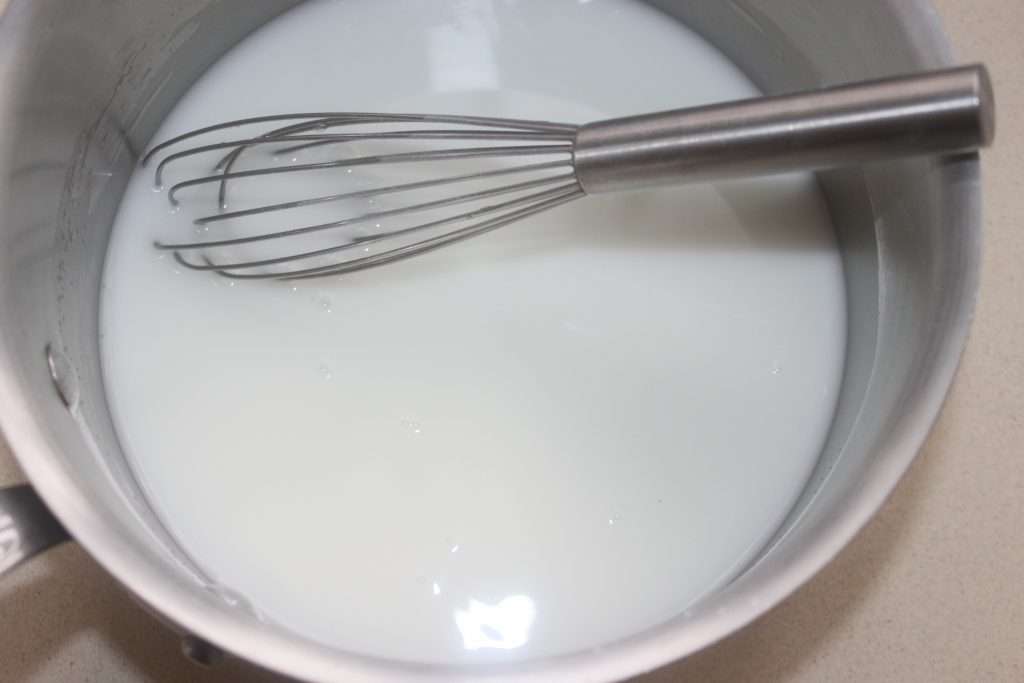
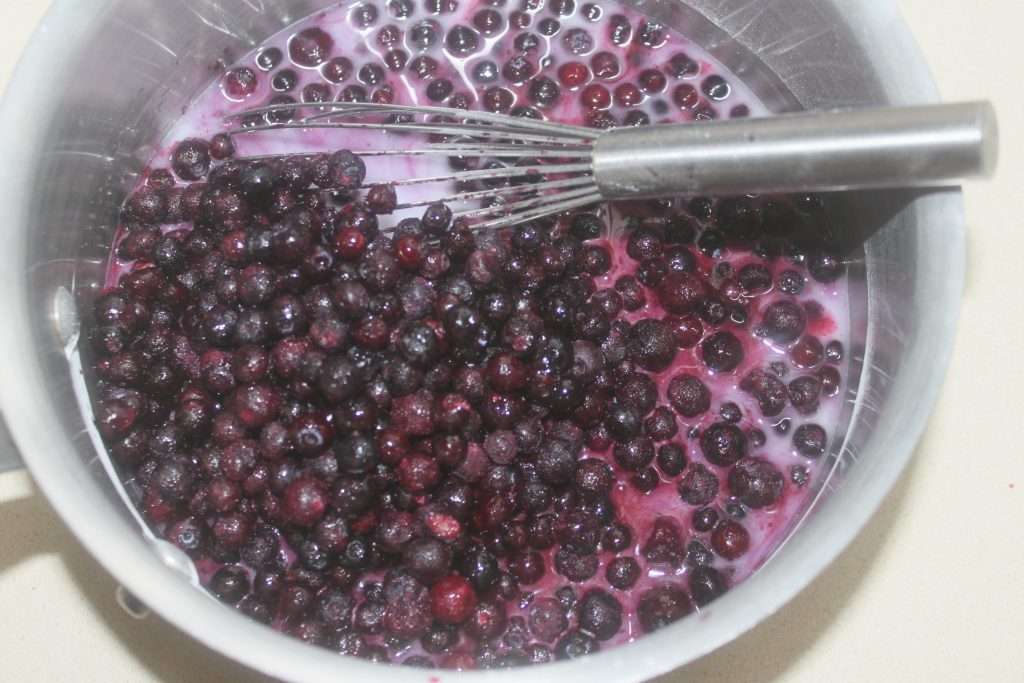
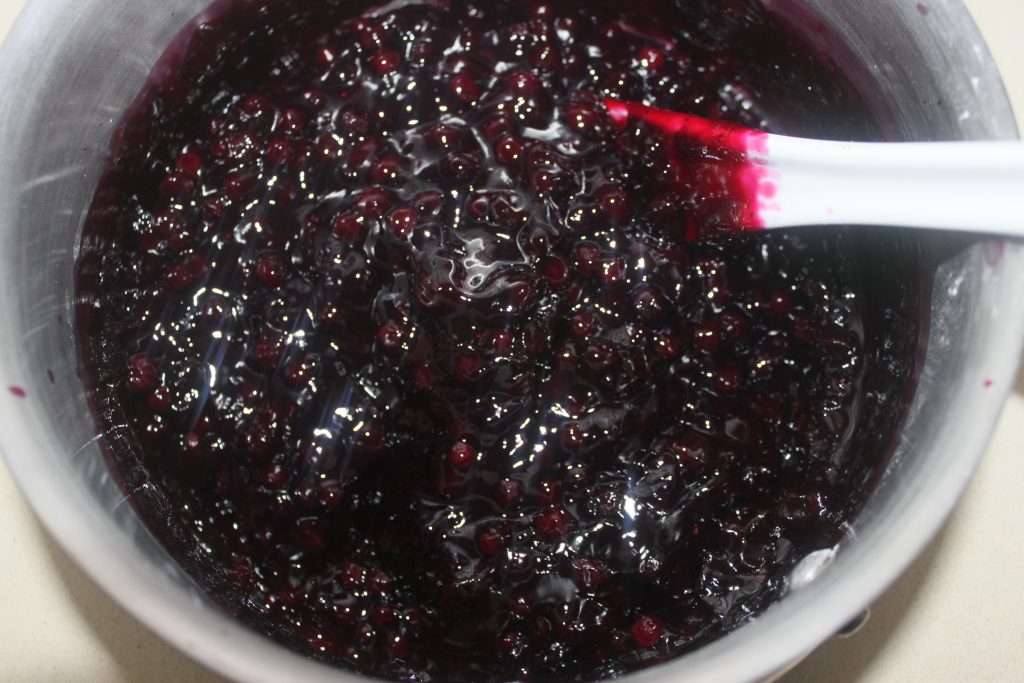
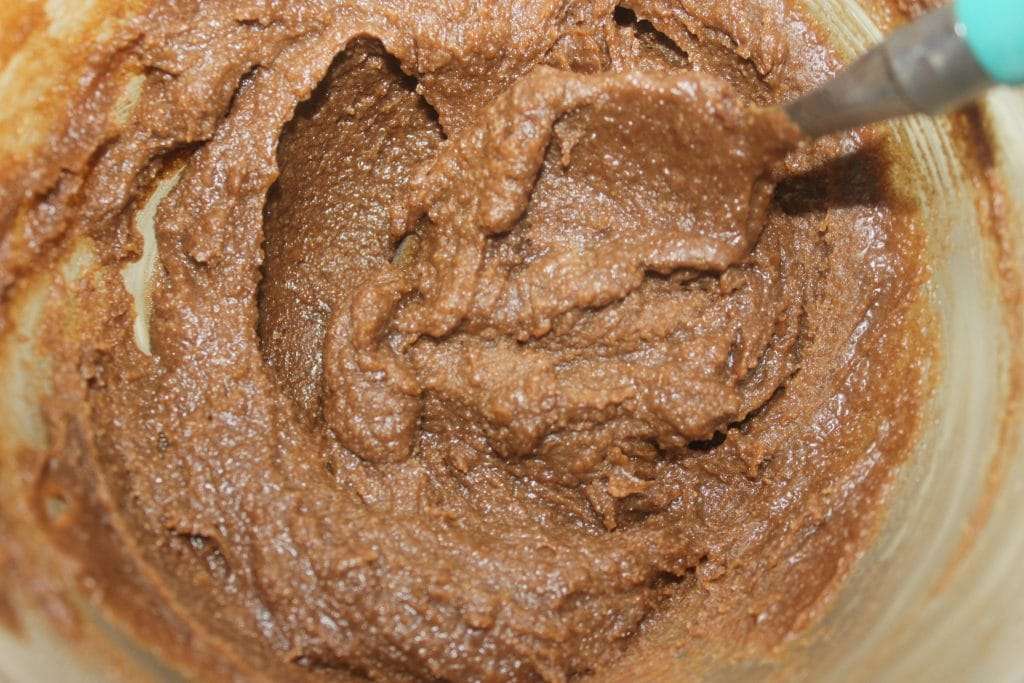
Meanwhile, prepare the blueberry filling. Pour the sugar and cornstarch into a saucepan.
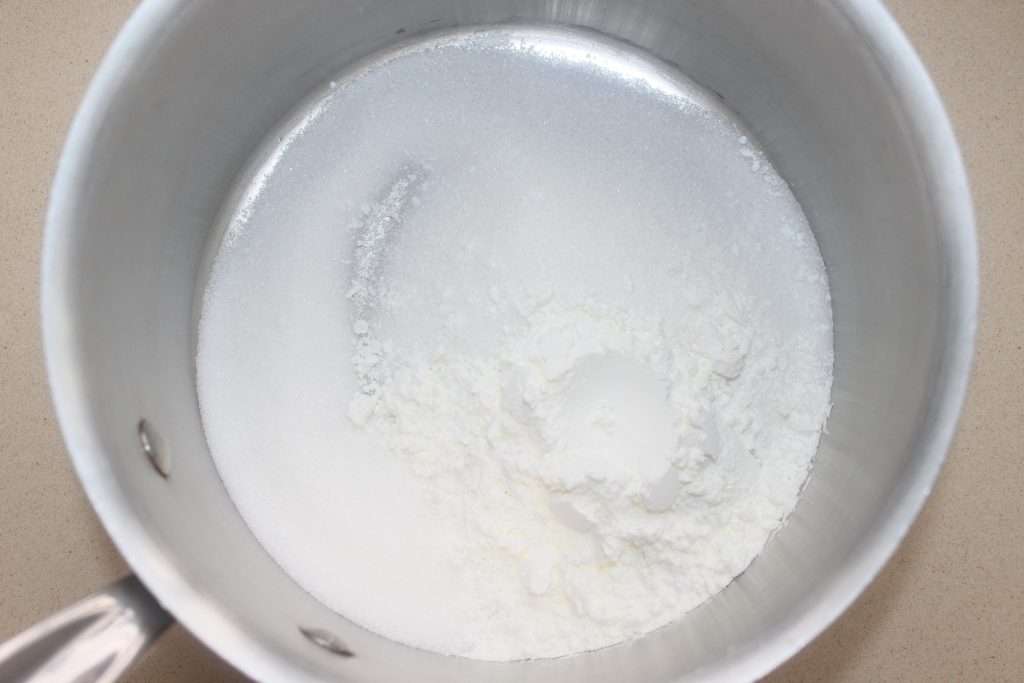
Mix well then pour in the water while mixing.
Add the blueberries.
Bring to a boil over low heat.
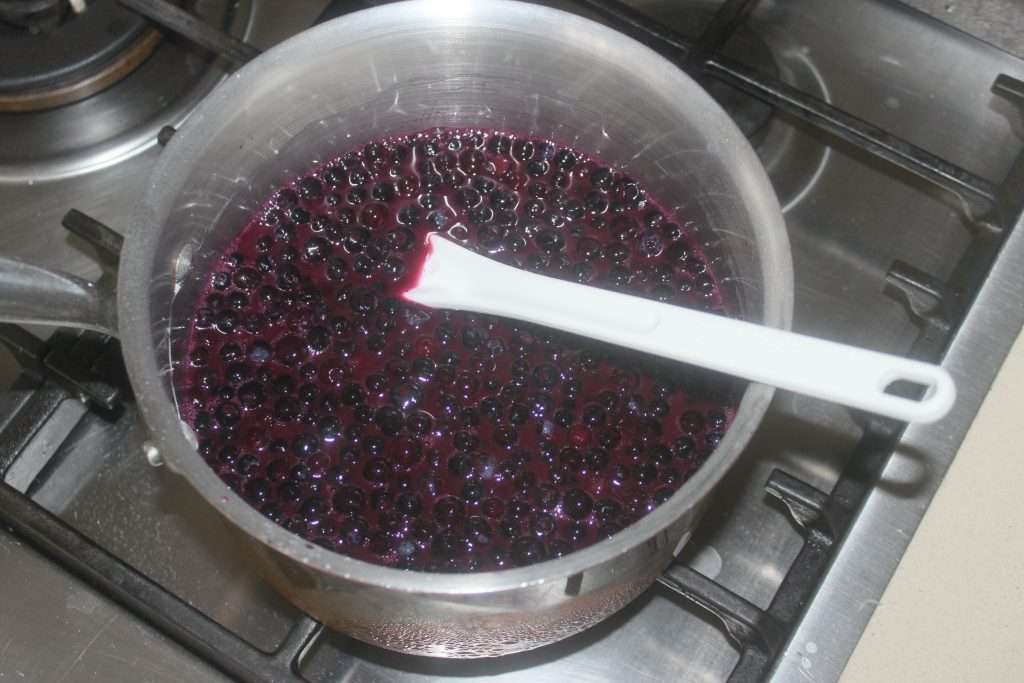
When it boils, let it boil for 3 minutes. The sauce thickens thanks to the cornstarch.
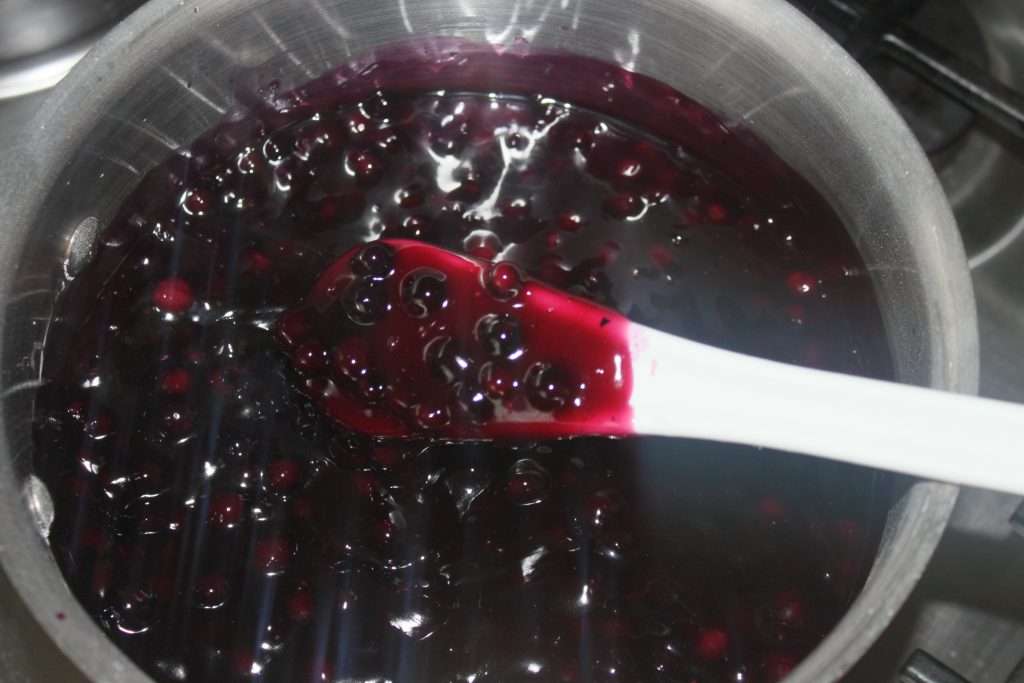
Let cool completely.
Put a good 3 centimeters of oil in a frying pan (not too big) and heat the oil. Put in a few doughnuts. If the dough browns too quickly, turn down the heat. The dough will puff up nicely.
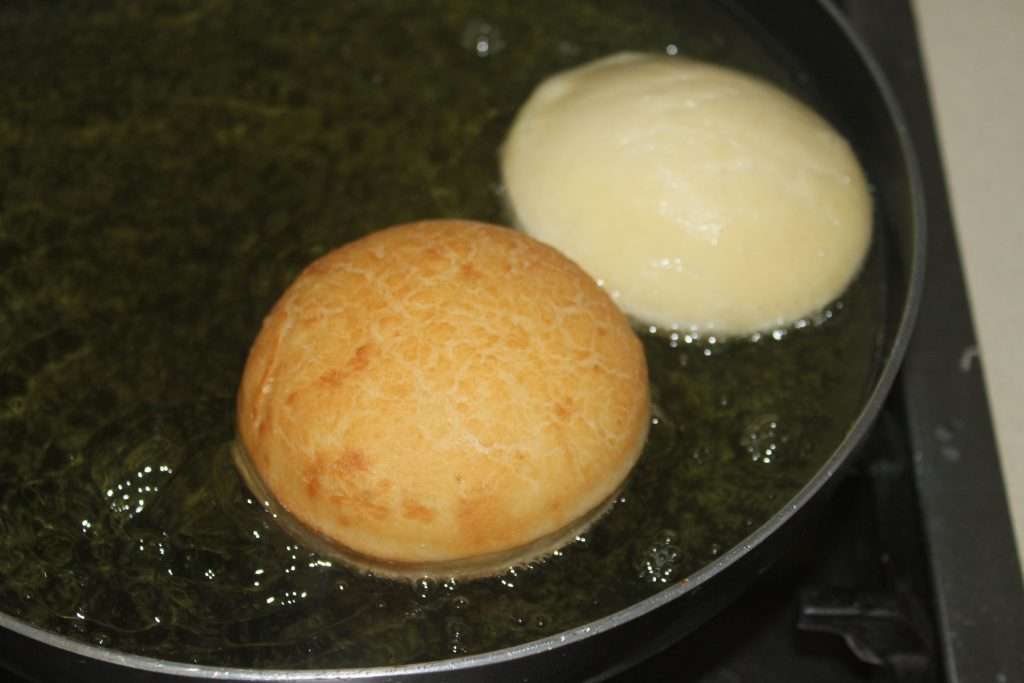
Cook on both sides and cool on paper towels.
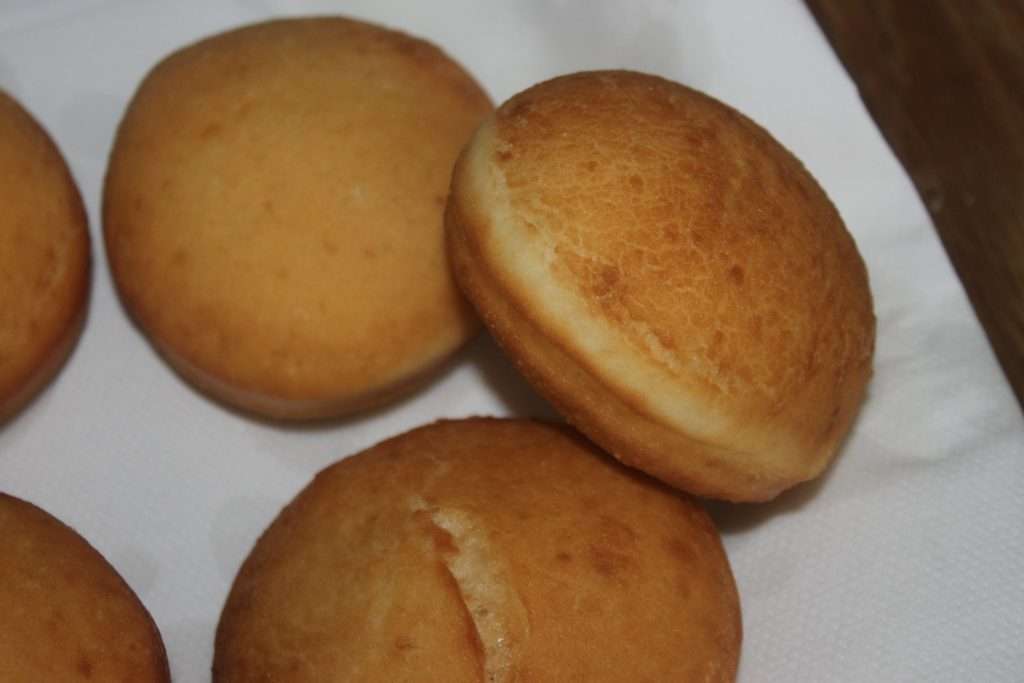
Pour the cooled filling into a pastry bag fitted with a piping bag large enough to hold the blueberries.
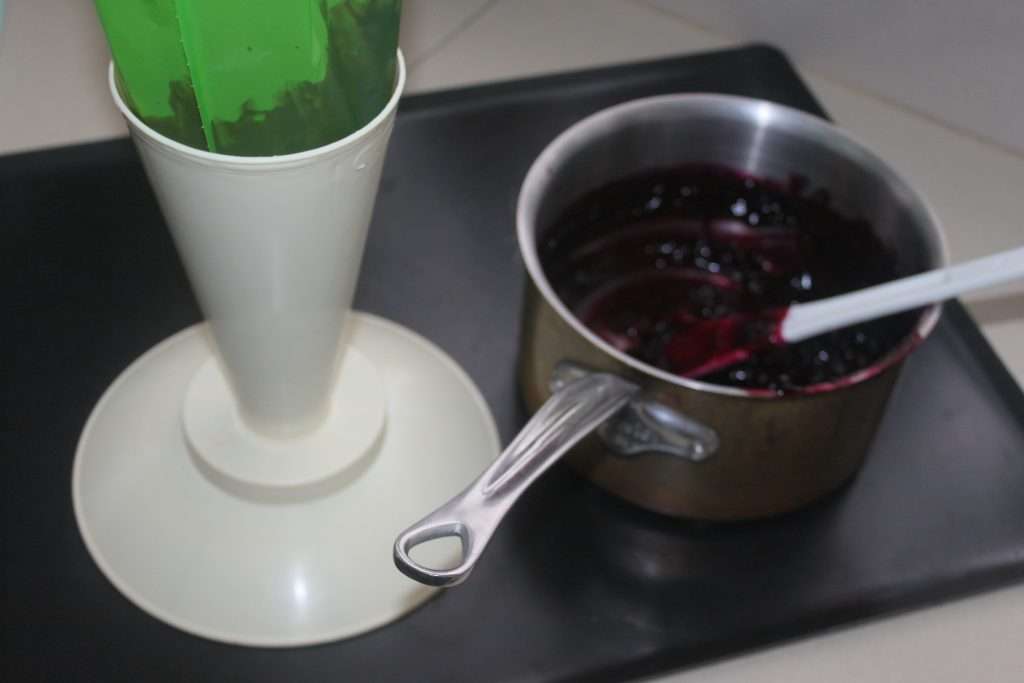
Push the sleeve into a doughnut and bake.
Put sugar in a small container and roll the doughnuts in it. To be enjoyed warm or cool!

Pétrissez avec le crochet pendant 7-8 minutes avant d’ajouter le beurre et le yudane froid.

Blueberry Doughnuts


To some, this may sound crazy, but I am a fan of Brussels sprouts! Not the traumatic ones from our childhood canteen, eh! But the home-cooked ones. I love them no matter how they are cooked. I start with baked cabbage, served with a delicious little tahini sauce. Simple efficient and good!
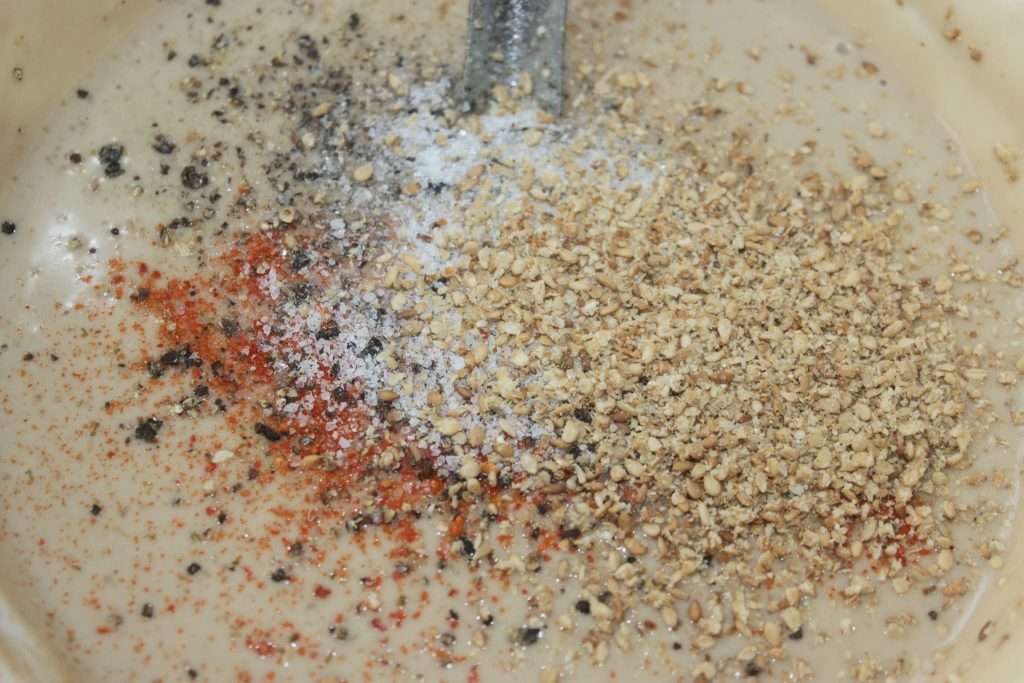
CHOUX DE BRUXELLES AU FOUR :
Recipe for 4 people:
- 1 kg of brussels sprouts
- olive oil
- salt, pepper, paprika, chilli, sesame
Tahini sauce :
- 135g of tahini (sesame paste)
- 15g of white vinegar
- 10g of balsamic vinegar
- 20g honey or agave syrup
- 15ml olive oil
- 100ml of water
- 1 clove of garlic
- salt pepper
Instructions :
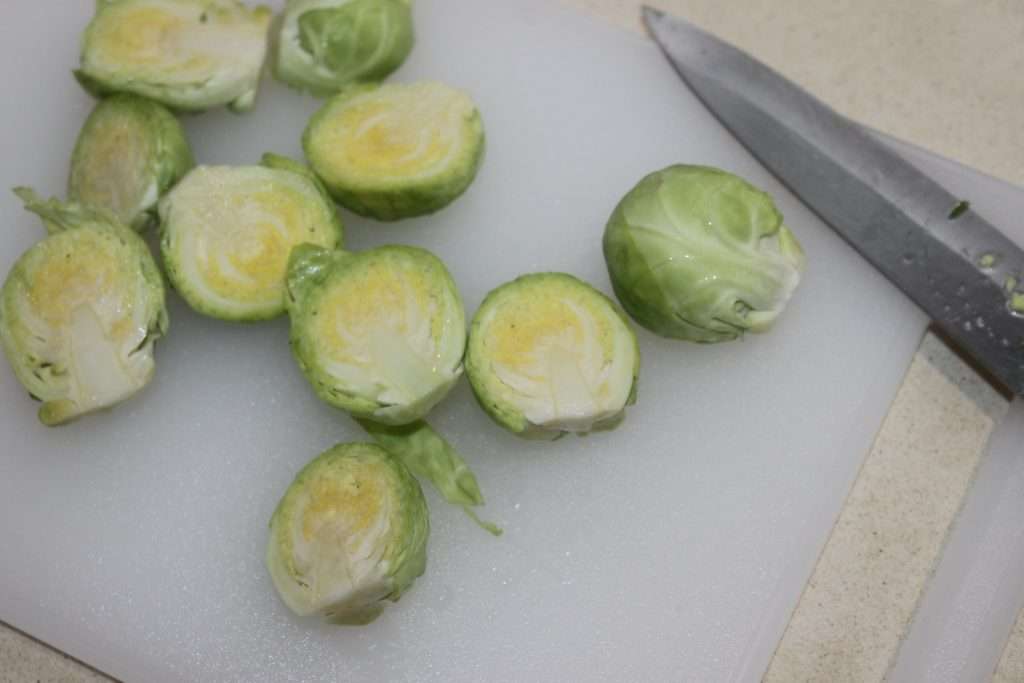
Start by rinsing the Brussels sprouts.
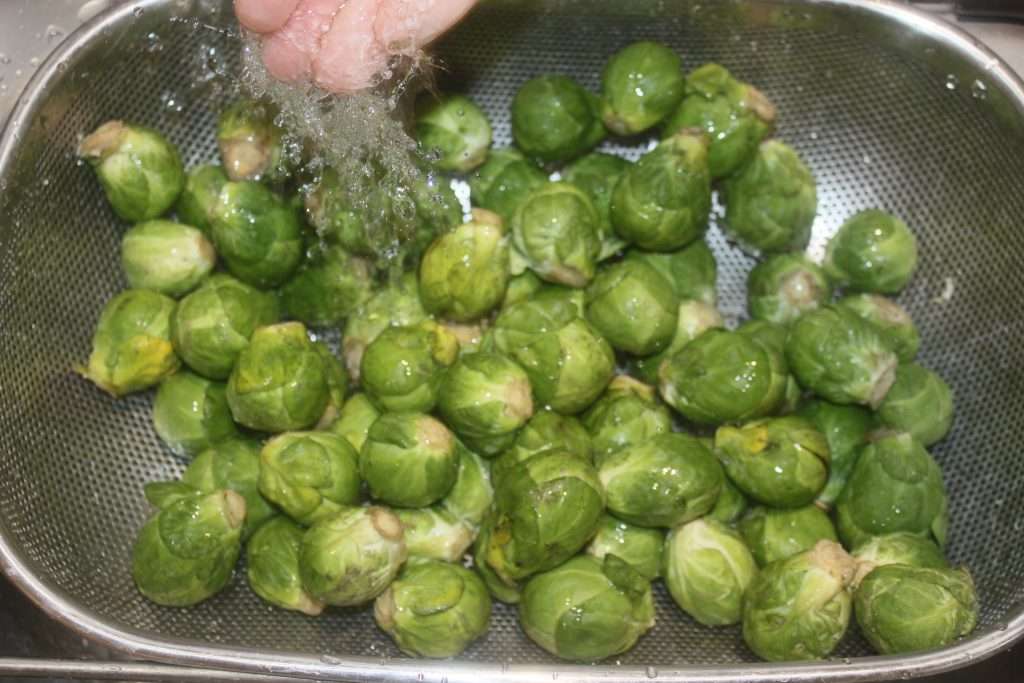
Cut the base a little and remove the damaged leaves. You will have newborns!
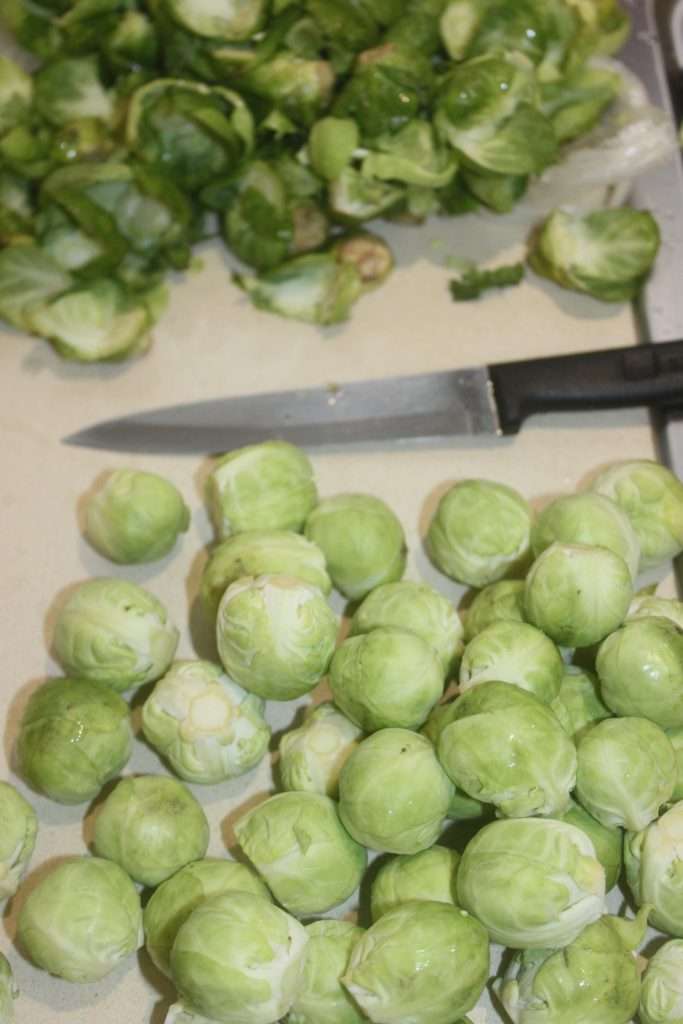
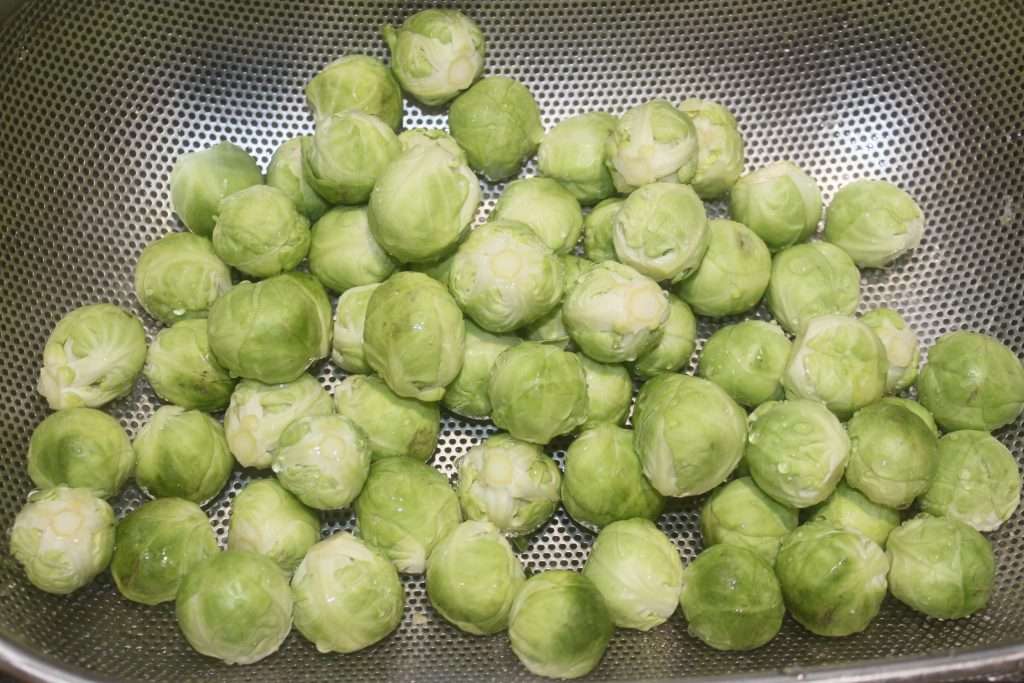
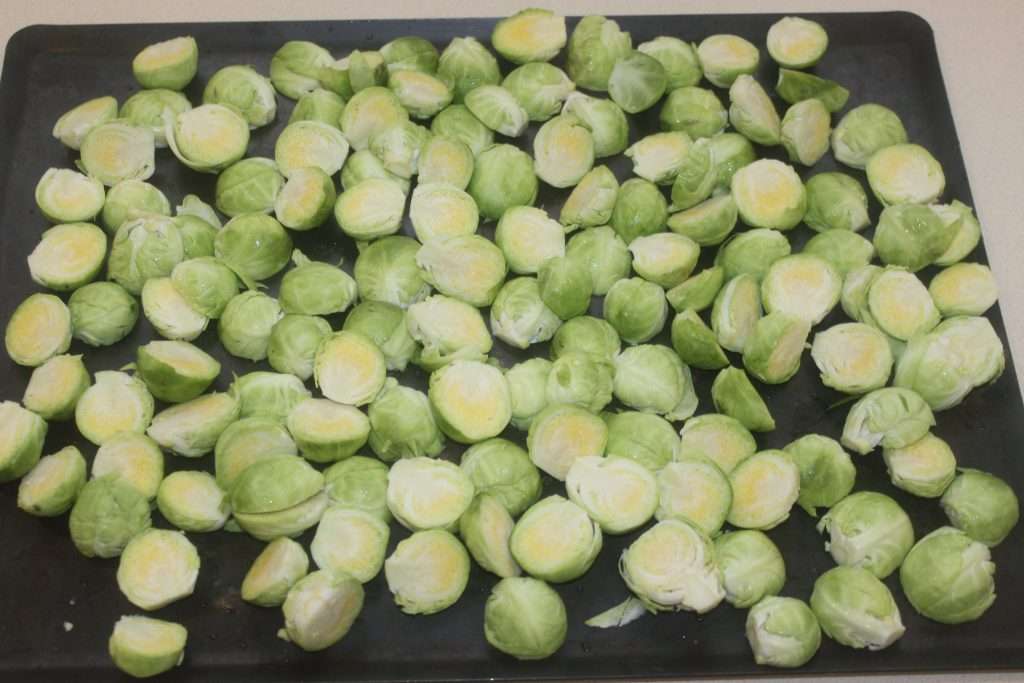
Cut them in half.
Place them on a baking sheet.
Sprinkle with olive oil, salt and pepper to taste. I also add a little paprika and chilli.
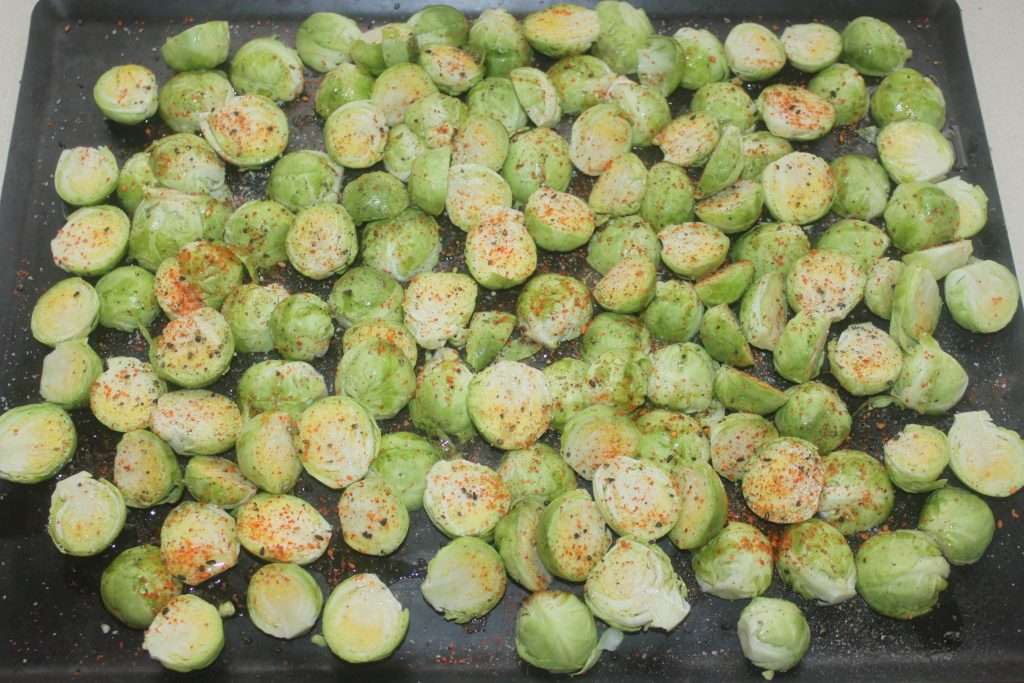
Bake for 30 minutes at 180°C on a convection oven.
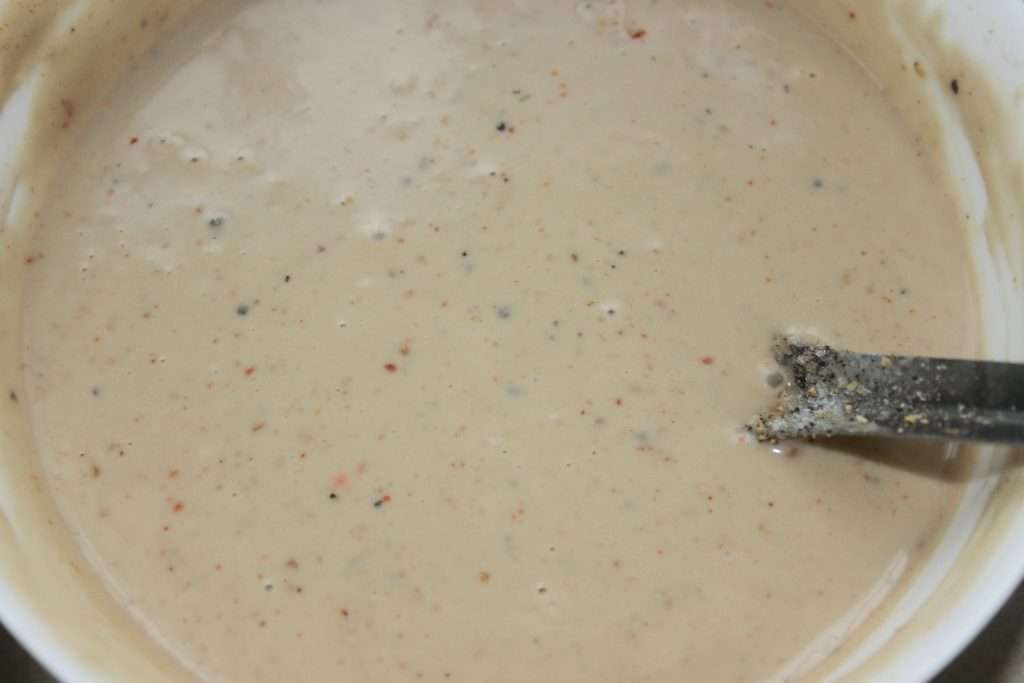
Meanwhile, make the sauce. Mix all ingredients together.
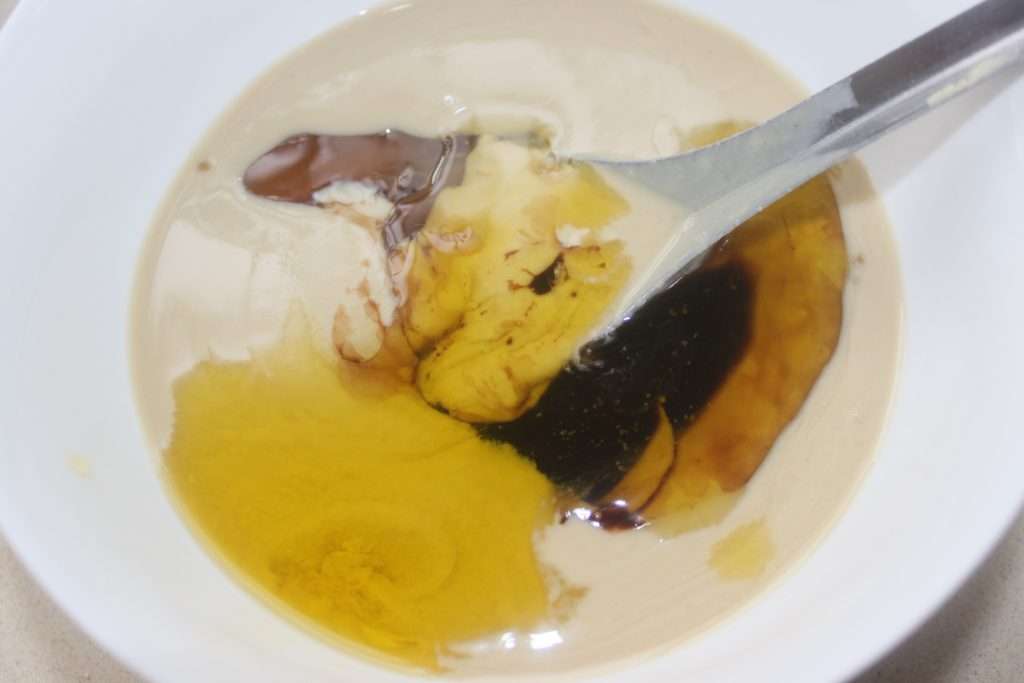
Add one peeled garlic clove, pressed with a garlic press.

Add salt and pepper to taste and, if you have any, a little sesame seeds. But also spice it up a bit!
Taste and adjust to your taste!
Serve the cabbage with the sauce.


De drôles de sablés avec une jolie forme en spirale, tout cela sans ustensile particulier. Vous les façonnerez à la main. C’est un peu de travail et vous recommencerez sans doute plusieurs fois pour obtenir un beau dessin. Mais c’est assez amusant à faire, surtout si vous voulez initier vos enfants à la cuisine. Et en plus, ils seront très bons !
Recette pour une trentaine de sablés :
- 250g de beurre demi-sel fondu
- 95g d’huile neutre
- 160g de sucre glace
- 1 sachet de sucre vanillé
- 1 œuf
- 590g de farine
- 1/4 de cuillerée à café de bicarbonate de sodium
- 5 cuillerées à café de cacao non sucré en poudre
Instructions :
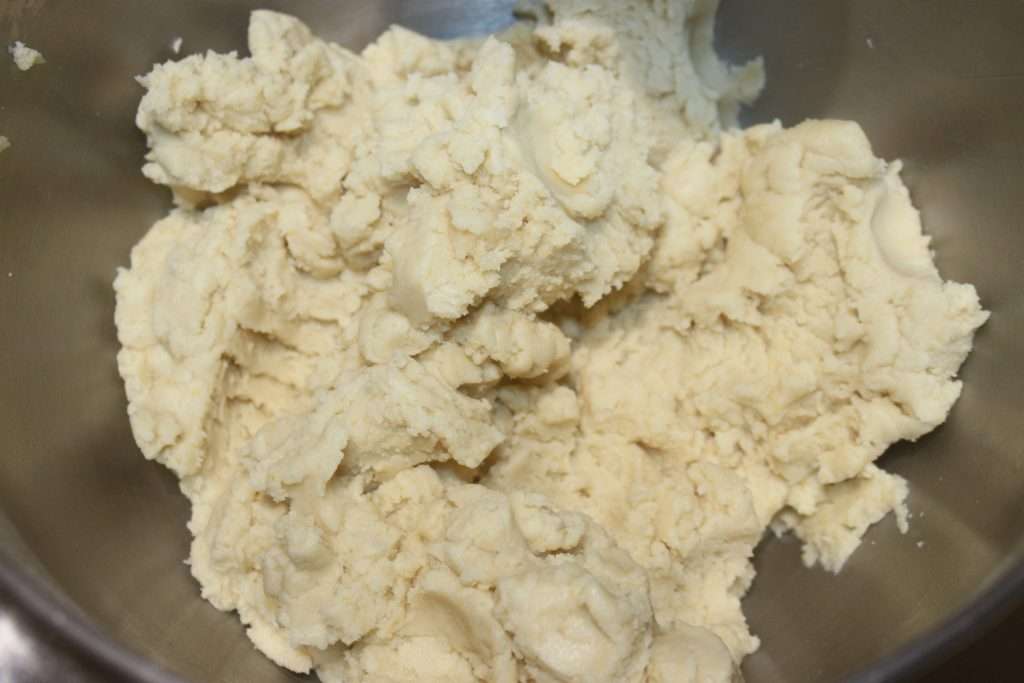
Mélangez dans un récipient, le beurre fondu, l’huile, le sucre glace, le sucre vanillé et l’œuf. Mélangez bien pour avoir une crème homogène.
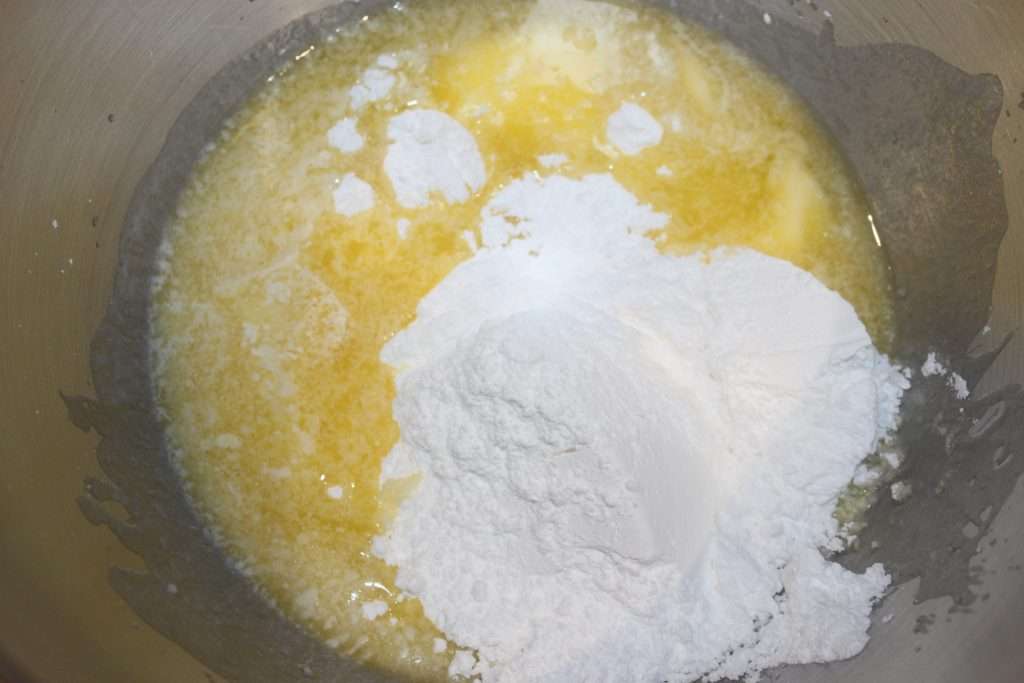
Ajoutez alors la farine et le bicarbonate.
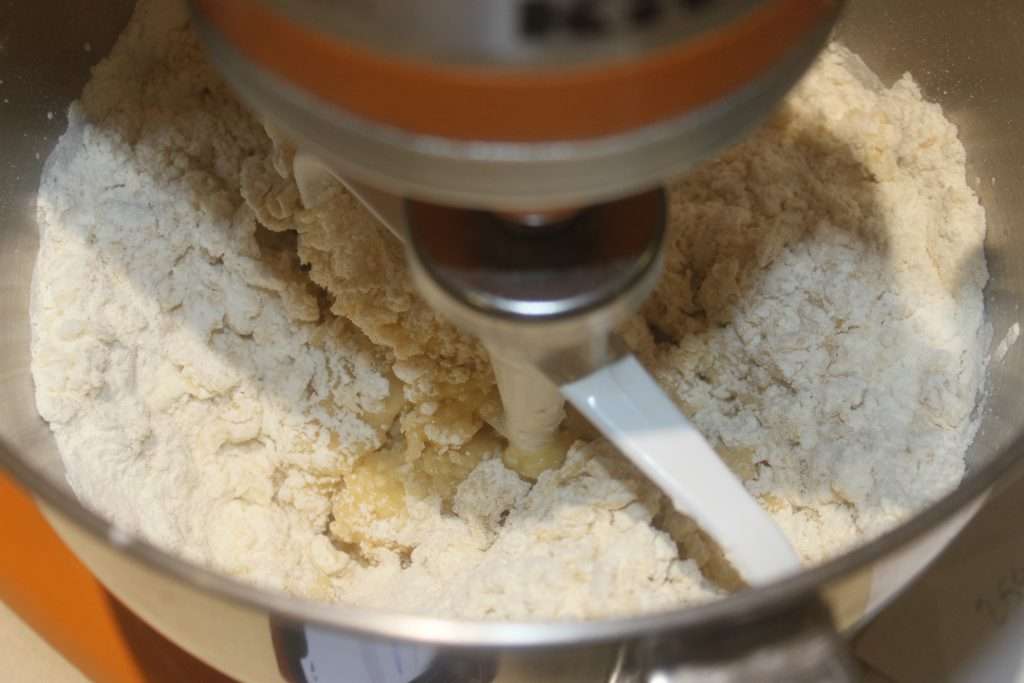
La pâte est déjà prête.
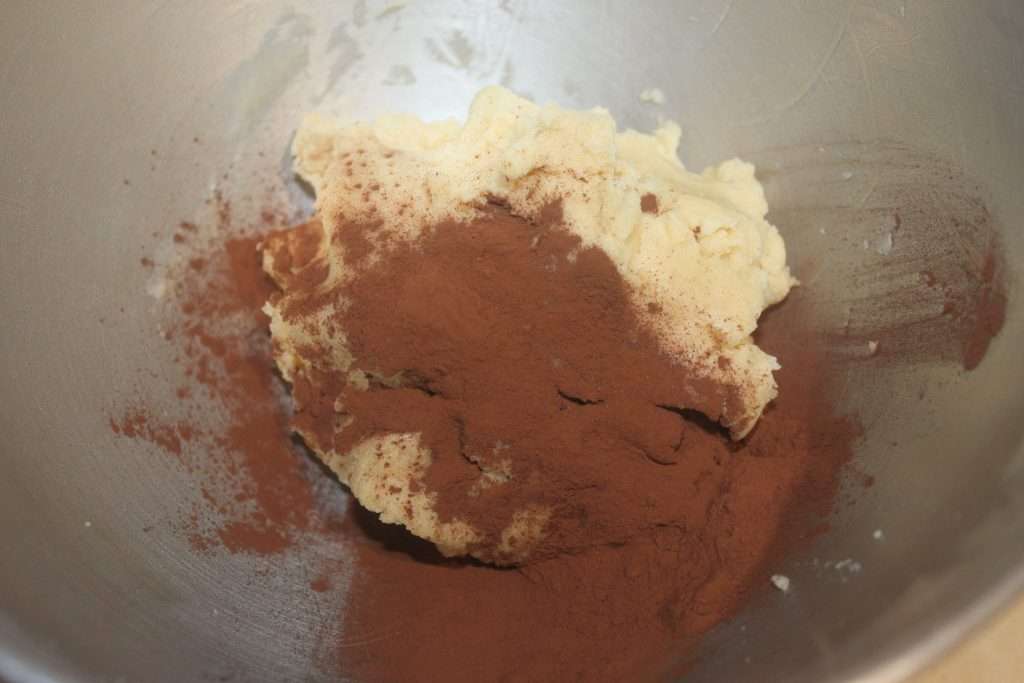
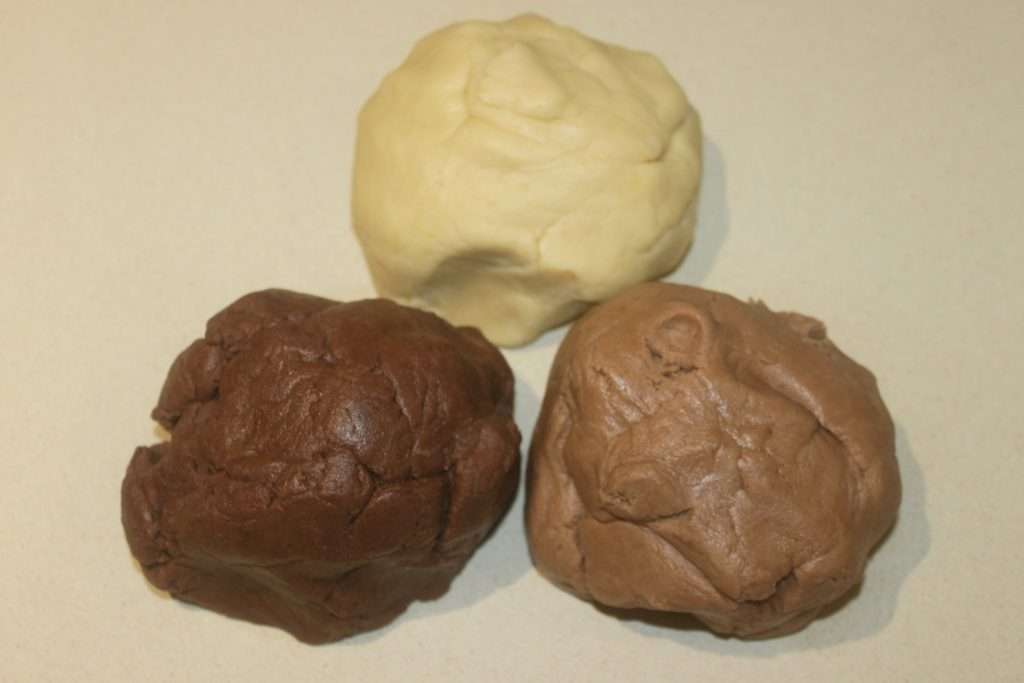
Divisez la pâte en trois parts égales. Dans une part, ne mettez rien, dans une autre mettez une cuillerée à café de cacao, et dans la dernière, 4 cuillerées à café de cacao. Mélangez bien le cacao à la part de pâte concernée.
Vous avez alors 3 boules de couleurs différentes.
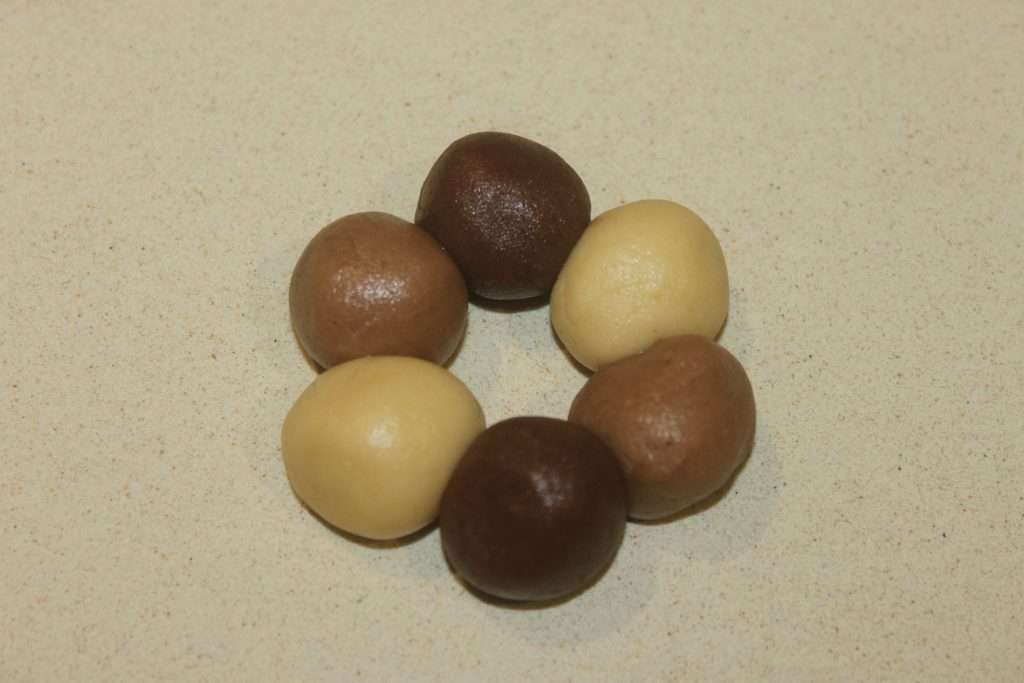
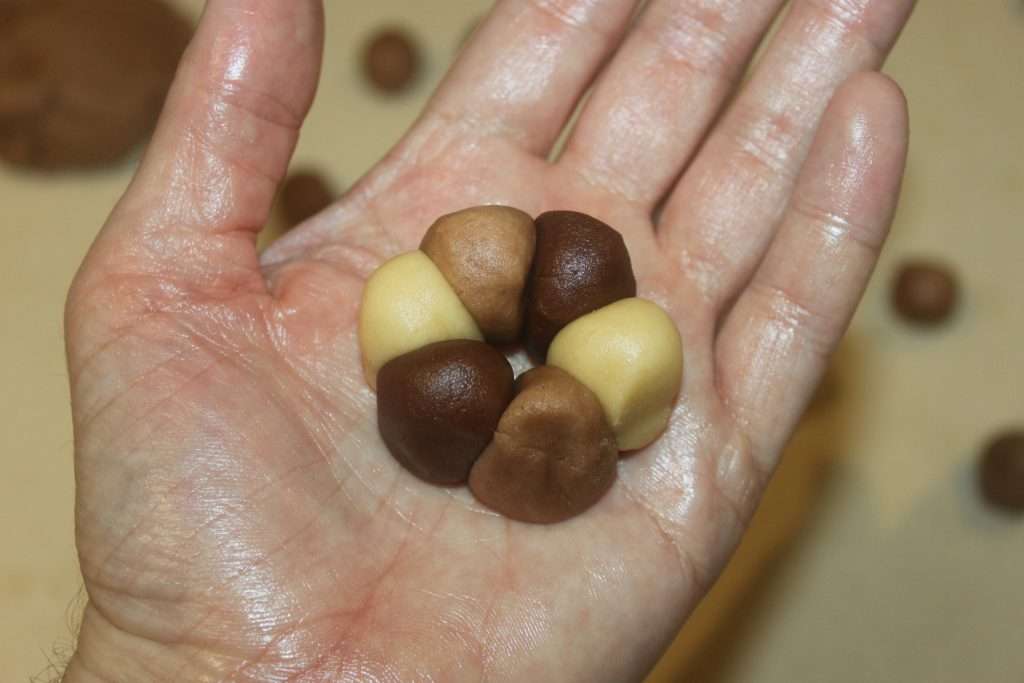
Pesez des boulettes de 5g dans les trois pâtes. Roulez bien entre vos mains.

Prenez 2 boulettes natures, 2 au cacao clair et 2 au cacao plus foncé. Mettez les en couronne de cette façon. Si cela vous semble trop compliqué, vous pouvez ne mettre que 3 boules au total au lieu de 6, en les pesant chacune à 10g au lieu de 5g. Vous aurez donc juste 3 spirales au lieu des 6 que je fais ici. Au goût, évidemment, cela ne change rien !
Mettez dans la paume de votre main. Puis avec l’autre main, façonnez en tournant continuellement pour former la spirale.
Cela demande peut être un peu d’entrainement, mais vous y arriverez.
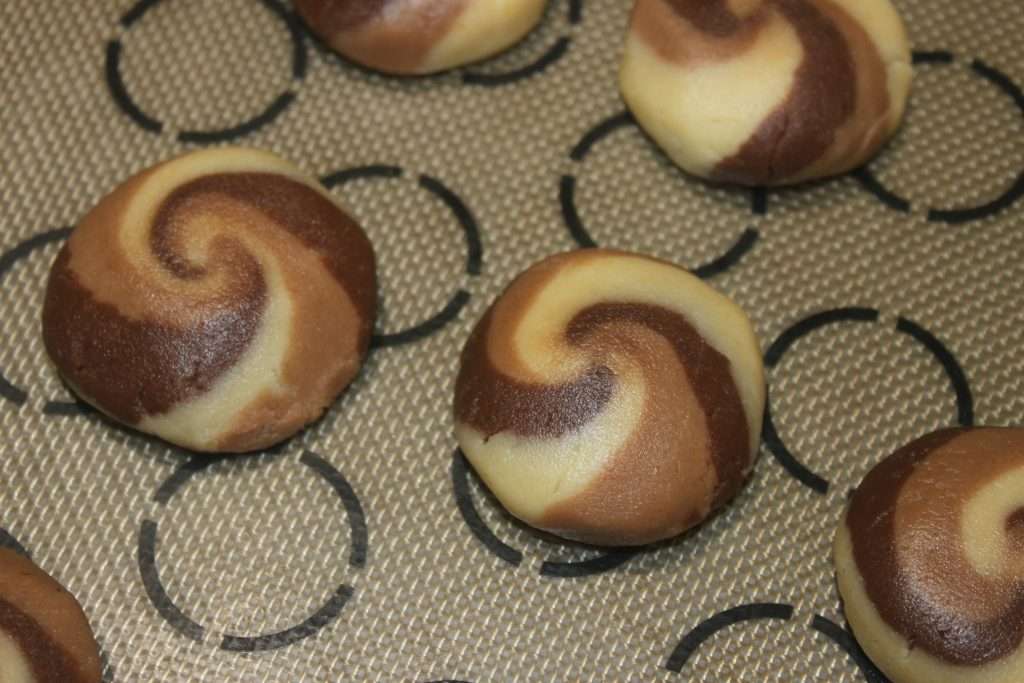
Certains sablés seront sans doute plus beaux que d’autres.
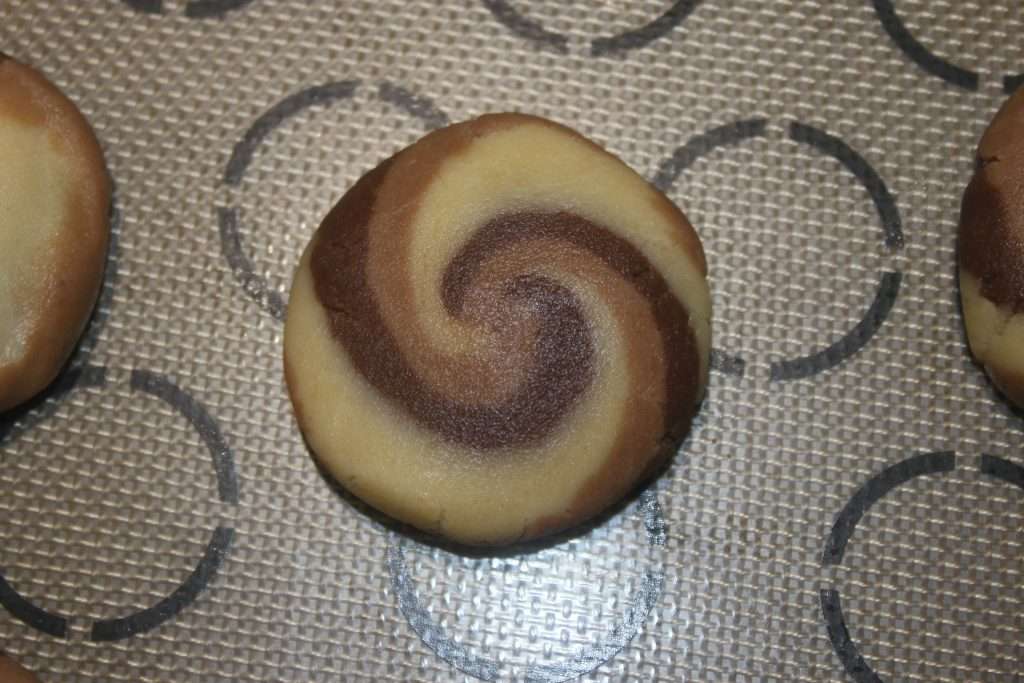
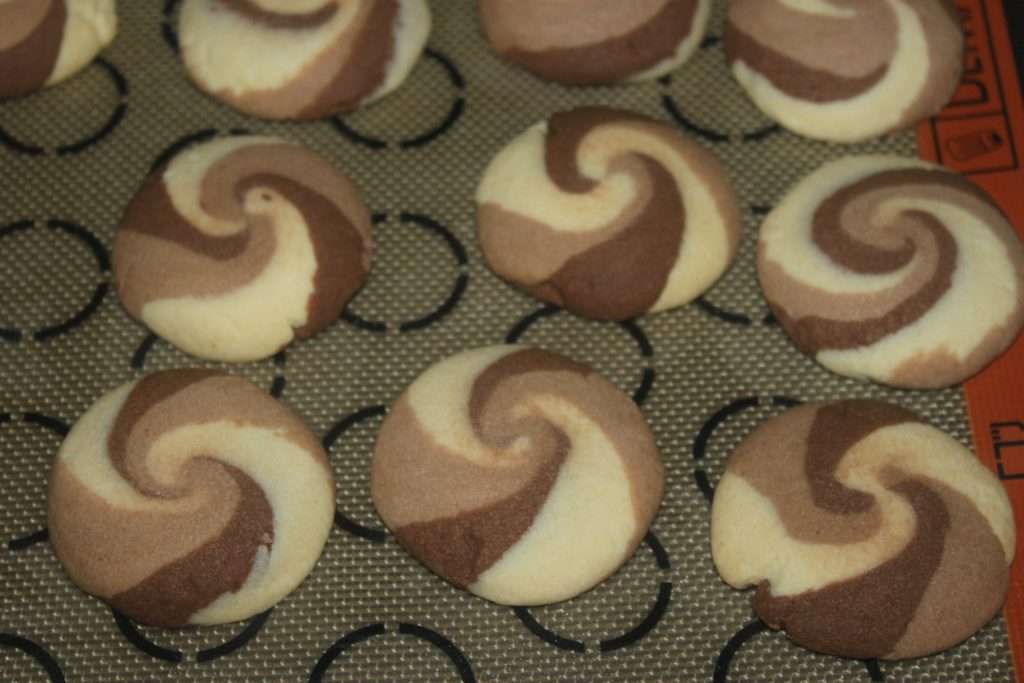
Faites cuire à 165°C pendant 15 à 20 minutes puis laissez refroidir sur une grille à pâtisserie. À conserver en boite hermétique.


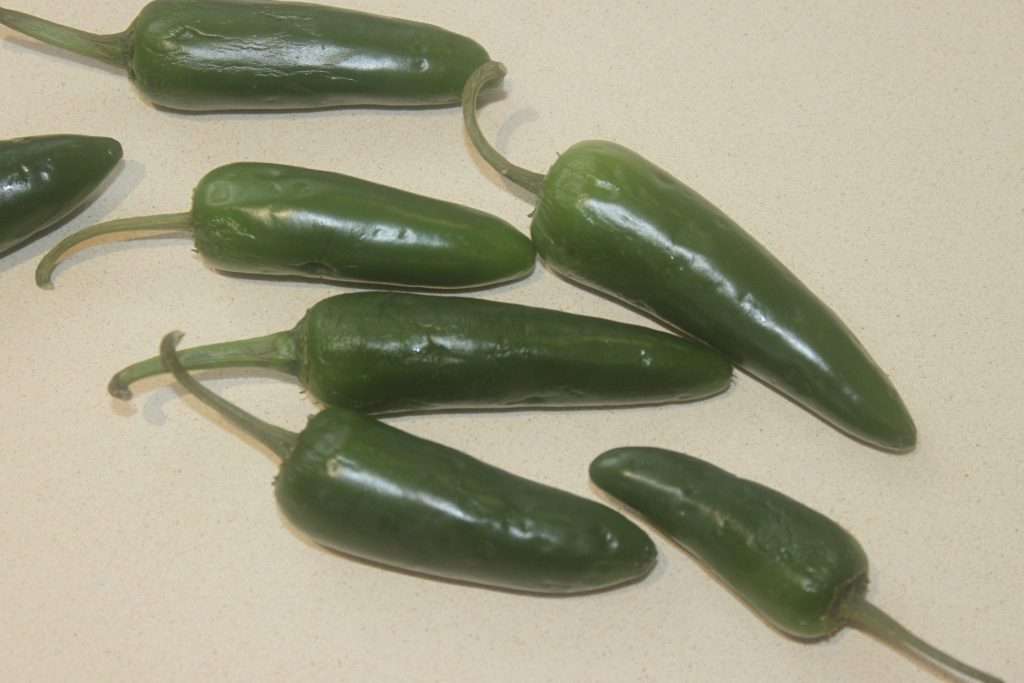
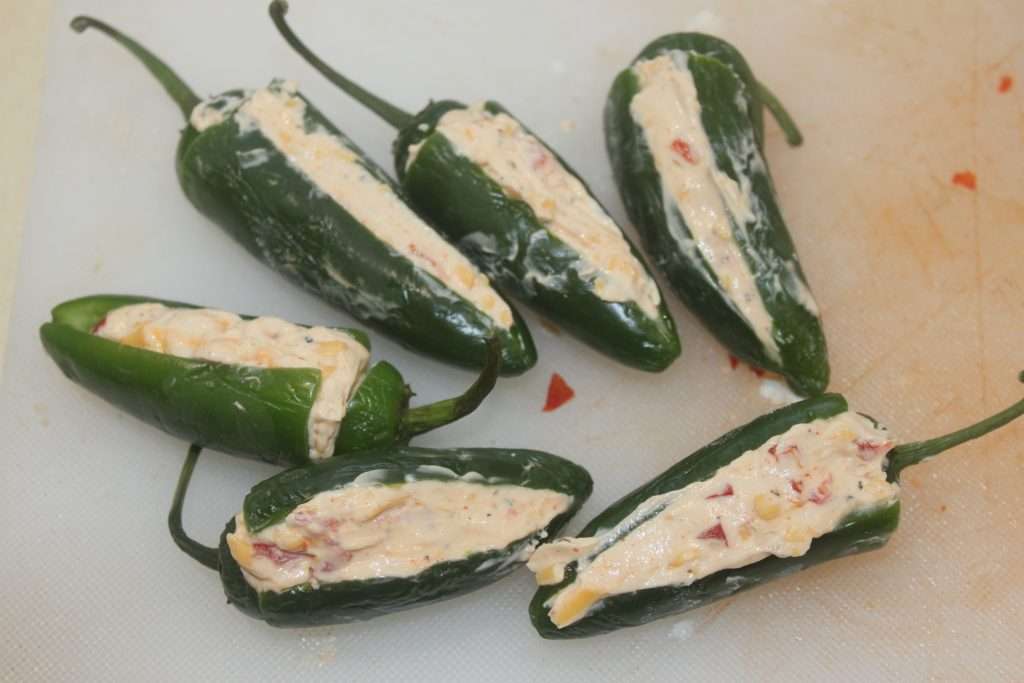
Delicious jalapeño peppers filled with cream cheese, cheddar and red bell pepper. I had tasted some in Seattle a while back at a great waterfront restaurant near the university in 2019 and wrote down what I liked so I could make them again. The hardest part is to find the peppers, but if you search on the internet, you will find them without too much difficulty. You can also replace them with mini peppers. It’s nice and crispy, creamy, and very spicy (but bearable) in the case of jalapeños! To be enjoyed with a small soothing sauce.
Recette :
- 500g of jalapeño peppers
- 300g of cream cheese
- 80g grated cheddar cheese
- 1/2 red bell pepper
- 1/2 teaspoon garlic powder
- 1/4 teaspoon paprika powder
- salt pepper
- flour
- 1 egg
- fermented milk
- breadcrumbs (I used panko)
Instructions :
Here are the small jalapenos. I grant you, it is not easy to find. But you can replace them with mini peppers.
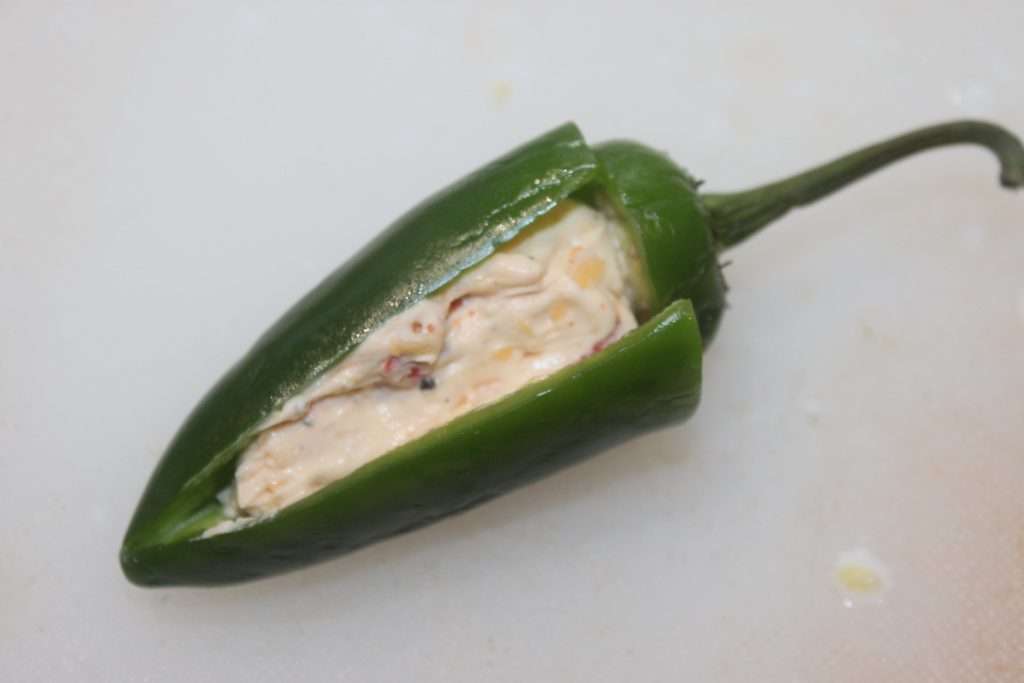
Slash lengthwise and then a little at the top of the pepper. You incise in the shape of a T. Empty the seeds. These peppers already sting, with the seeds it would be even worse!

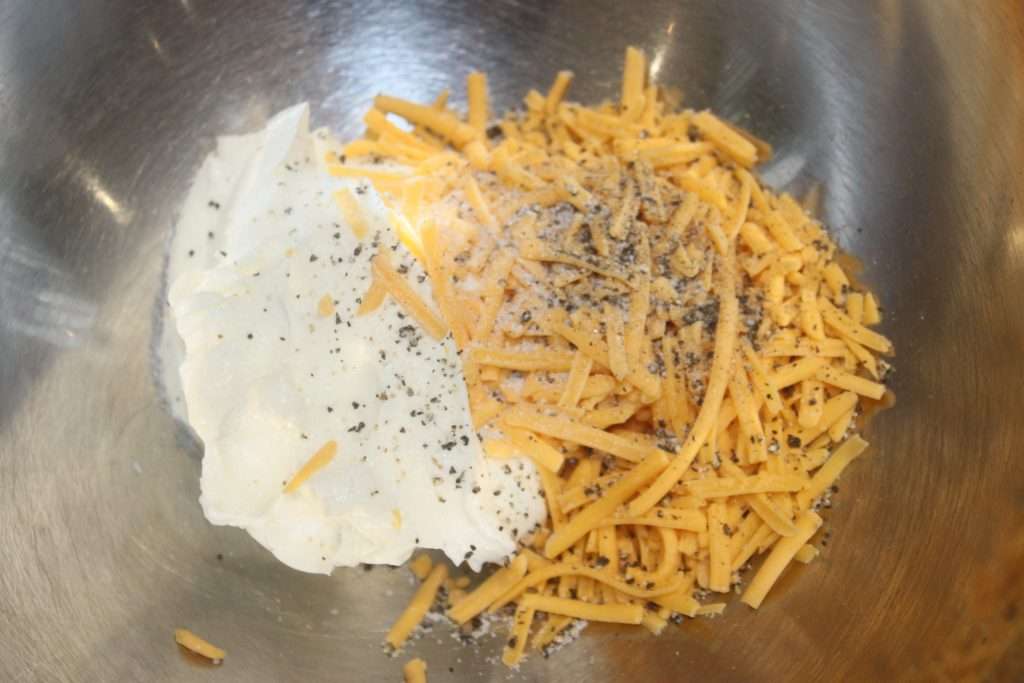
For the filling, mix the cream cheese, cheddar cheese, salt and pepper. Do not add too much pepper if the peppers are very hot.
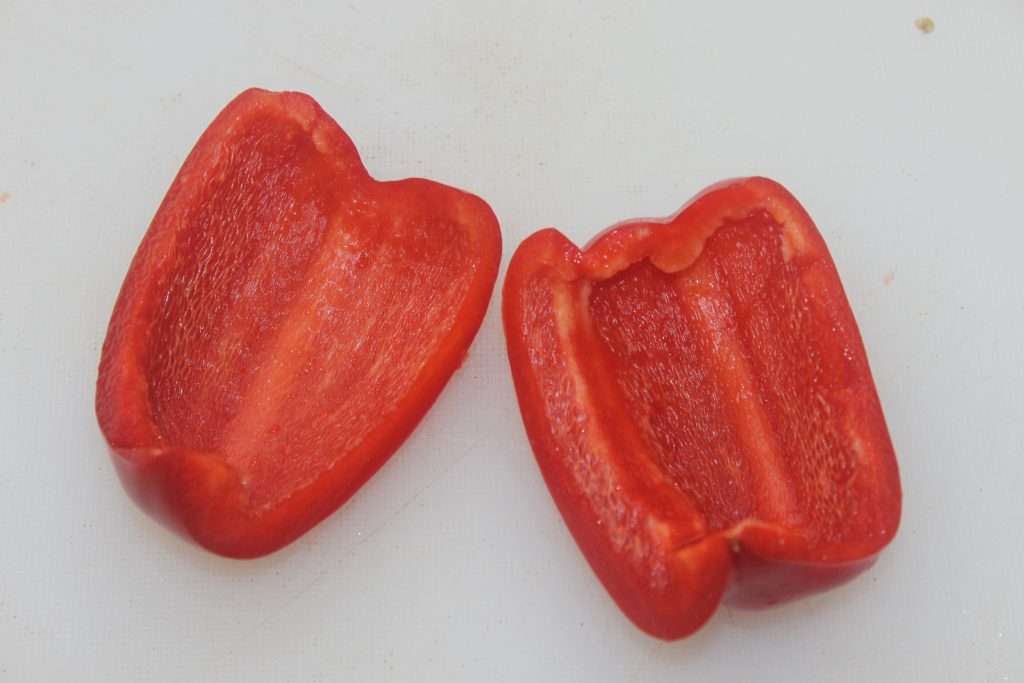
Drain the red bell pepper half and finely chop it.
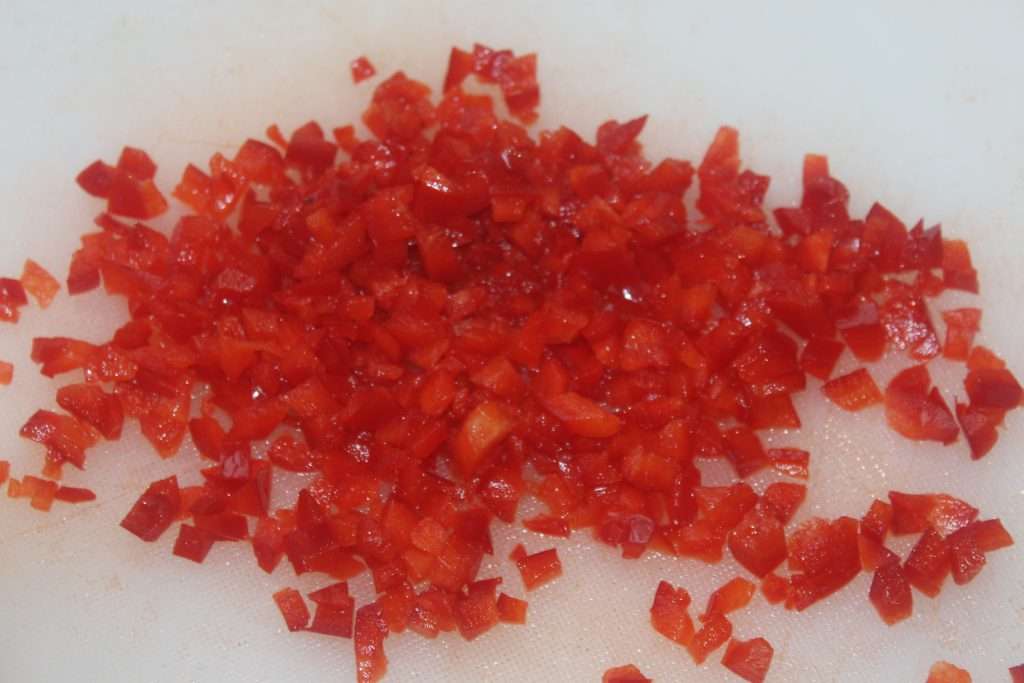
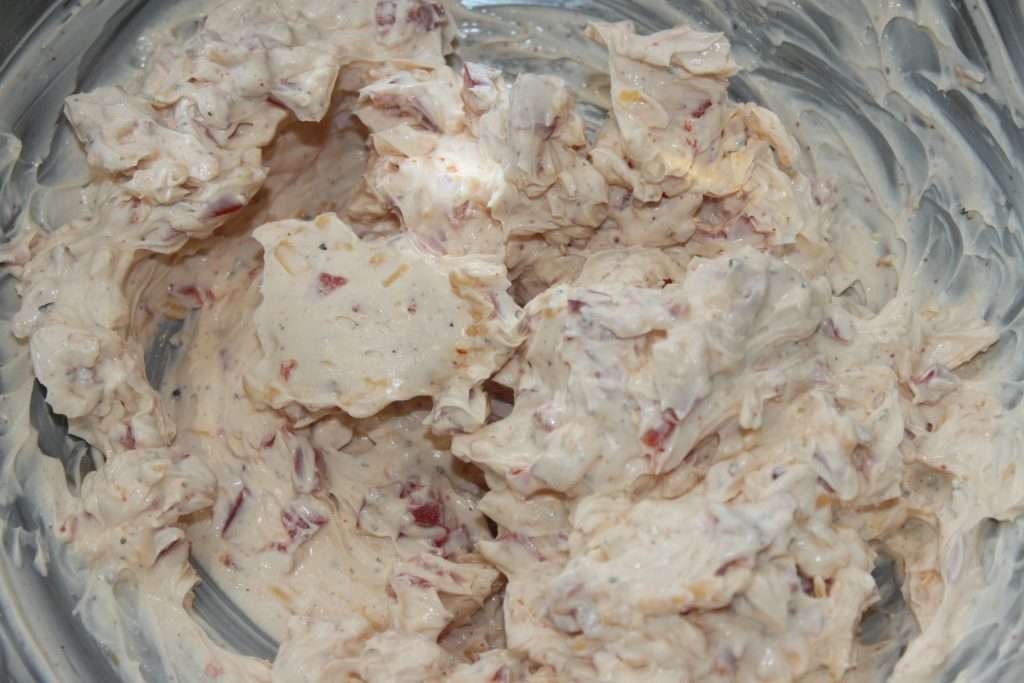
Put in the stuffing and mix well.
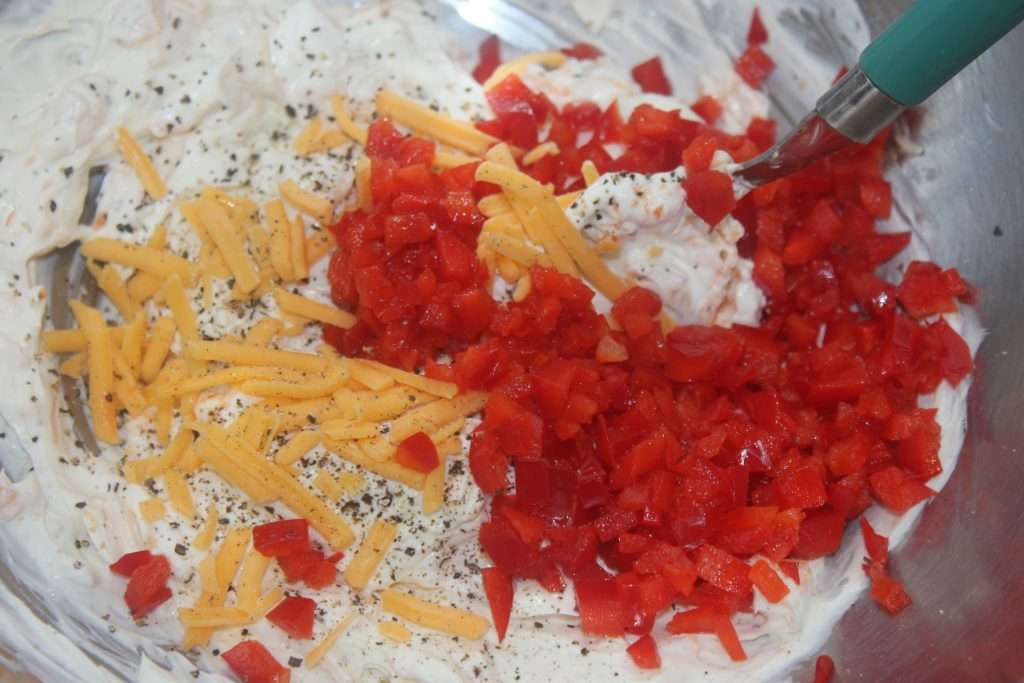
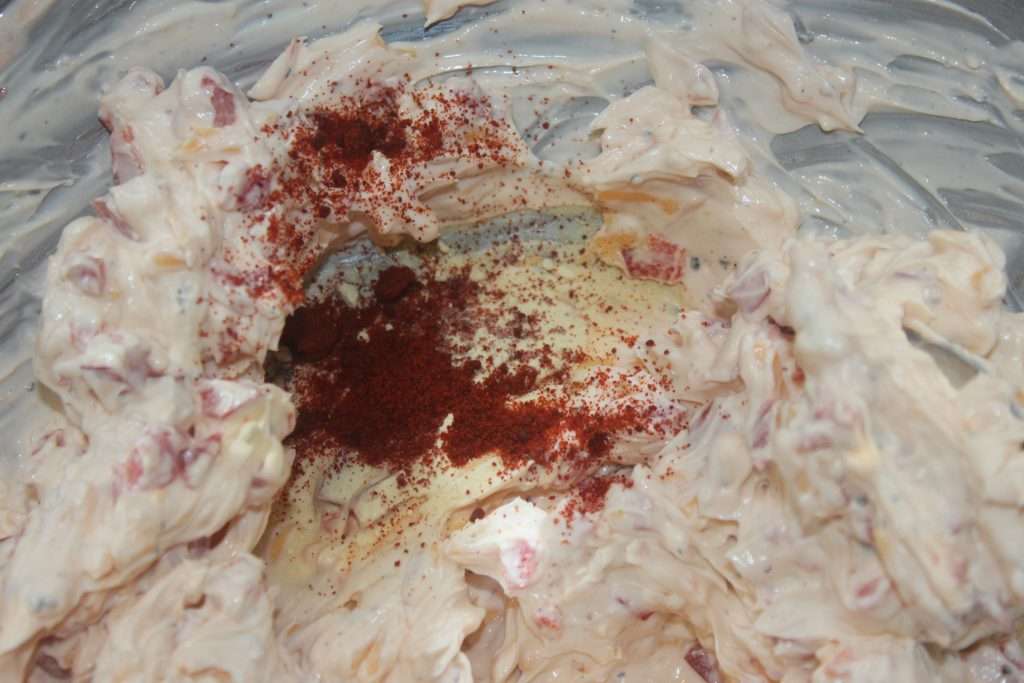
Add garlic powder and paprika.
Fill the jalapeños.
Do the same for all the peppers.
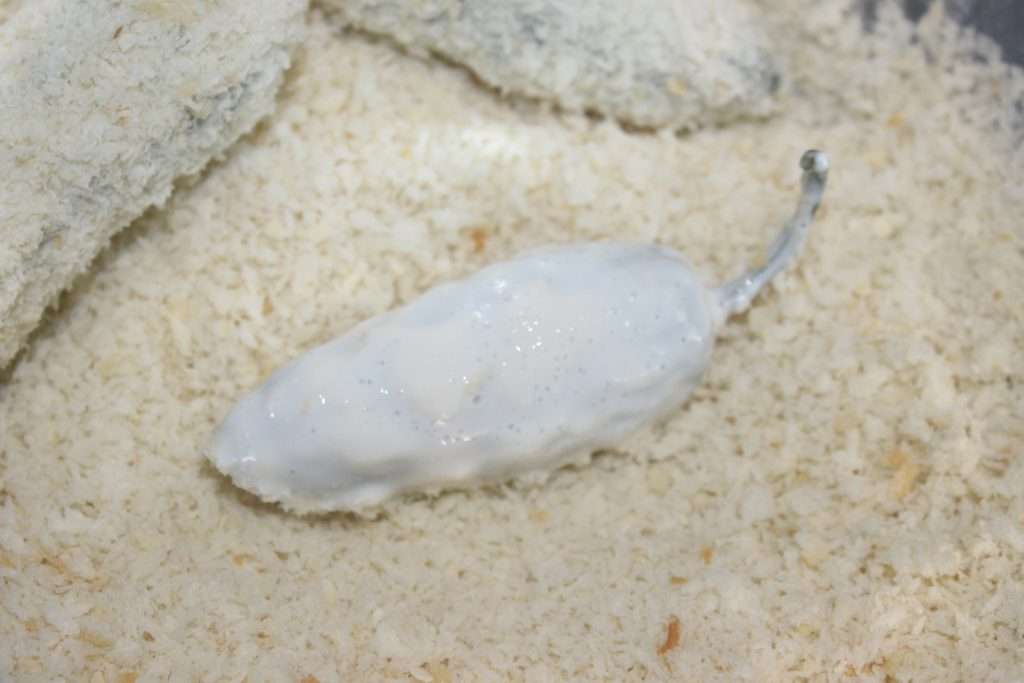
Beat the egg in a bowl and dip a jalapeño in it.
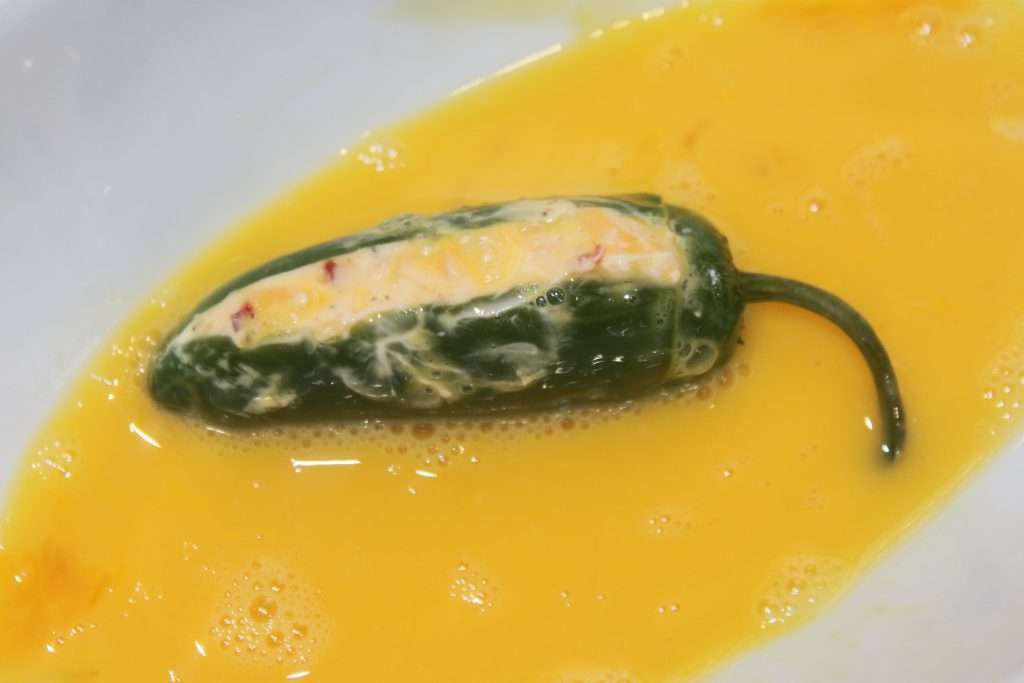
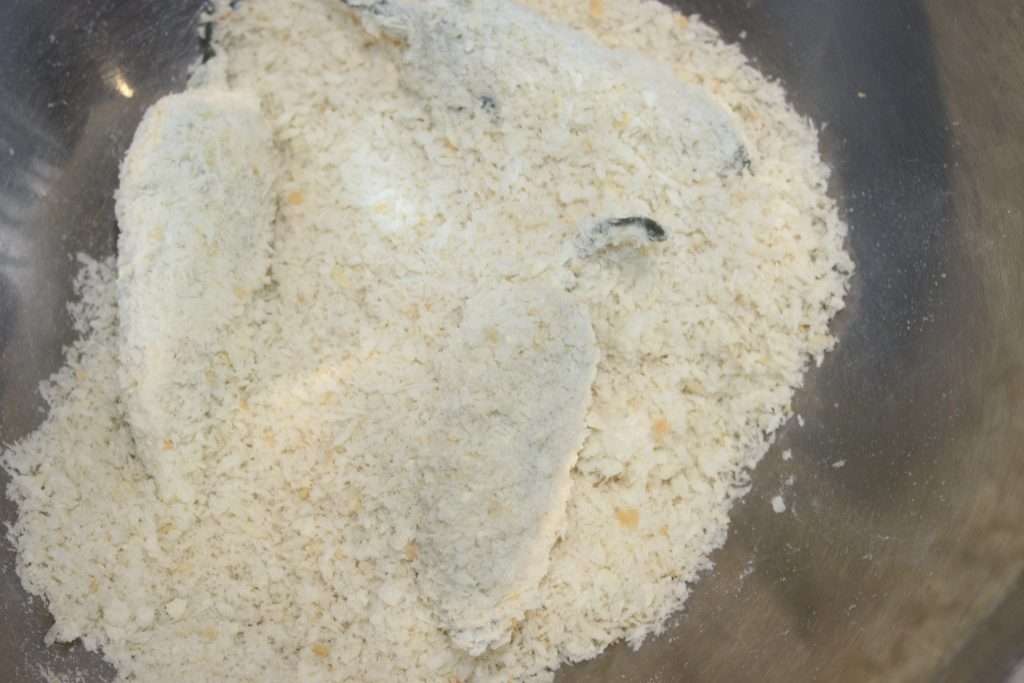
Transfer to a container filled with flour.
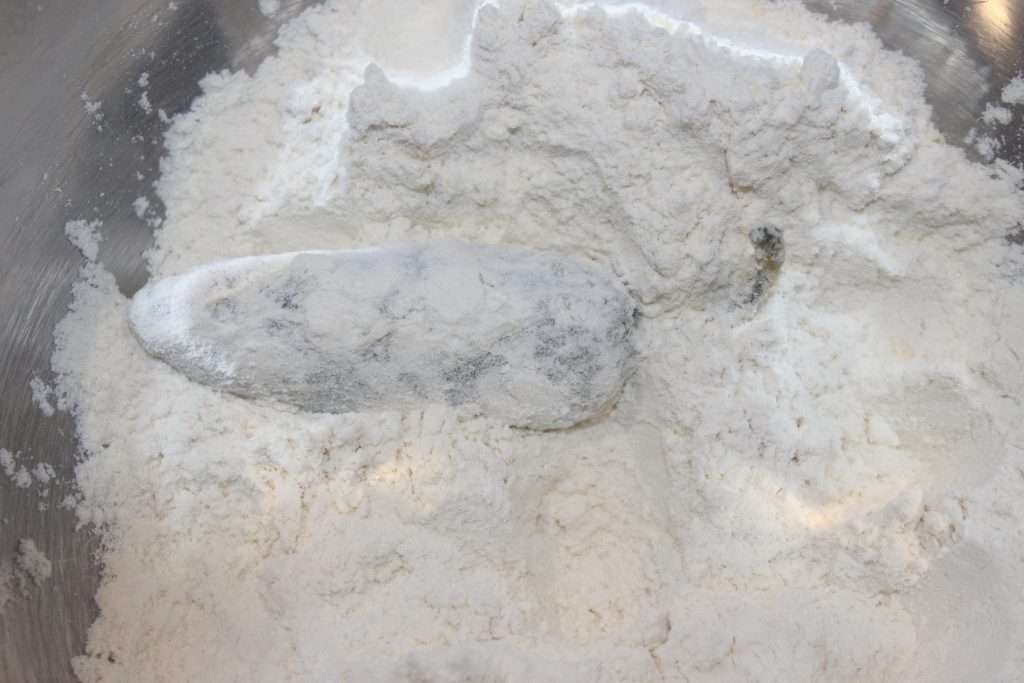
Then soak in the fermented milk.
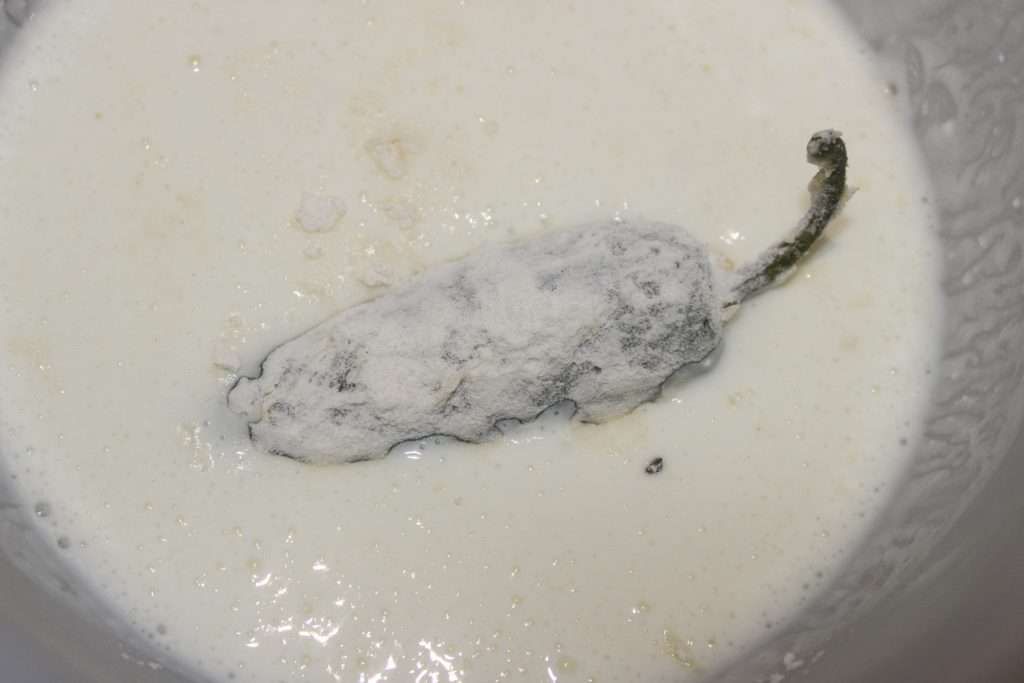
Then in the breadcrumbs, here panko.
Bury well in breadcrumbs gently.
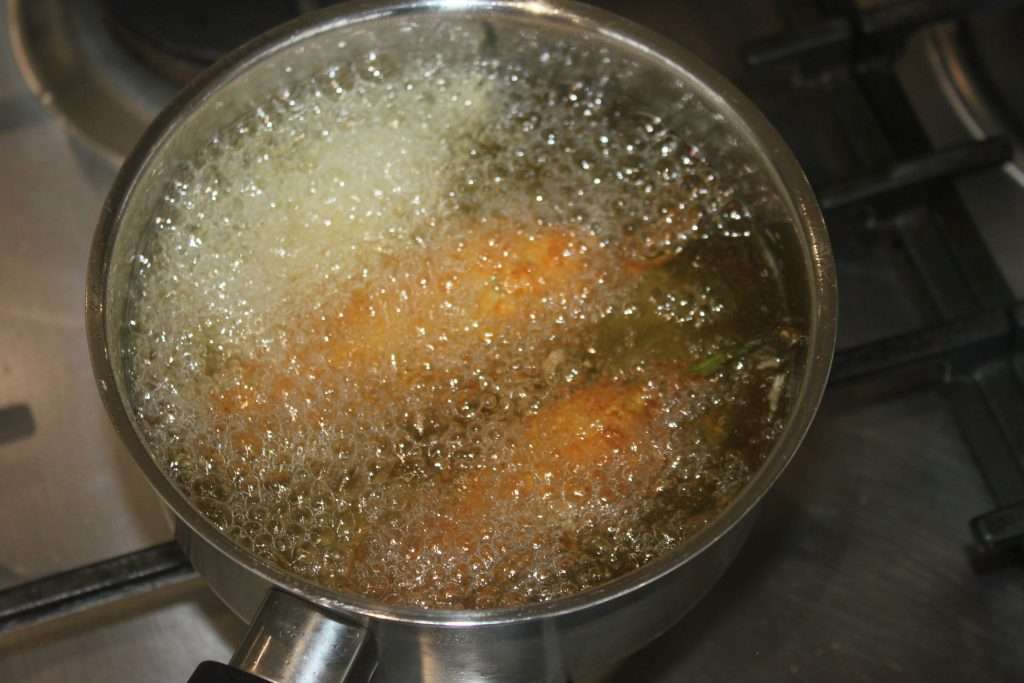
Heat a pan of oil to 180°C. Then fry the peppers. When it crackles a lot, it means that the stuffing is liquefying a little too much, it will be time to take them out!
Let cool on paper towels.
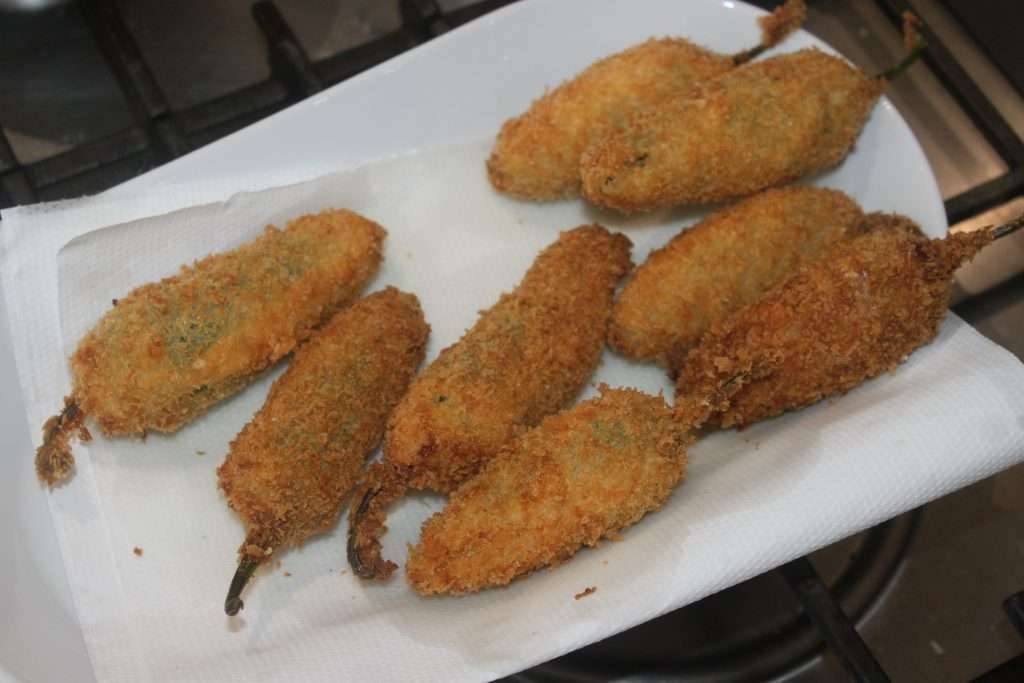
To be consumed immediately. You can also freeze them in an airtight box and then reheat them in the oven. After removing from the oven, let cool again for 10 minutes to regain their crispness. Serve with a paprika mayonnaise, as in my paprika fries (see recipe HERE) lightened with a little yogurt. The chili can be strong and you will need a sauce that soothes the palate.
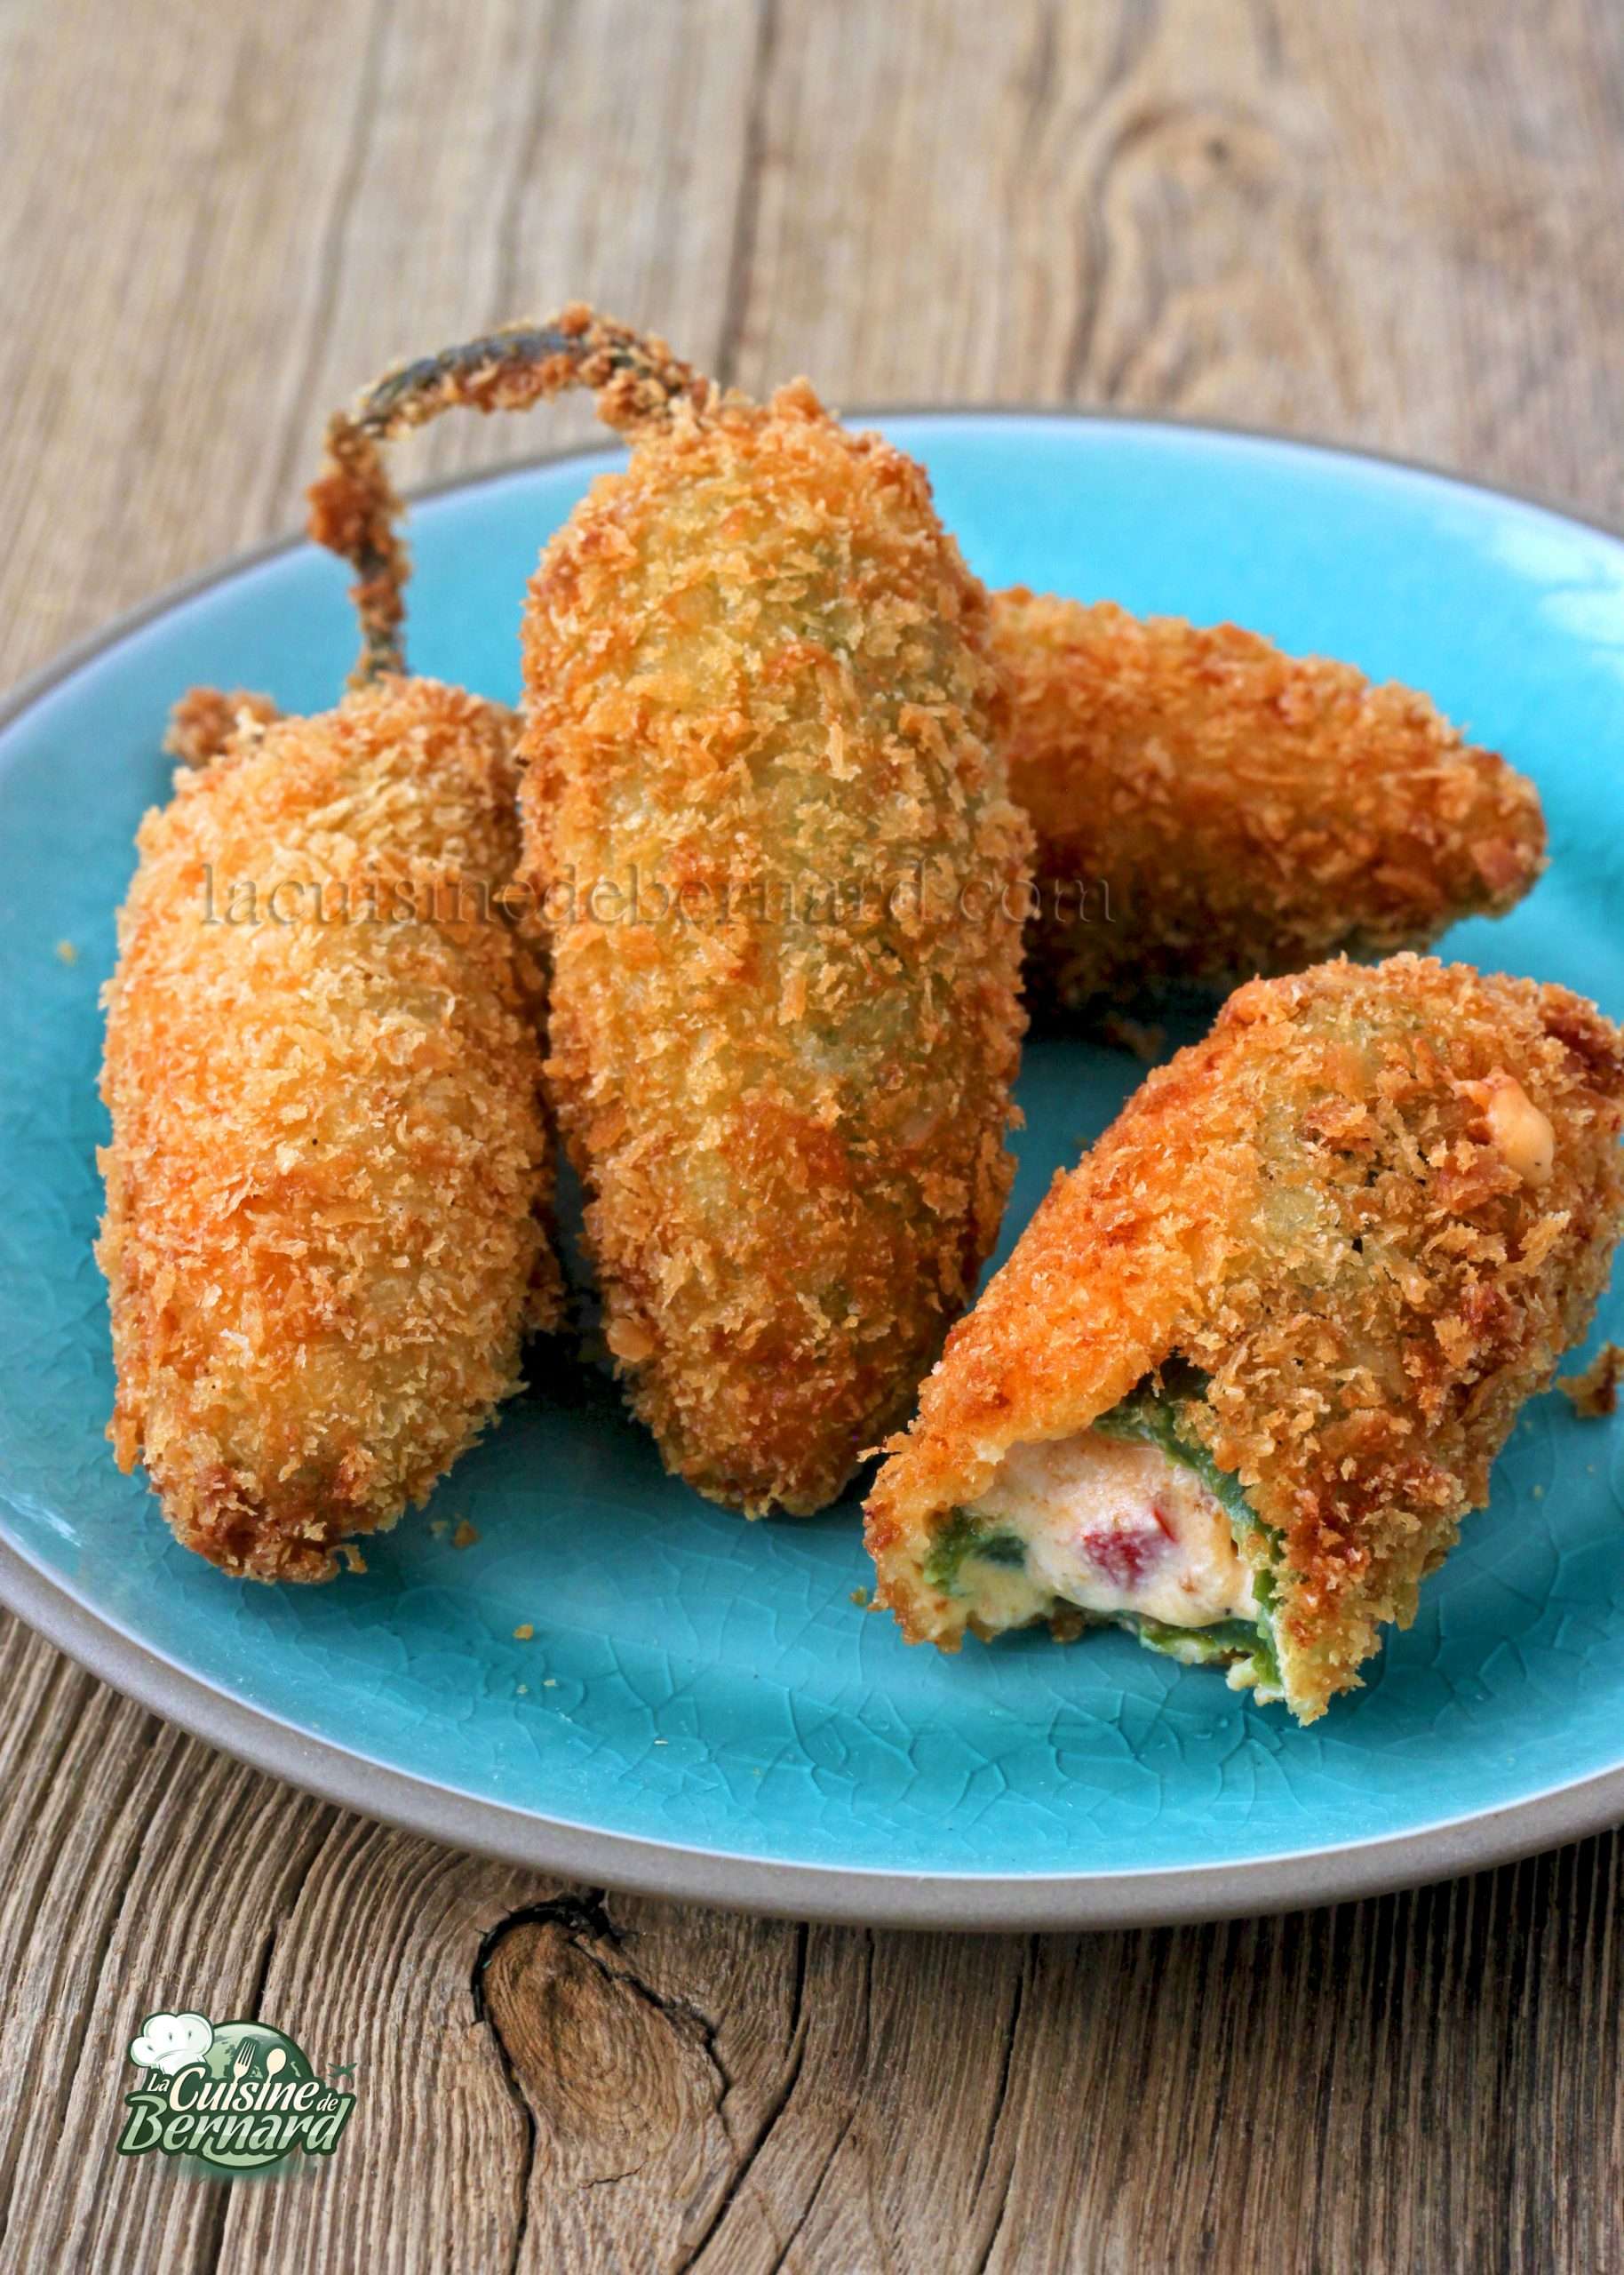

Jalapeño Poppers


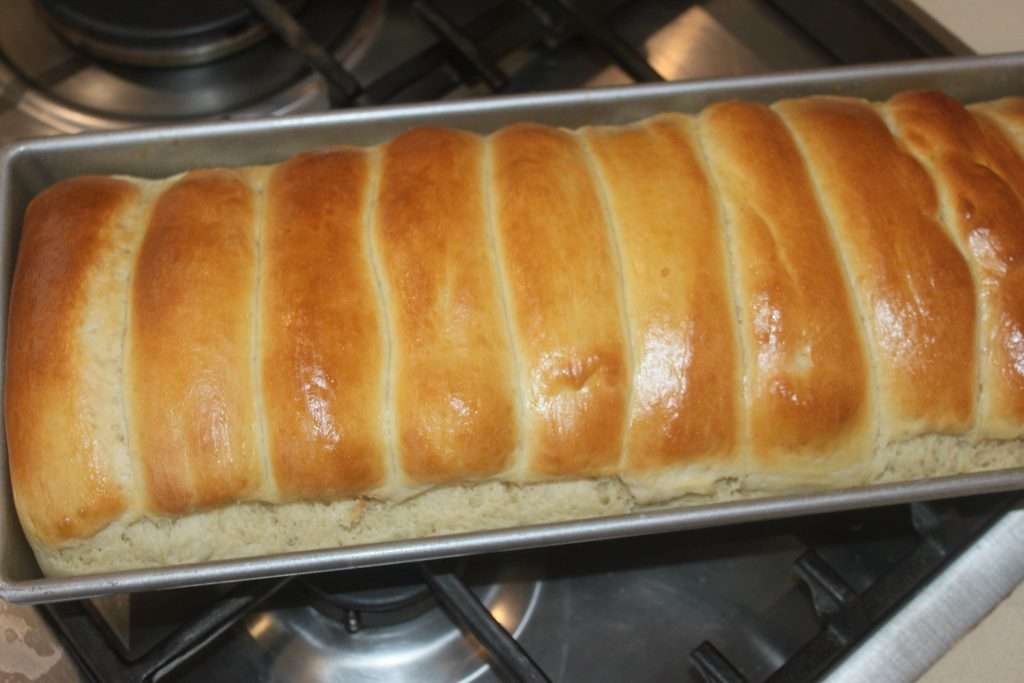
I am a real fan of these “hot dogs” with shrimps or lobster that we see in the United States and more and more in our country. So I suggest both versions, because the lobster version is quite expensive. With the very soft bun, it is a total delight! A little lemon and celery to finish it off, and you’re done!
Recette pour 4 personnes :
- 8 hot dog buns (recipe HERE)
- 2 lobsters (for the luxury version) cooked or raw
- 800g of cooked pink shrimps
Sauce:
- 1 egg
- 1 teaspoon of mustard
- 200ml of oil
- juice of half a lemon
- 100ml full cream
- 1 stalk of celery
- salt pepper
Instructions :
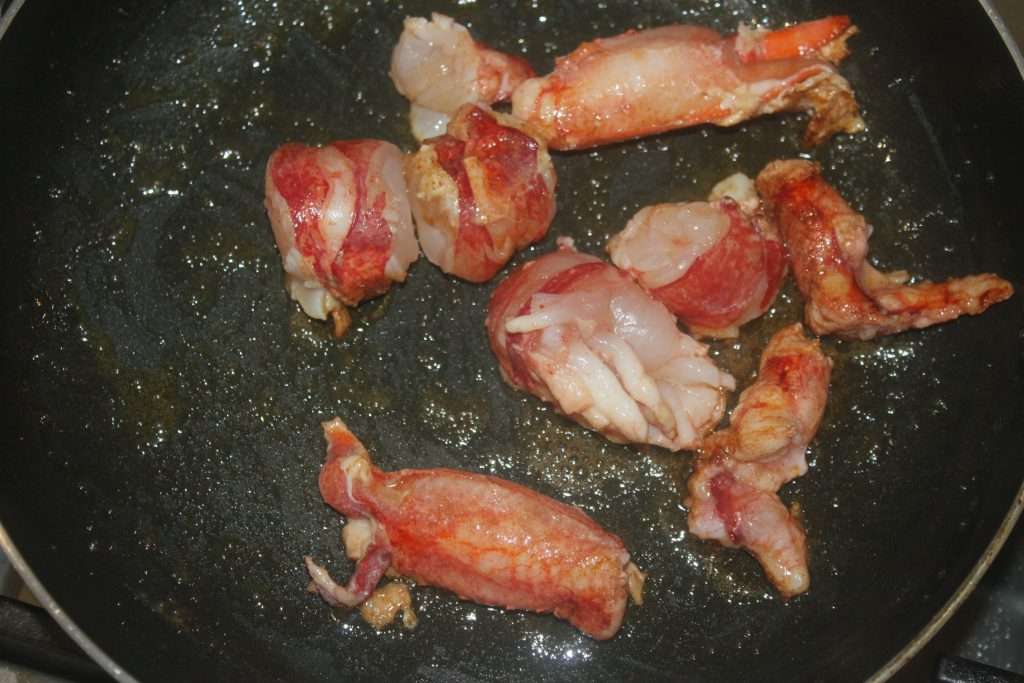
For this recipe, I had taken a frozen raw lobster, it is what I had on hand at most simple.
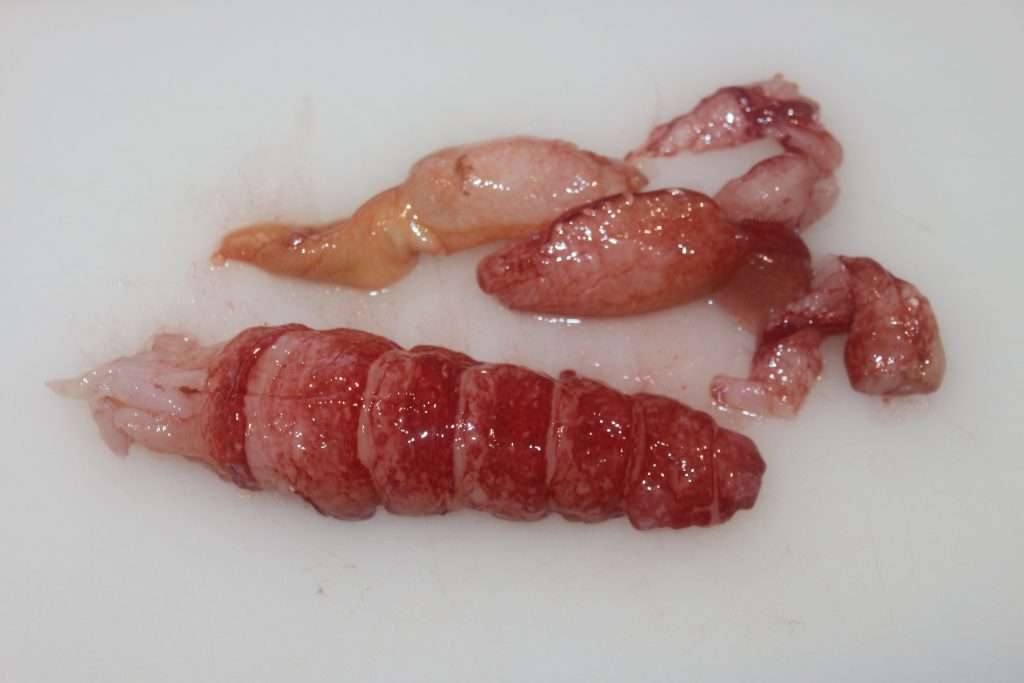
In this case, for 4 people, you will need 2. But cut them into pieces and sauté them for 6 minutes in a frying pan over moderate heat in semi-salted butter.
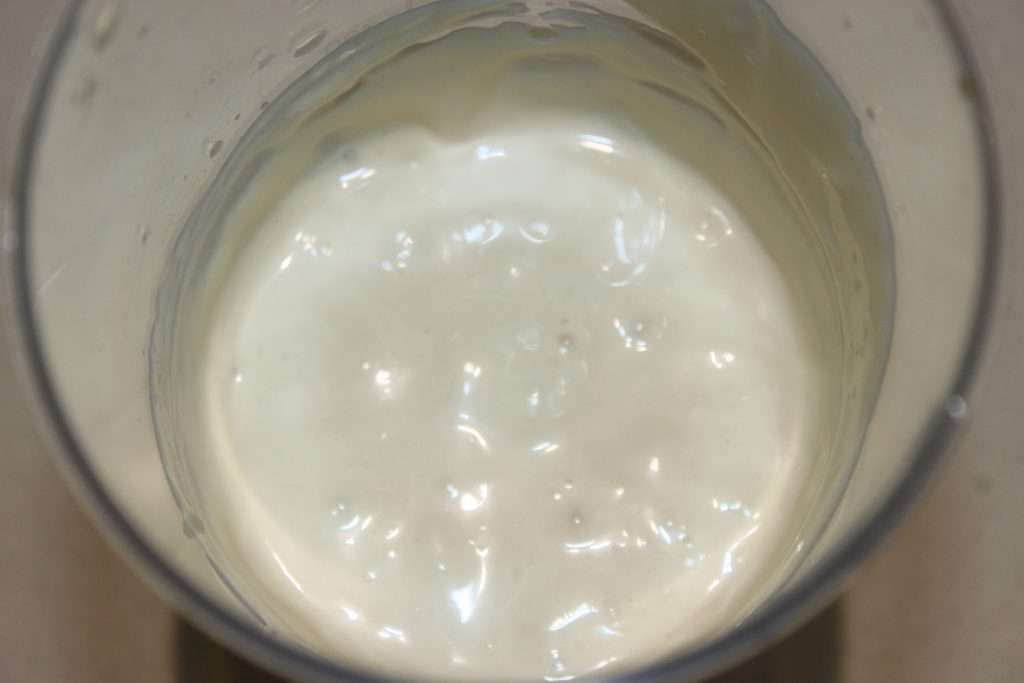
When they are cooked, or the shrimp are cooked (for shrimp, just cook them in water!), prepare the sauce. Place the egg, mustard and oil in a blender jar.
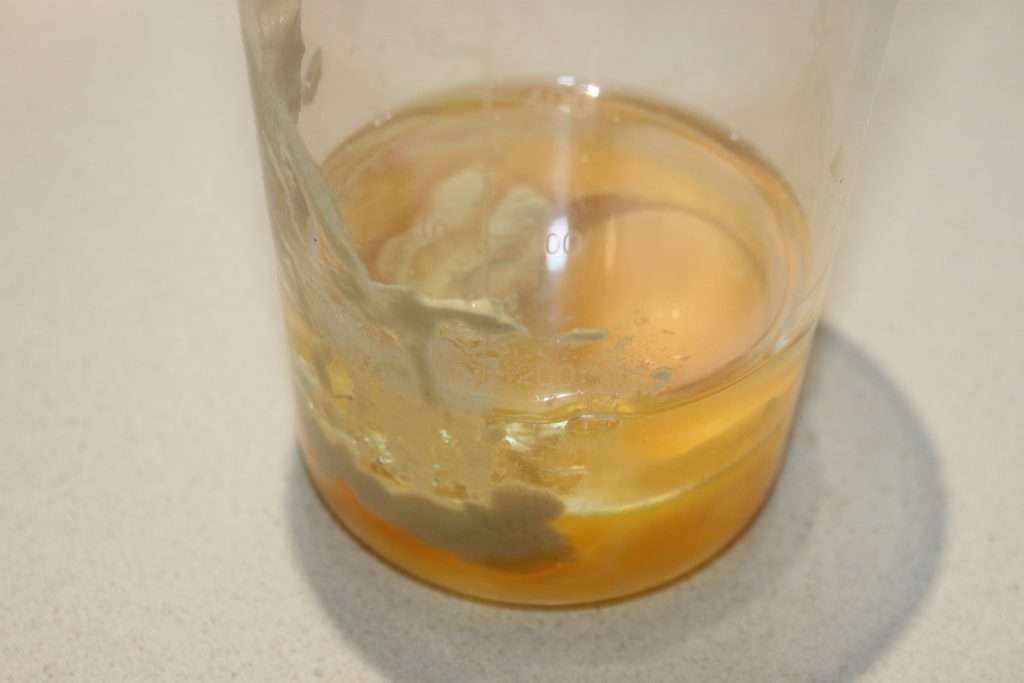
Blend from the bottom and then slowly work your way up.
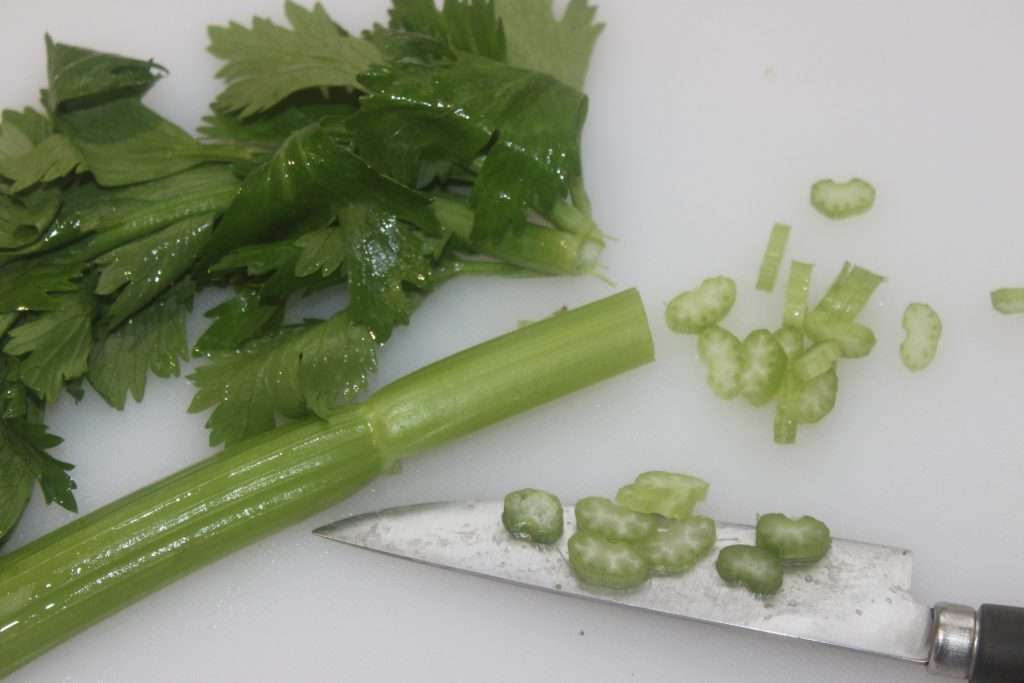
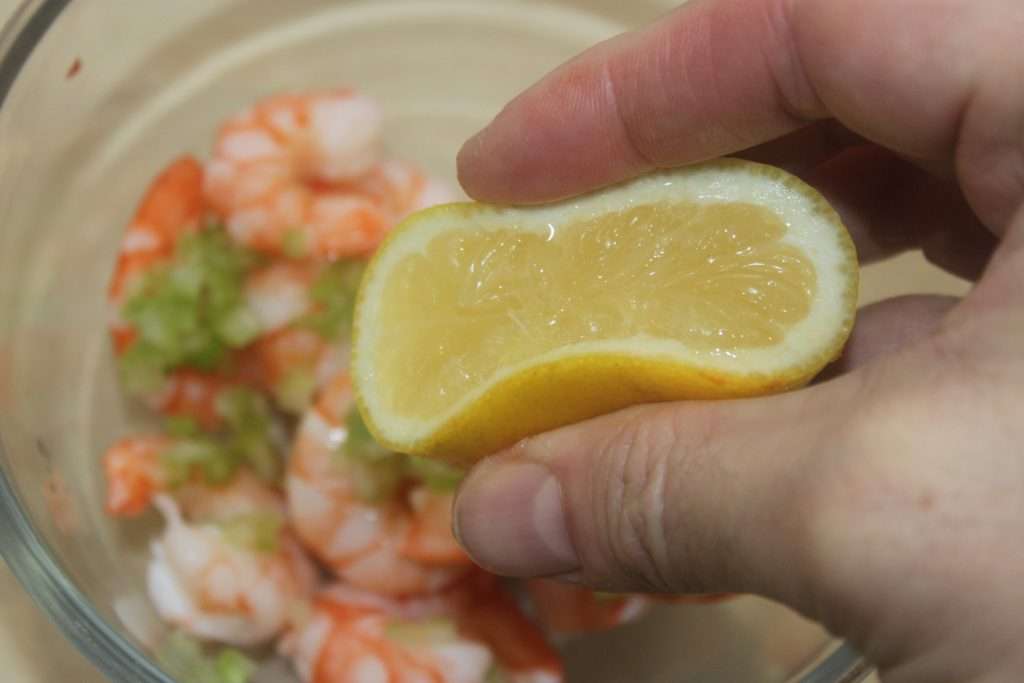
Add lemon juice, cream, salt and pepper to taste. Very finely chop 15cm of a celery stalk without the leaves.
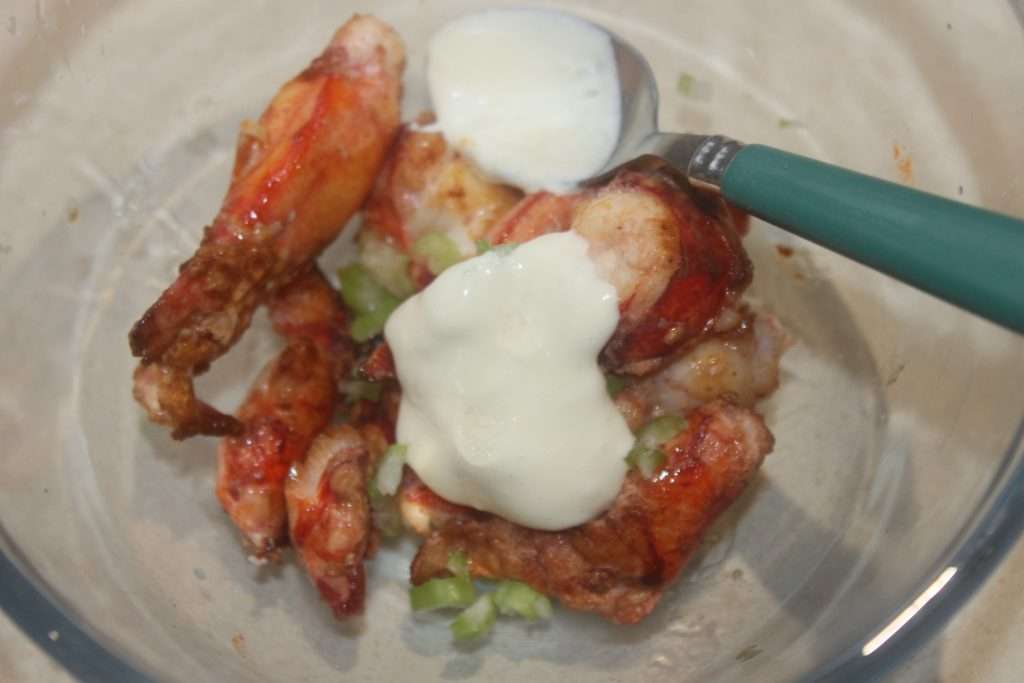
Add to shrimp or lobster.

You can add a little extra lemon juice to taste.
The same goes for the luxury version with lobster! Then add two-three tablespoons of sauce, adding more as needed. It’s up to you how generous you want to be with the sauce.
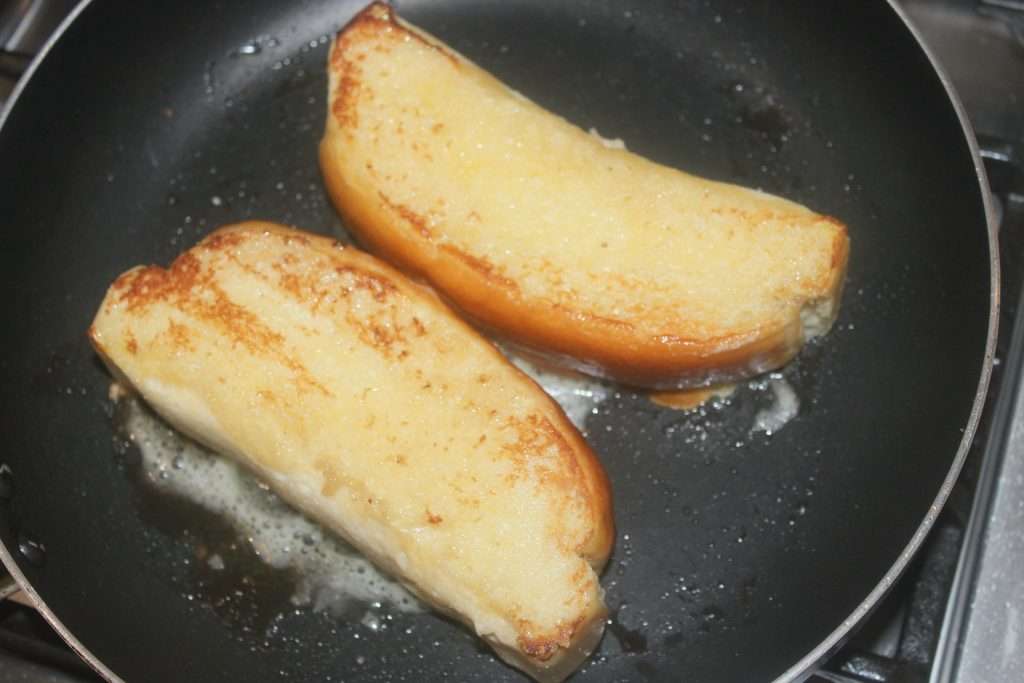
When everything is ready, spread semi-salted butter on both sides of the hot dogs and heat them in a pan over moderate heat until golden brown.
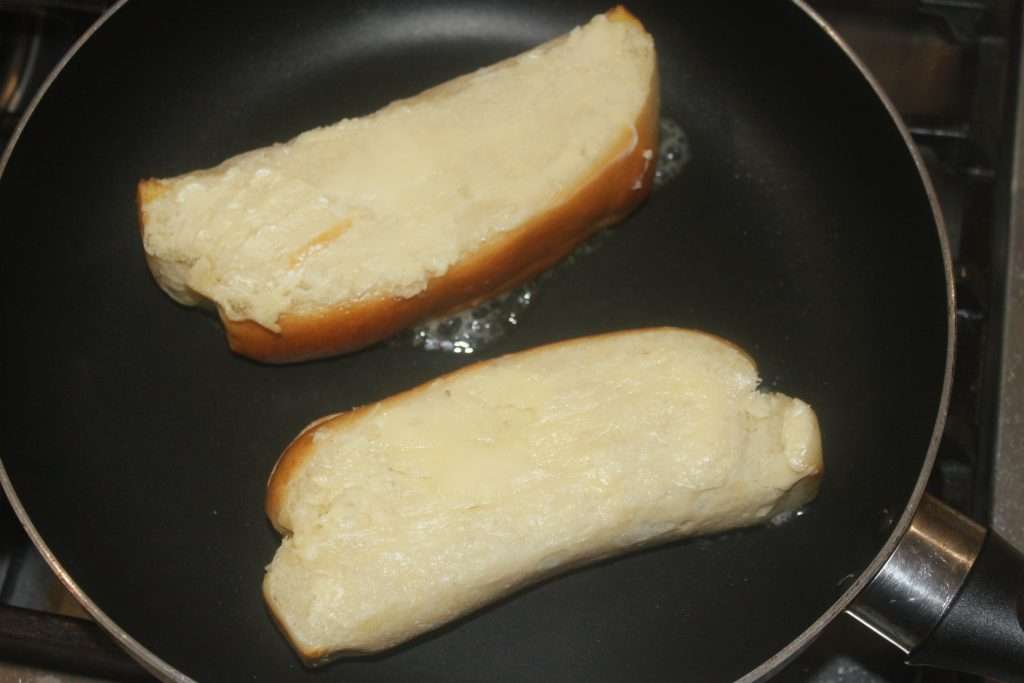
Hop! If you made the yudane version(HERE), they will get all their softness back!
When they are hot, cut them in the center without going to the bottom, put a small layer of sauce inside, then fill them with shrimps or lobster. A little chive and it’s ready! I put salad for the picture, but I find that it kills the delicate taste of the lobster. It’s up to you!
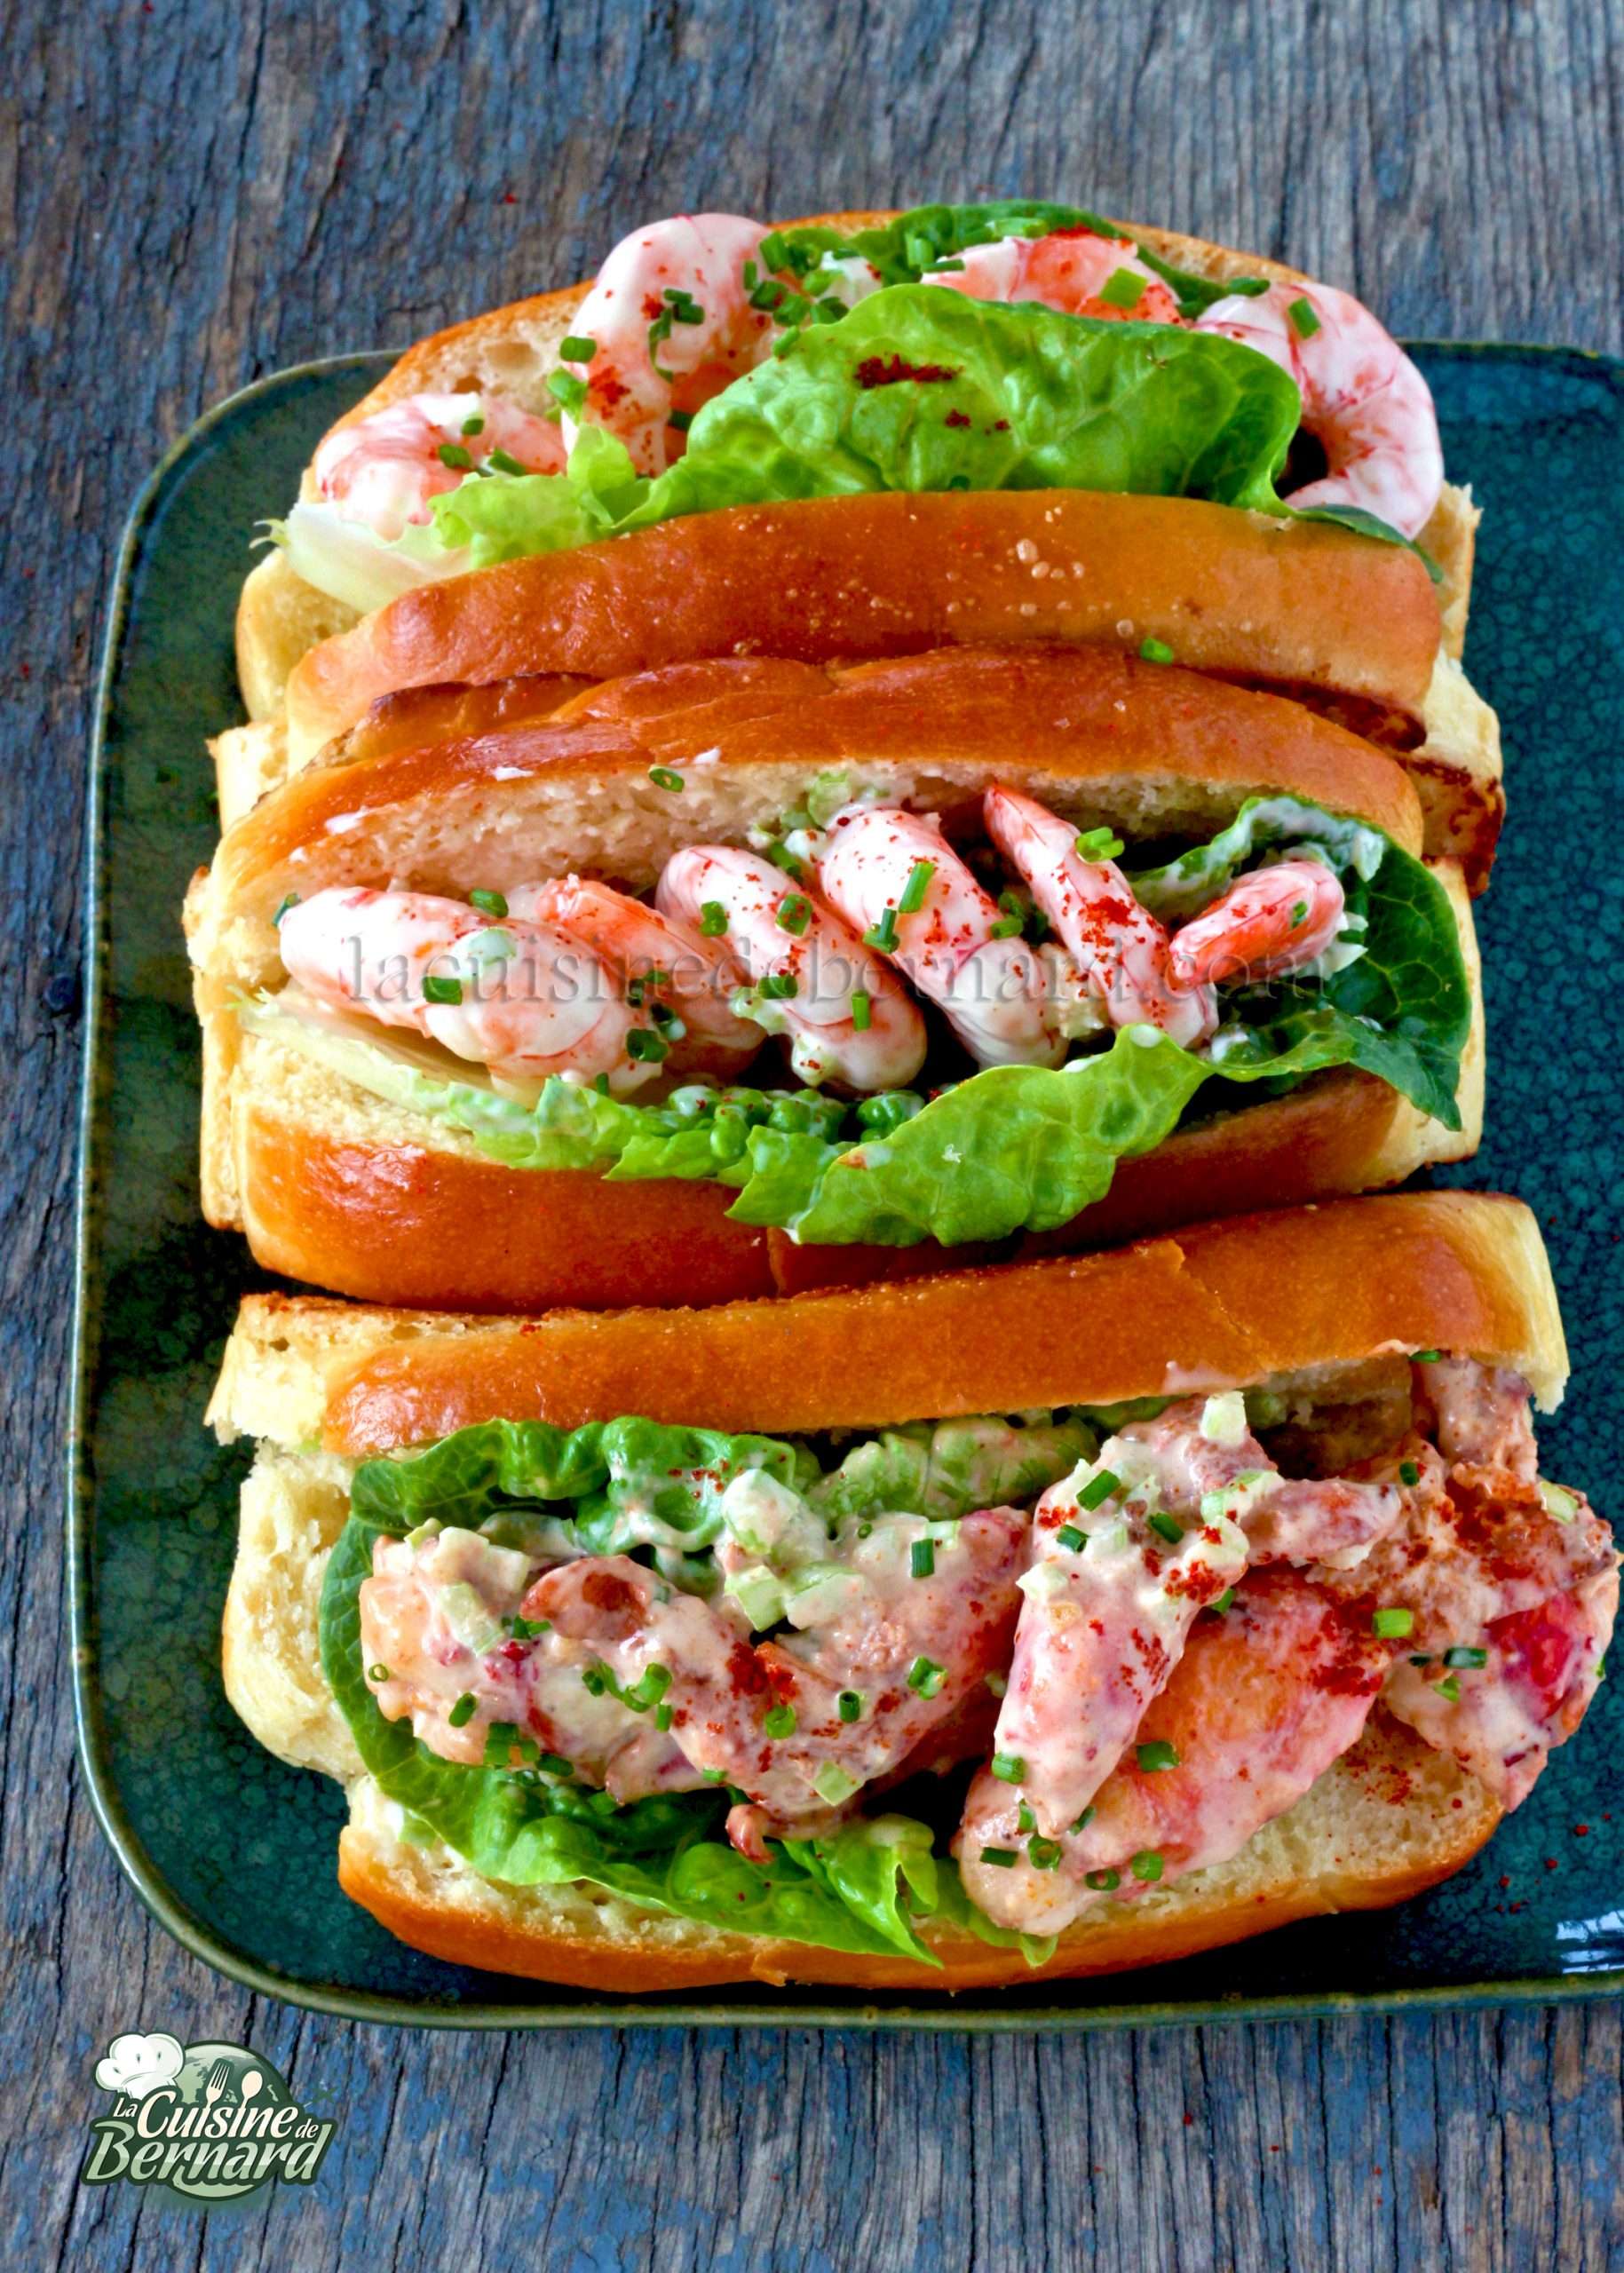

Lobster rolls and Shrimp rolls


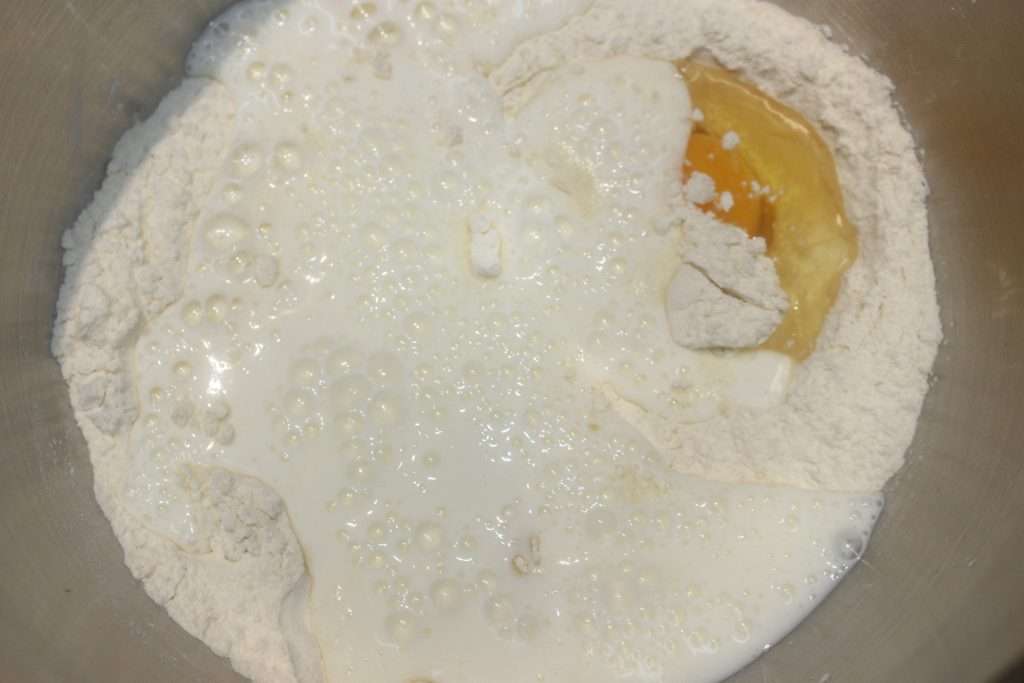
Le yudane tient du petit miracle. Pour obtenir des brioches, buns et pains au lait magiquement moelleux, le yudane et le tangzhong sont des solution assez hallucinantes ! Je commence par le yudane, pour ces buns à hot dogs. Vous pourriez aussi en faire des buns ronds à hamburgers. La texture obtenue est fantastique et change radicalement d’une pâte faite sans le yudane. Alors qu’est-ce que c’est que le yudane? C’est une partie de la farine qui est mélangée à de l’eau bouillante. On ajoute ensuite cette pâte molle et plastique dans la pâte, qui devient alors incroyable. Pourquoi? Car le yudane a retenu l’eau, et a provoqué la gélatinisation de l’amidon de la farine. Il faut essayer pour le croire !
Recette BUNS MŒLLEUX POUR HOT DOGS, MÉTHODE YUDANE :
Yudane :
- 100g de farine T55
- 100ml d’eau bouillante
Pâte :
- 400g de farine T55
- 320g de lait entier
- 20g de beurre doux à température ambiante
- 30g de sucre
- 5g de sel
- 6 g de levure déshydratée de boulangerie (ou 20g de fraiche)
Instructions :
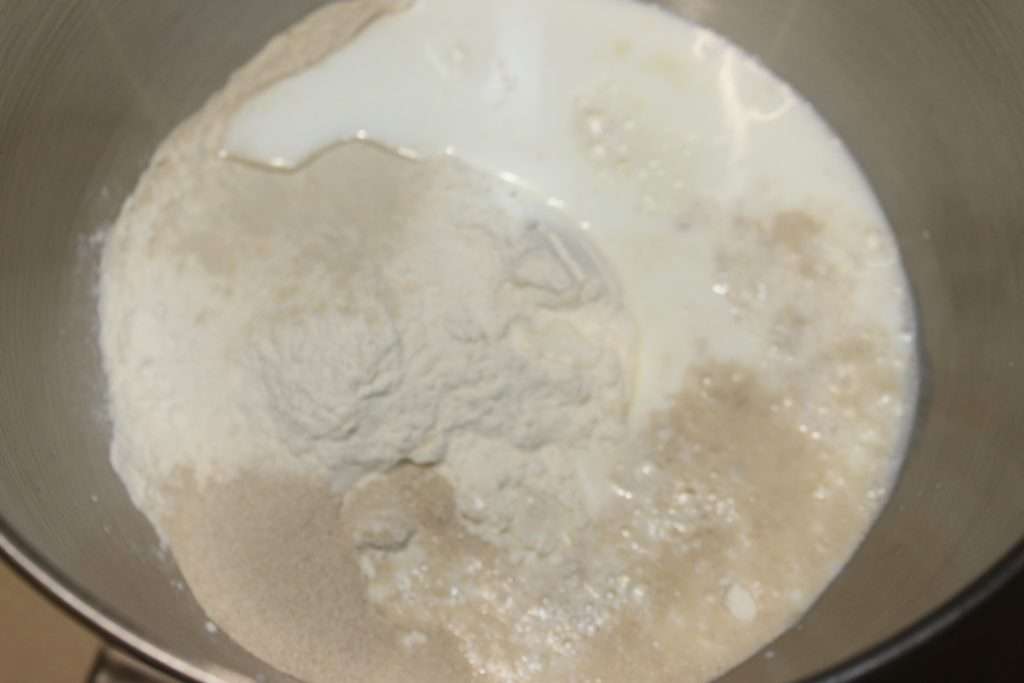
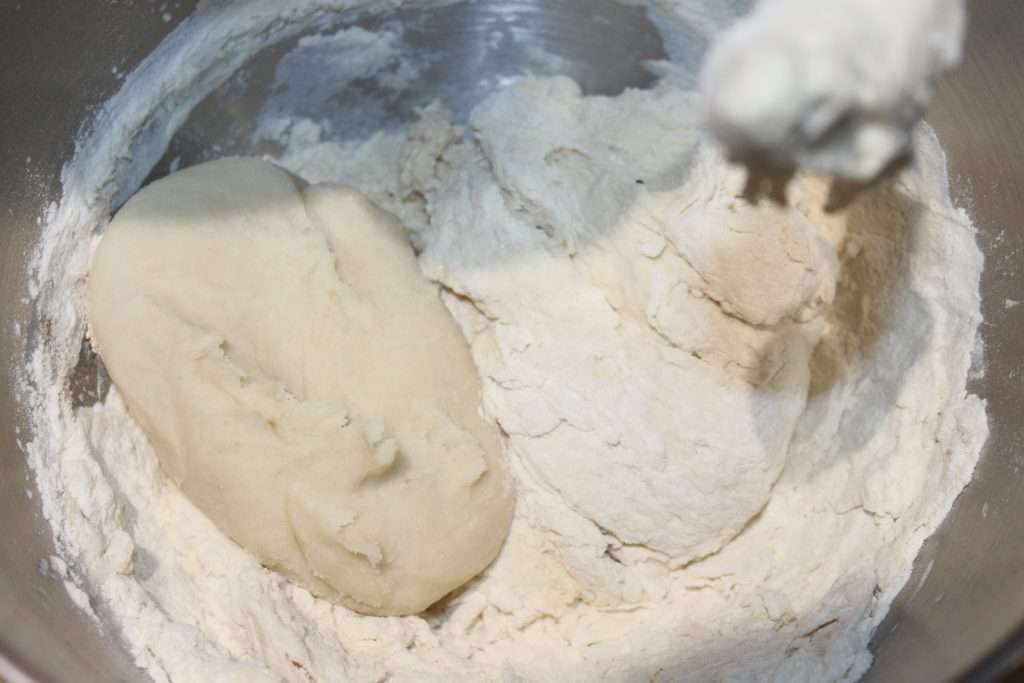
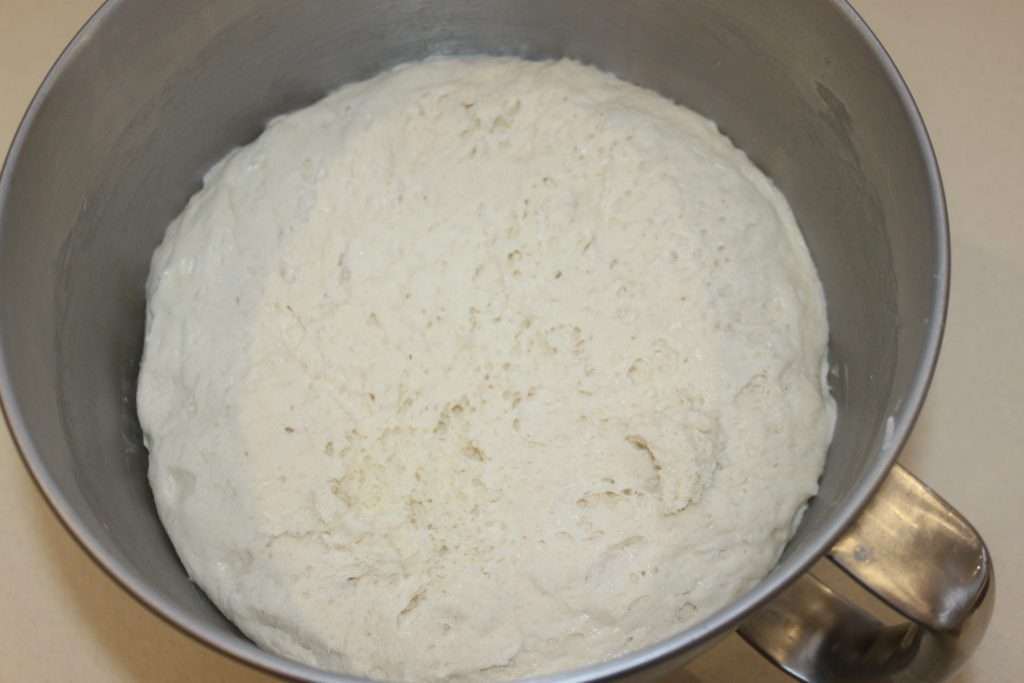
Commencez par préparer le yudane (se prononce yudané). Versez l’eau bouillante sur la farine dans un récipient.
Mélangez vivement à la cuillère pour avoir une pâte homogène.
Je pétris ensuite à la main sur le plan de travail pour avoir une pâte lisse et soyeuse, très malléable. Mettez-la ensuite dans un film étirable, bien emballée, et mettez-la au frais pour au moins 4 heures, voire une nuit.
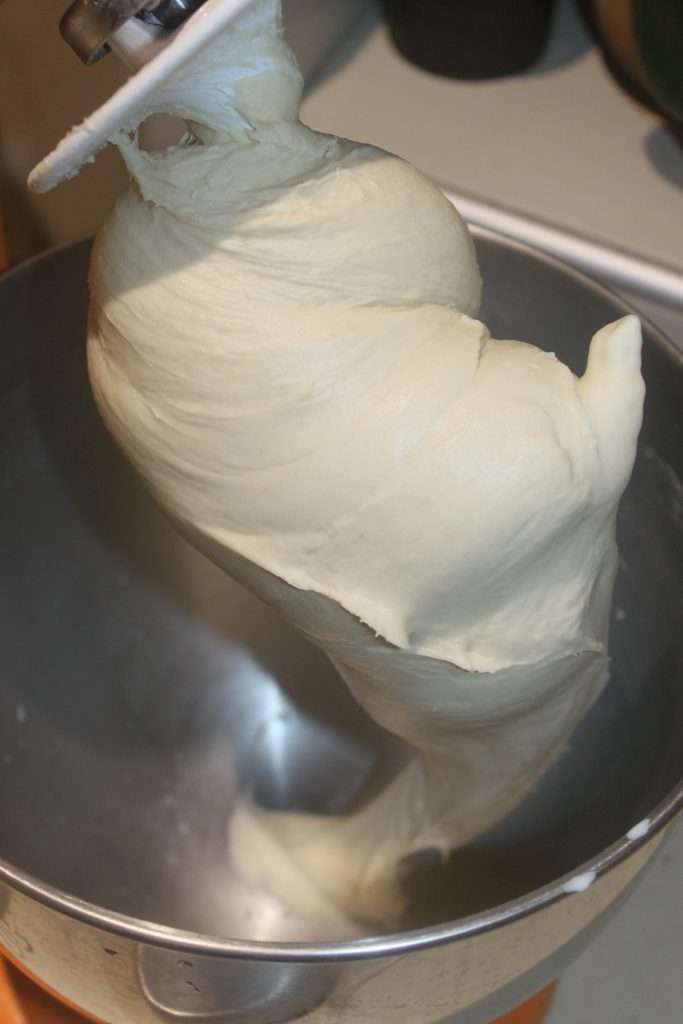
Le lendemain, versez tous les ingrédients dans la cuve de votre robot avec le crochet pétrisseur.
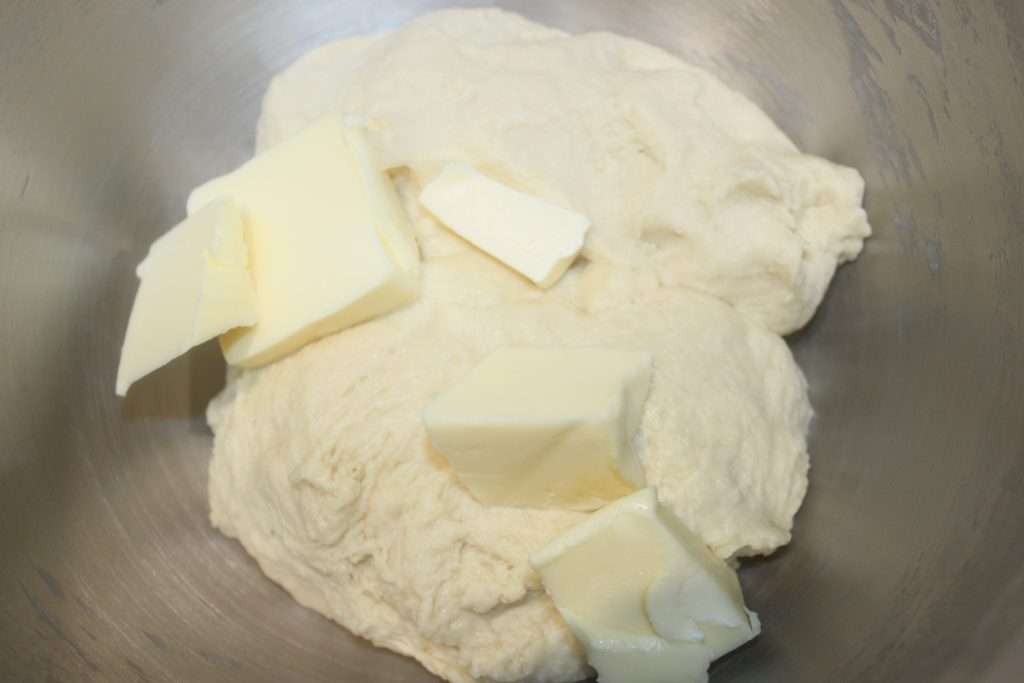
Mélangez bien et ajoutez le yudane froid sorti de son film étirable. N’oubliez pas le beurre (que l’on ne voit pas sur les photos, mais il est bien là !).
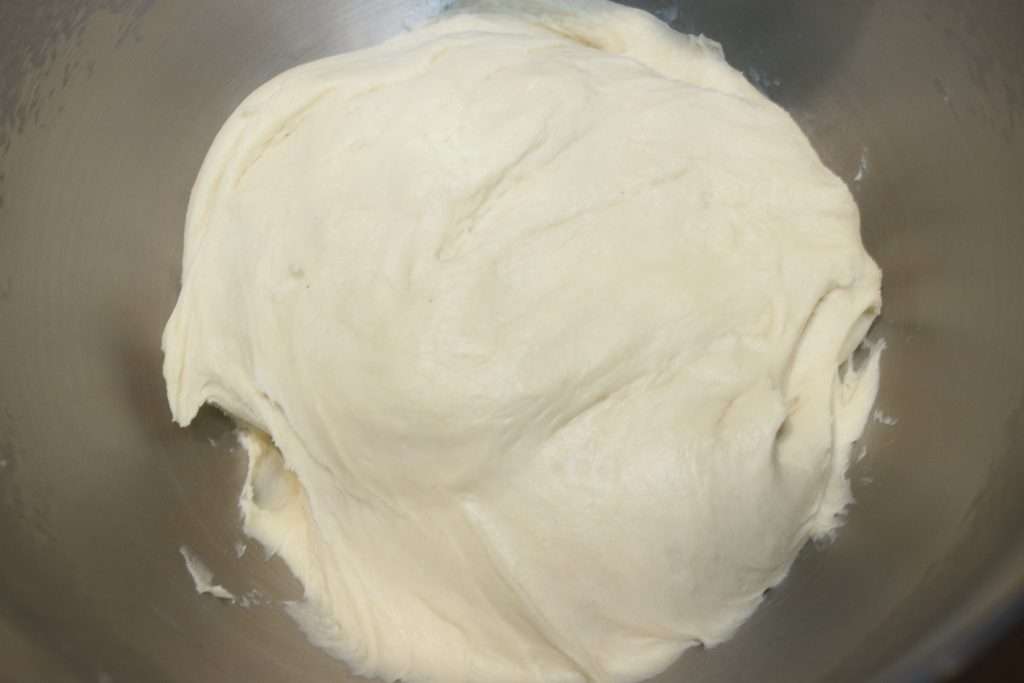
Pétrissez pendant 10 minutes jusqu’à ce que la pâte se décolle du fond de la paroi.
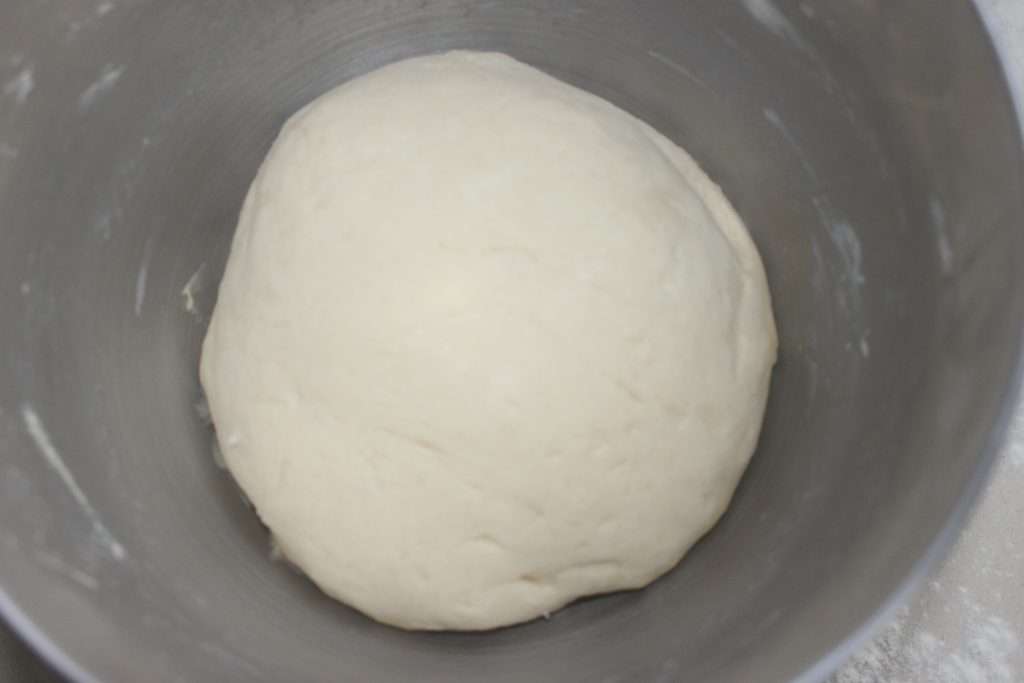
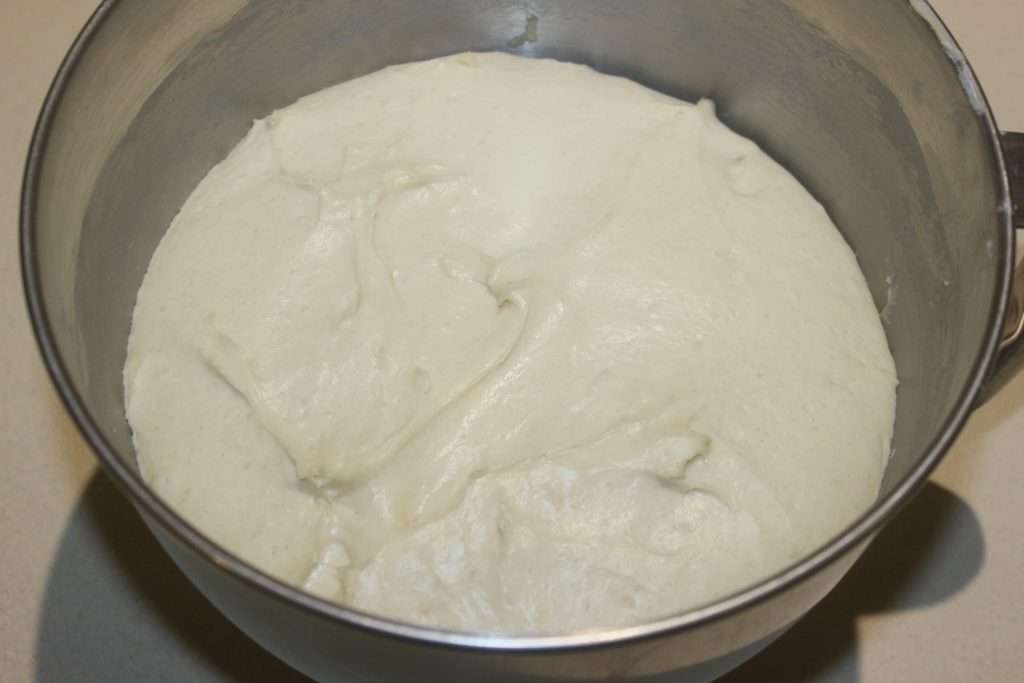
Laissez ensuite gonfler 1h30 à 2h dans un endroit tiède, ou au four à 35°C. La pâte va bien pousser.
Dégazez-la. Vous pouvez l’utiliser tout de suite ou alors la filmer et la conserver au frais jusqu’au lendemain.
Elle gonflera une deuxième fois, et cela améliore encore sa saveur, mais cela fonctionne très bien aussi sans cette étape.
Pour ma part, j’ai un moule rectangulaire pour les buns à hot dogs. Mais vous pouvez vous en passer totalement et les faire dans un moule carré ou d’une autre forme. J’ai divisé la pâte en 10 parts égales. Il faudra adapter le nombre et la taille à votre moule.
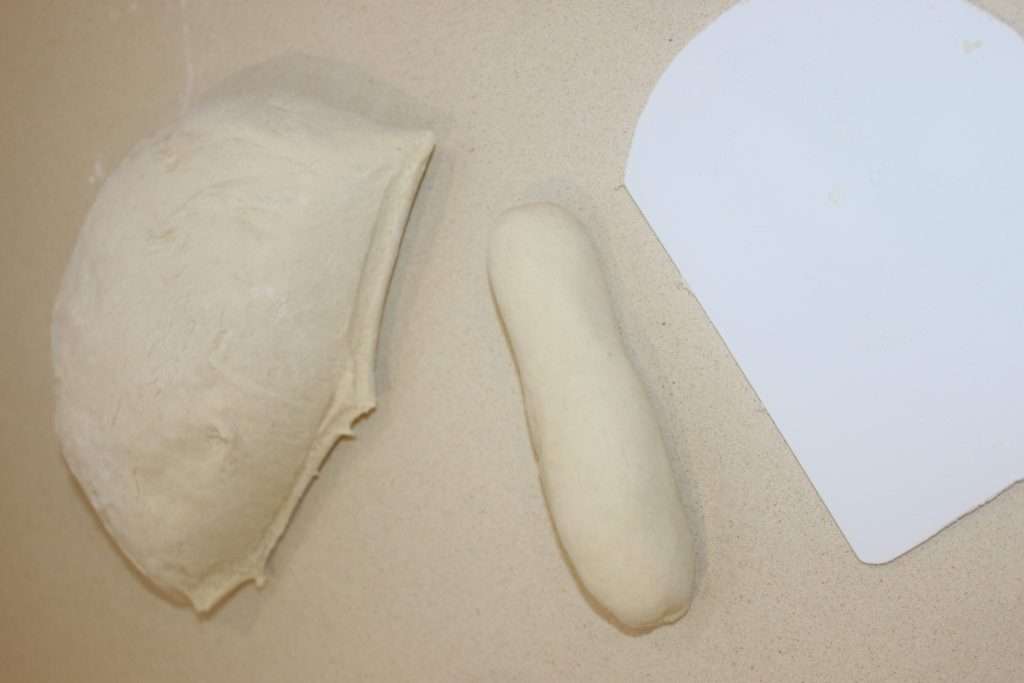
Il faut ensuite la rouler en boudins.
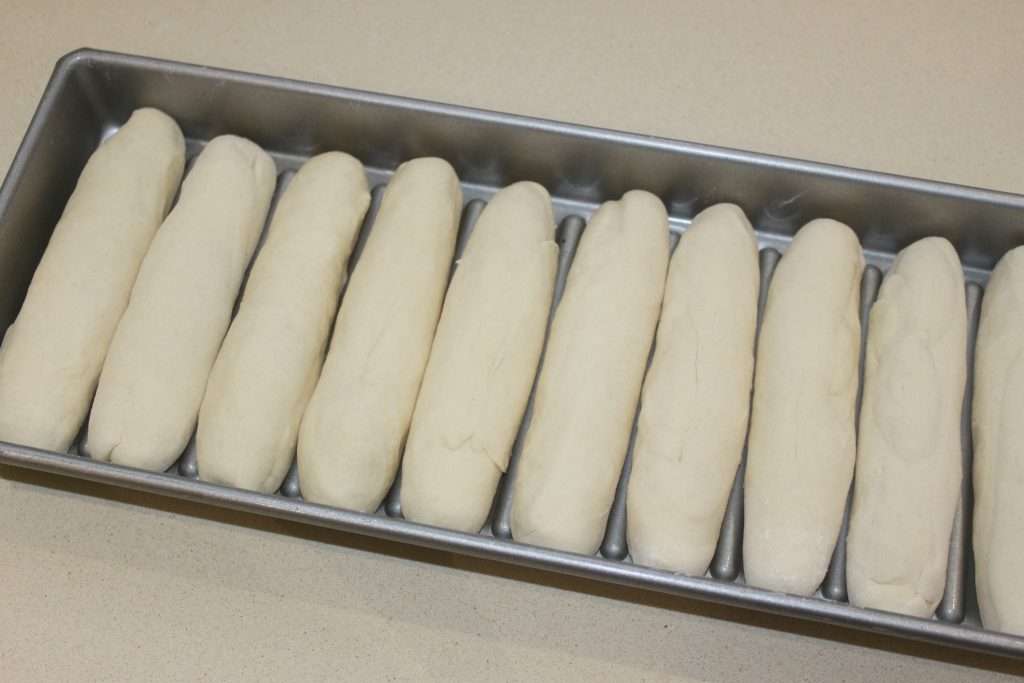
Laissez pousser 45 minutes à 1 heure puis passez de l’œuf battu sur la surface.
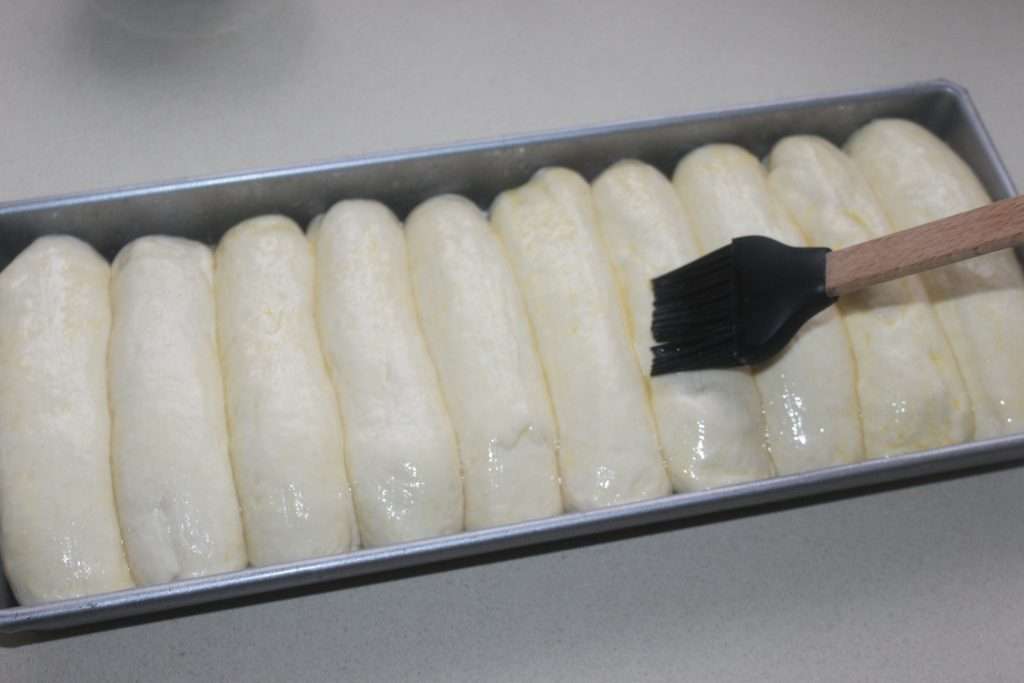
Faites cuire 30 minutes à 160°C.
À la sortie du four, je couvre tout de suite de deux linges propres, pour garder l’humidité. Quand les pains sont à température ambiante, ils sont moelleux comme jamais !!


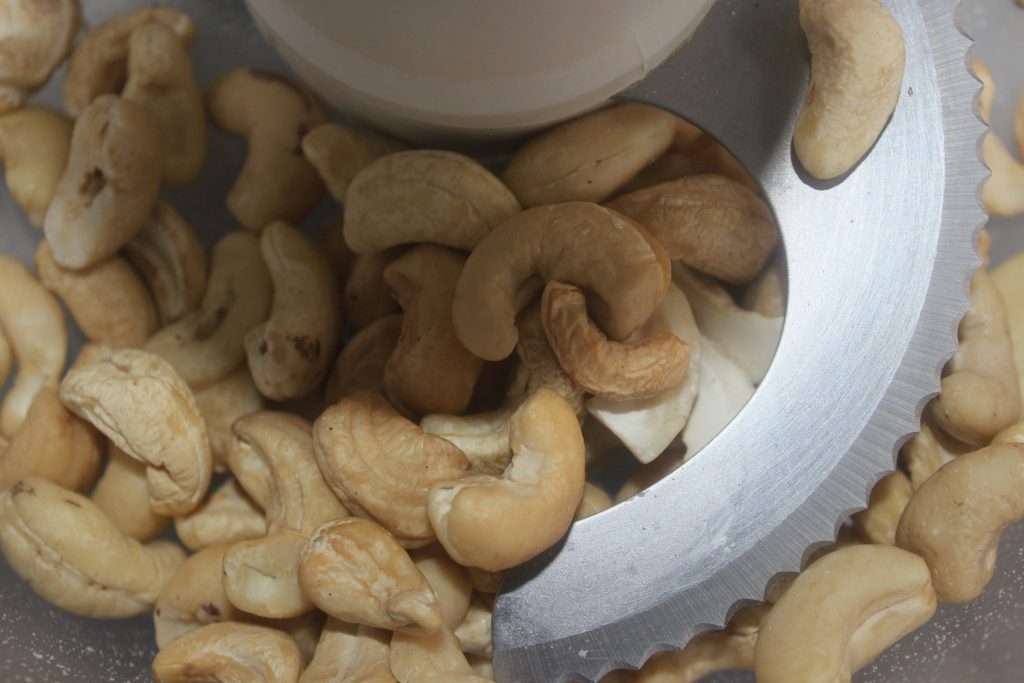
J’adore ces petits gâteaux feuilletés aux noix de cajou, qui nous viennent du Liban, dont j’adore toute la gastronomie. J’avais fait cette recette dans mon premier livre, Mes desserts, édité chez Flammarion en 2014. J’ai eu très envie de la refaire pour mon blog de cuisine et de la partager avec vous. C’est assez démoniaque, car quand on commence, on a un peu du mal à s’arrêter !! La recette est très facile à faire et je peux vous garantir que ça croustille comme il faut et que les saveurs sont délicieuses. Vous pourrez aussi remplacer les noix de cajou par des pistaches.
Recette des FEUILLETÉS LIBANAIS AUX NOIX DE CAJOU pour un moule de 22cm :
- 350g de noix de cajou crues
- 55g de sucre
- 1 paquet de pâte à filo
- 150g de beurre doux
- 150g de ghee (beurre fermenté indien, oui oui !!)
Pour le sirop:
- 350g de sucre
- 175ml d’eau
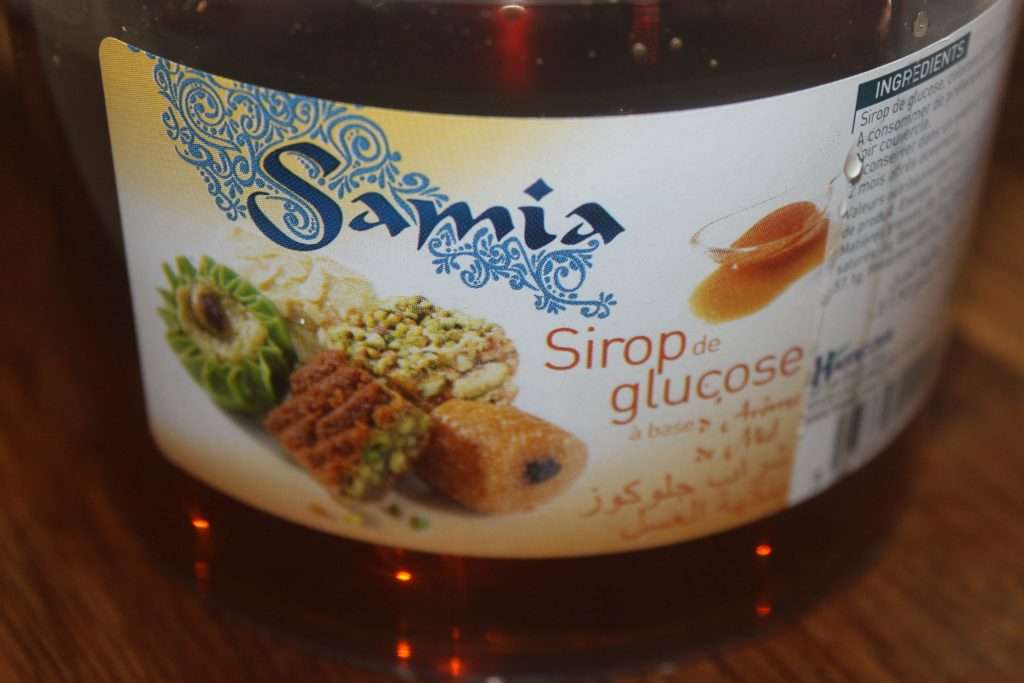
- 2 cuillerées à soupe de sirop de glucose
Instructions :
Mettez les noix de cajou dans un mixeur.
Mettez aussi le sucre (55g).
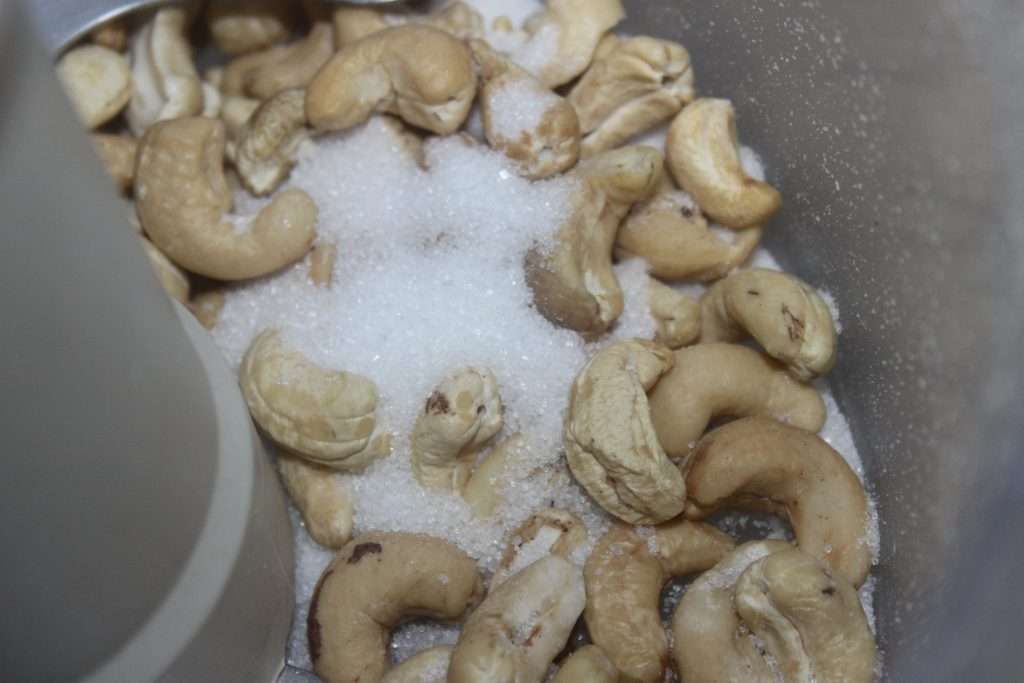
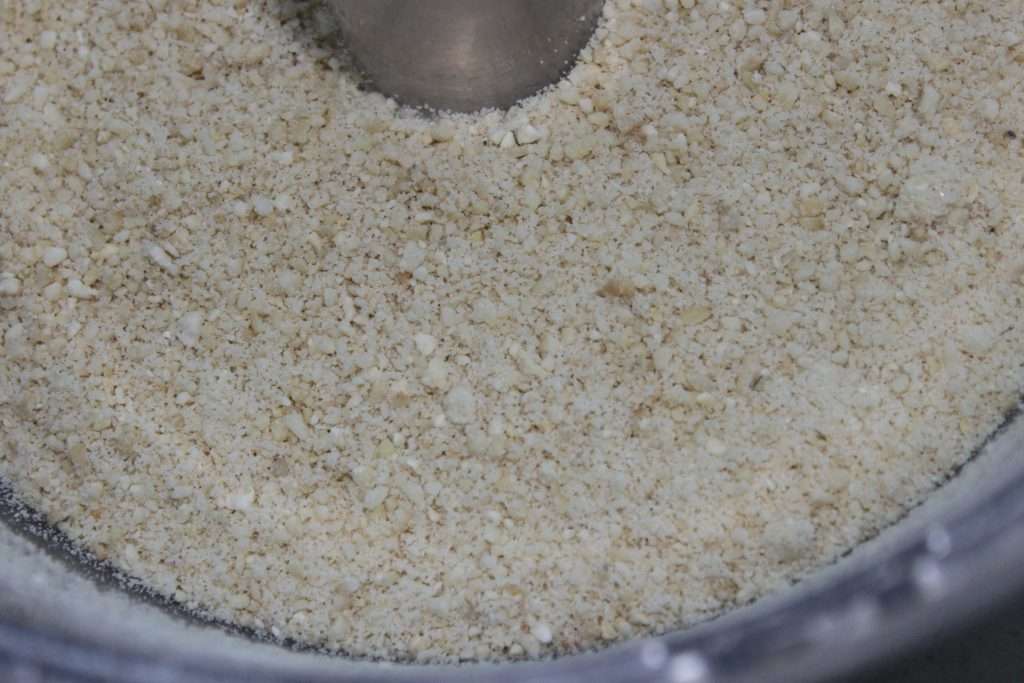
Mixez jusqu’à avoir une poudre. Ne mixez pas trop, sinon vous allez avoir une pâte.
Mettez le beurre et le ghee dans une casserole. Je mets du ghee, alors que c’est indien (vous le trouverez assez facilement en boutique indienne, bio ou exotique, et évidemment sur internet), car il a un goût qui va donner au final, le vrai goût des feuilletés libanaise. Vous pouvez ne mettre que du ghee. Mais vous pouvez aussi ne mettre que du beurre, mais si vous voulez conserver très longuement vos feuilletés, il faudra le clarifier. C’est du beurre clarifié qui est utilisé au Liban.
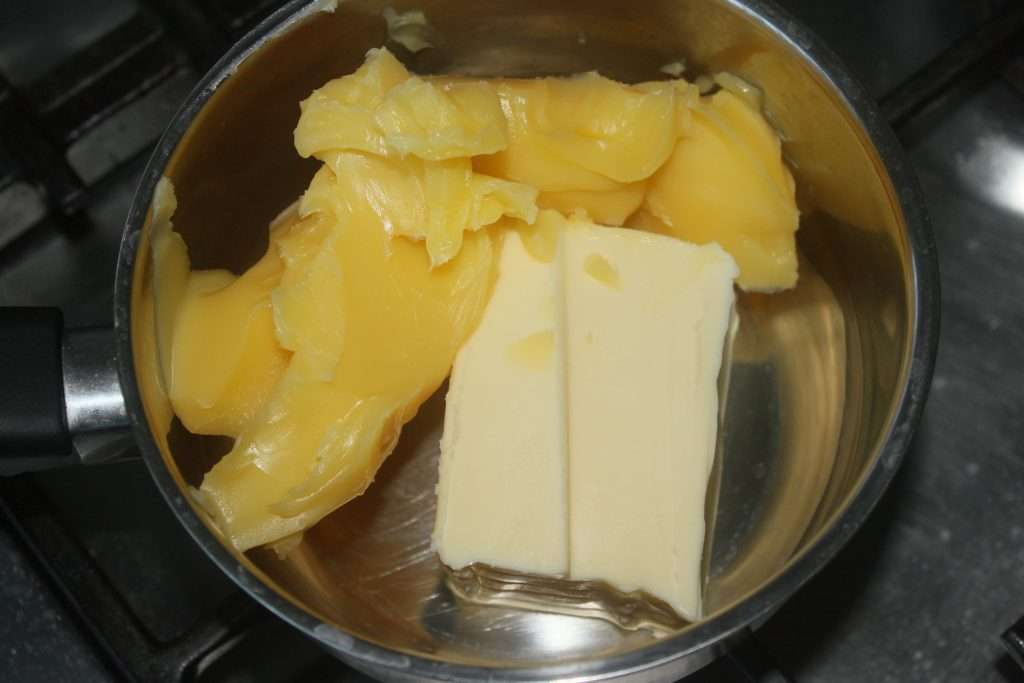
Faites fondre et c’est tout.

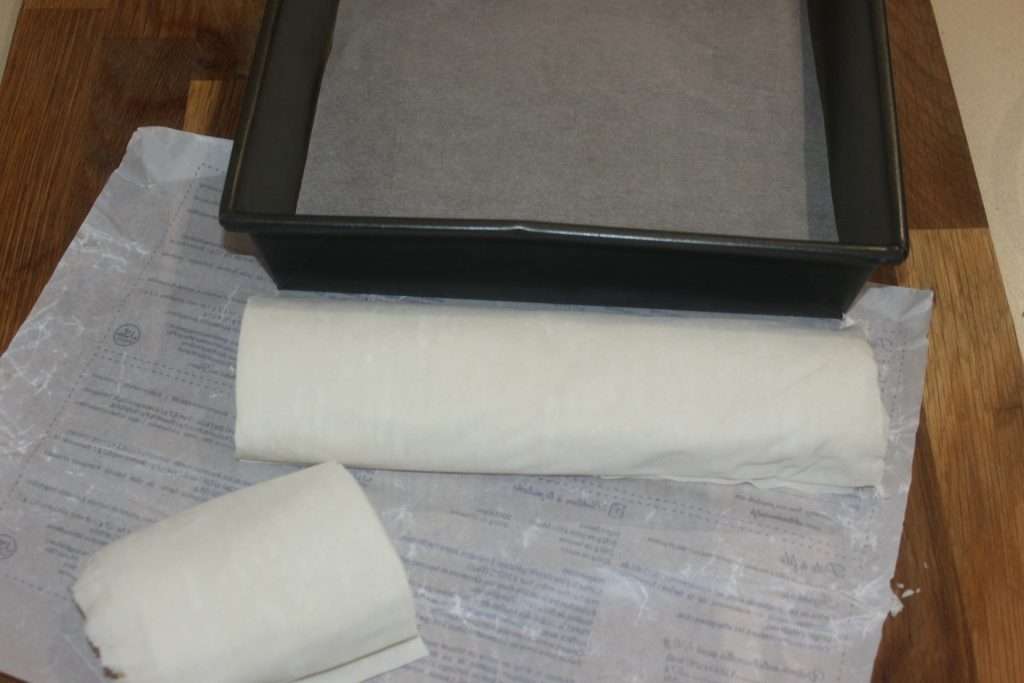
Vous la pâte à filo.
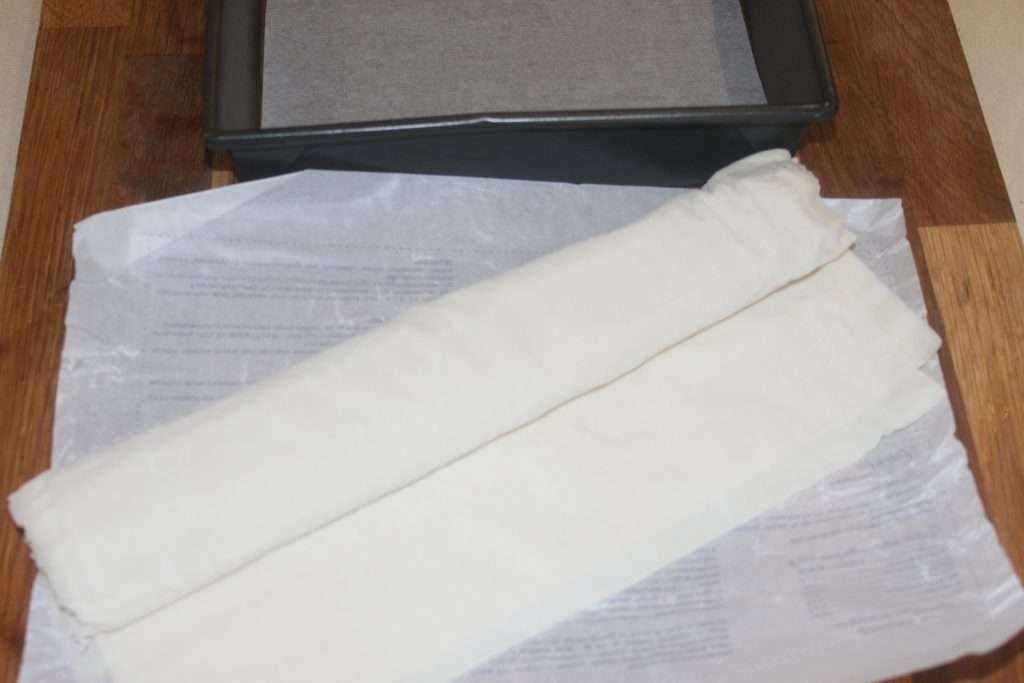
Coupez la pâte à la taille du moule. Je mets juste un papier sulfurisé dans le fond du moule.
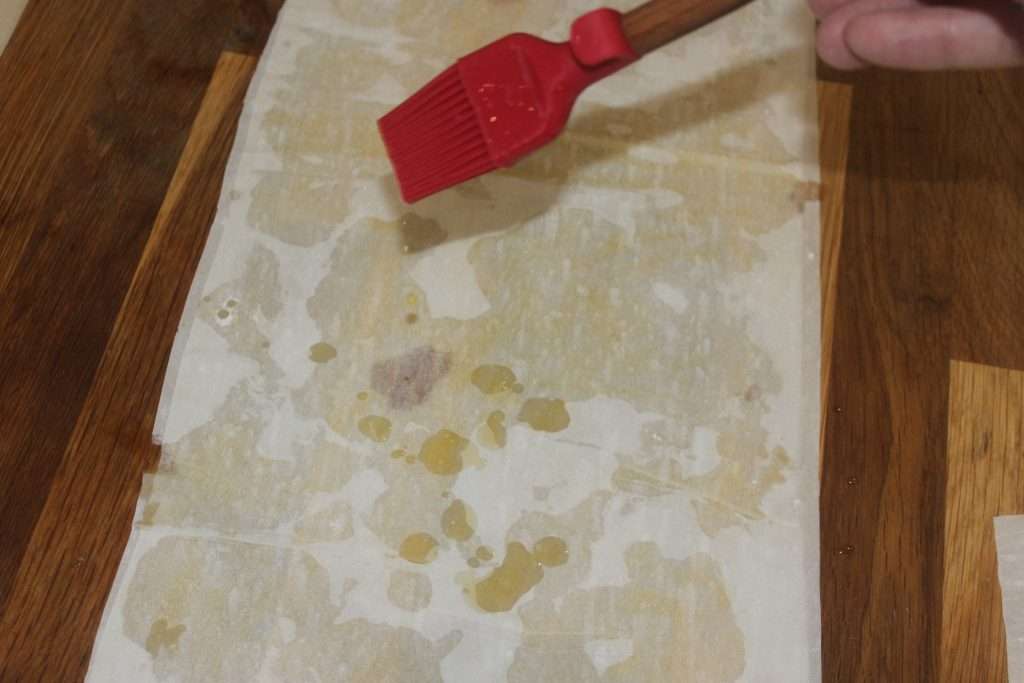
Déroulez une feuille puis posez-la sur le plan de travail. Arrosez avec la matière grasse fondu. Posez une deuxième feuille puis arrosez à nouveau. Pas besoin de badigeonner toute la surface des feuilles. Vous arrosez aléatoirement, c’est déjà très bien.
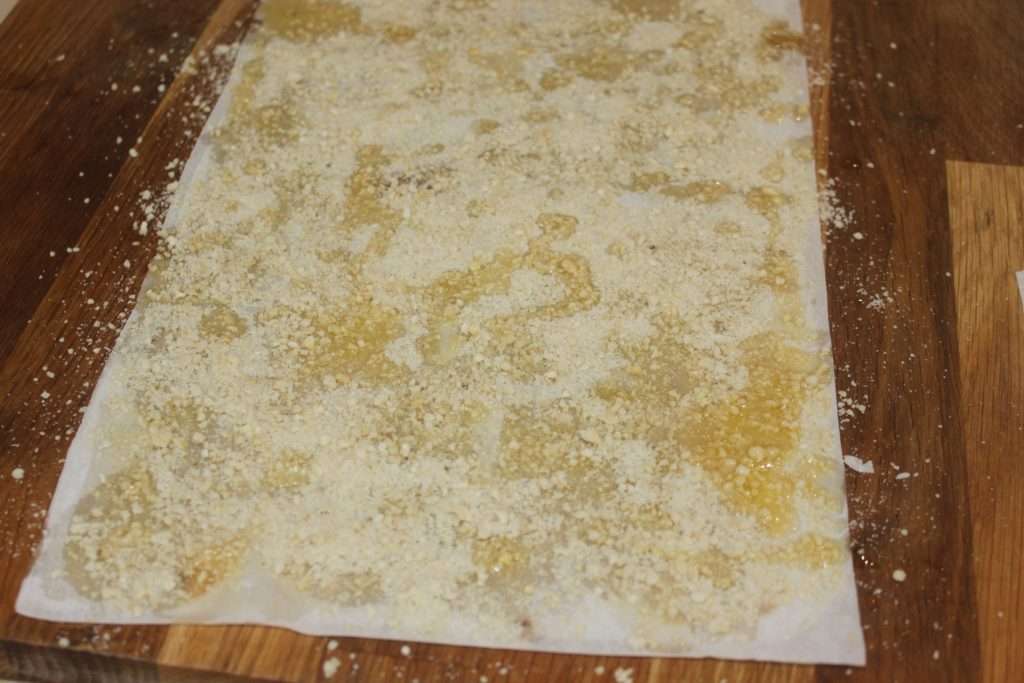
Parsemez avec la poudre sucrée de noix de cajou. Je laisse juste une bande libre de toute poudre vers le haut. En gros, je parsème partout, sauf 1/5 ème du haut pour permettre de bien fermer le rouleau au moment de son enroulement.
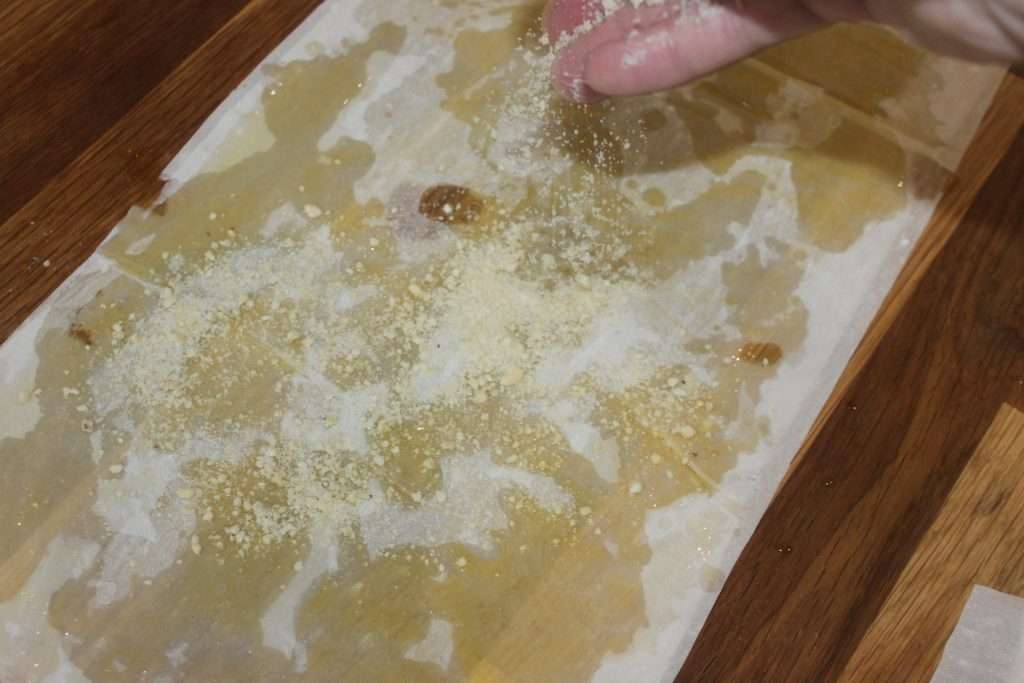
Arrosez à nouveau avec le beurre/ghee fondu.
Commencez à enrouler assez serré à partir du bas.
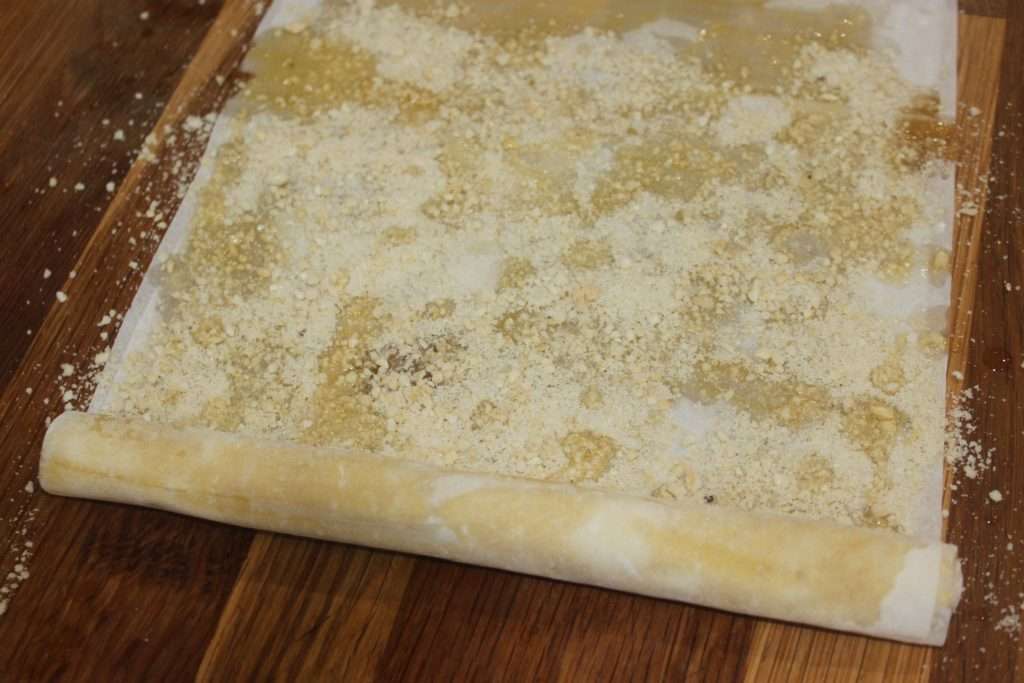
Posez le rouleau dans le moule, et laissez la jointure vers le bas.

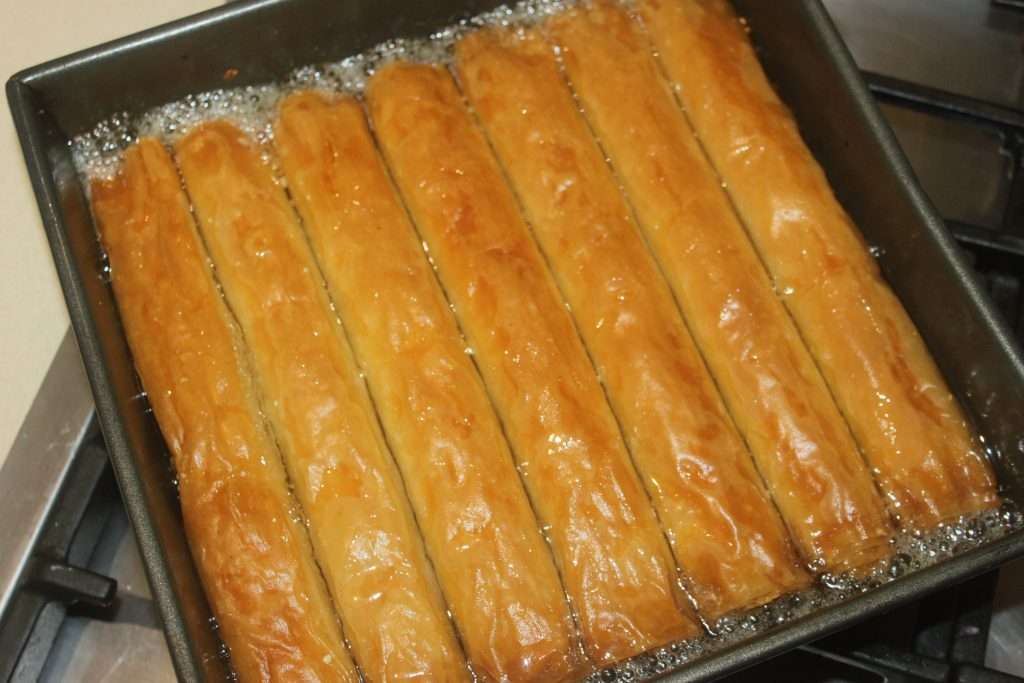
Faites de même sur les reste des rouleaux. J’en ai fait 7 pour le moule. Badigeonnez cette fois parfaitement la surface avec la matière grasse.

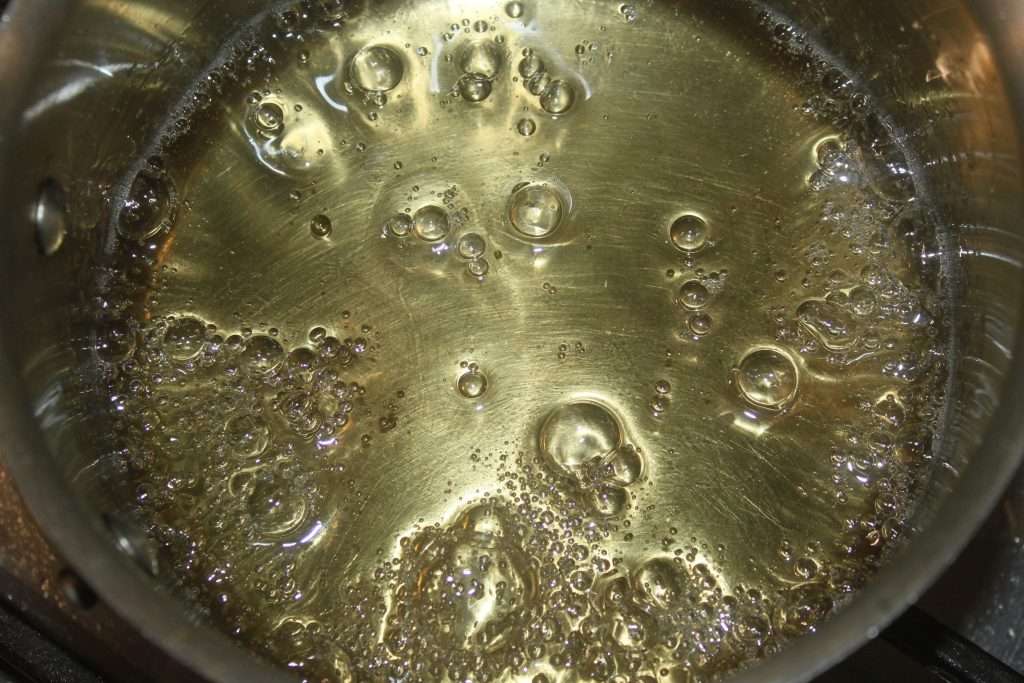
Mettez au four à 170°C chaleur tournante pendant 30 minutes. Pendant ce temps préparez le sirop. Mettez tous les ingrédients dans une casserole sur feu modéré.
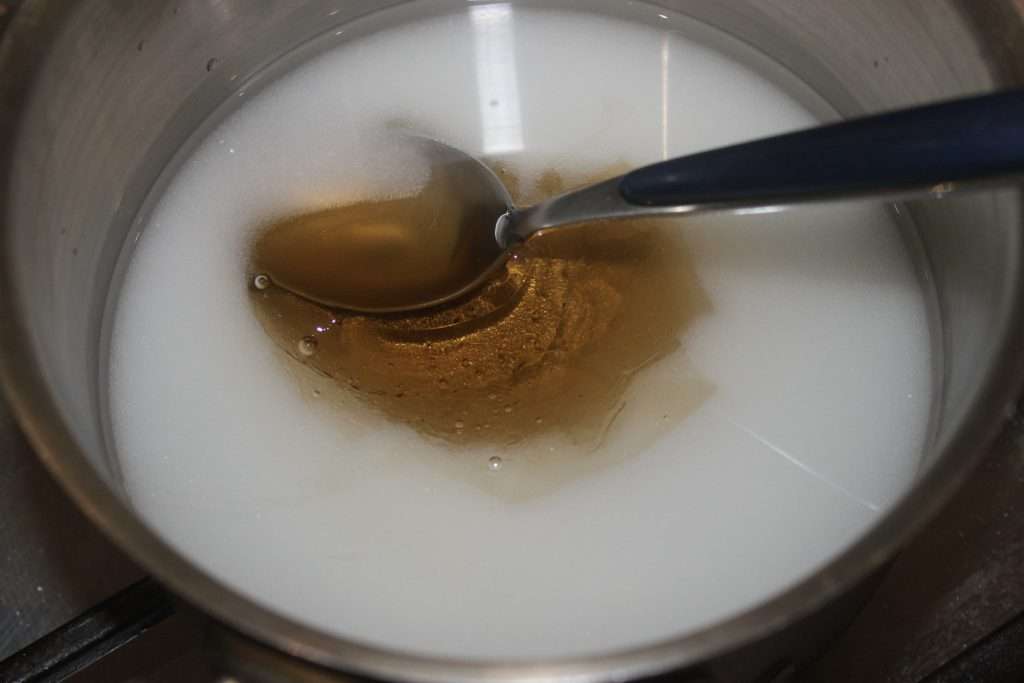
Pour le sirop de glucose (qui empêchera la recristallisation du sucre), j’ai pris cette marque (ce n’est pas un placement de produit, juste ce que j’ai acheté) qui est vraiment top.
Portez à ébullition puis baissez le feu au minimum et laissez cuire 10 minutes.
À la sortie du four, arrosez les gâteaux avec tout le sirop. Pas de panique, ils rejetteront le sirop dont ils n’ont pas besoin.

Laissez refroidir à température ambiante.
Coupez ensuite en parts puis conservez dans une boite hermétique à température ambiante.
Si vous avez mis du beurre clarifié ou du ghee, vous pourrez les conserver plus d’un mois, si vous avez fait comme moi ici un mélange beurre non clarifié et ghee, alors vous pourrez les garder au moins 10 jours.

Lebanese puff pastries with cashew nuts


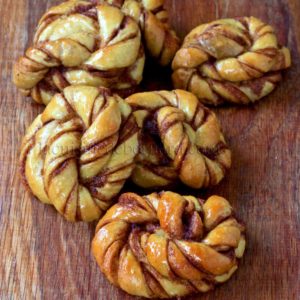
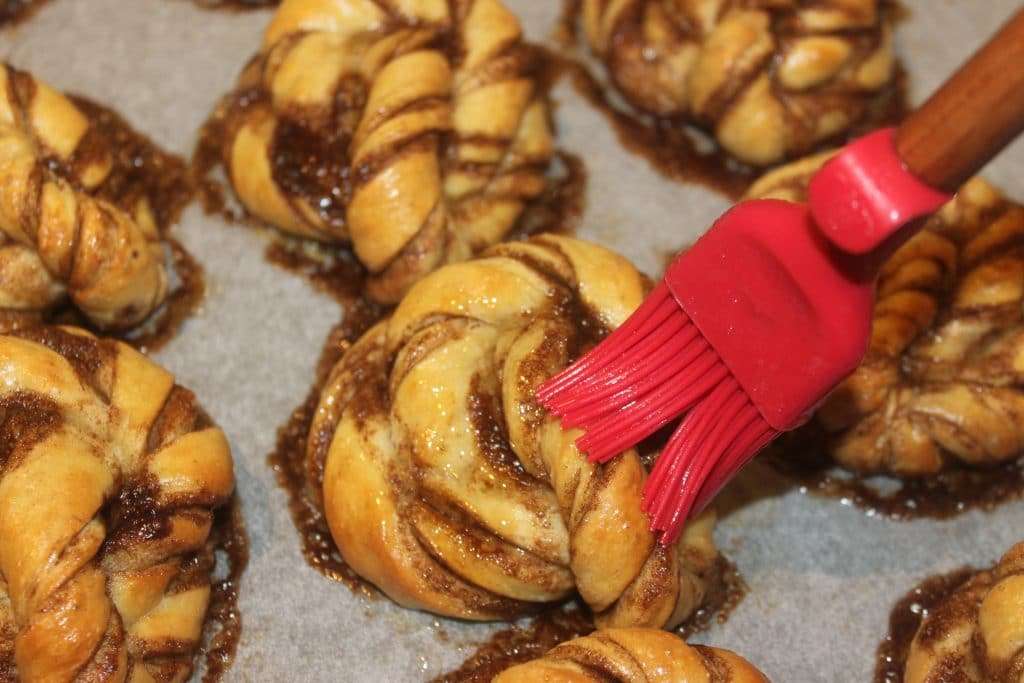
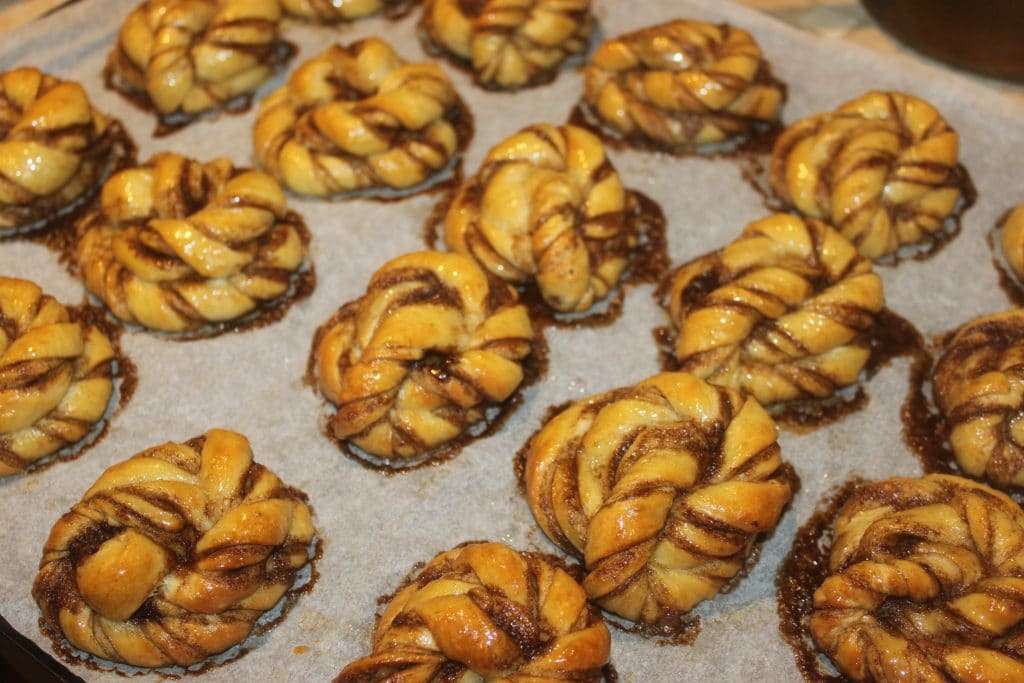
For Christmas, I offer you one of the many recipes from my new book, Scandalously Decadent, published by Flammarion, the Kanelsnurrer. I redid everything step by step for the blog, and the picture you see here is not the one from the book. You have to try this recipe, just for the incredibly delicious smell of baking these kanelsnurrer, these “cinnamon swirls”. Because in addition to the cinnamon in the filling, the paste also contains cardamom. This is the original, Scandinavian version of cinnamon buns. Despite the apparent complexity of the designs, the recipe is actually very simple and quick to make. Just make the dough early enough to let it rest. The little trick to make the twists is not complicated and the result is amazing: the kanelsnurrer are soft and fragrant!
Pour une vingtaine de kanelsnurrer :
Dough:
- 540g of T55 flour
- 240g of semi-skimmed milk
- 6g dry baker’s yeast
- 85g of sugar
- 4g of salt
- 7,5g of ground cardamom
- 50g of egg (1 egg)
- 90g of soft butter in pieces
Trim:
- 100g of soft semi-salted butter
- 50g of sugar
- 50g of brown vergeoise
- 10g of cinnamon
For gilding :
- one beaten egg
For the shine:
- simple syrup (50g of sugar and 50g of water, all brought to a boil)
Instructions :
Start by preparing the dough the day before. Put all the ingredients except the butter in a food processor.
The cardamom will give the dough an incredible taste!
Mix with the dough hook for 5-6 minutes on low speed. The dough should no longer stick to the inner edge of the bowl.
Then add all the butter in pieces and start again for 8 minutes, always on low speed. If necessary, stop the processor, scrape off any butter that doesn’t mix with a spatula, then start it again. After this quick kneading time, the dough should still be fairly smooth. Cover with a clean cloth, then let swell in a warm place for 1h30. The dough should double in volume. Degas it with the palm of one hand and wrap it in cling film. Place in the fridge overnight, or at least 4-5 hours.
For the filling, combine the soft semi-salted butter, sugars and cinnamon in a bowl.
Unwrap the cold dough and place it on a lightly floured work surface. Roll it out to a rectangle of about 26 cm by 42 cm.

Spread the dough with the filling, on ¾ of the surface: the whole width should be spread, but only ¾ of the length. Try to be as uniform as possible in the thickness of the filling.
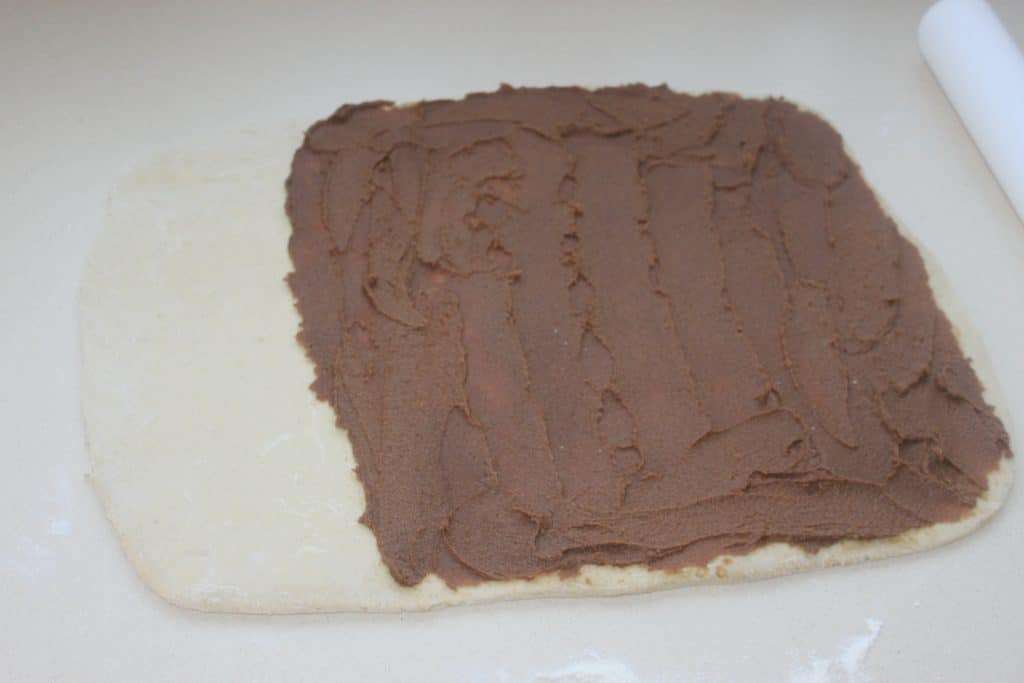
Fold the dough lengthwise into thirds. You now have a dough folded in three, so 26 cm by about 14.
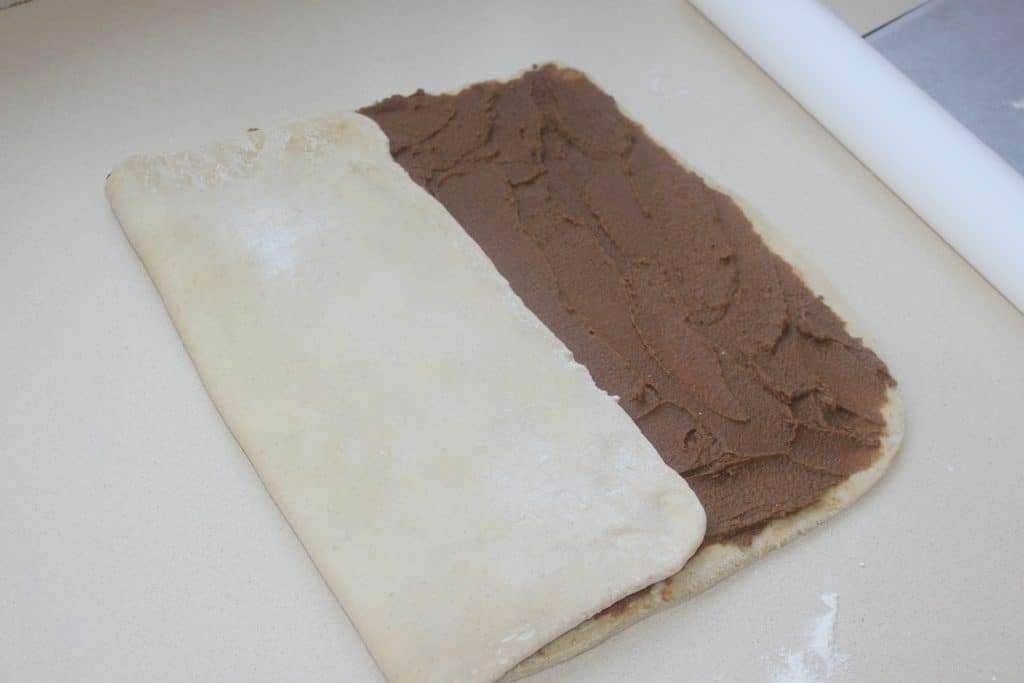
Cut 2cm wide by 14cm strips with a knife.
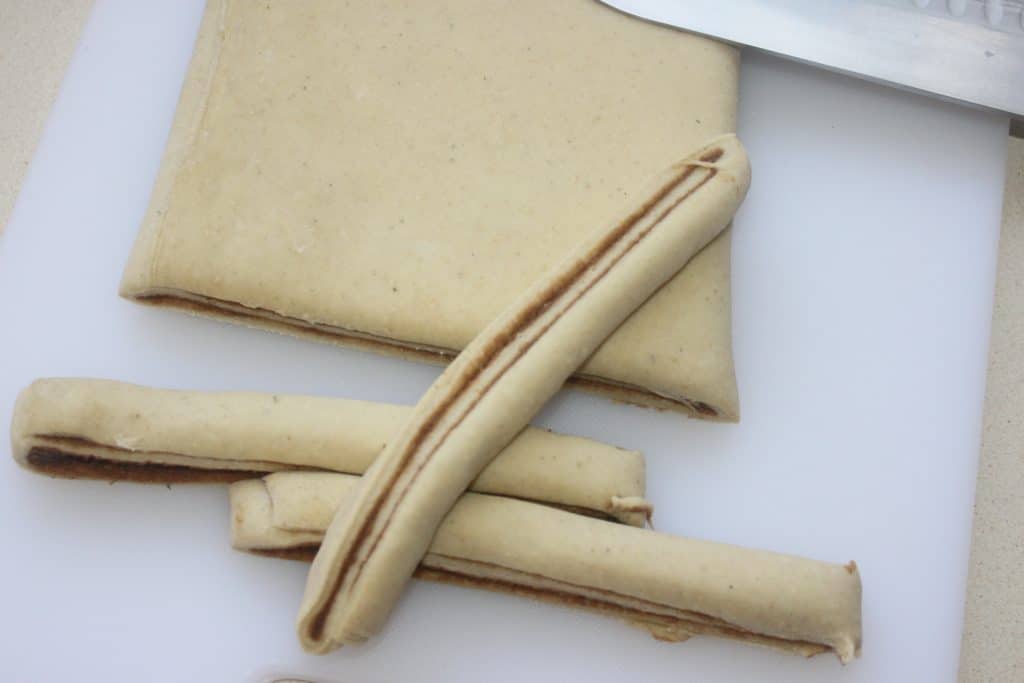
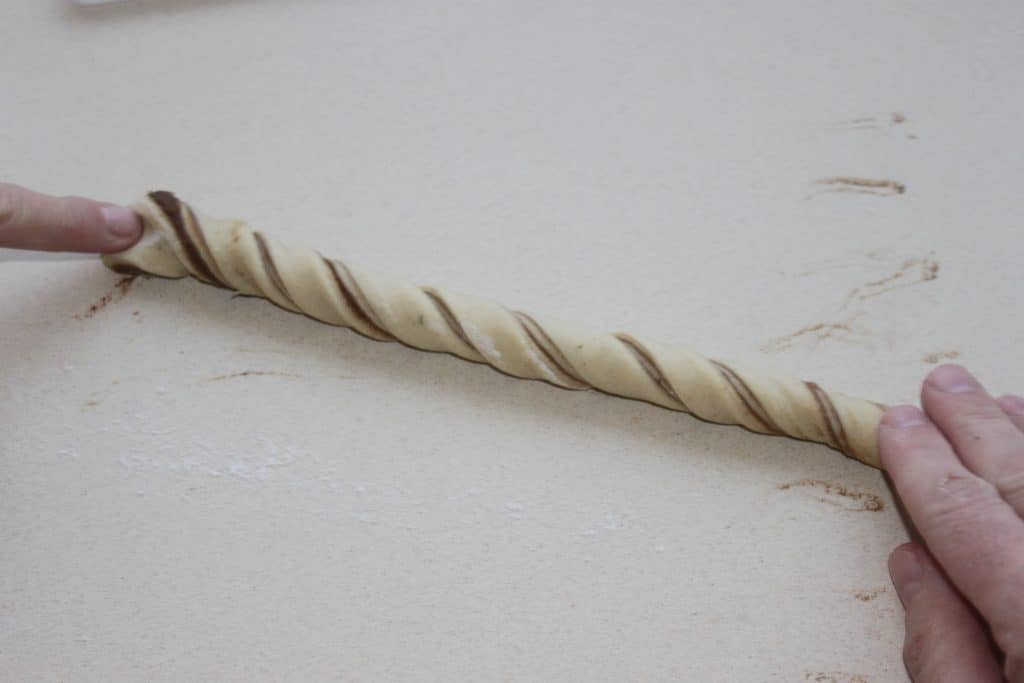
Take a strip of dough, stretch it slightly, then twist it so that it turns about 8 times on itself.
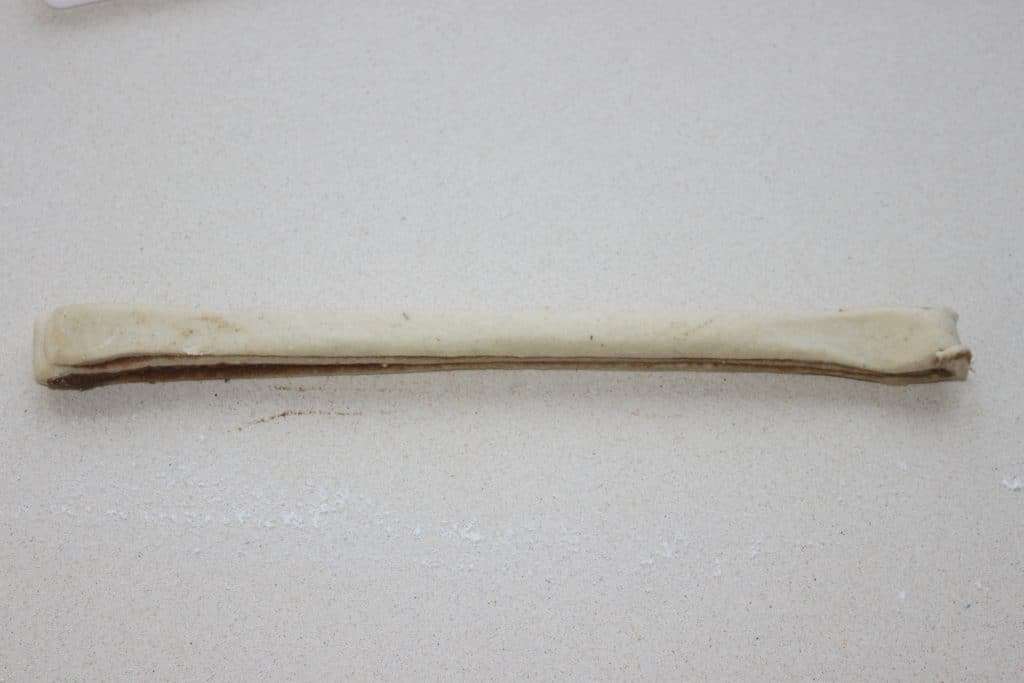
If you are right-handed: take the twisted strip of dough with your left hand and clamp it with your thumb and middle finger. Roll it twice between the index and middle fingers of your left hand using your right hand. Insert the remaining end into the center of the resulting vortex.
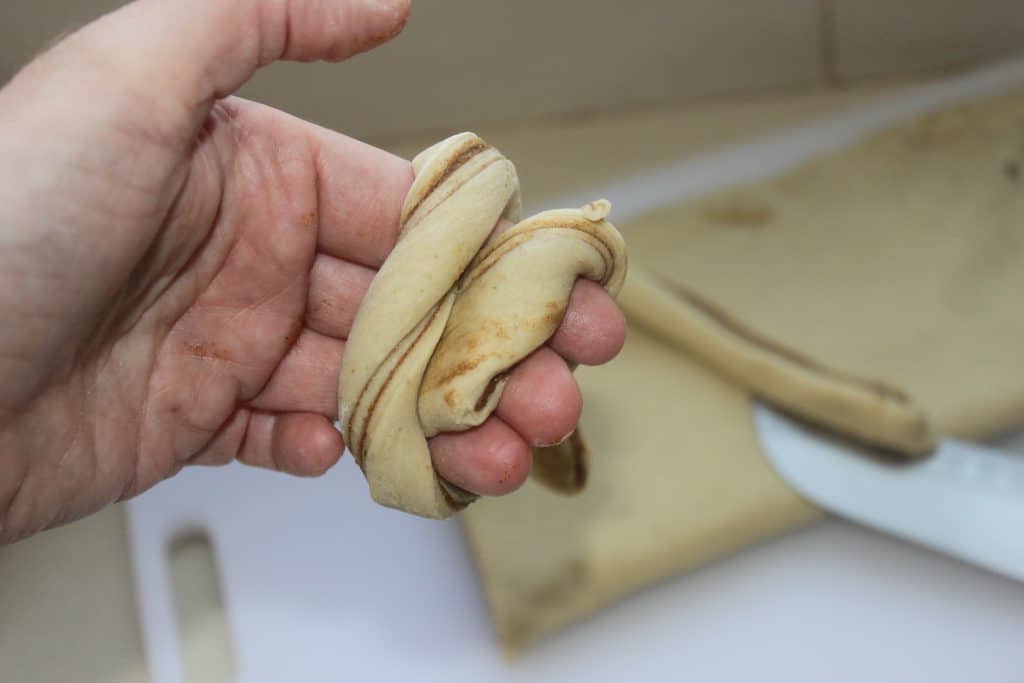
This is all actually very simple to do, so no worries.

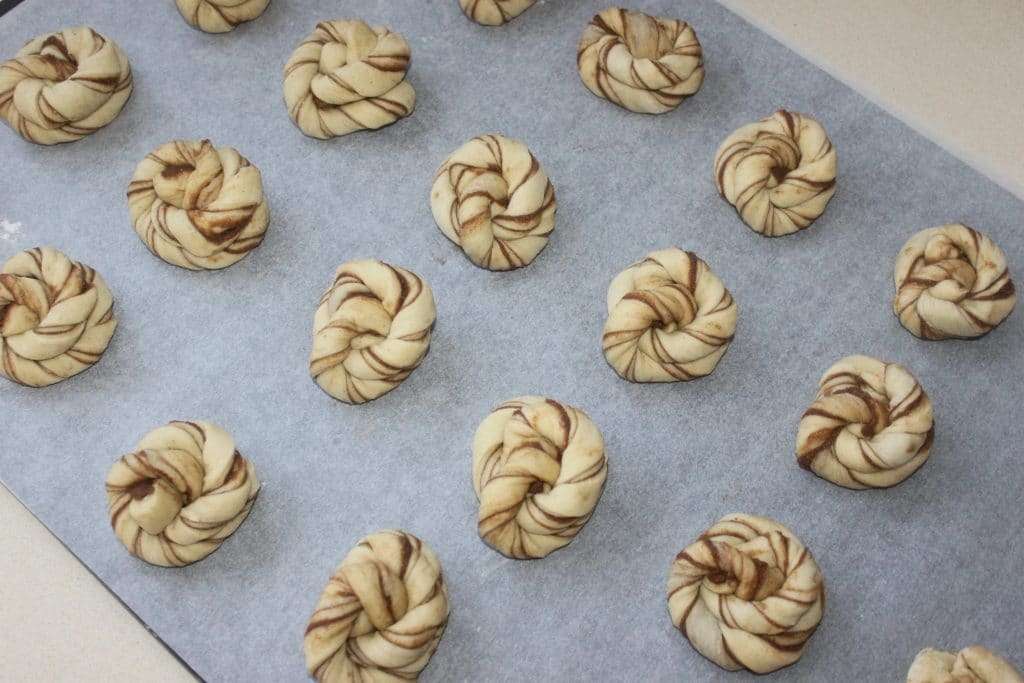
Place each kanelsnurrer on a baking sheet lined with parchment paper. Repeat this process for all the dough strips. Let them swell for about 40 minutes: they will almost double in size.
You can spray with a little water so they don’t dry out during the growing process.

Brush with beaten egg and bake for 15 minutes in a preheated oven at 180°C.
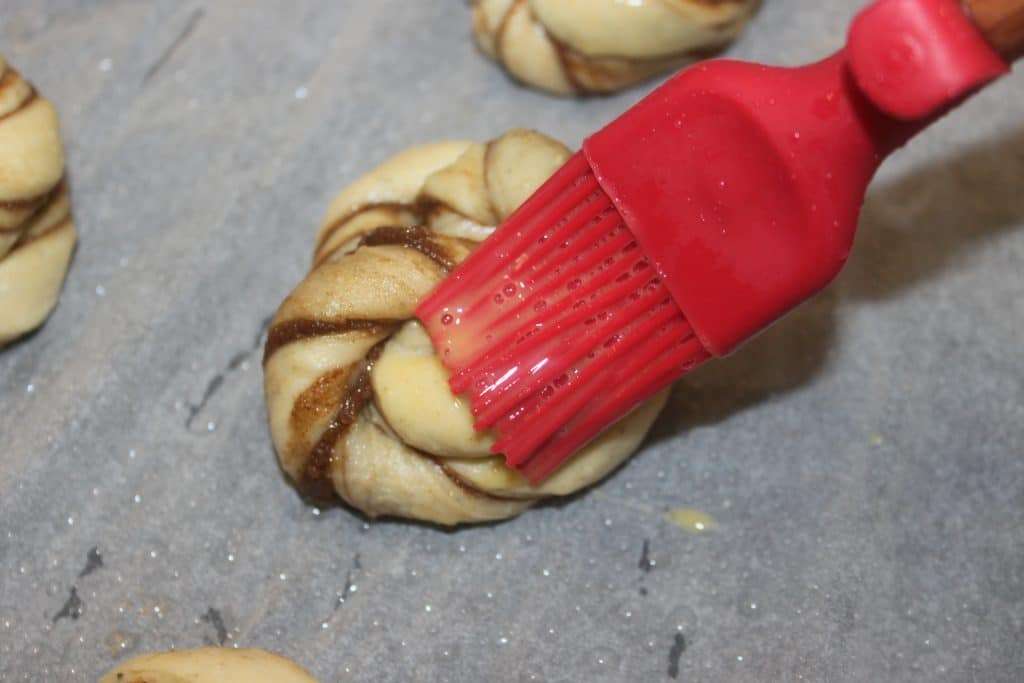
They must be well browned. Then brush the syrup with a brush right after you take it out of the oven to get a nice shine. For the simple syrup: bring 50g of sugar and 50g of water to a boil and that’s it.
To be enjoyed as a snack or for breakfast.
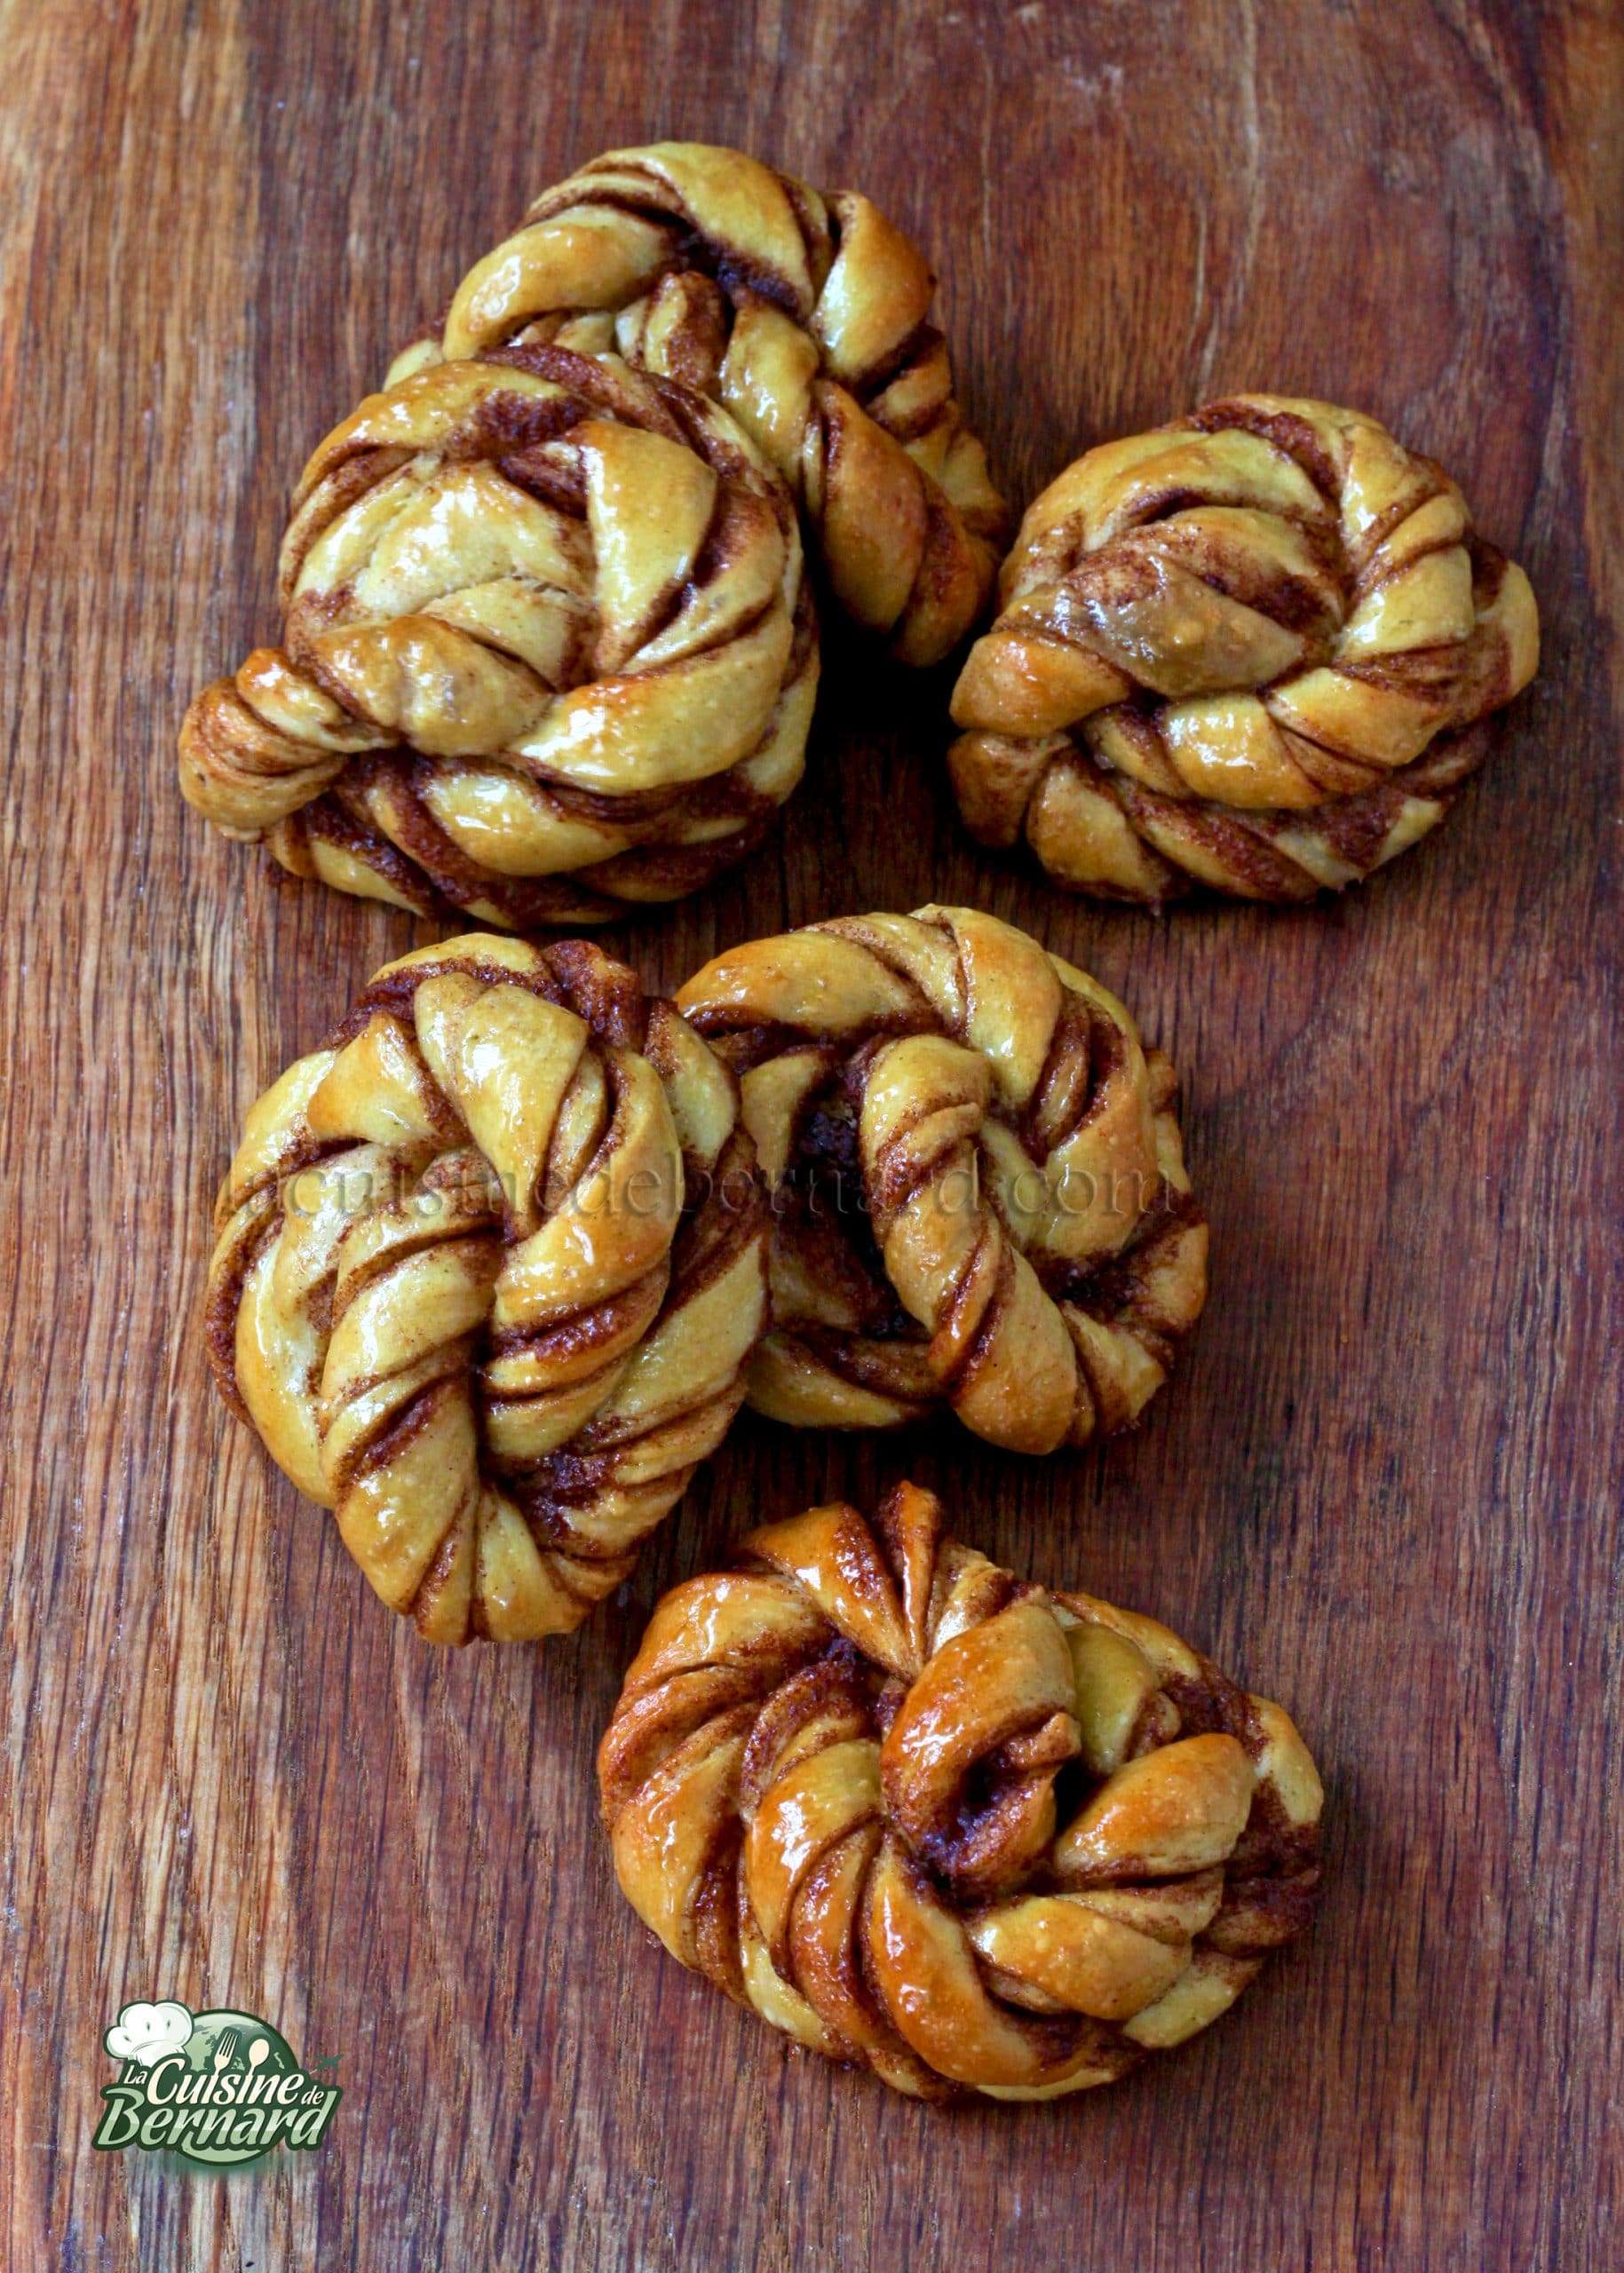
Here is the picture of Claire Curt, which is in my book “Scandalously Decadent”, published by Flammarion!