

Qatayef, or atayef (not to be confused with ktayef, pastry made from angel hair) is a delicious pancake filled with ashtalieh cream, rose and orange blossom water and crushed roasted pistachios. Everything is served with a flavored syrup and gives a final result that is not very sweet. This pastry is found in Lebanon, but also in Egypt and other countries of the Levant. This presentation with half of the pancake folded to make a cone is called assafiri.
Recipe for about twenty pancakes:
For the ashtalieh cream:
- 250g semi-skimmed milk
- 230g full cream
- 75g sweetened condensed milk
- 75g cornstarch
- 120g of water
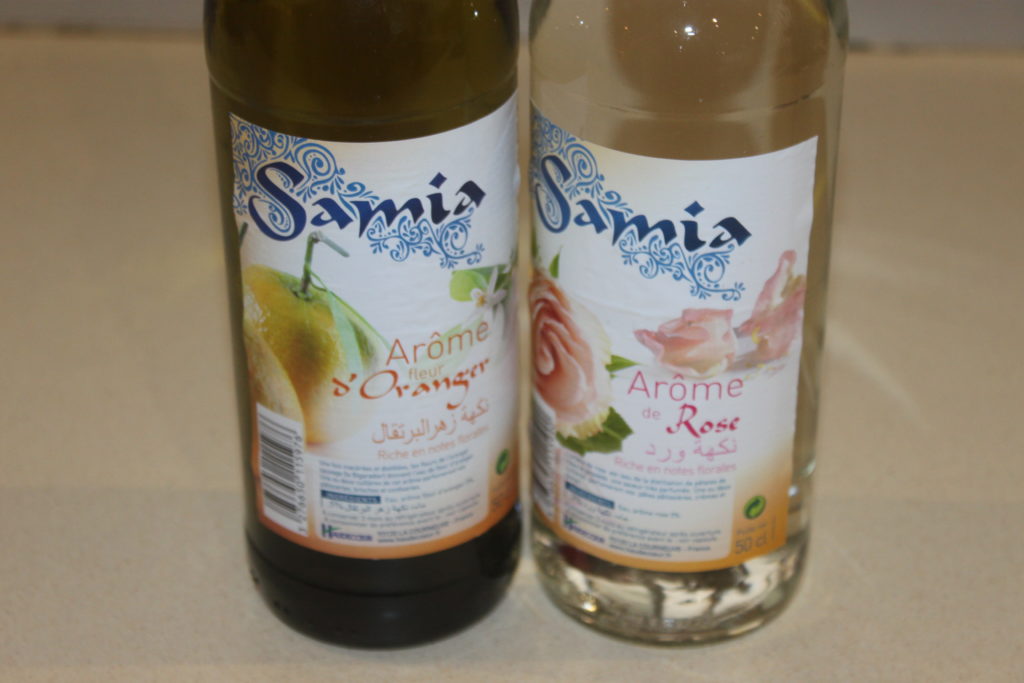
- 1 tablespoon of orange blossom
- 1 tablespoon of rose water
For the syrup:
- 280g of sugar
- 180ml of water
- 1 slice of lemon
- 1 teaspoon of orange blossom water
- 1 teaspoon of rose water
For the dough:
- 190g flour
- 50g fine semolina
- 1 teaspoon of sugar
- 1 teaspoon of baking powder
- 425g semi-skimmed milk
- 1/2 teaspoon of dried baker’s yeast
- About 150g shelled unsalted roasted pistachios.
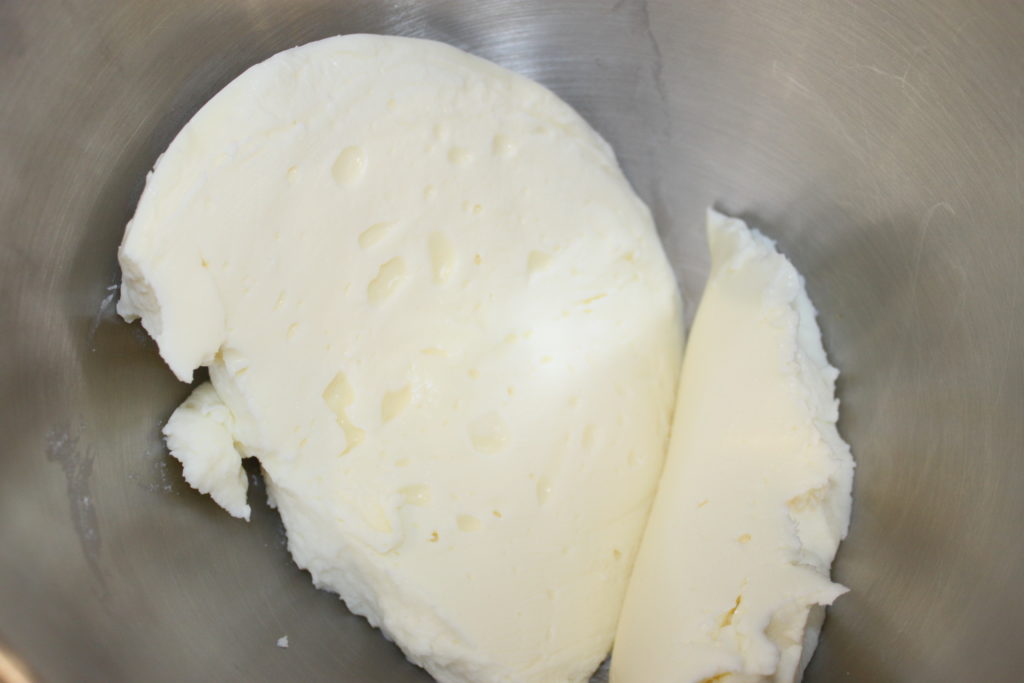
For the ashtalieh cream:
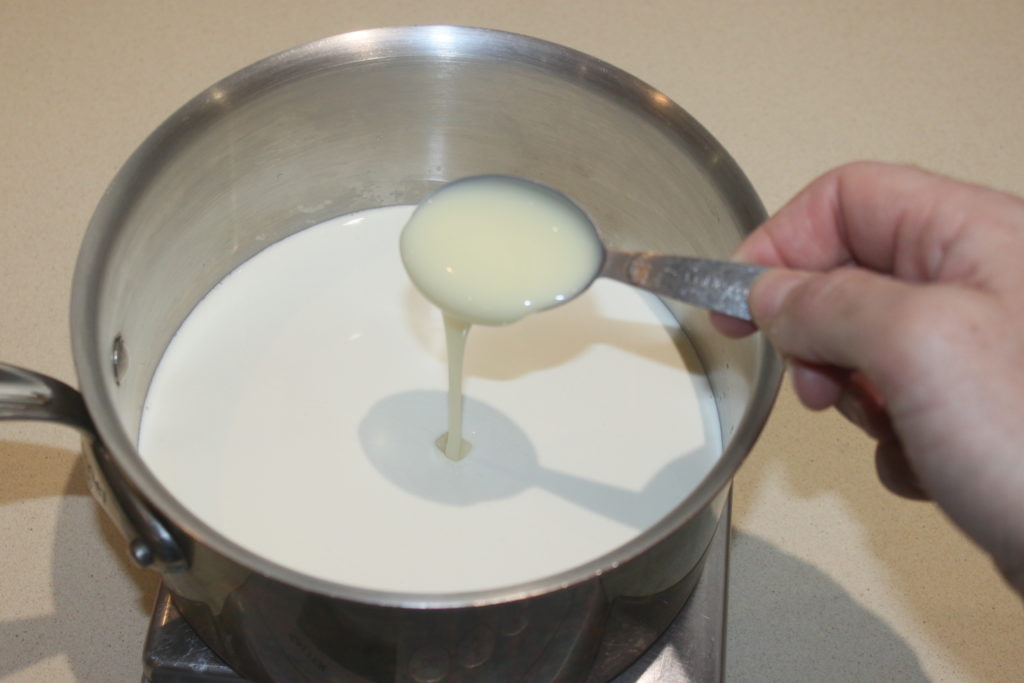
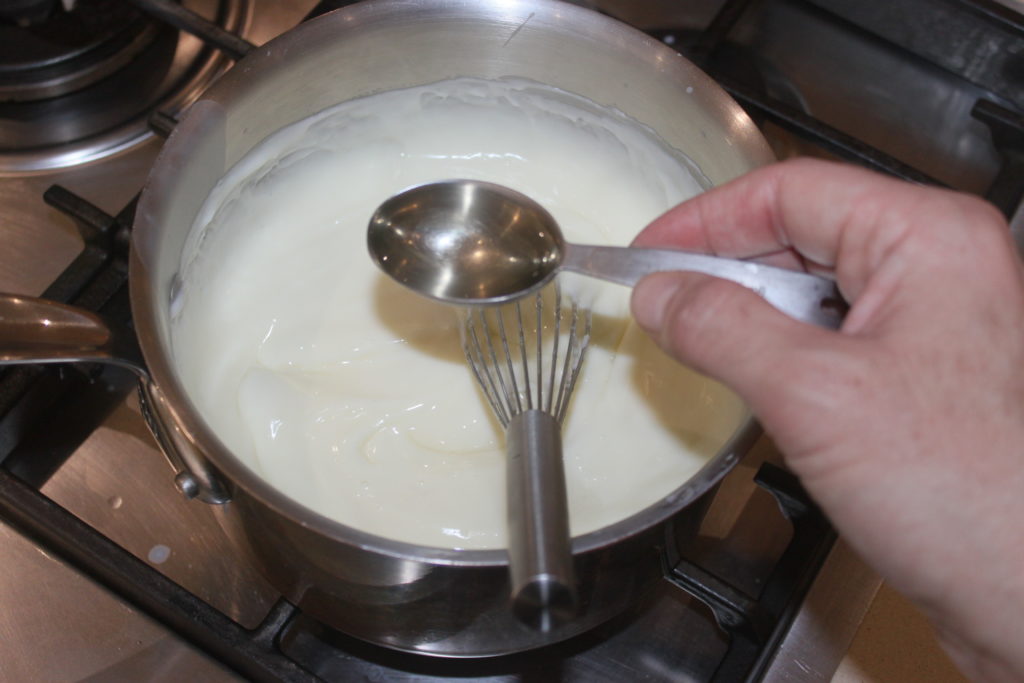
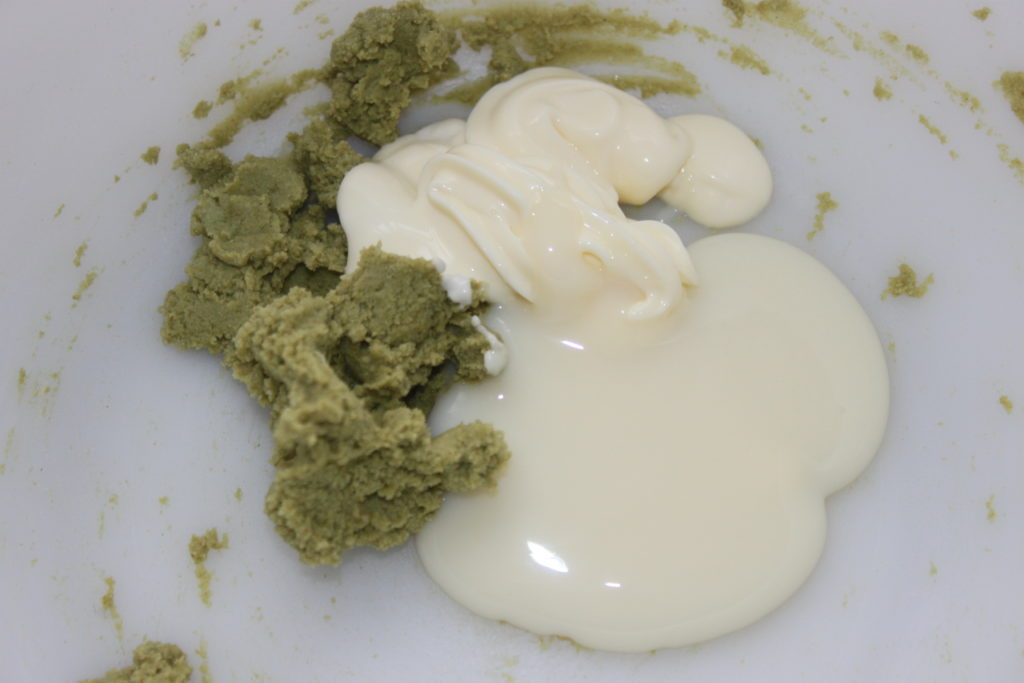
Put the milk, cream and condensed milk in a saucepan over low heat.
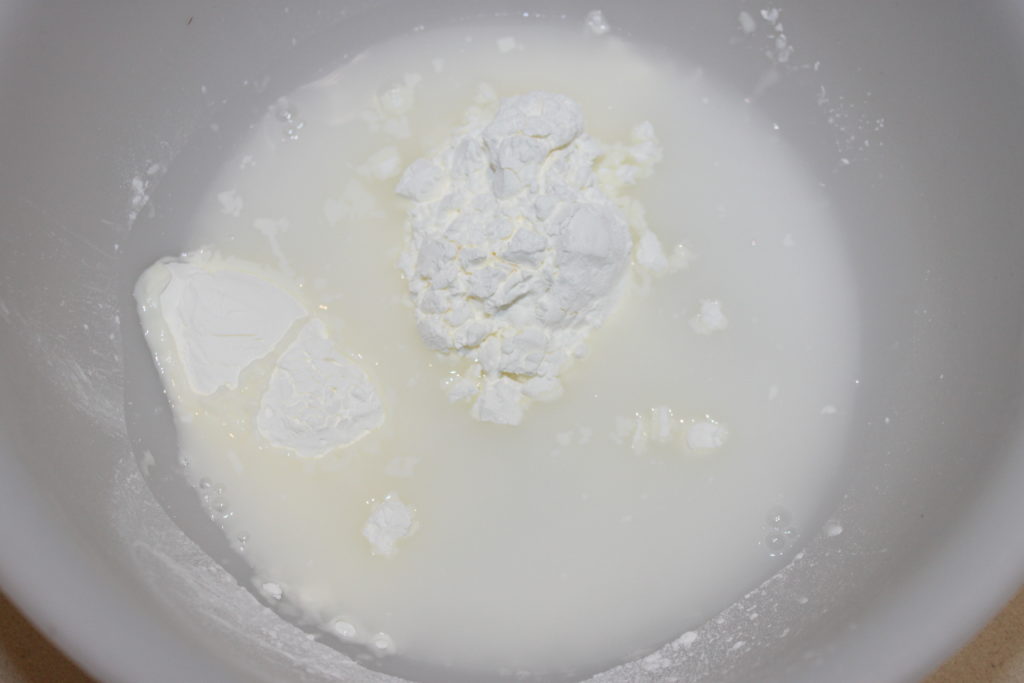
In a container, put the cornstarch (maïzena) and the water. Mix well.
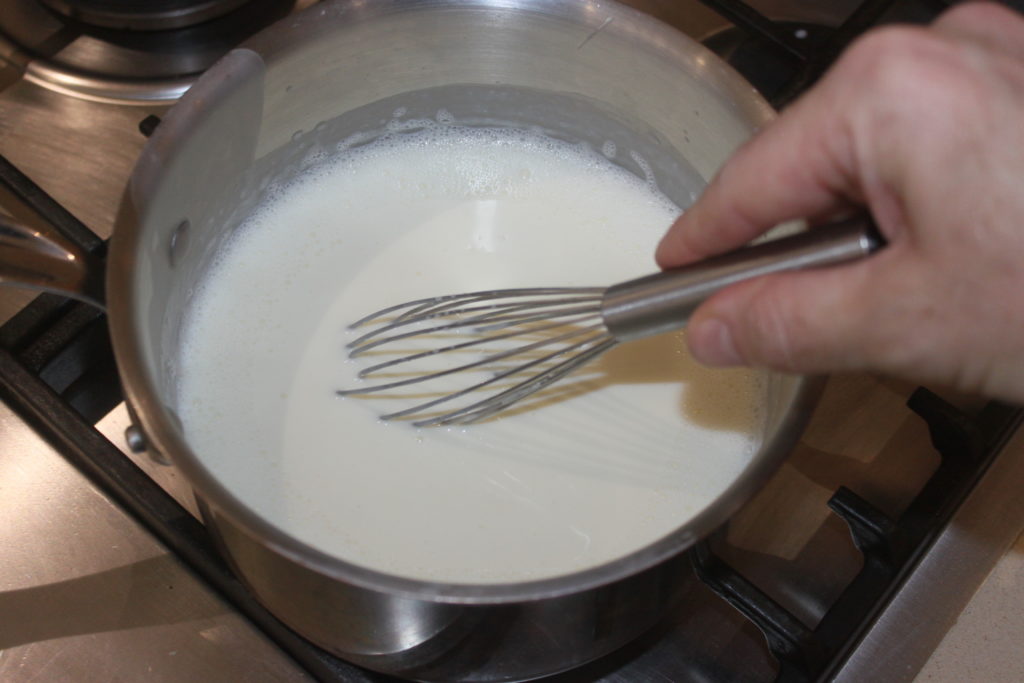
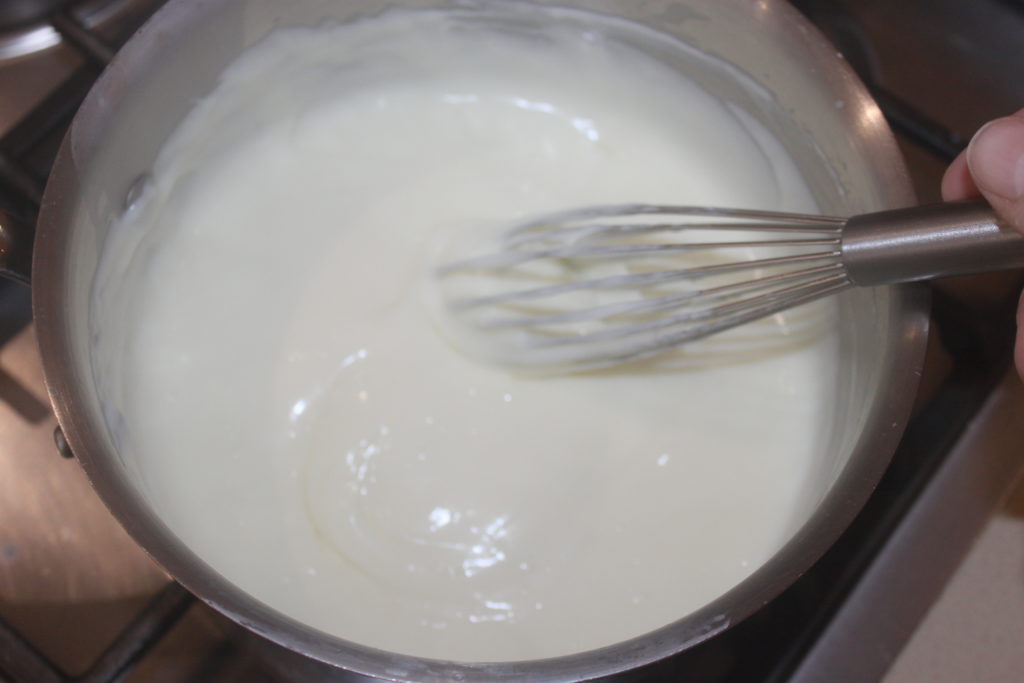
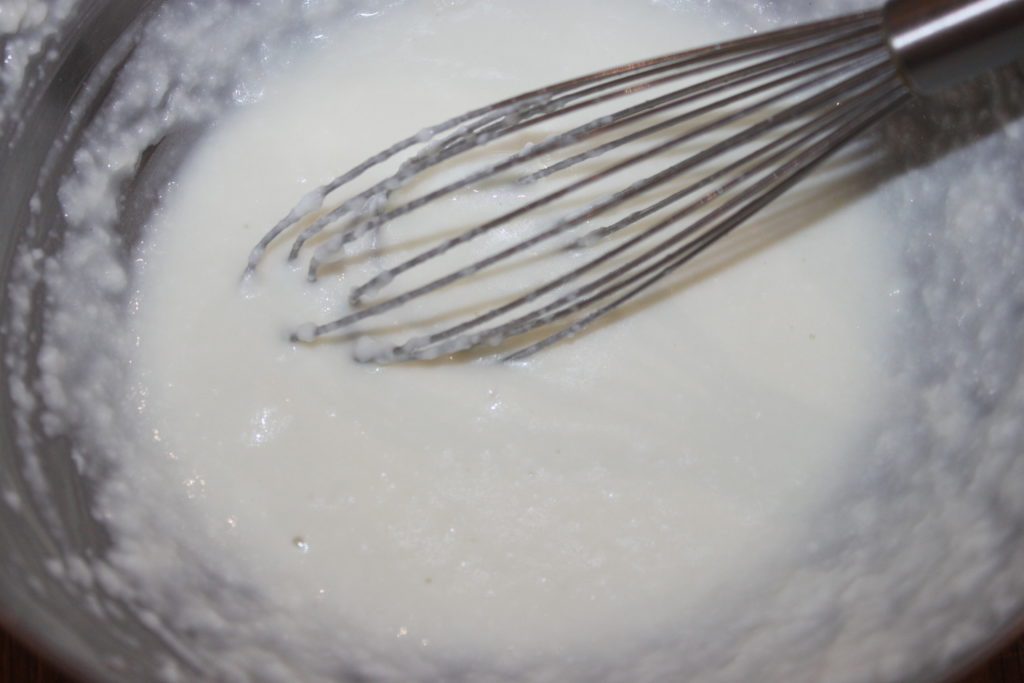
When the milk simmers, pour slowly into the container while whisking. Pour everything back into the saucepan and bring to a boil while stirring. The cream will thicken quickly.
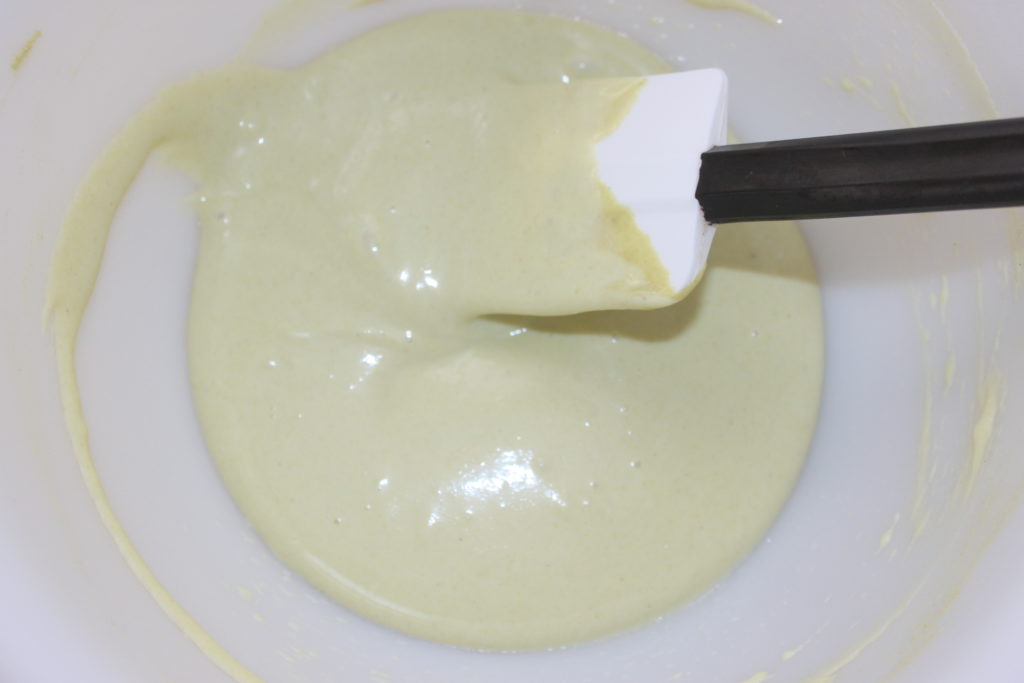
Turn off the heat and add the orange blossom and rose waters. If you find a real orange blossom, take advantage of it!
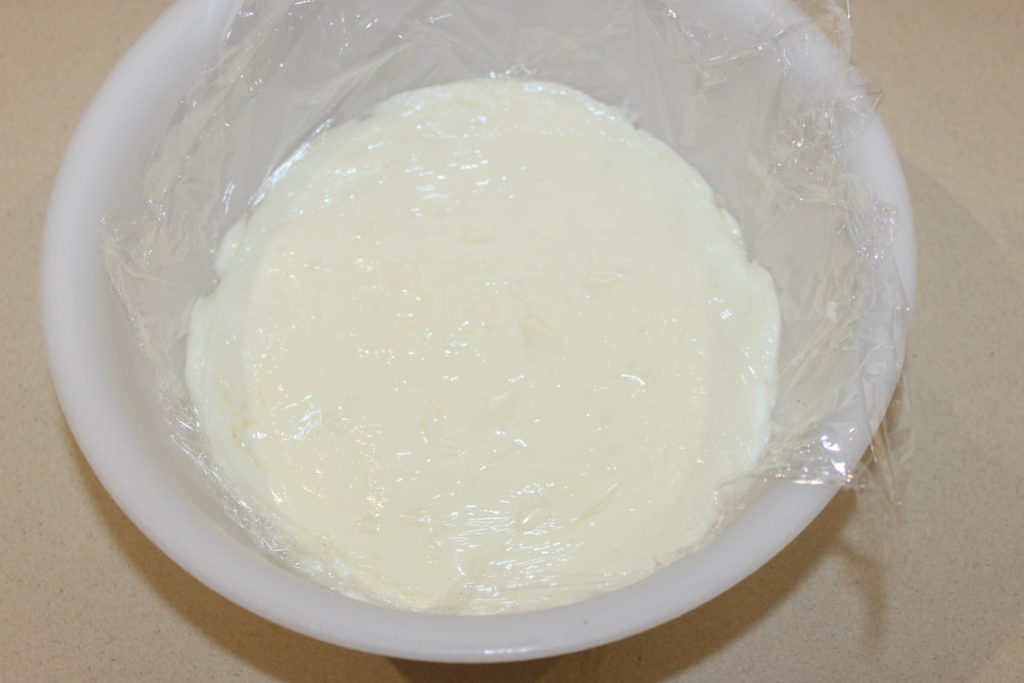
Pour into the still hot cream.
Mix well.
Pour into a clean container then put a cling film in contact. Let cool to room temperature then refrigerate. You can do it the night before.
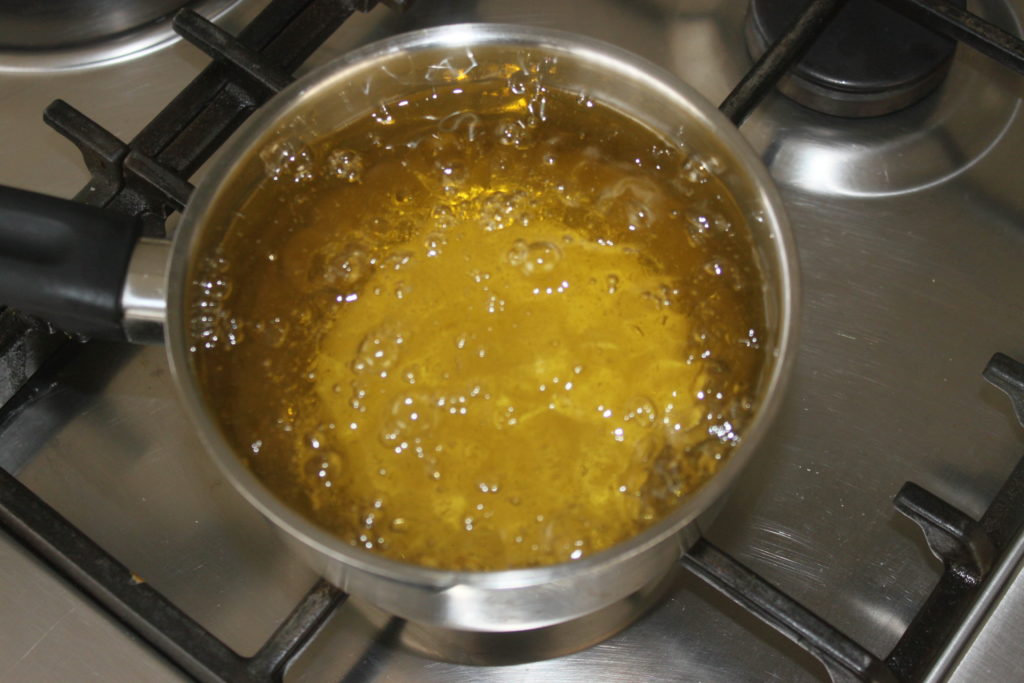
For the syrup, put the sugar, water and lemon to boil for 4 minutes.
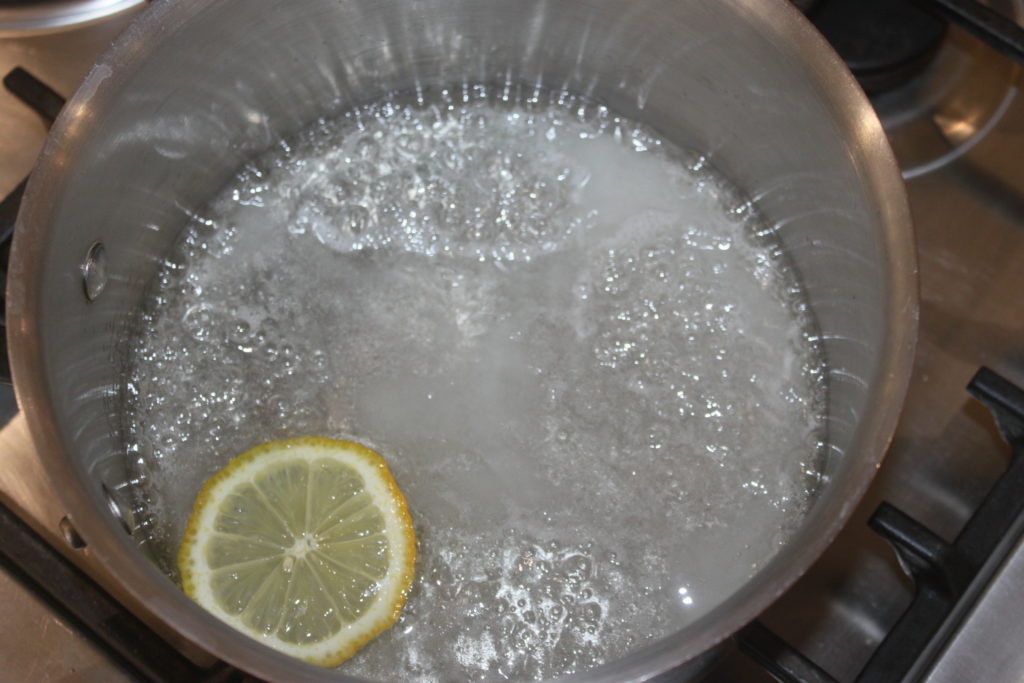
Remove from the heat, add the orange blossom and rose water.
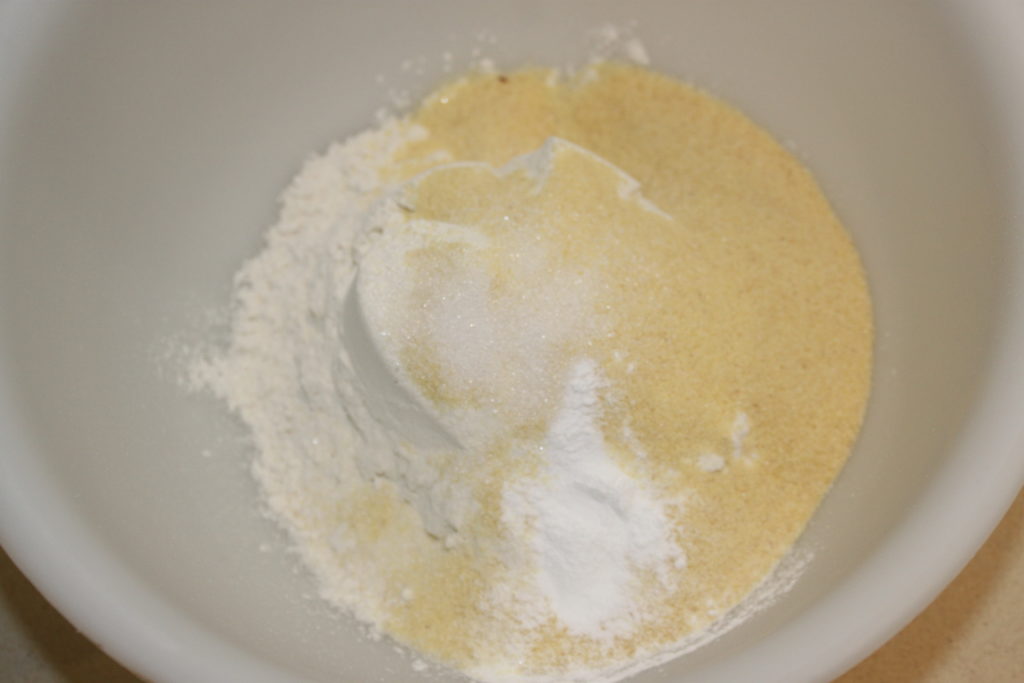
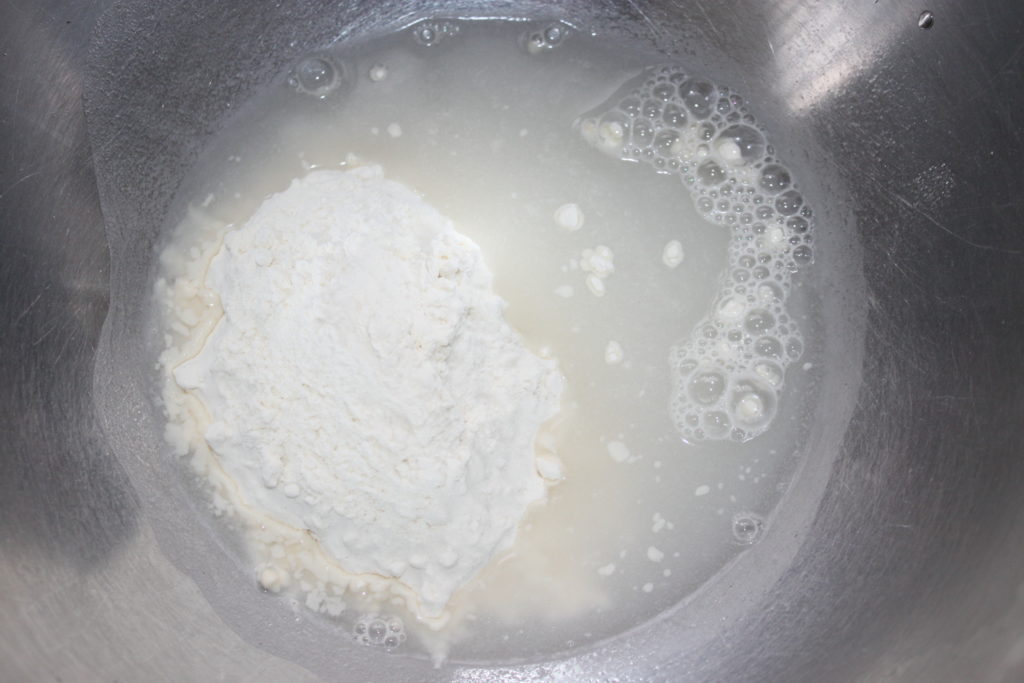
For the dough: put the flour, fine semolina, sugar and baking powder in a container.
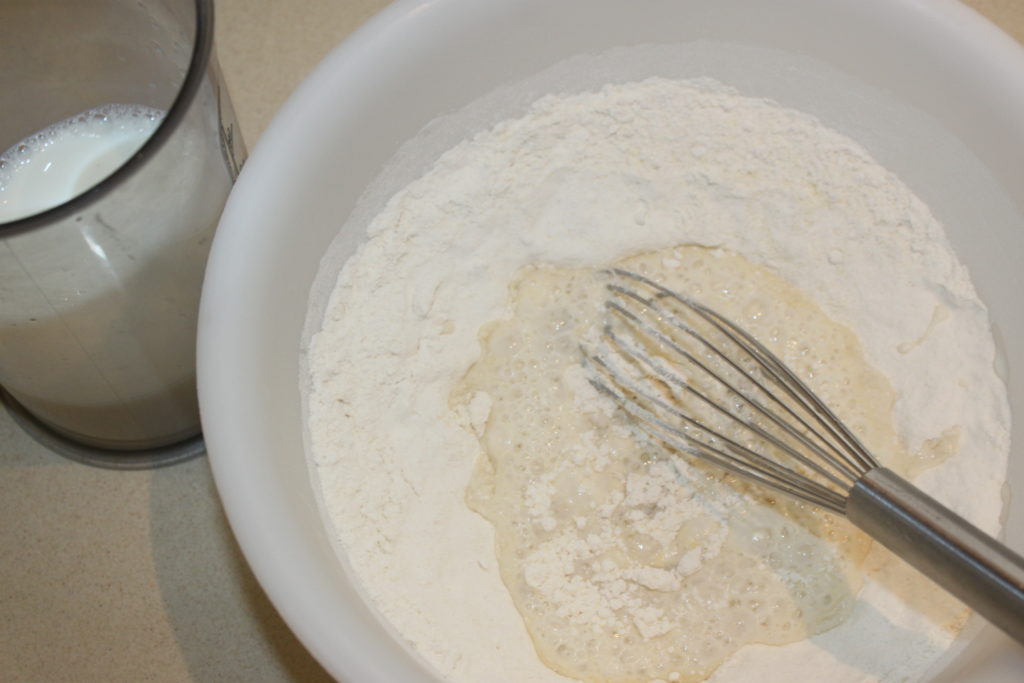
Pour the dried yeast into the milk and mix well. Then pour the milk into the container while mixing to avoid lumps.
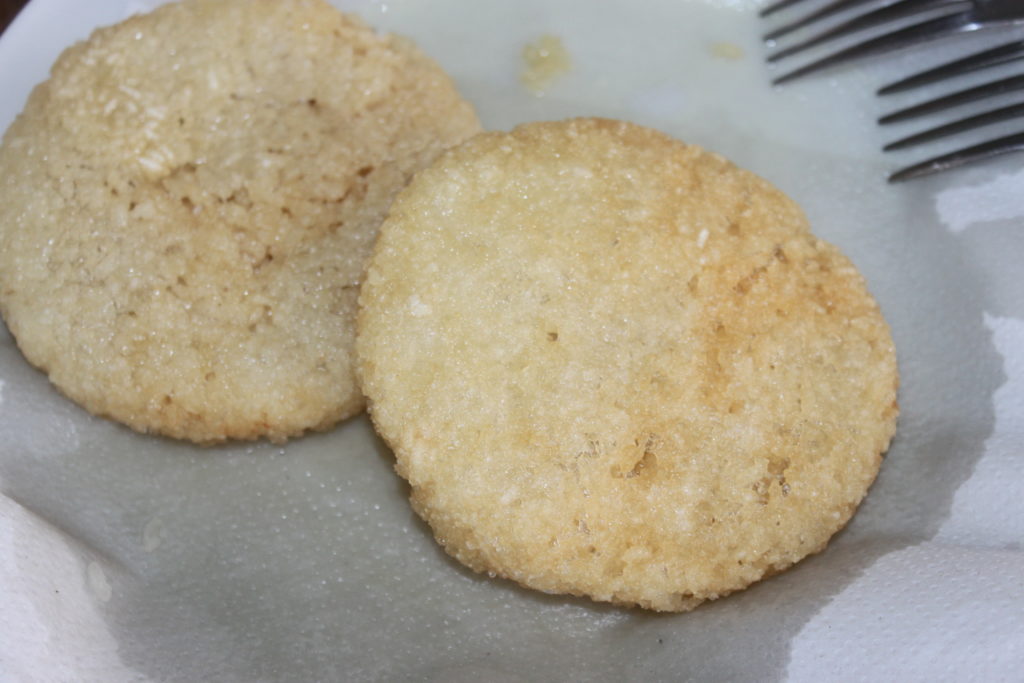
When the dough is ready, let it rest for 15 minutes. Then make the pancakes. I took here a machine with small pancakes which one offered to me for my birthday! But otherwise, in the pan, it will be very good too. The diameter of the pancakes is about 8cm.
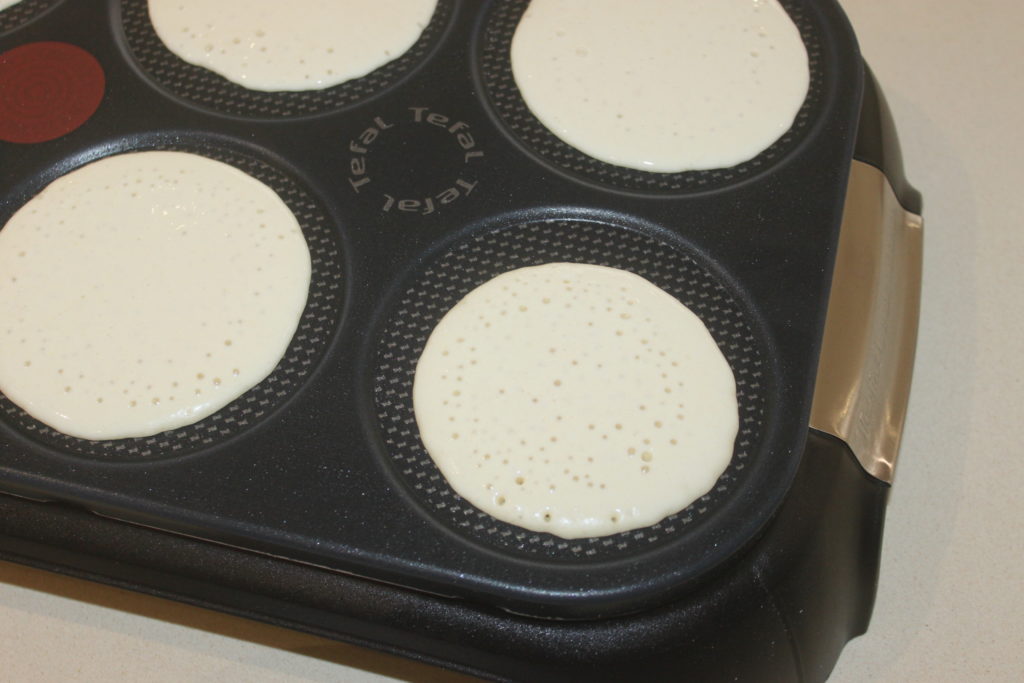
The dough will make lots of holes like a thousand hole pancakes.
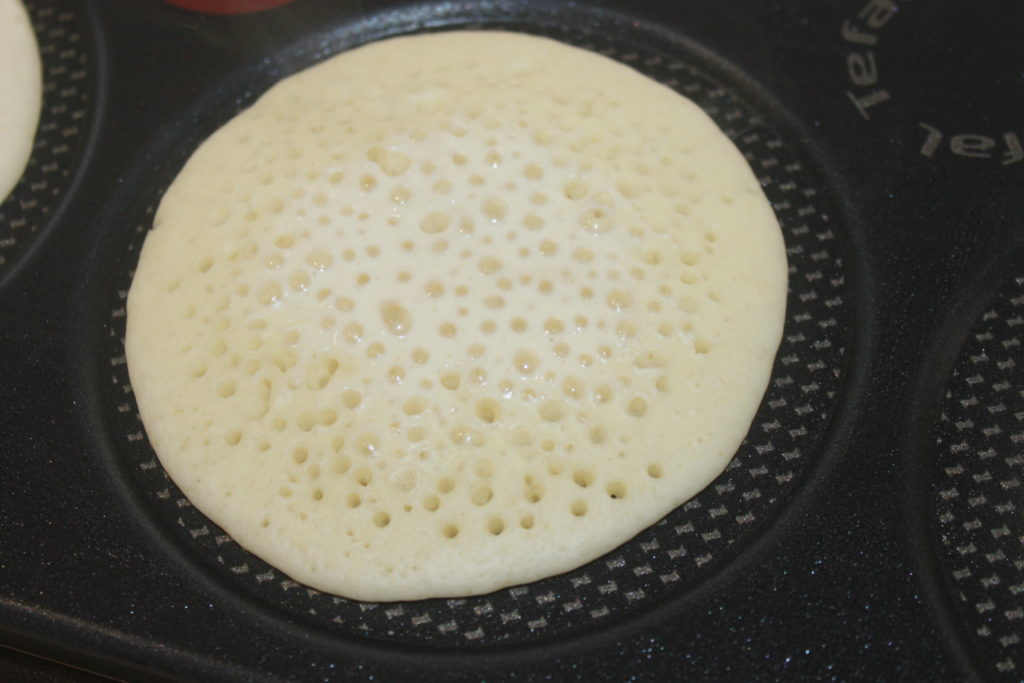
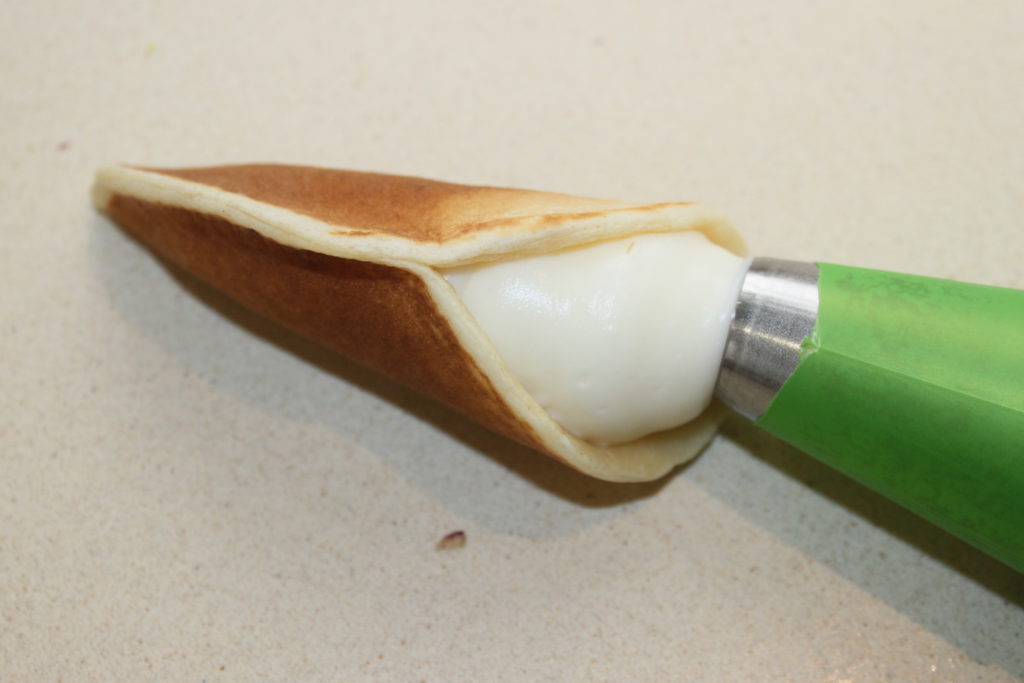
Cook only one side. They will be perfect. When they are cooked, fold a crepe in half and pinch on half to close them. I do this when they are still warm.
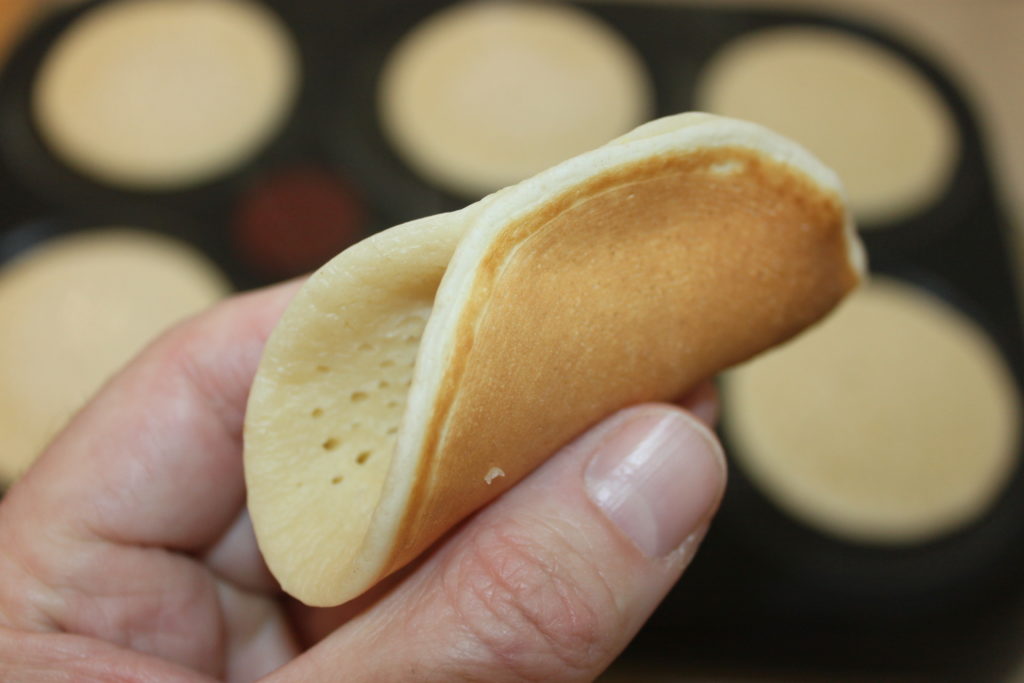
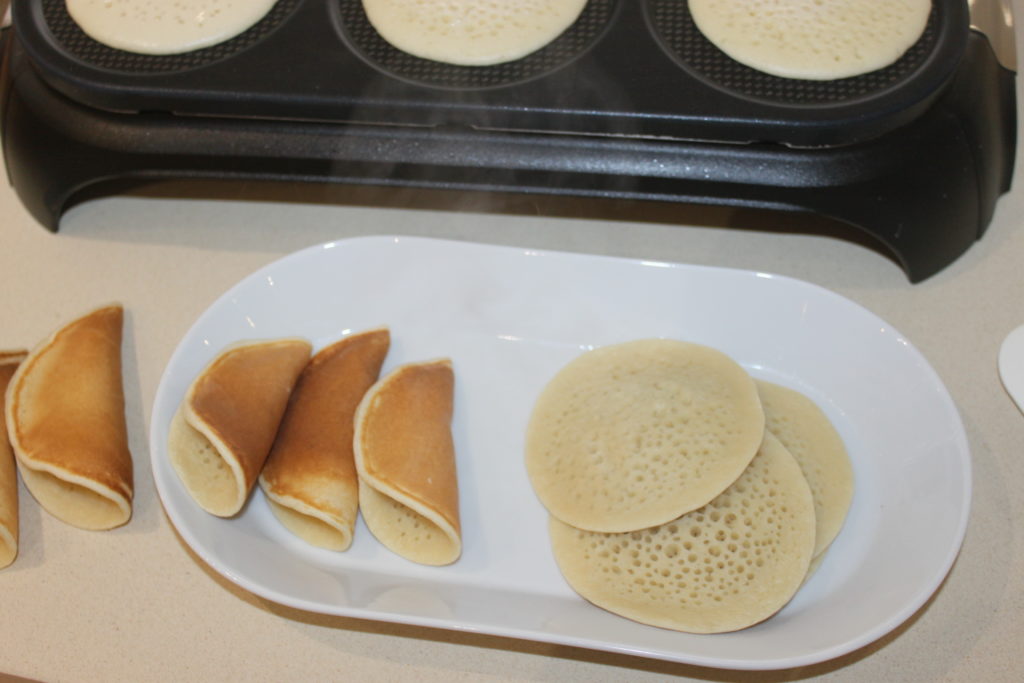
And here are the little cones ready to be garnished.

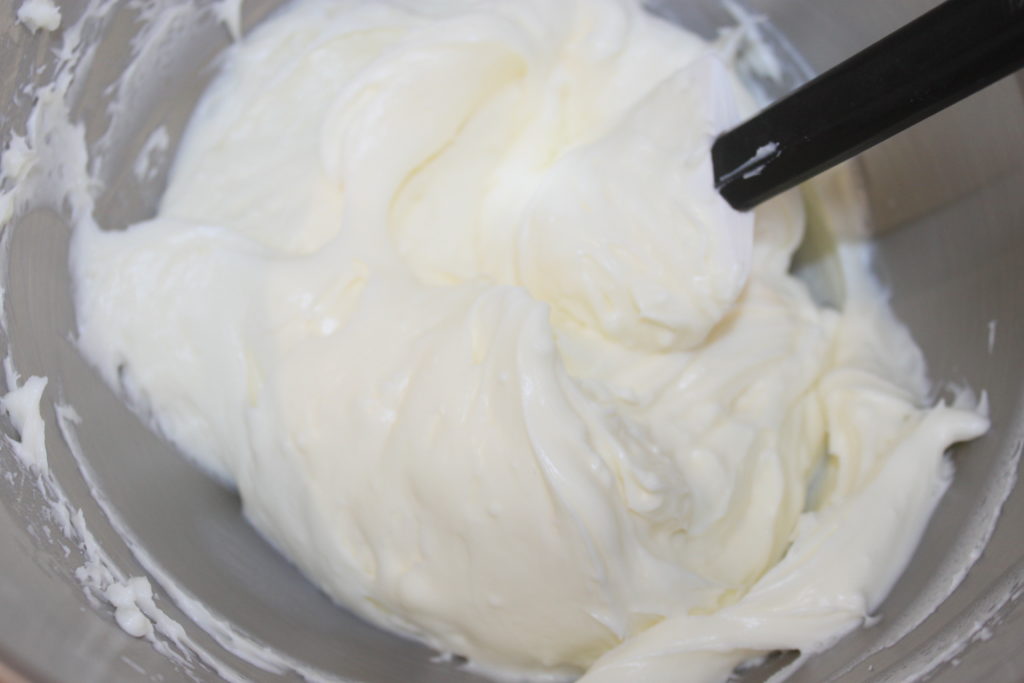
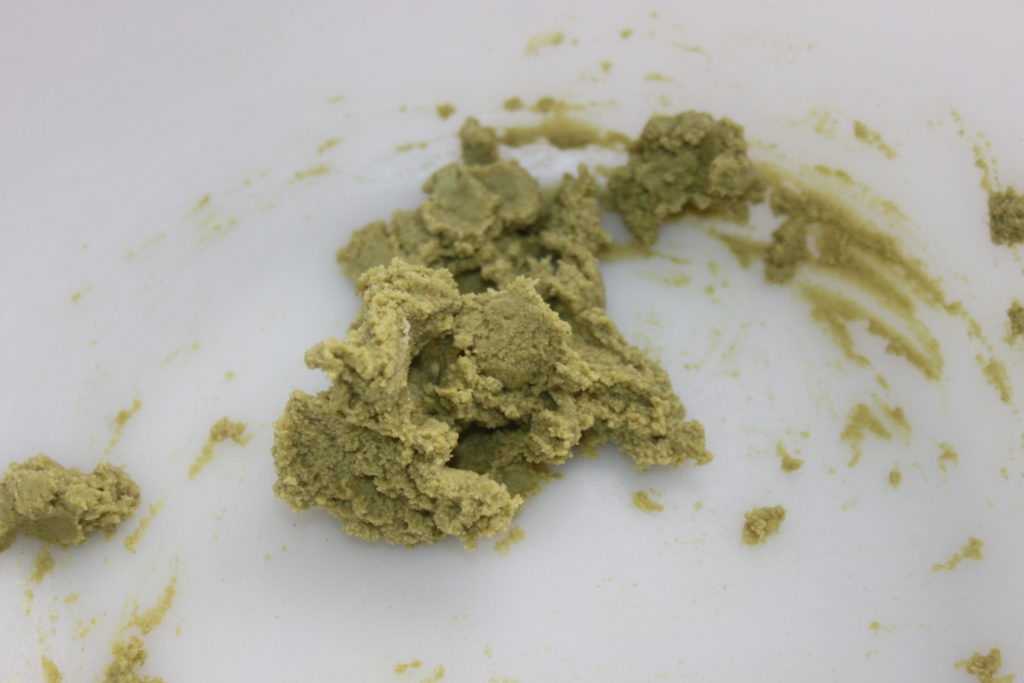
Pour the cooled cream into the bowl of a food processor fitted with the whisk attachment.
Whisk at high speed for one minute. The cream this time is smooth but still with a good texture.
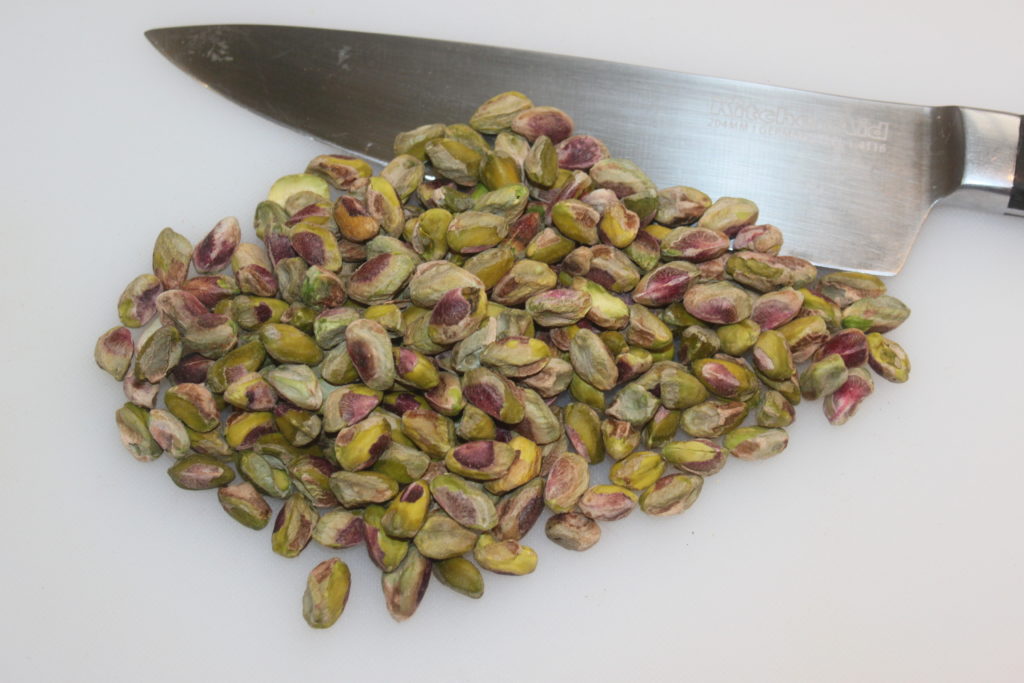
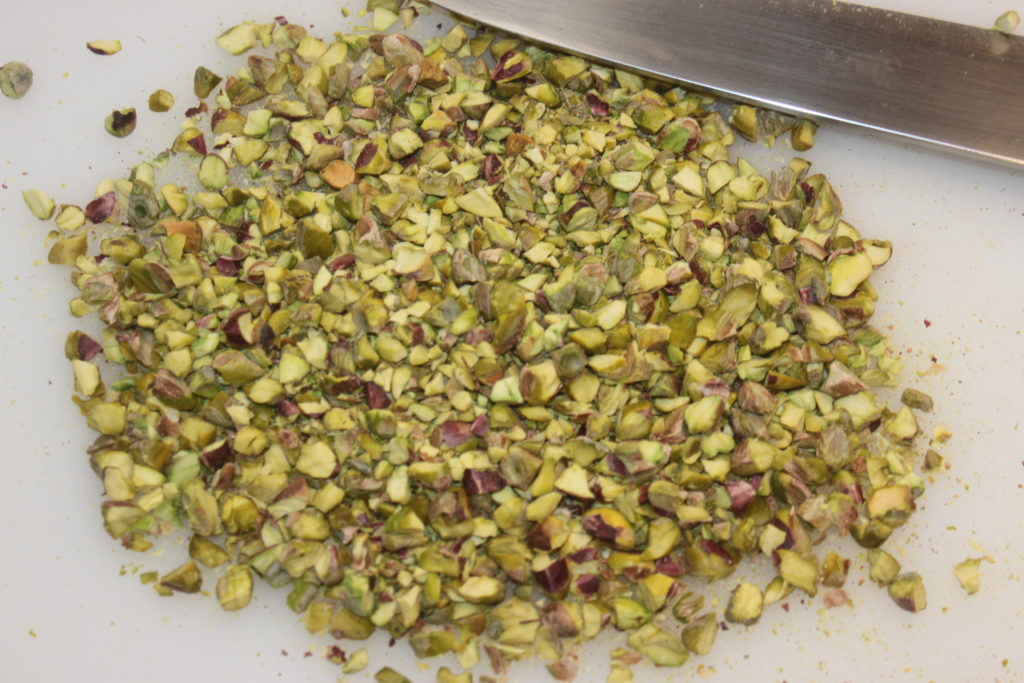
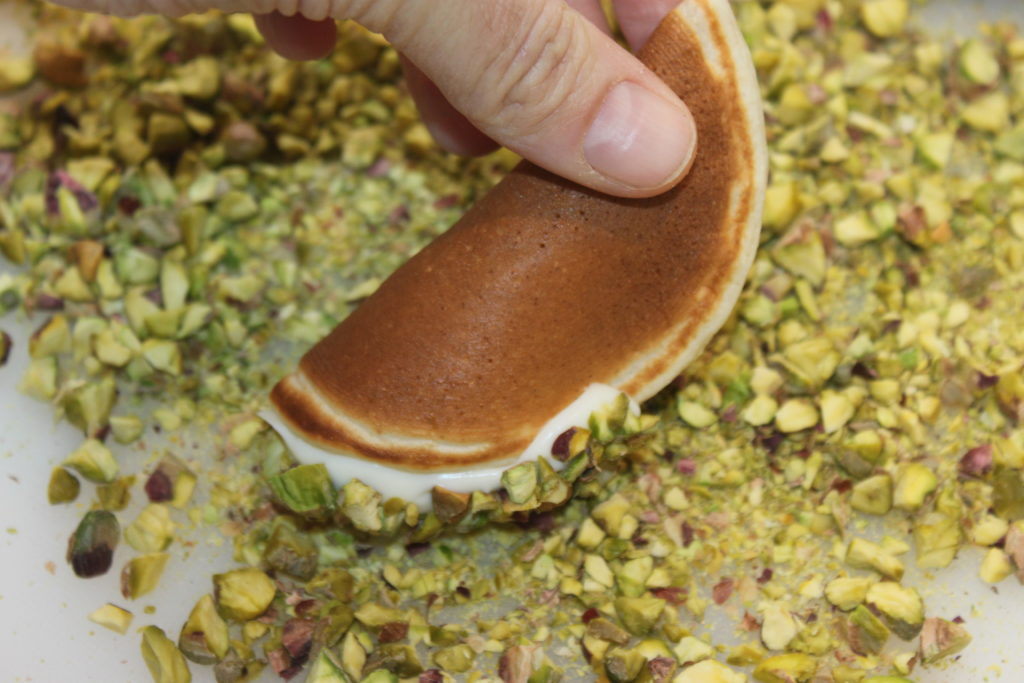
Chop the pistachios with a knife.
We are ready to fill everything!
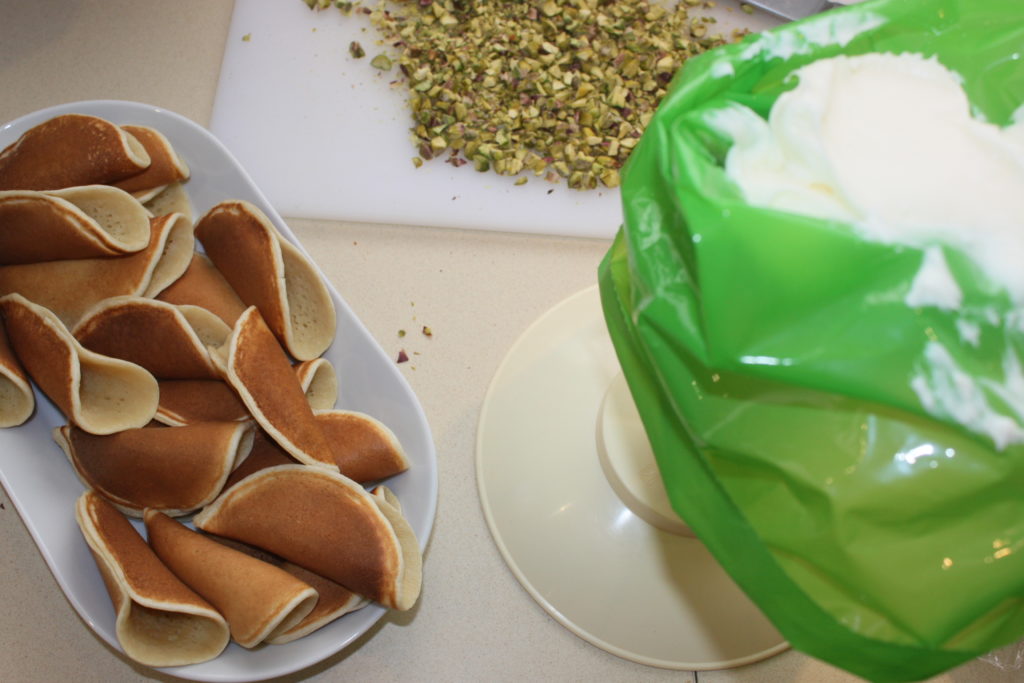
Fill the pancakes with the cream.
Then pass them in the crushed pistachios.
Put in a pretty dish then sprinkle with syrup and leave it available.
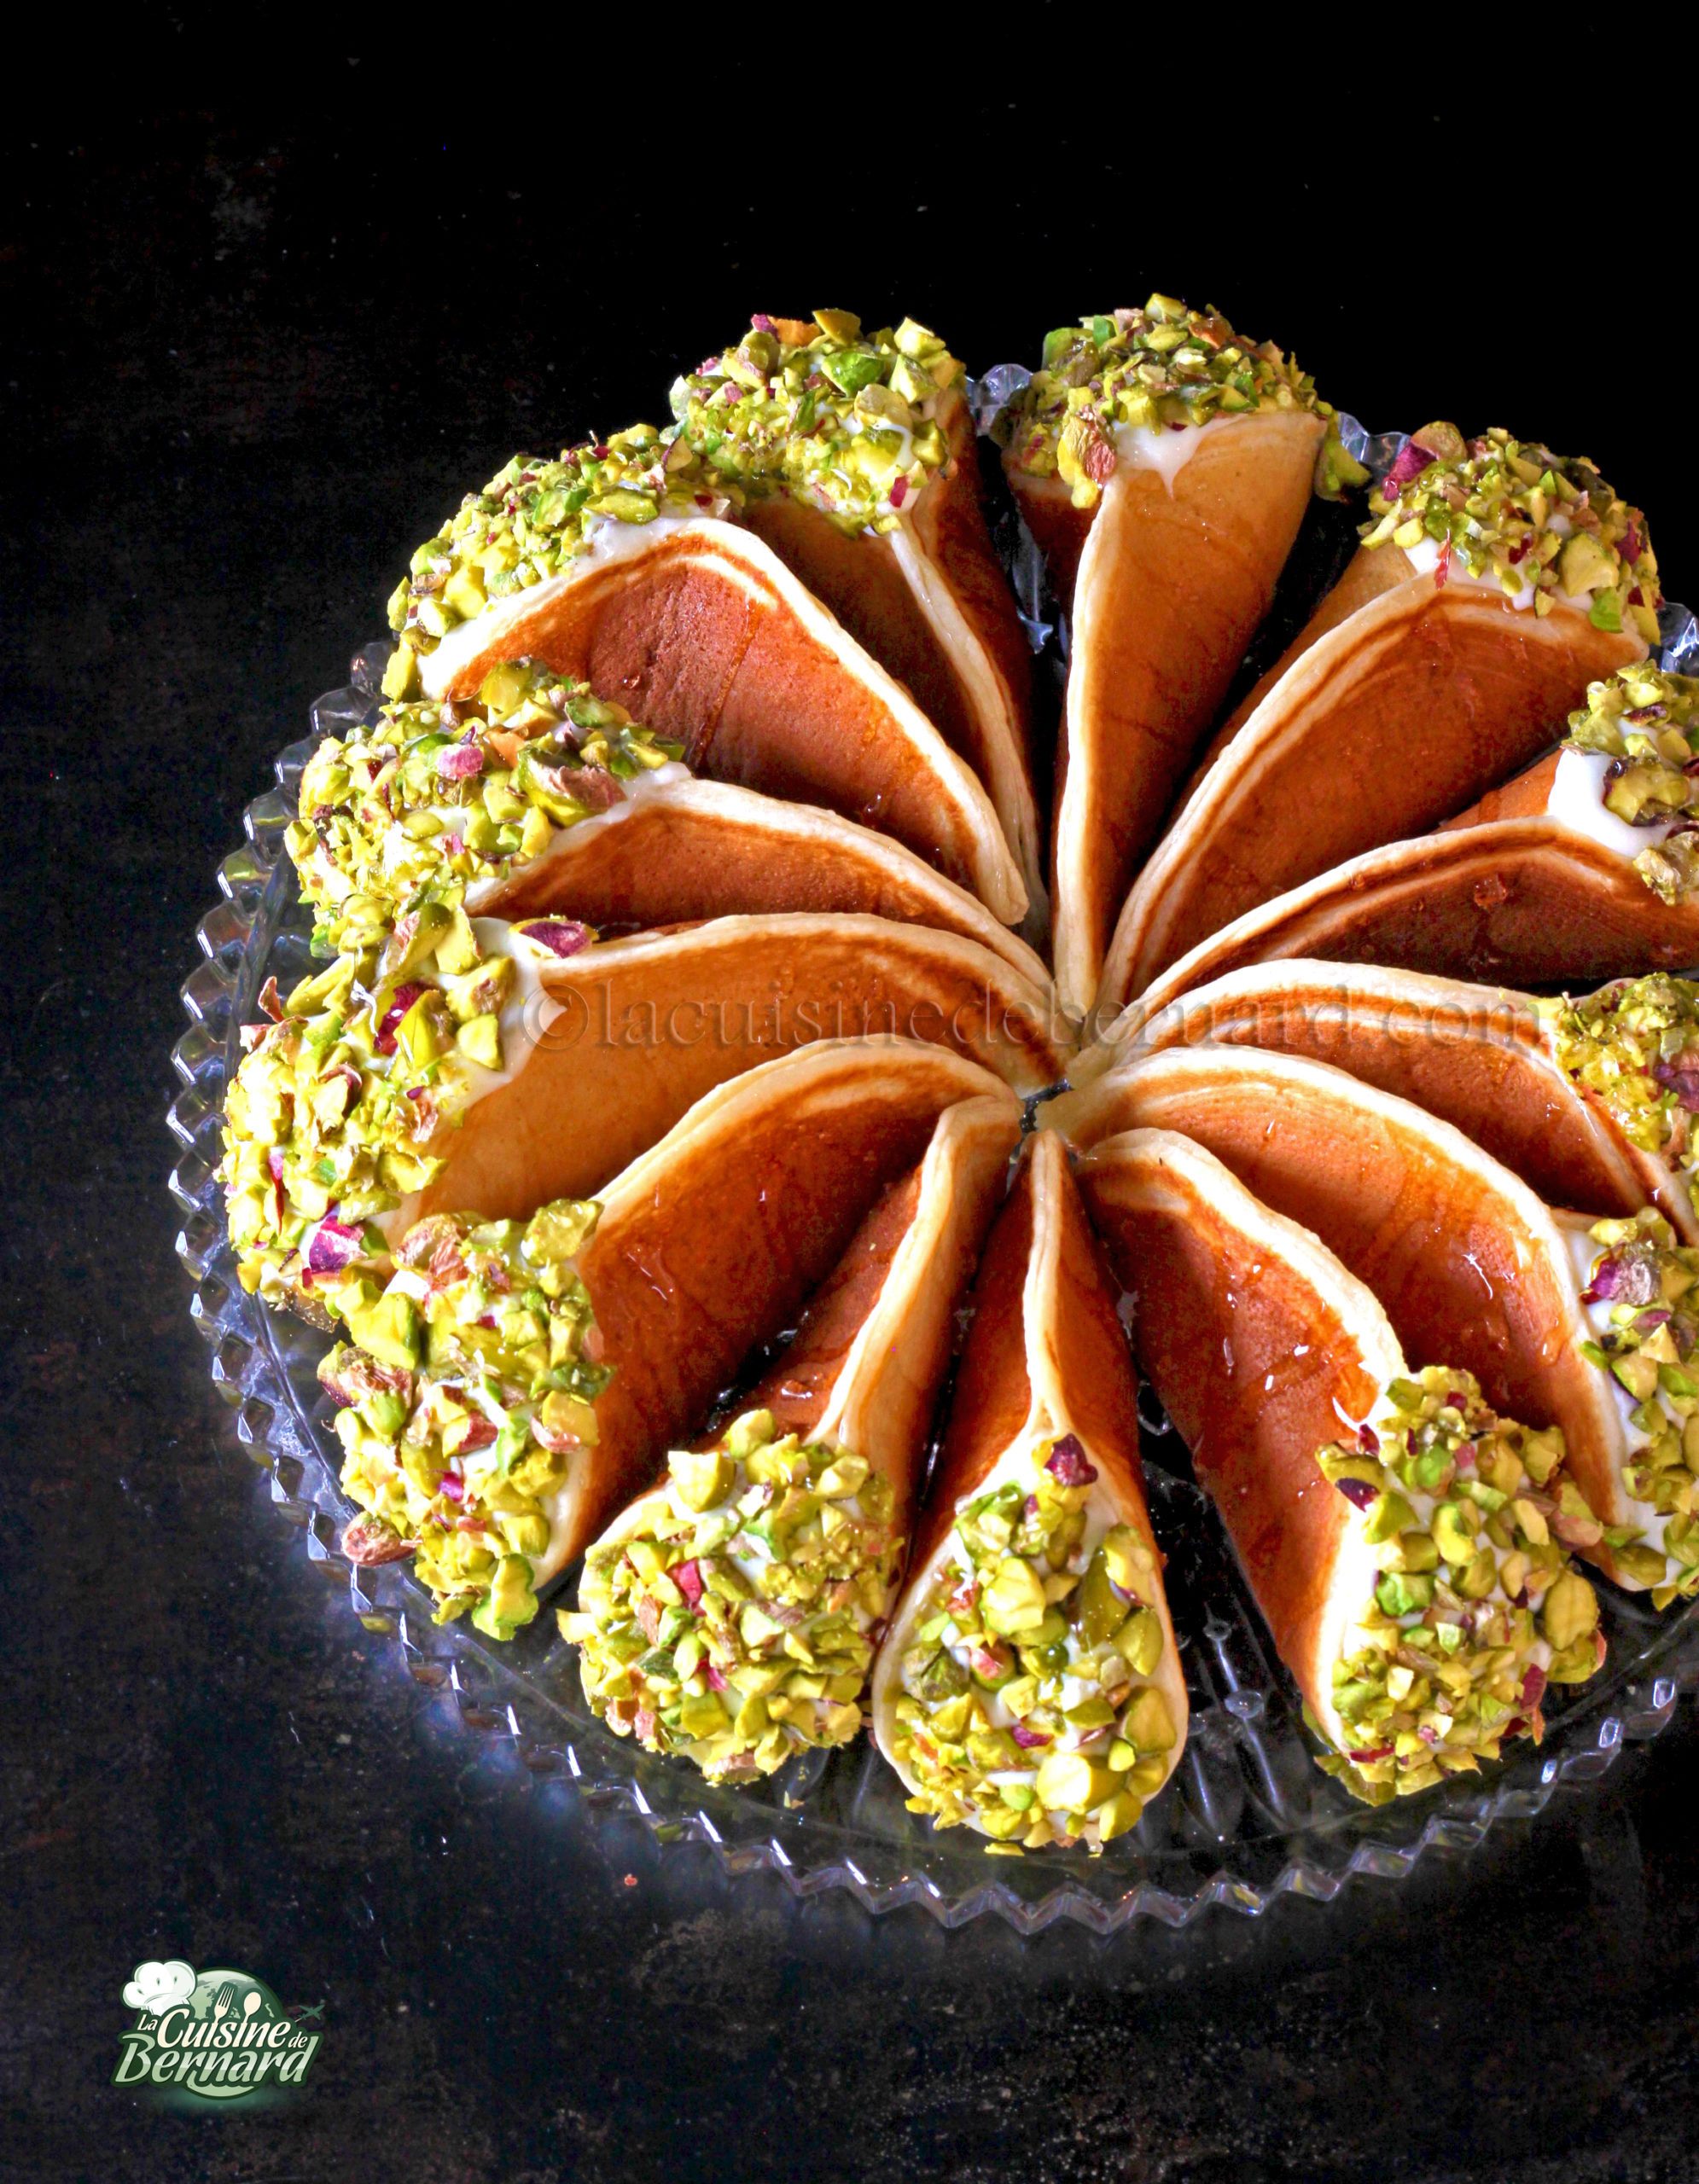

Atayef Assafiri


I have just returned from Rome where I spent a few days of vacation again, that I already offer you a really simple recipe! The translation being “cheese and pepper”. The sauce is made with the cheese and the pasta cooking water. You just have to be careful not to recook the sauce, which in this case would cause the pecorino to curdle. In about ten minutes, everything is ready and absolutely delicious!
Recipe for 4 people:
- 400g pasta (spaghetti to be traditional, but I used rigatoni here)
- 250g pecorino romano
- black pepper, salt
- olive oil
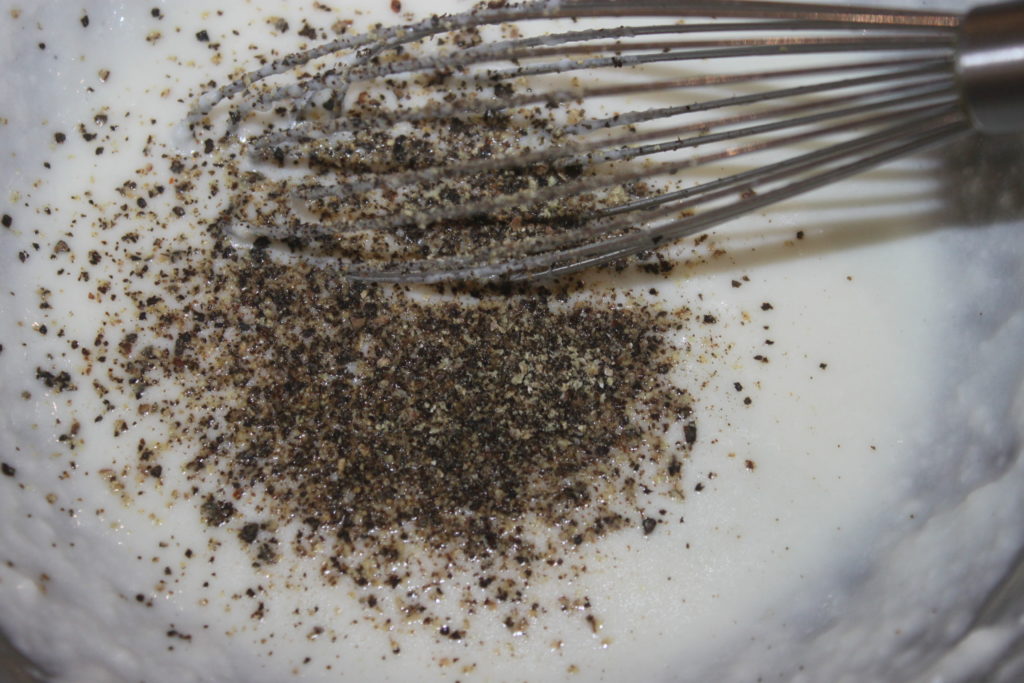
Put the pepper in a small mortar (or even on a cutting board) and crush it. On the board, take a large knife to crush with the dish of it.
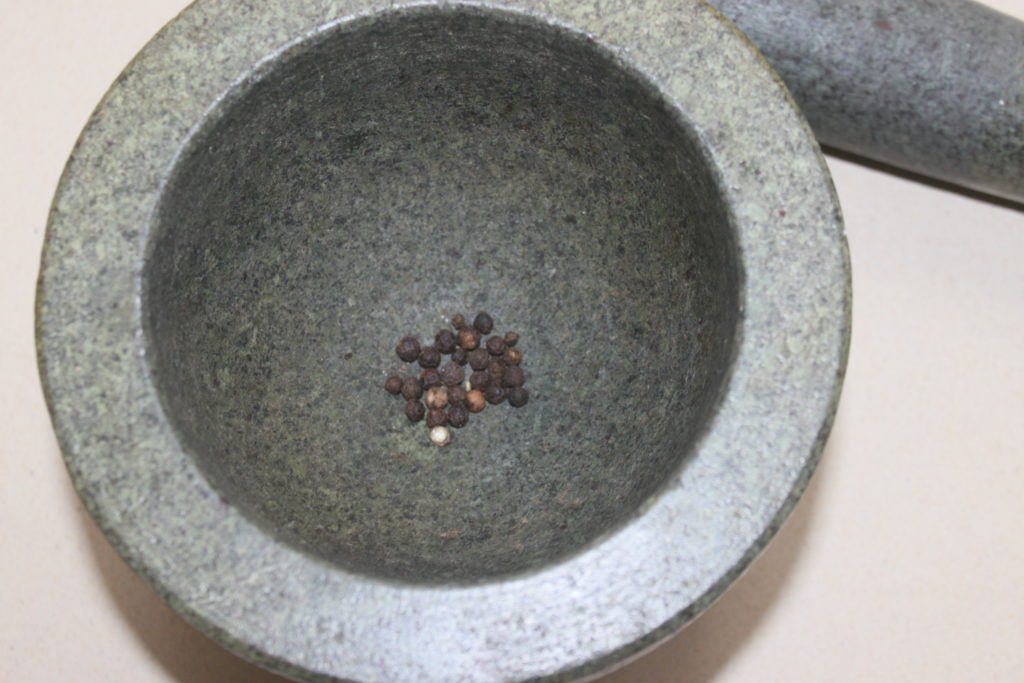
Put about fifteen peppercorns to grill for a minute over moderate heat, stirring. Set aside.

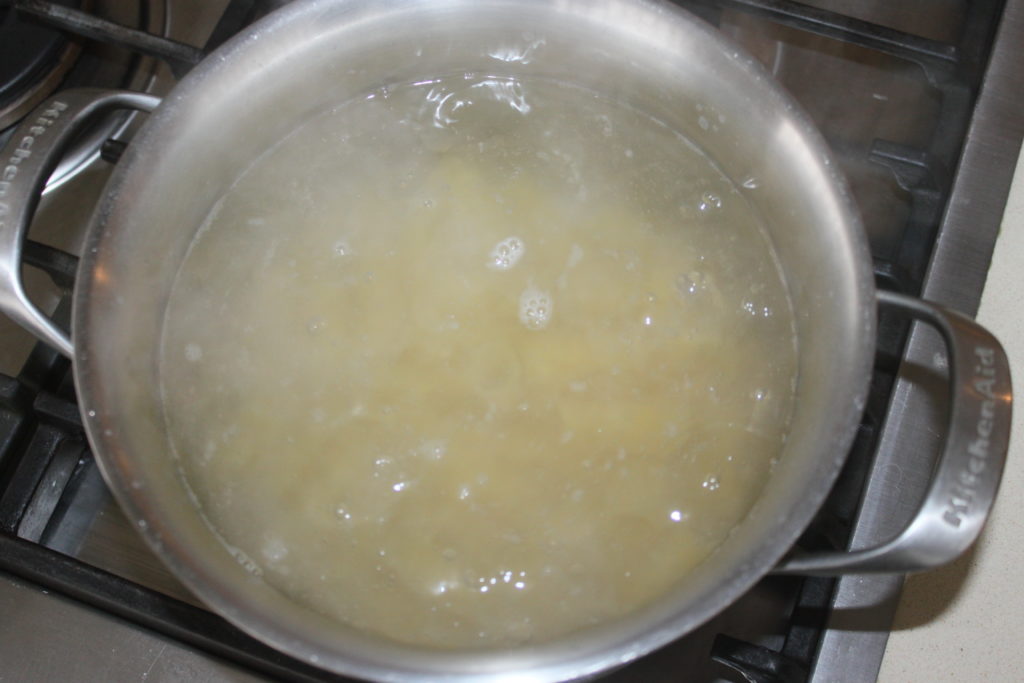
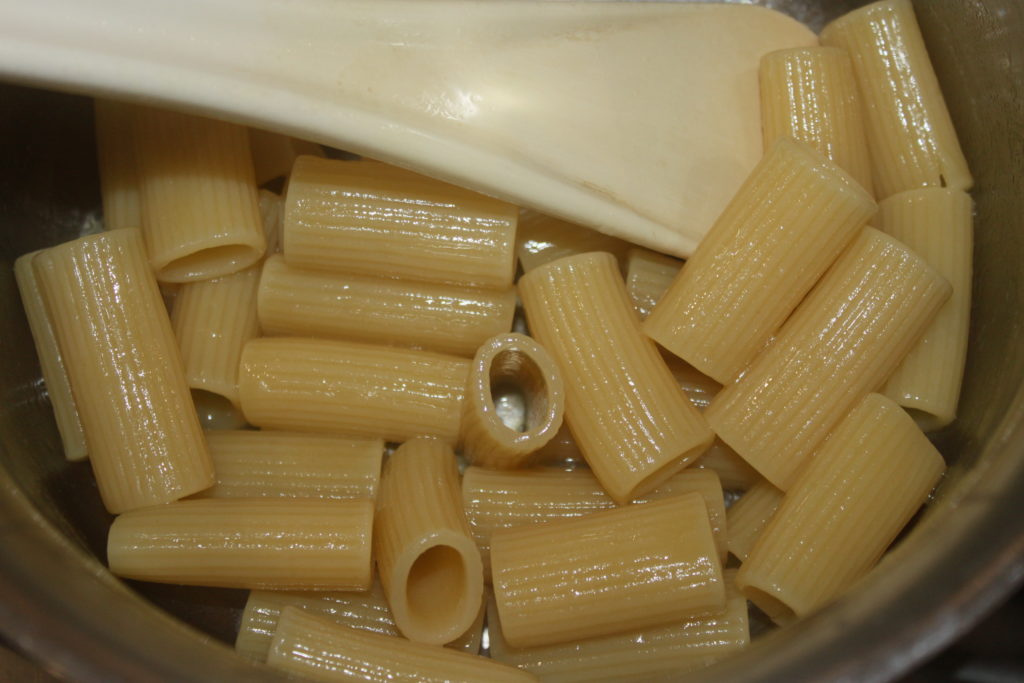
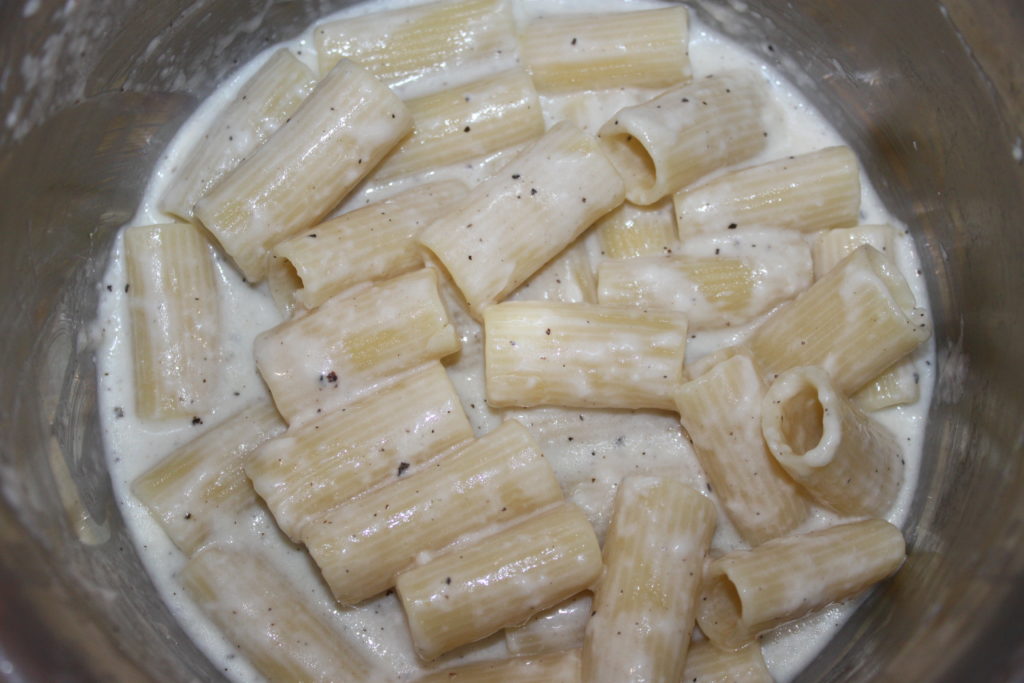
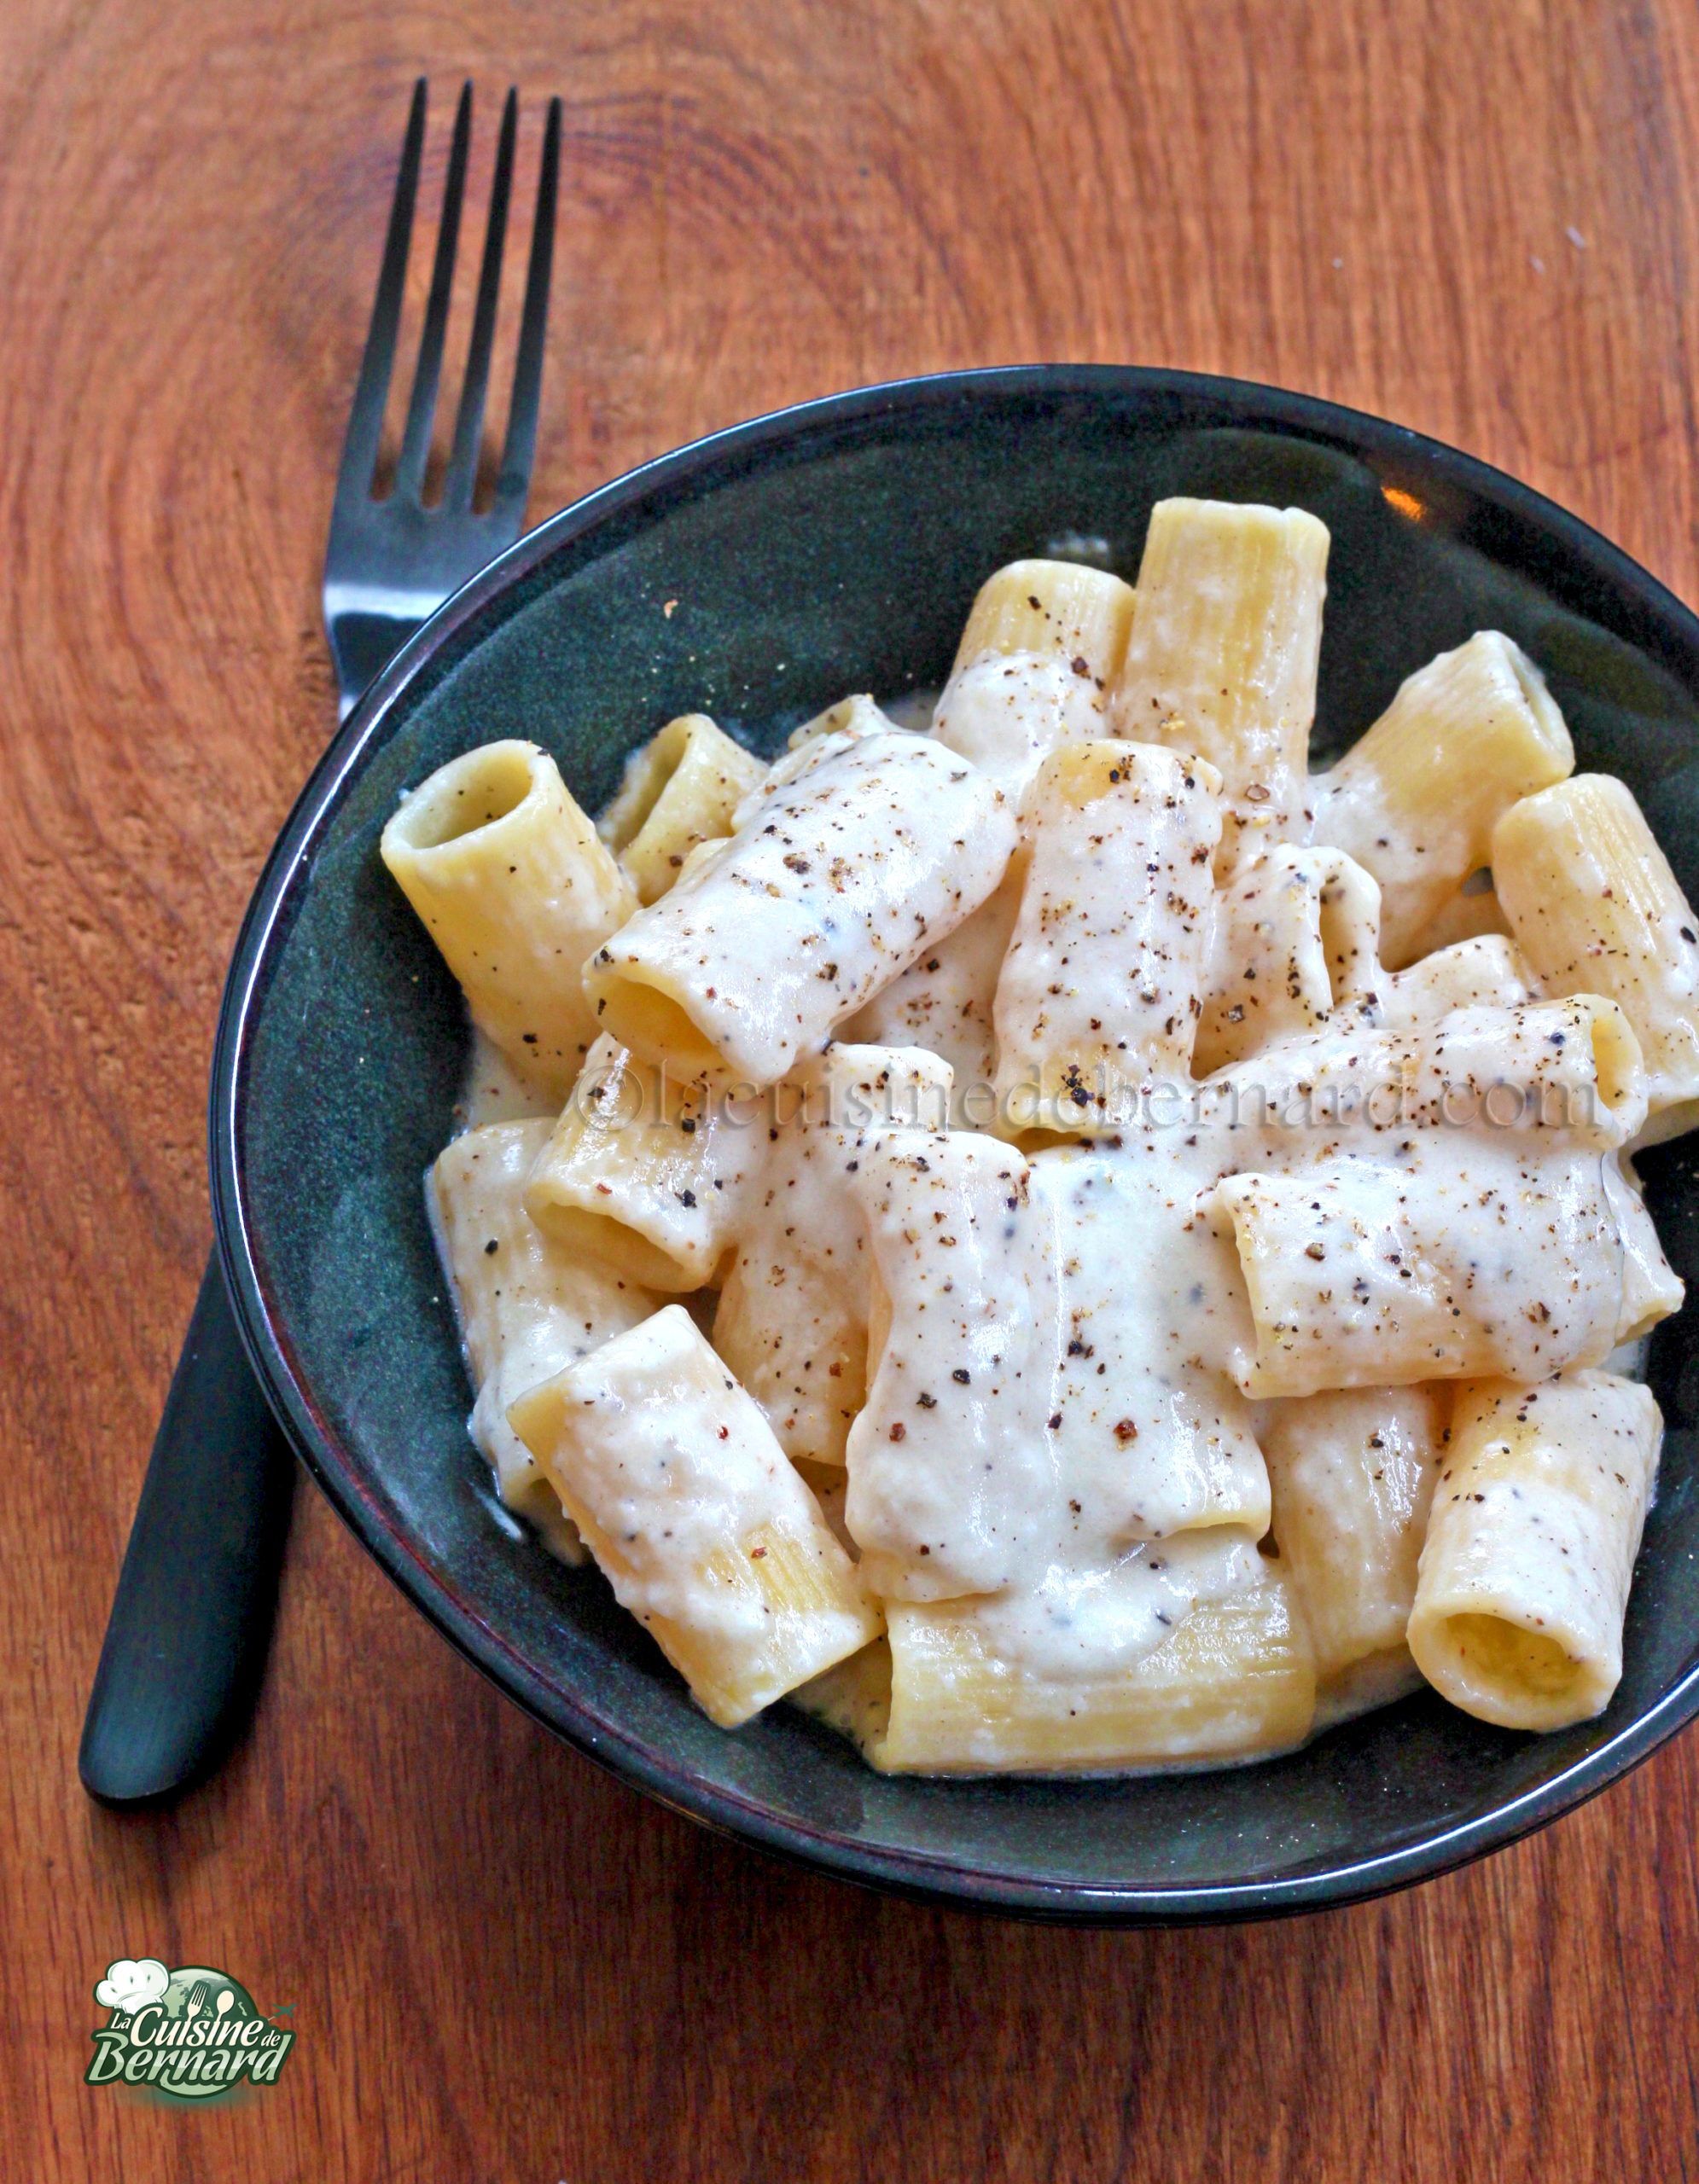
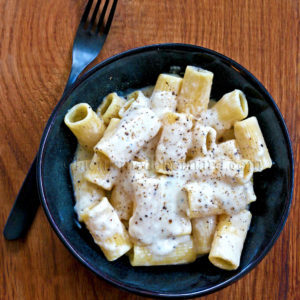
Put a pot of water to boil. Then cook the pasta for 1 minute less than the al dente recommendation. I don’t salt the pasta water at all because the pecorino is already quite salty.
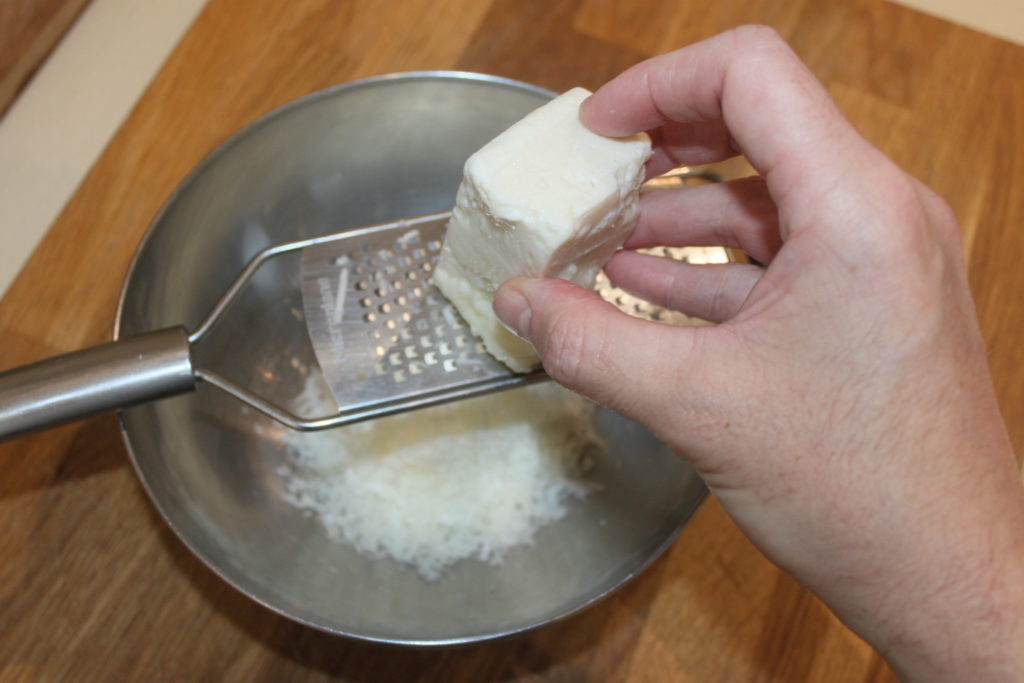
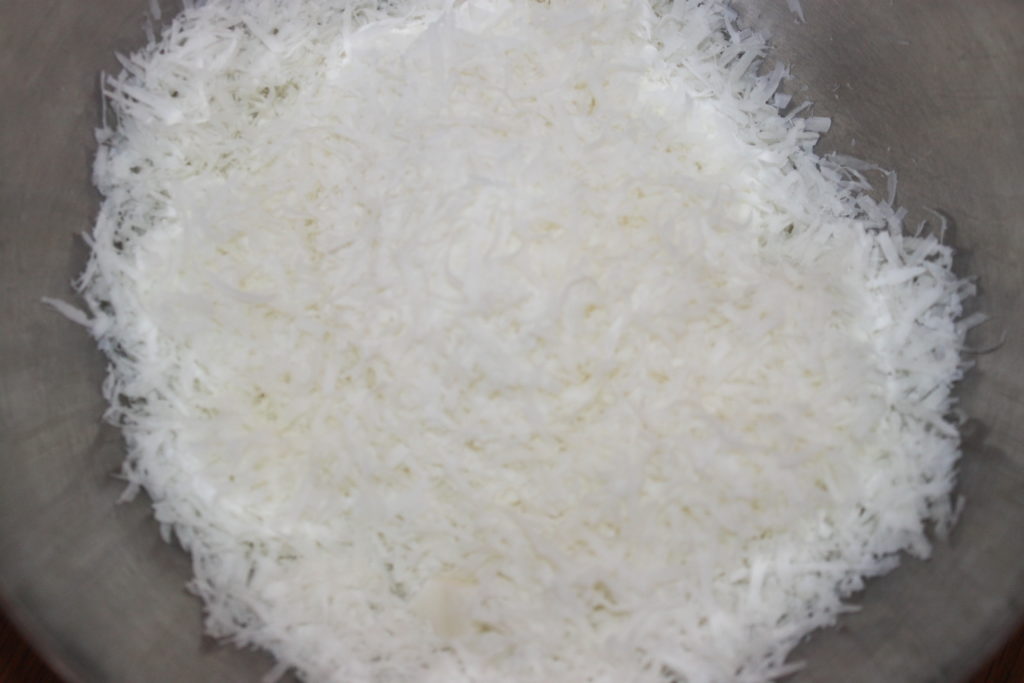
While the pasta cooks, finely grate the pecorino.
Pour a little cooking water into the cheese.
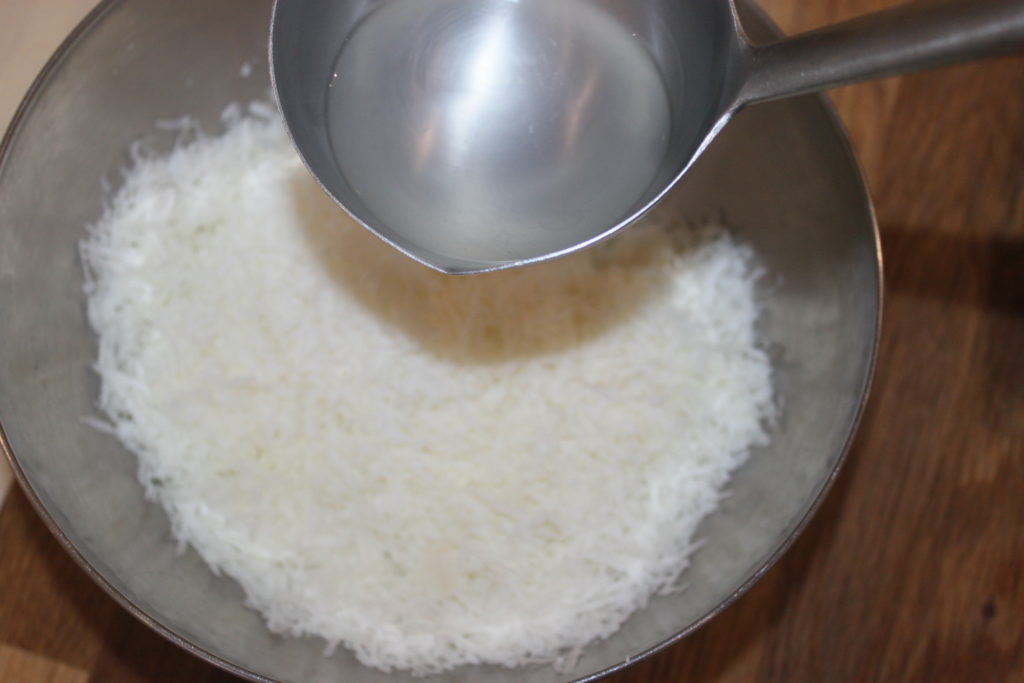
With a small whisk, mix without delay and add just enough water to create something creamy. Be careful not to add too much water, otherwise the sauce will no longer be creamy. Go in small amounts.
Add the lightly roasted black pepper.
Keep some pasta cooking water aside. Drain the pasta then put it back in the pan over moderate heat with two to three tablespoons of cooking water and a tablespoon of olive oil. Cook until the liquid is completely absorbed.
Cut the fire! Then pour the pecorino cream. Above all, do not put the fire back on, otherwise the cheese will coagulate. This is why the pasta is reheated with a little water beforehand, so that everything is hot.
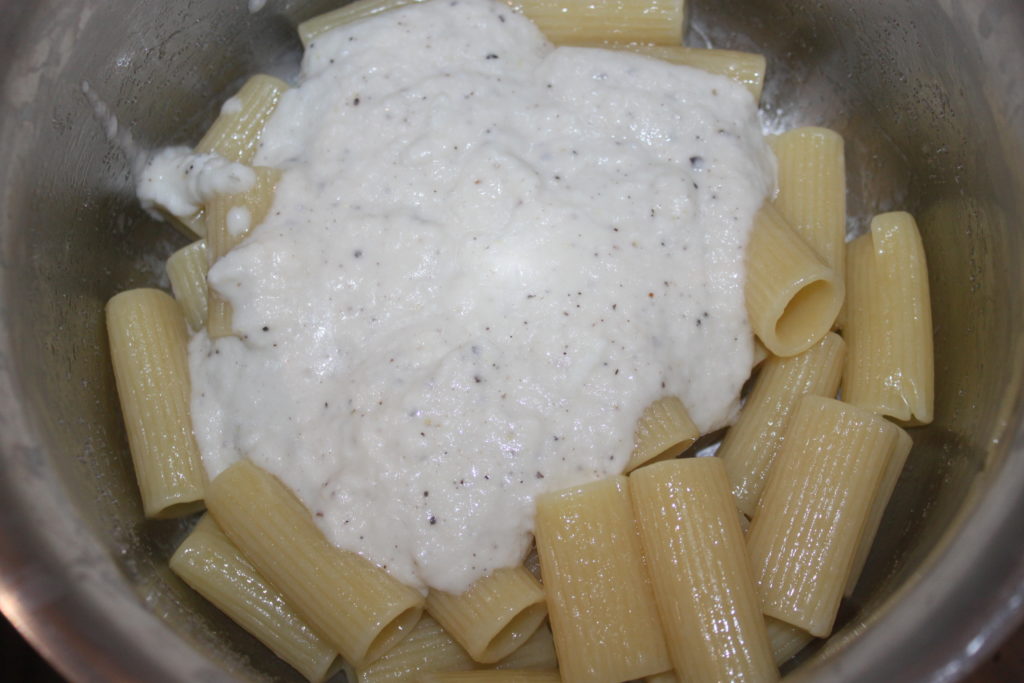
Mix well.
Serve with a little more black pepper.
Cacio e pepe
Ingredients
- 400 g pasta (spaghetti to be traditional, but I used rigatoni here)
- 250 g pecorino romano
- black pepper
- salt
- olive oil
Instructions
- Put the pepper in a small mortar (or even on a cutting board) and crush it. On the board, take a large knife to crush with the flat of it.
- Put about 15 peppercorns to toast for a short minute over moderate heat while stirring. Set aside.
- Put a pot of water to boil. Then put the pasta to cook 1 minute less than the al dente recommendation. I don't salt the pasta water at all because the pecorino is already salty enough.
- While the pasta is cooking, finely grate the pecorino.
- Pour some of the cooking water into the cheese.
- With a small whisk, mix without delay and add just enough water to create something creamy. Be careful not to add too much water or the sauce will not be creamy. Use small amounts.
- Add the lightly roasted black pepper.
- Keep some of the pasta cooking water aside. Drain the pasta and return it to the pot over moderate heat with two-three tablespoons of cooking water and one tablespoon of olive oil. Let it cook until all the liquid is absorbed.
- Turn off the heat! Then pour in the pecorino cream. Don't turn on the heat or the cheese will coagulate. That's why we heat the pasta with a little water beforehand, so that everything is hot.
- Mix well.
- Serve with a little more black pepper.
Nutrition


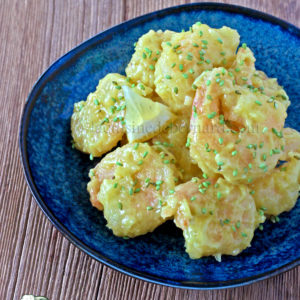
Here is a simple and effective dish, ready in just a few minutes. The longest will be to cook the plain rice to accompany it! I offer you these crunchy prawns in a spicy sweet and sour sauce, with sugar snap peas and a few Thai basil leaves, for an ultra tasty meal. The hardest to find is Thai basil, but know that it grows very well in pots indoors! Convenient to always have on hand, if like me you are a fan!
For 4 people :
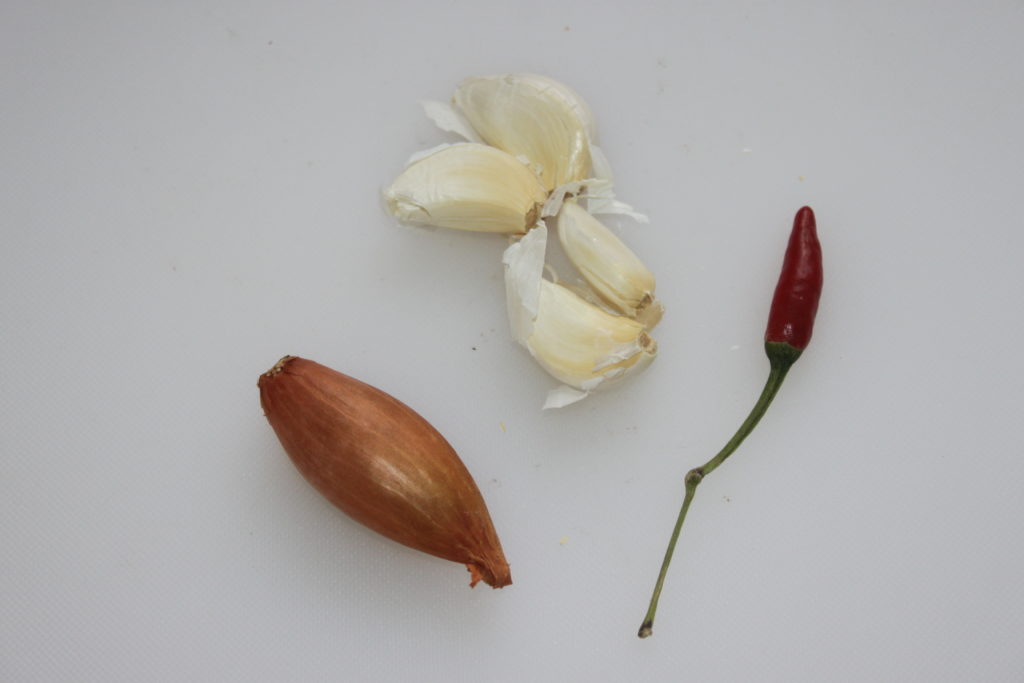
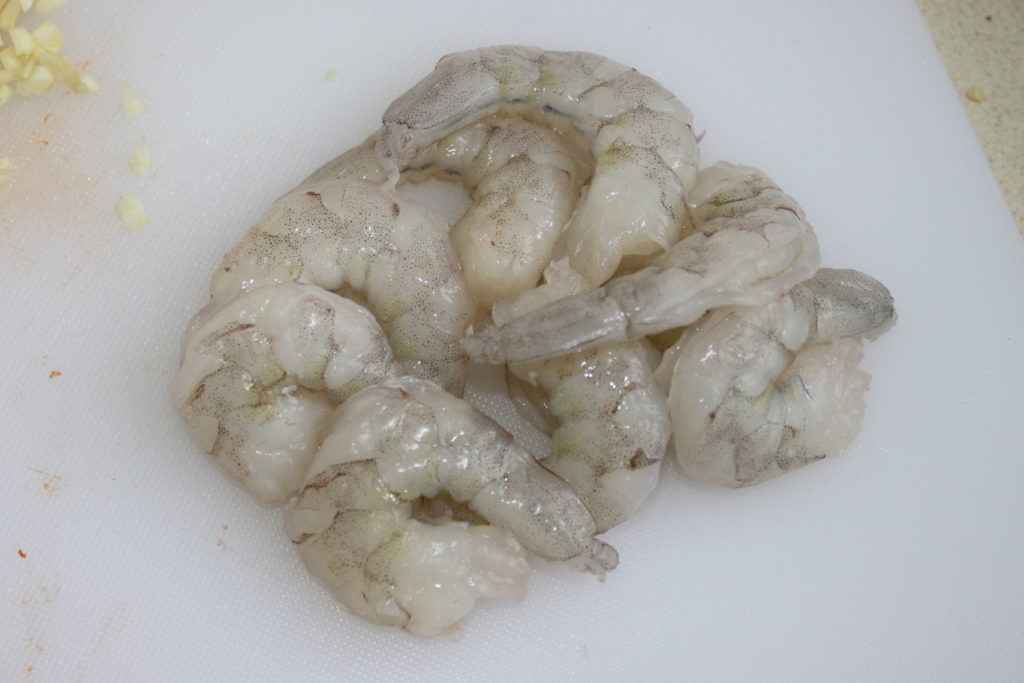
- 30 beautiful raw shrimp, deveined and shelled
- 4 garlic cloves
- 1 small red pepper (optional)
- 1 or 2 shallots
- 250g sugar snap peas
- a few leaves of Thai basil
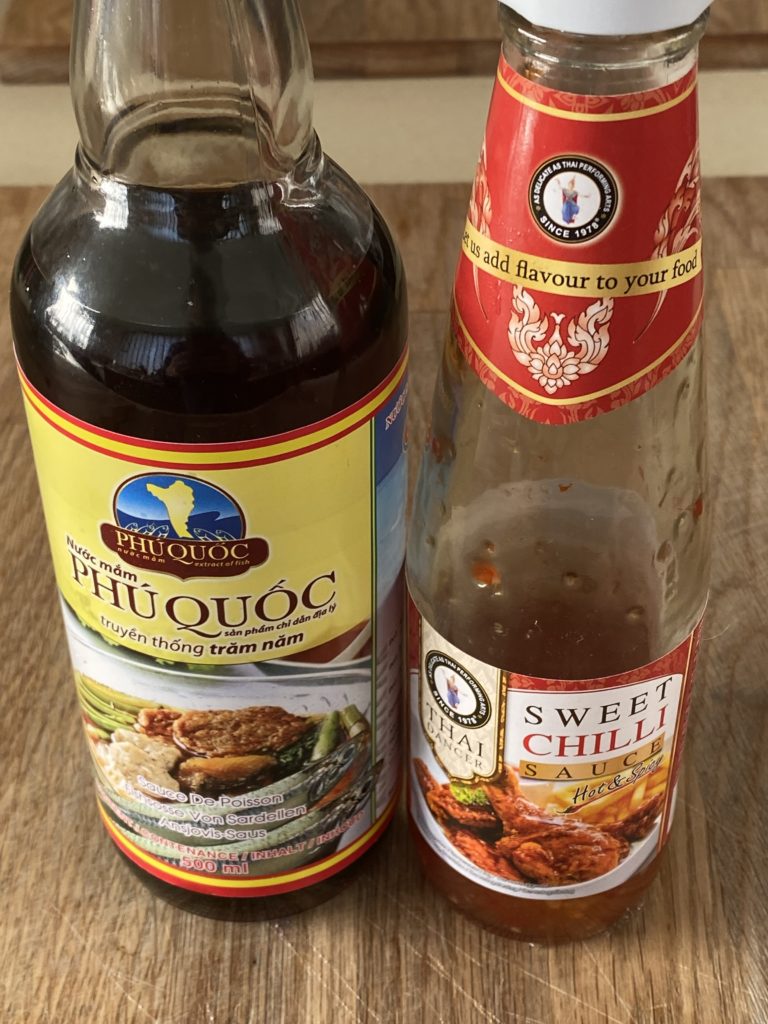
- 2 tablespoons sweet chili sauce
- 1 tablespoon nuoc mam
- 1 small teaspoon of white vinegar
- oil
Here are the sauces used: nuoc mam, the famous Vietnamese fish sauce and sweet chilli sauce. Both are very easy to find everywhere!
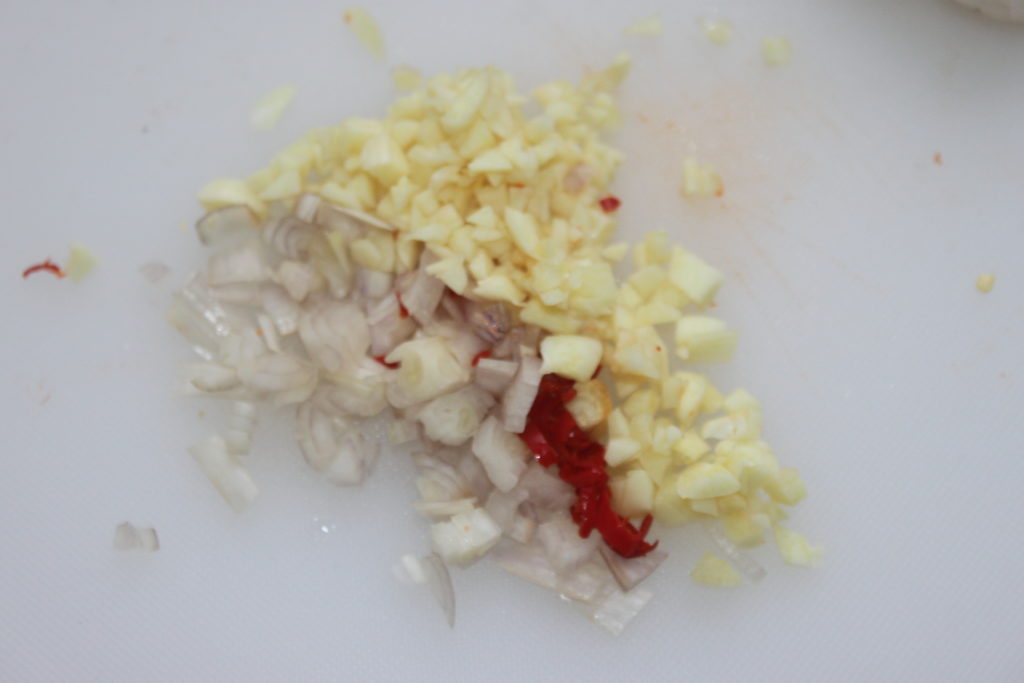
Start by peeling the garlic and the shallot. Deseed the small pepper. Chop everything finely.
The prawns must be deveined and shelled.
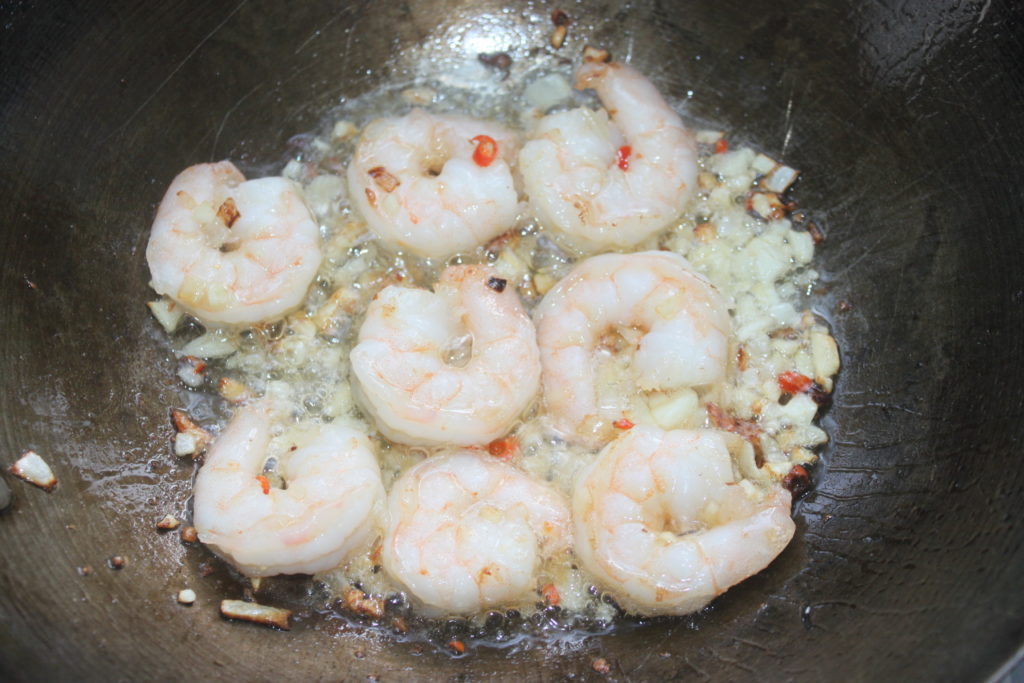
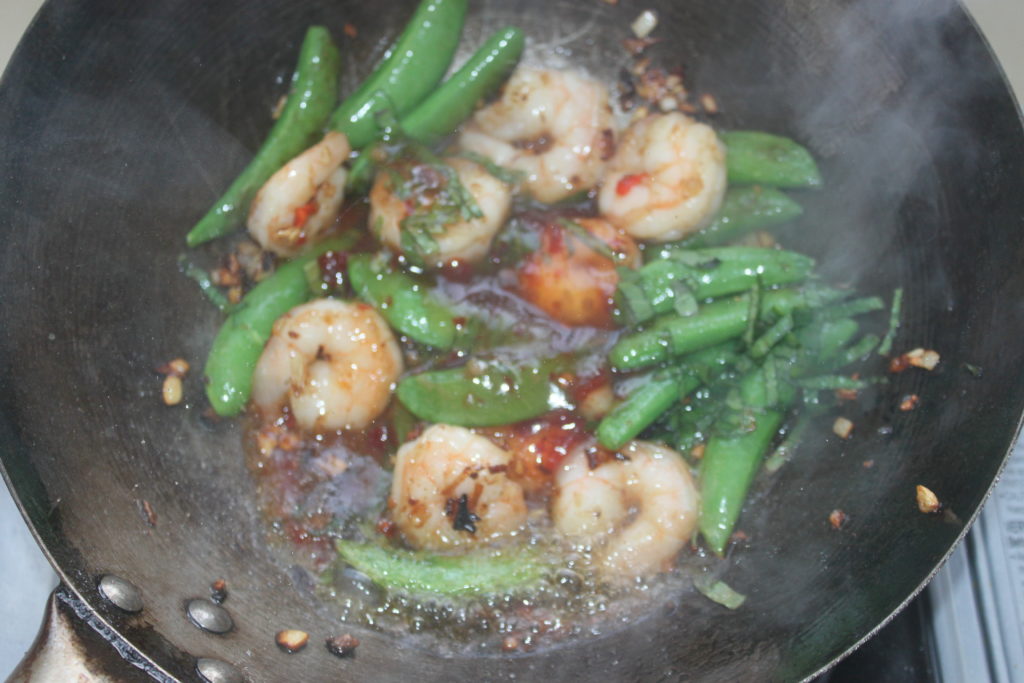
In a wok or sauté pan, put a little oil, the prawns and half the minced garlic/shallot/chili mixture over high heat.
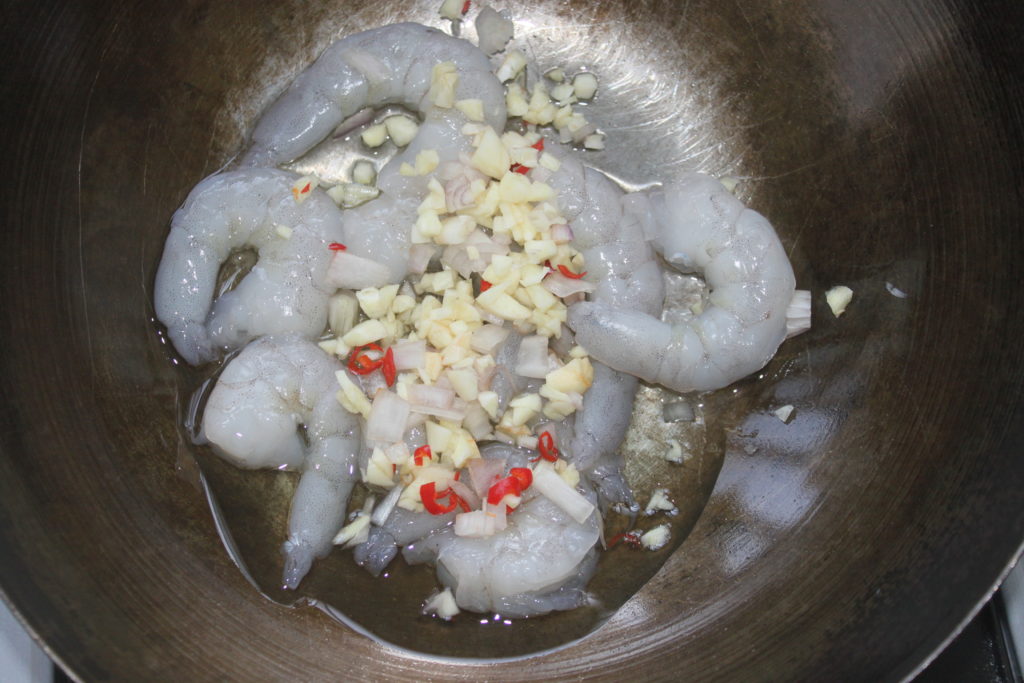
Let everything sauté without burning the garlic/shallot.
Empty everything into a container, then add a little oil with the rest of the chopped mixture and the snap peas.
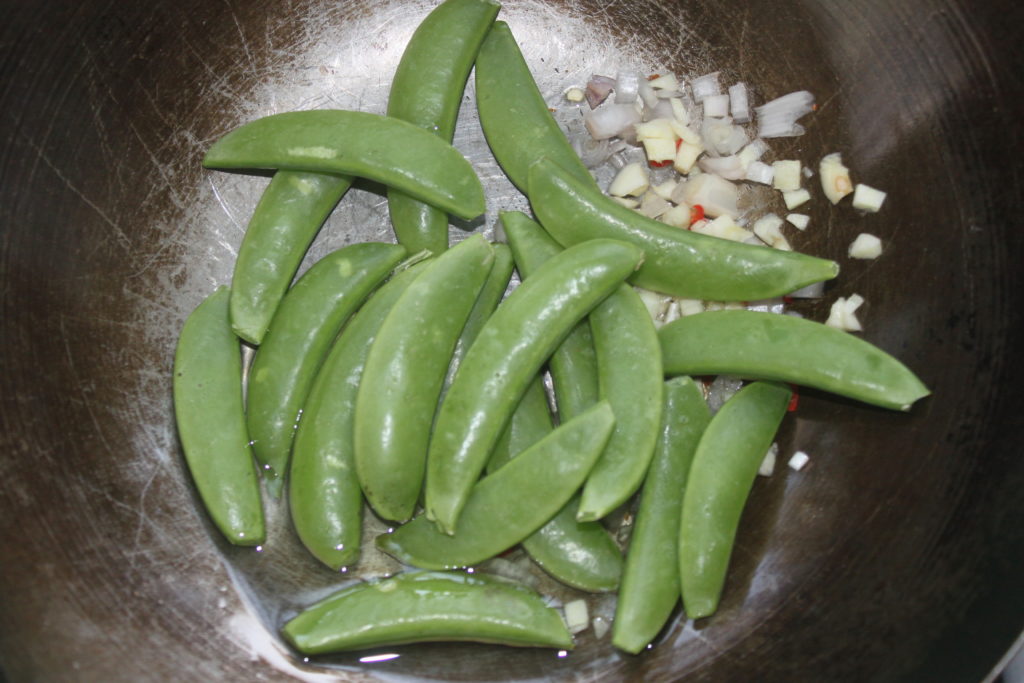
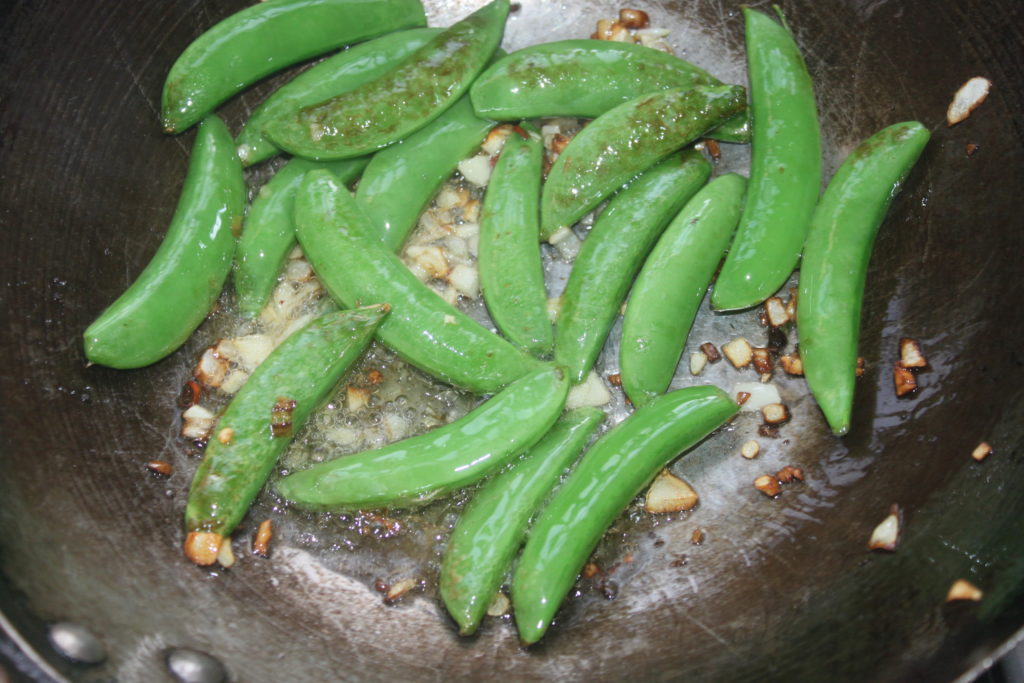
Sauté over high heat for 2 minutes, stirring regularly.
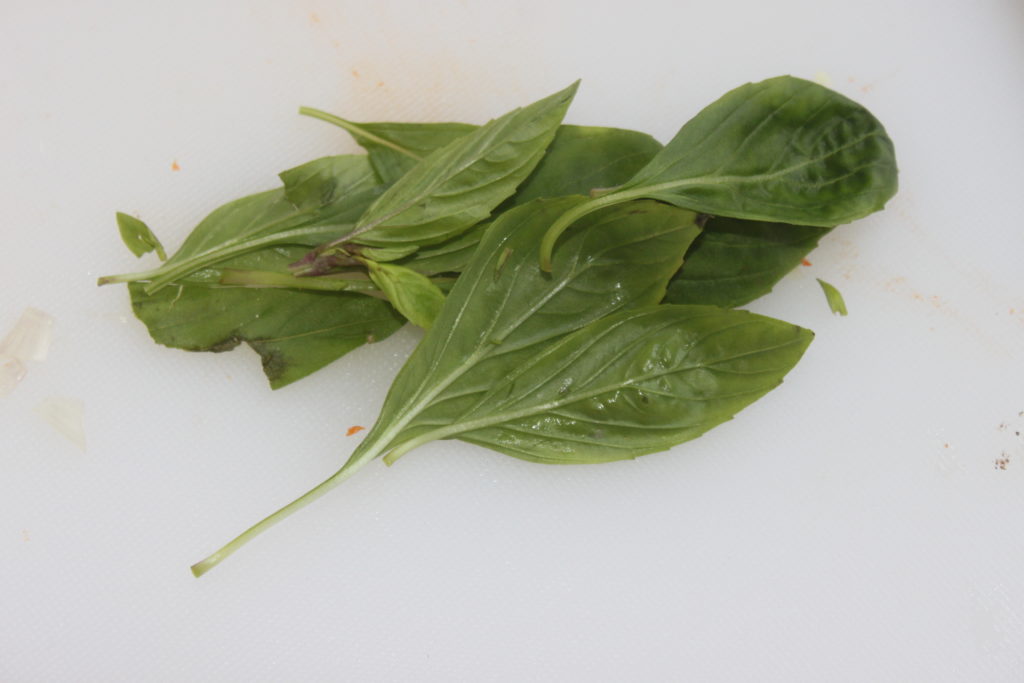
Finely chop some Thai basil leaves.
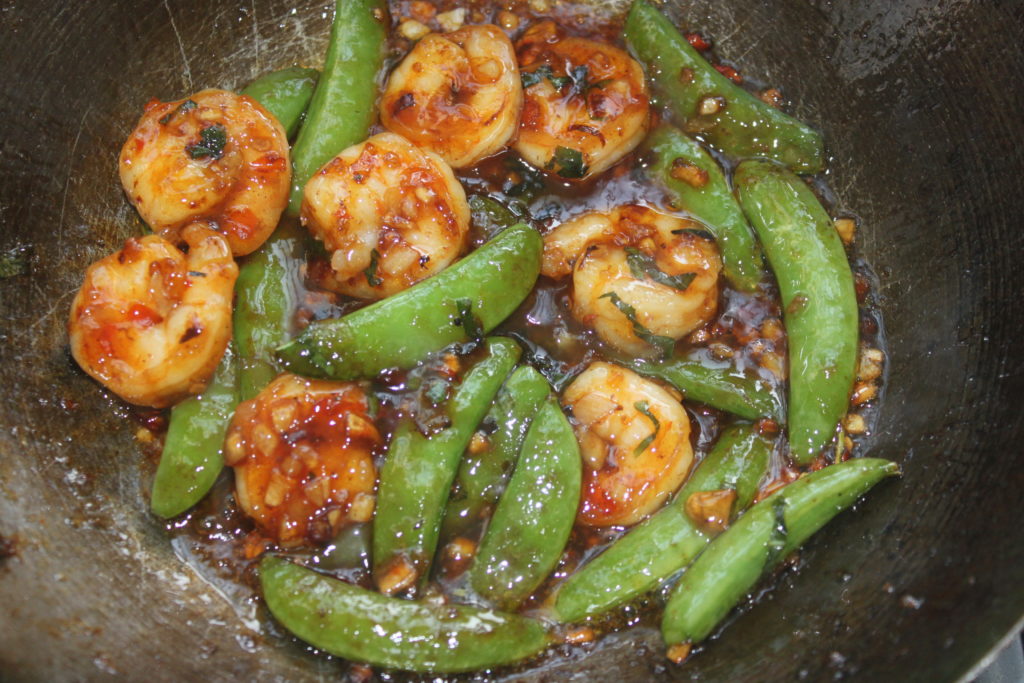
Return the prawns (along with the juices and whatever else you have in the small container set aside) with the Thai basil.

Add the sweet chilli sauce, nuoc mam and vinegar.
Cook over high heat to thicken the sauce.
Serve immediately with plain white rice!
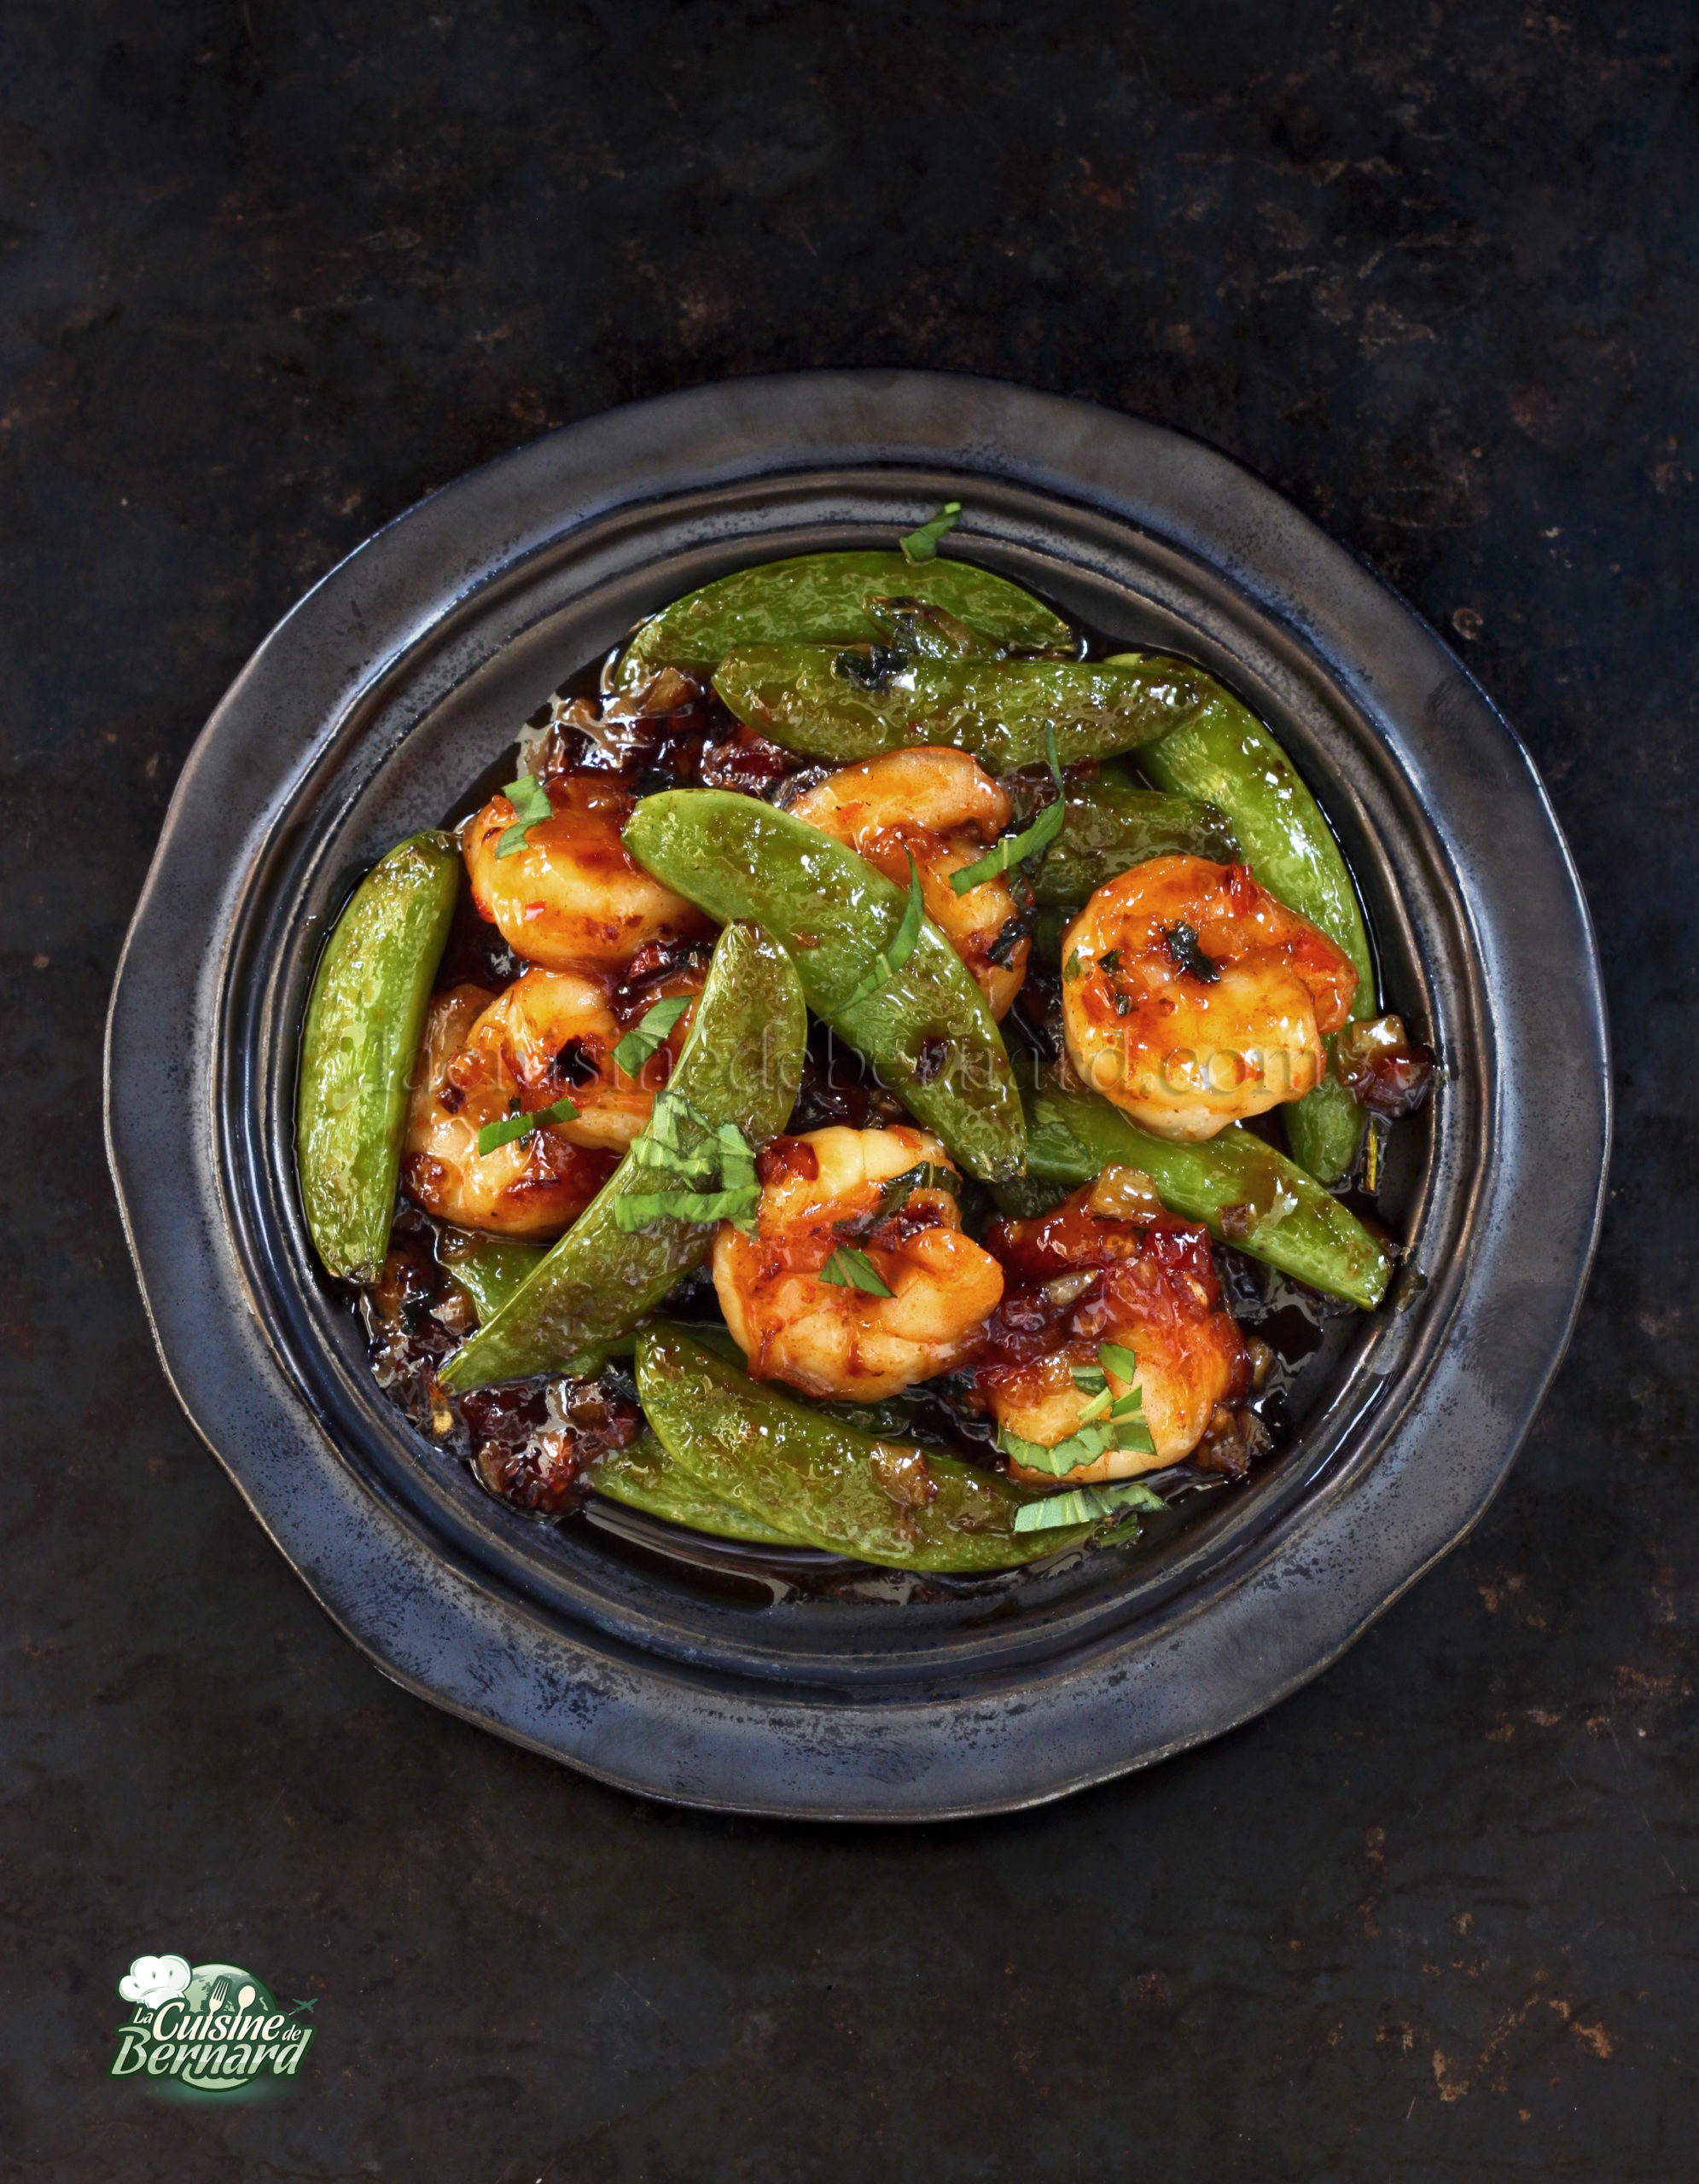
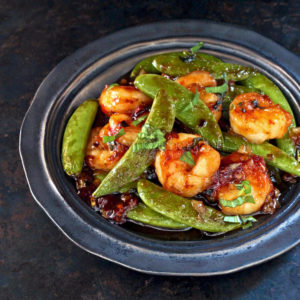
Shrimps and sugar snap peas, spicy sauce


I’m straying a bit from tradition at the moment, though I’ll get back to it. But once in a while, when it’s good, I don’t see the problem! I had seen this recipe in a fusion restaurant in the United States a few years ago, so I wanted to do it again here in my own way. This recipe is not fixed at all, you can at your leisure make only the tuna part, or the crab part and replace the fried sticky rice cake, by a more classic plain or vinegar rice. In any case I can promise you that it is fresh, crispy, soft, slightly spicy, but above all irresistible!
Recipe for 4 people:
Two options:
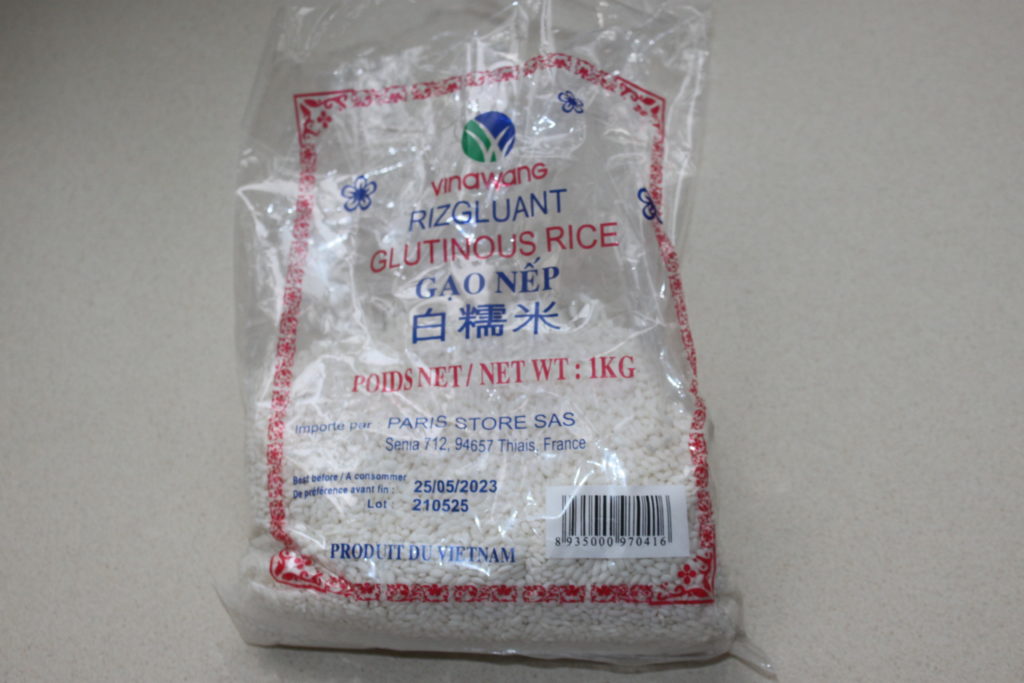
Crispy fried glutinous rice:
- 230g of sticky rice
- 290g of water
For non-fried round rice:
- 230g of round rice
- 290g of water
For tuna:
- 170g of raw tuna
- 30g mayonnaise (Japanese if possible)
- 10g of sriracha
- 1 tablespoon of lime juice
a little chopped chives
For crab:
- 170g of good quality crab flavor sticks
- 30g of mayonnaise
- 1 tablespoon lemon juice
- a little chopped parsley
To accompany :
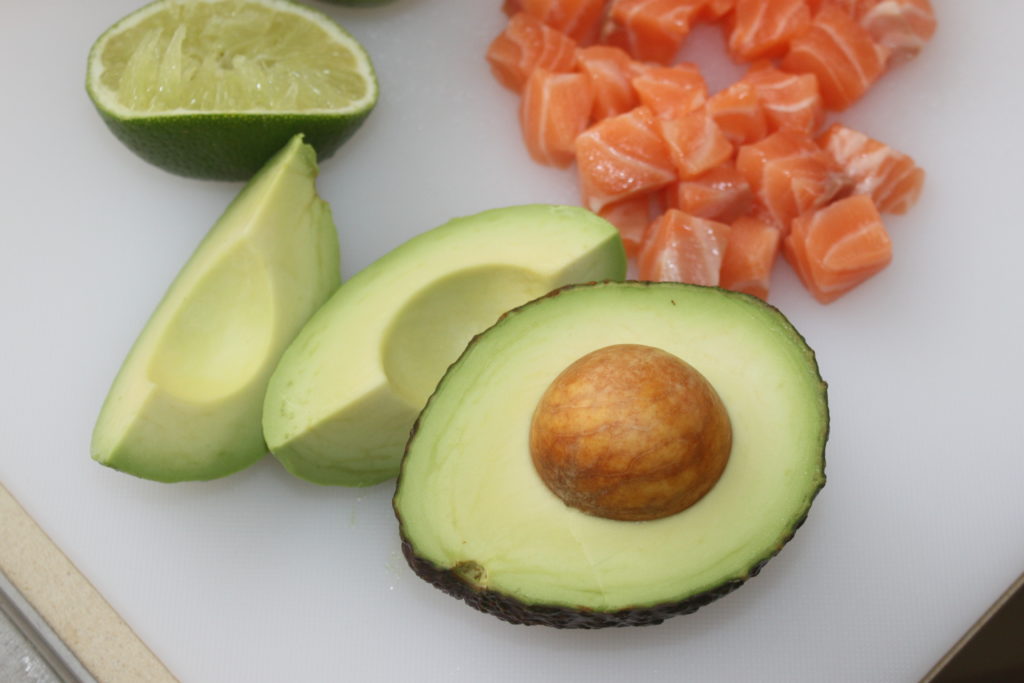
- 2 lawyers
- 1 back of salmon from 170 to 200g
- a little fried onion
Start by preparing the rice:
For glutinous rice or non-fried round rice, the preparation is the same.
Weigh the rice and rinse it with clean water for one minute.
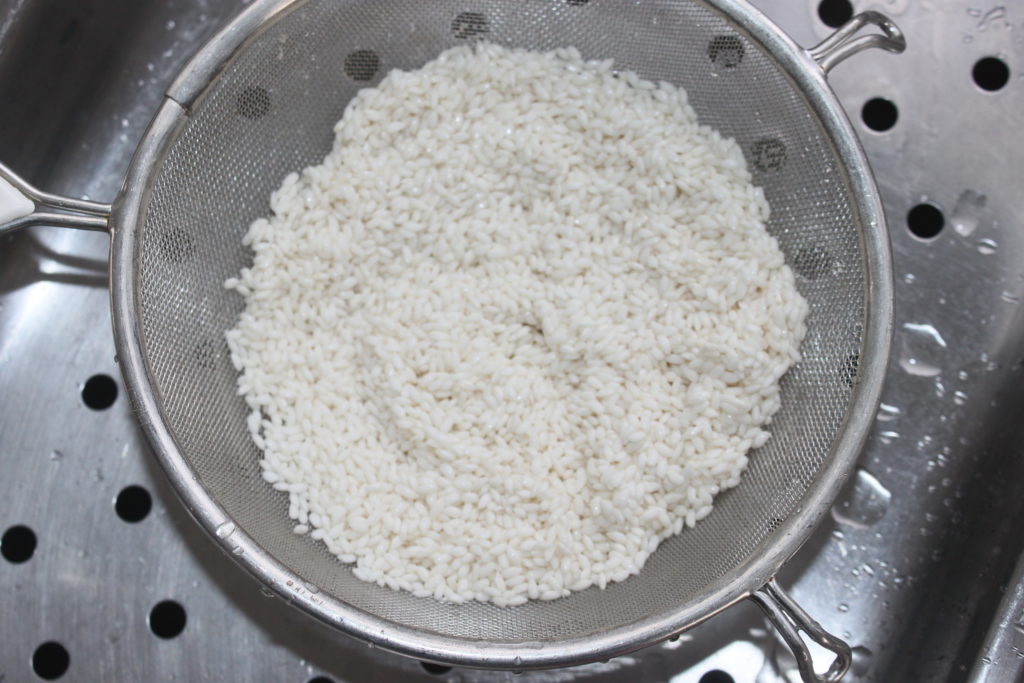
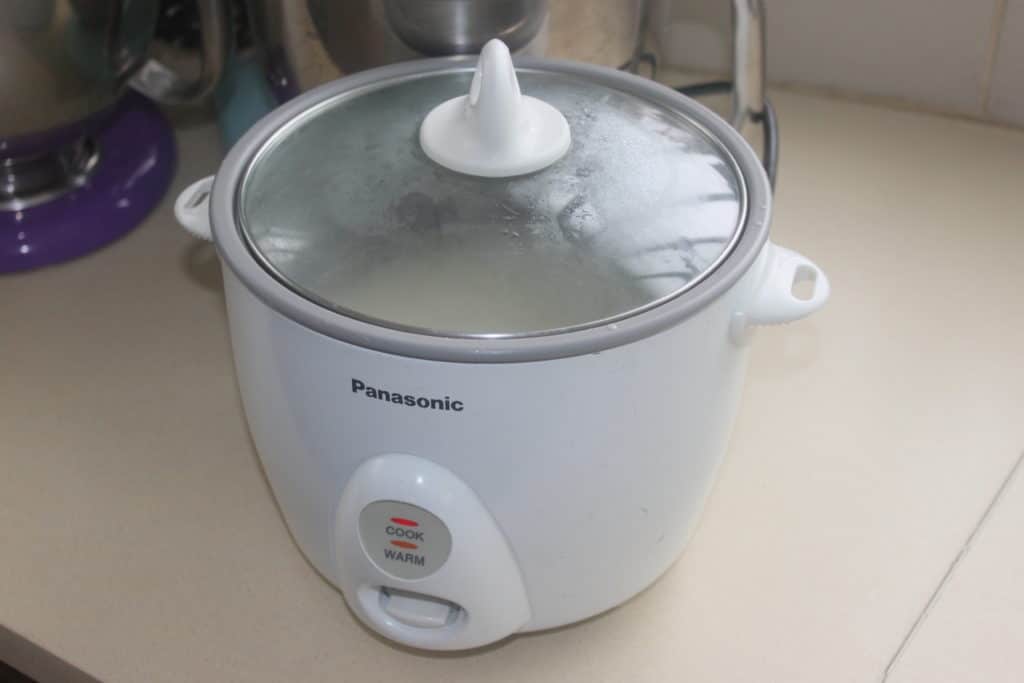
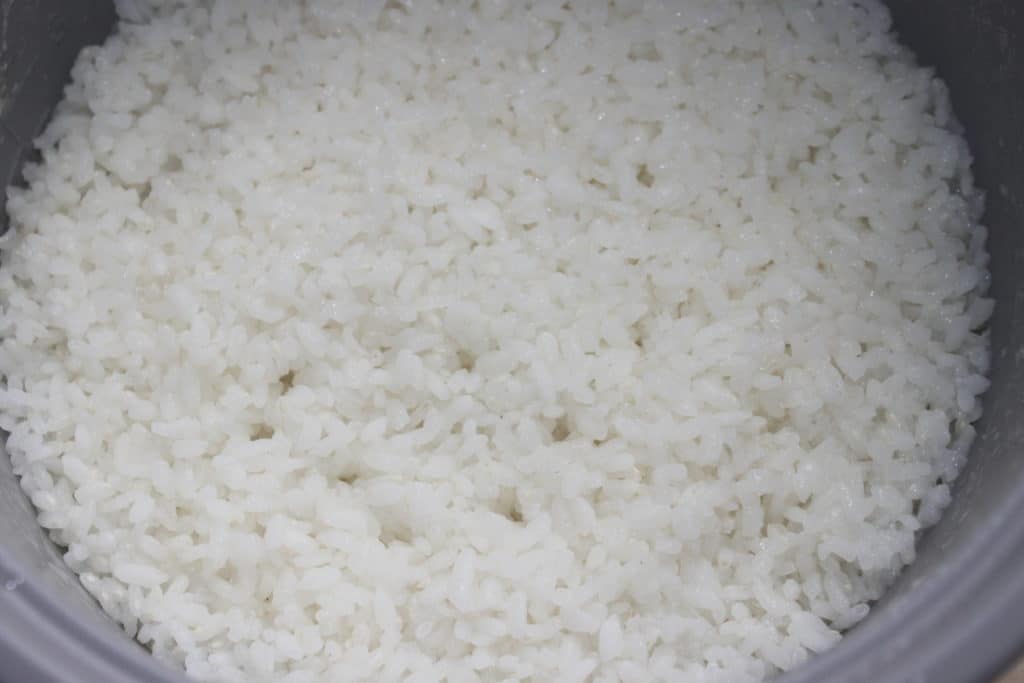
Drain it well and put it in the rice cooker with the 290g of water.
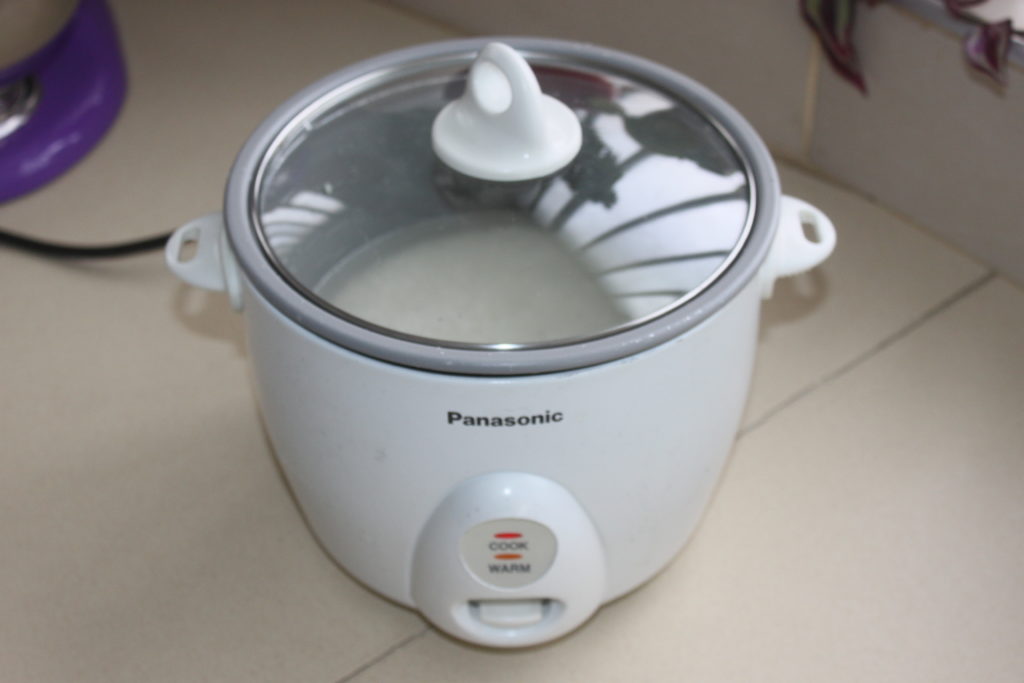
Put it to cook.
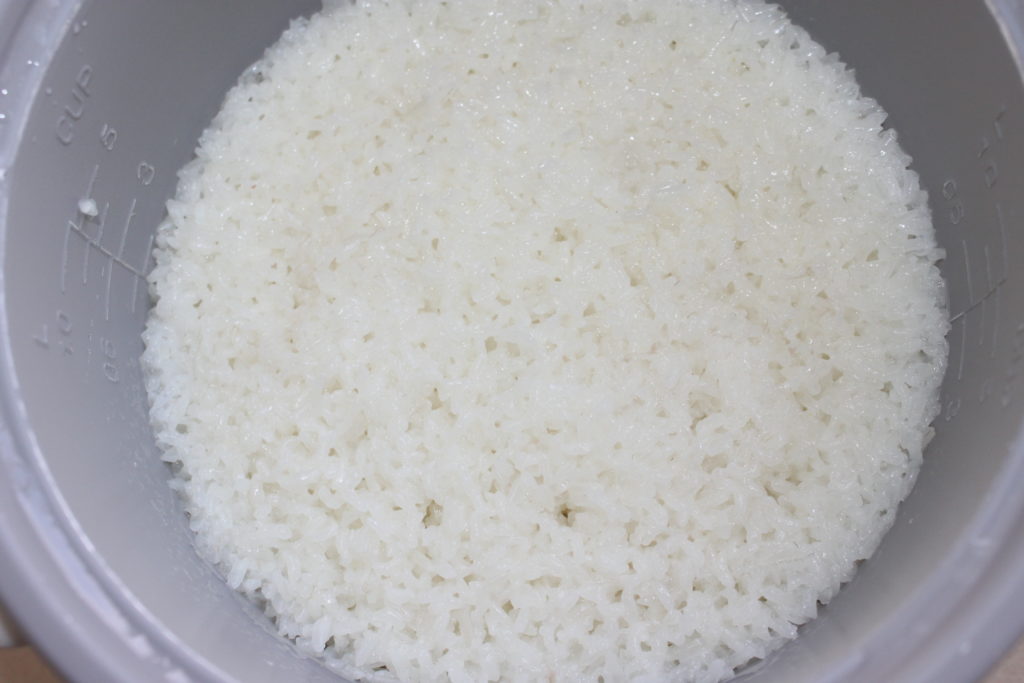
For the glutinous rice, mix lightly with a spoon to make a paste.
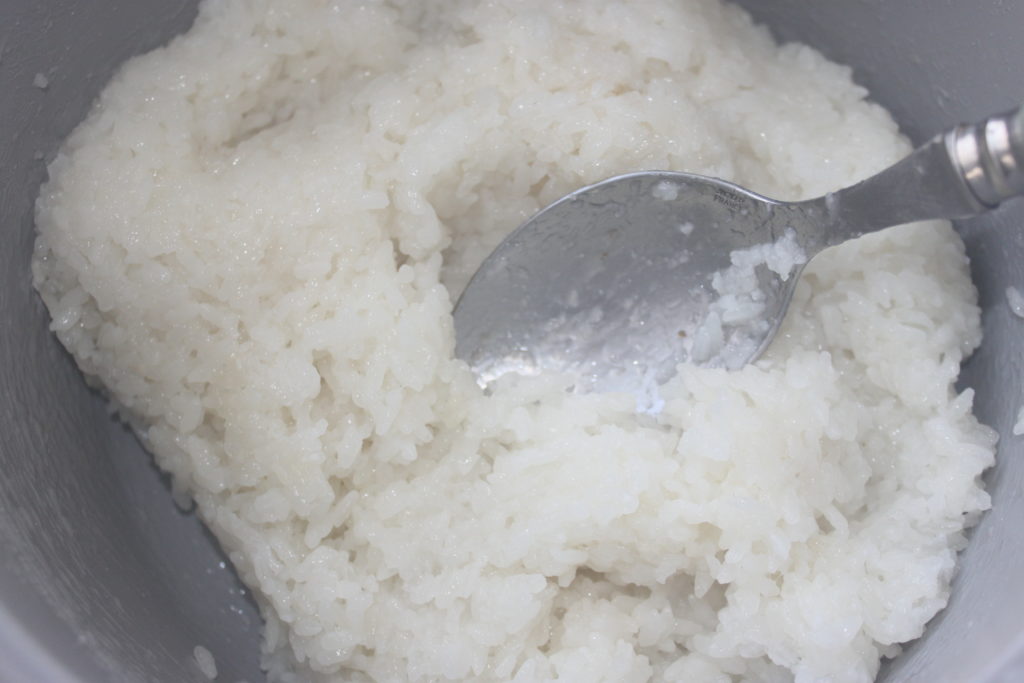
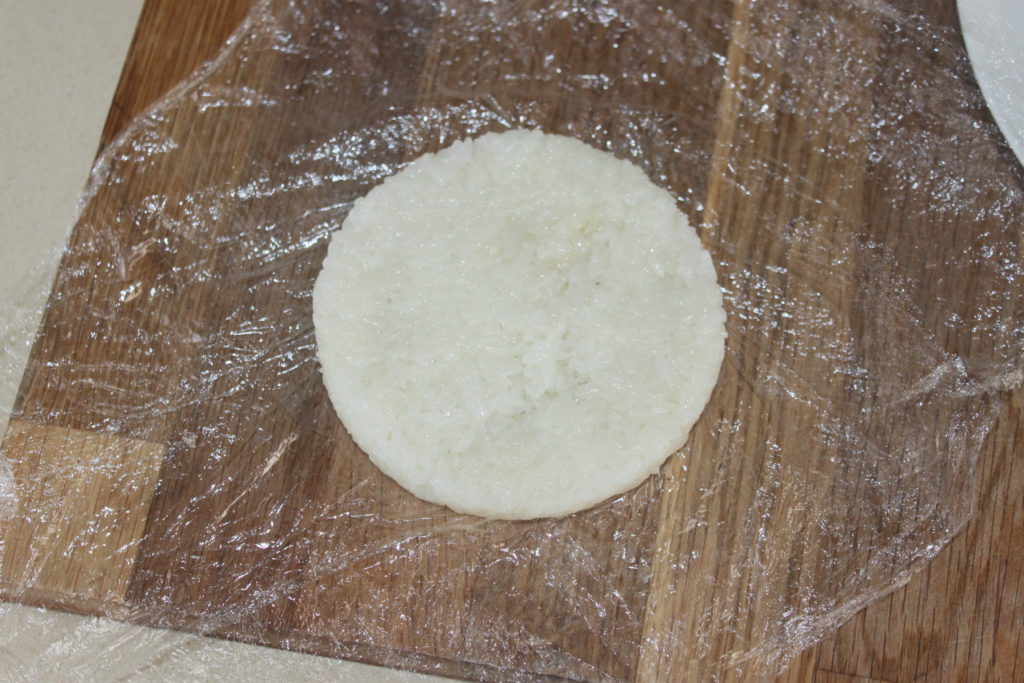
Take a 10cm circle and put cling film in the bottom. Weigh a 130g ball of rice and put it in the bottom.
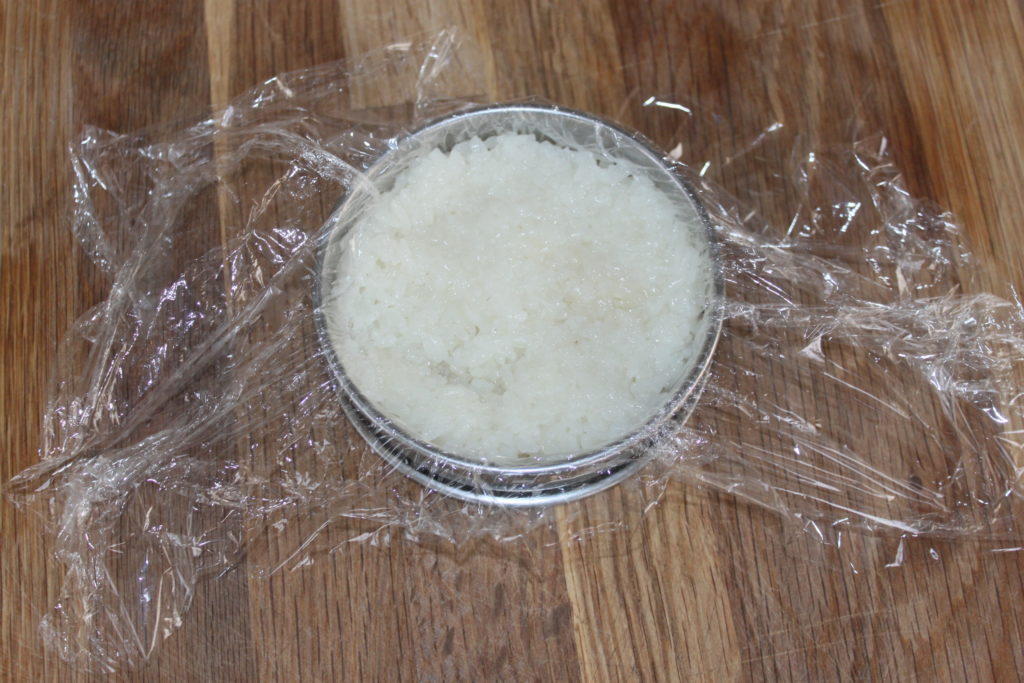
Close the film and press well. Turn out and open the film.
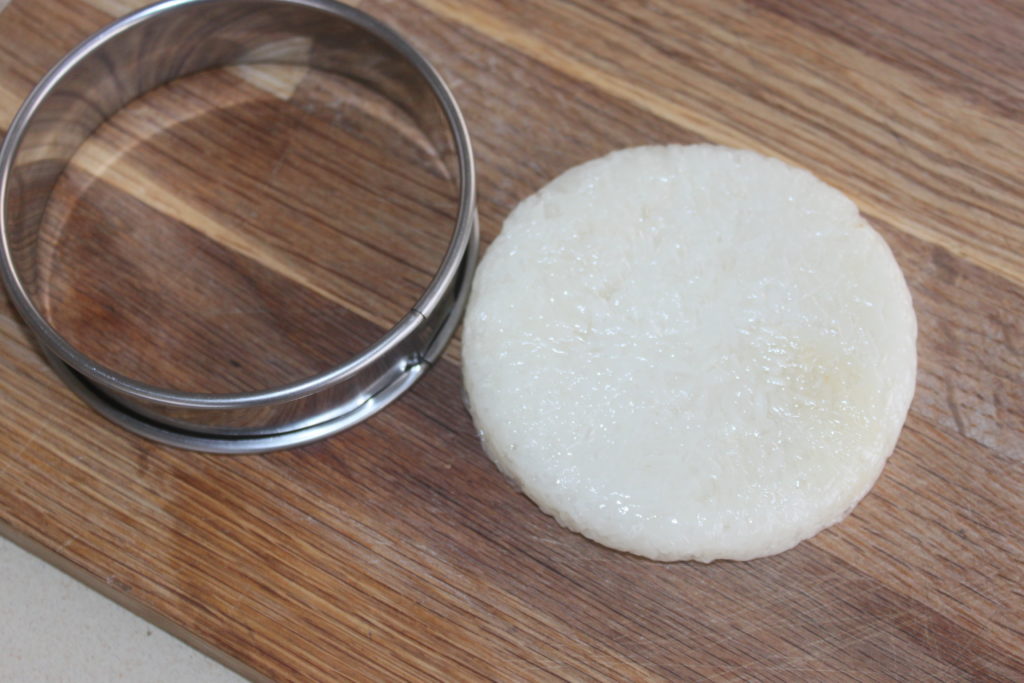
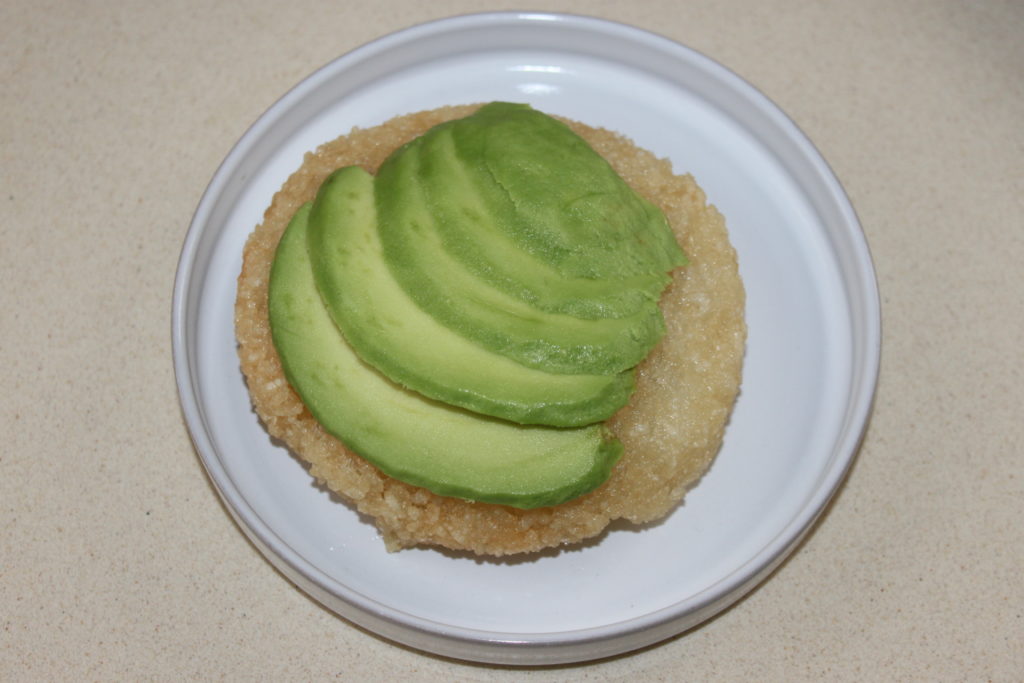
Do the same with the rest to make 4 patties. You can use the same stretch film each time. Heat a small pan of oil to 190°C. Fry the patties one by one. Do not brown them either czr it becomes too crispy!
Drain the patties on paper towels.
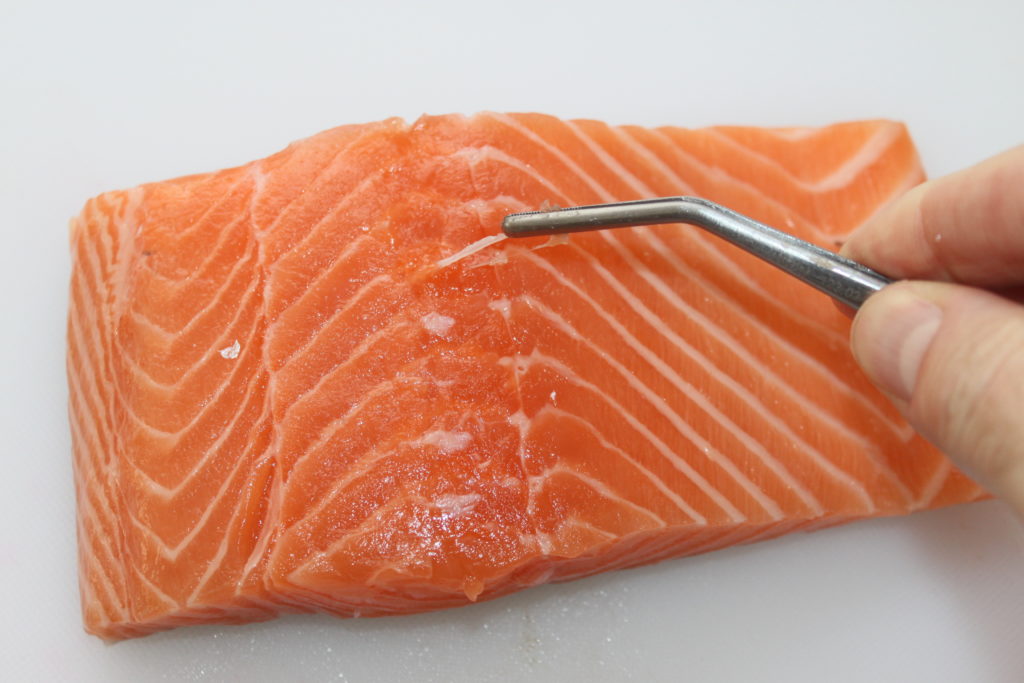
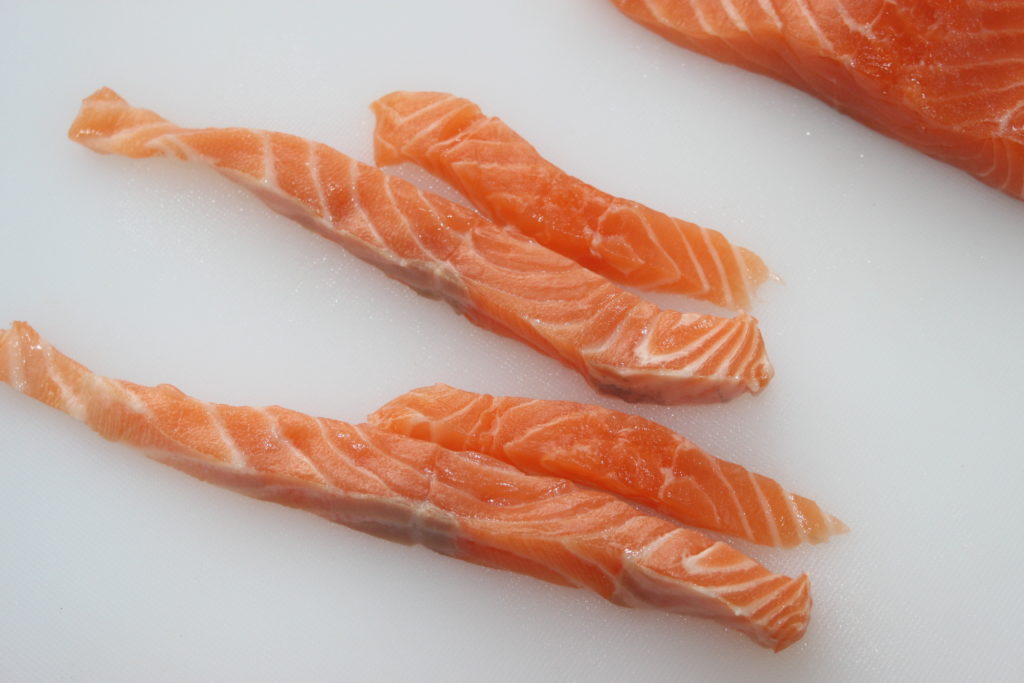
For salmon: remove bones with tongs. Run your finger over it to make sure there are none left!
Run a knife through the skin to remove it.
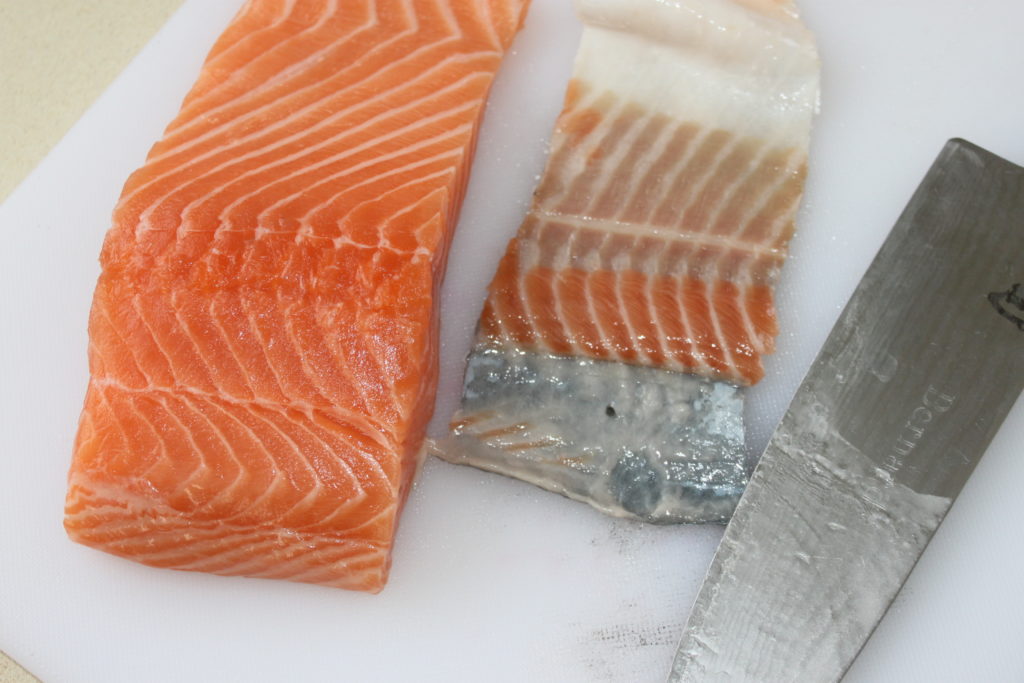
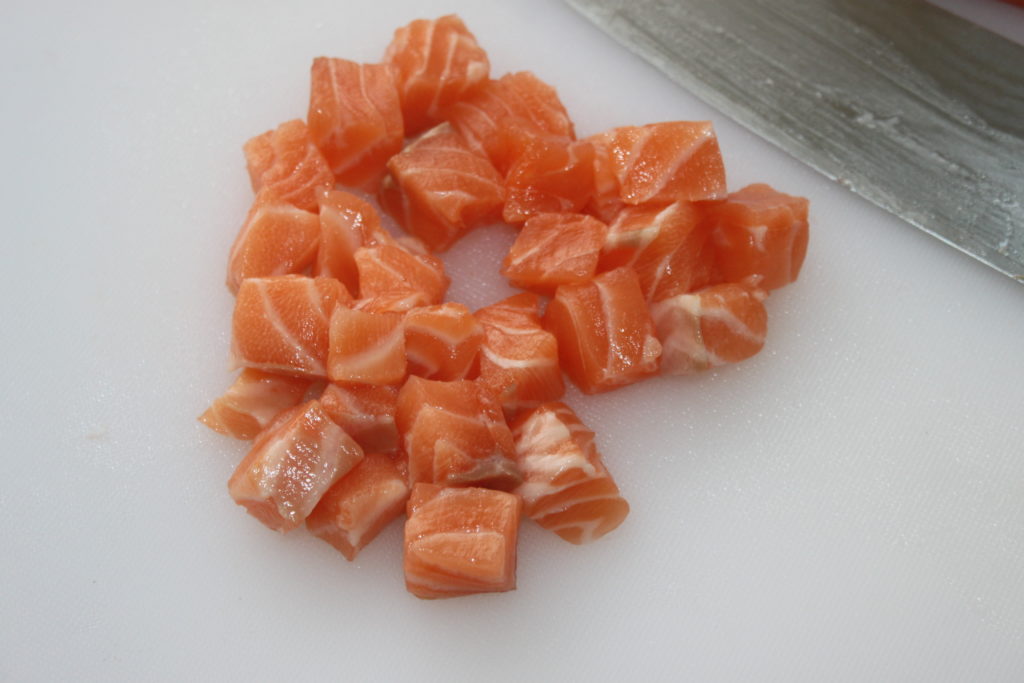
Cut the salmon into slices and then into cubes.
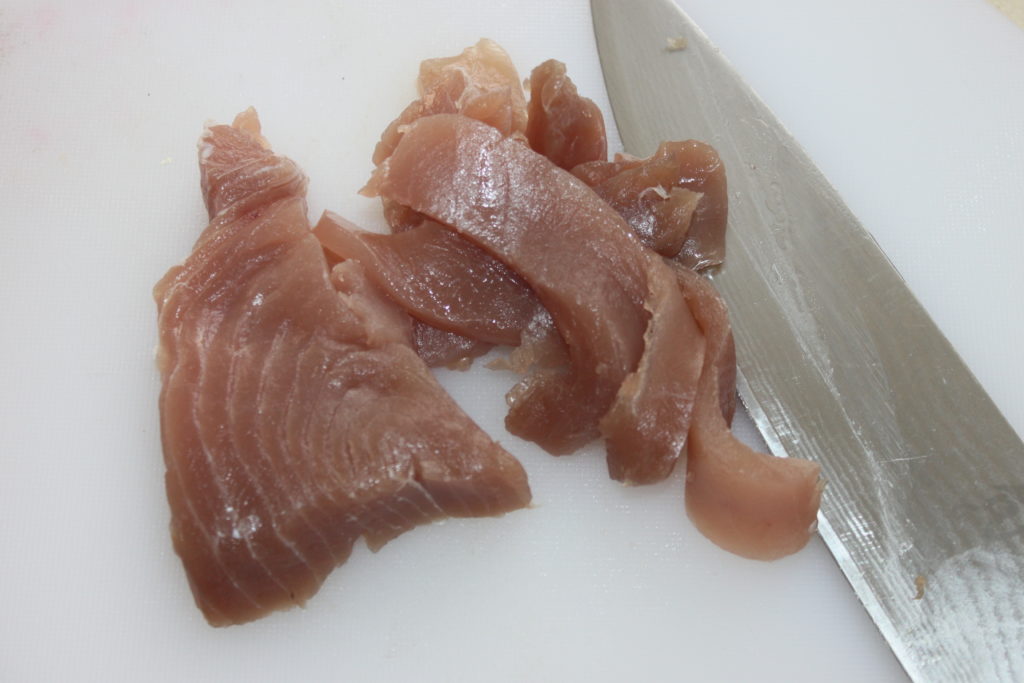
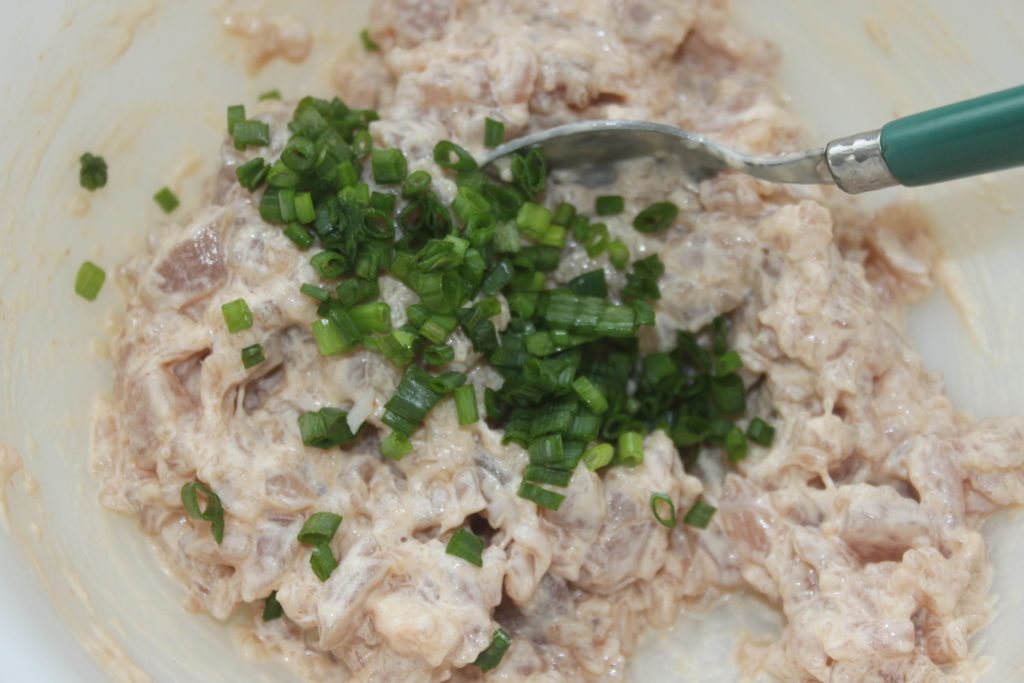
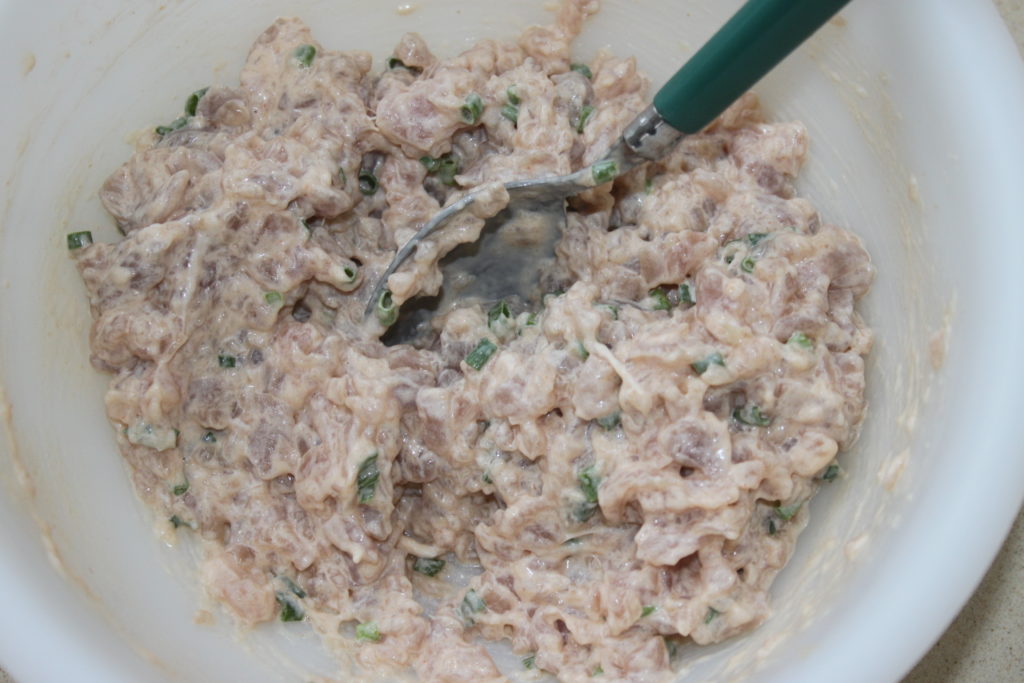
For the tuna: first cut it with a knife and then chop it finely.

Place it in a small container and add the ingredients: mayonnaise, sriracha, lemon juice.

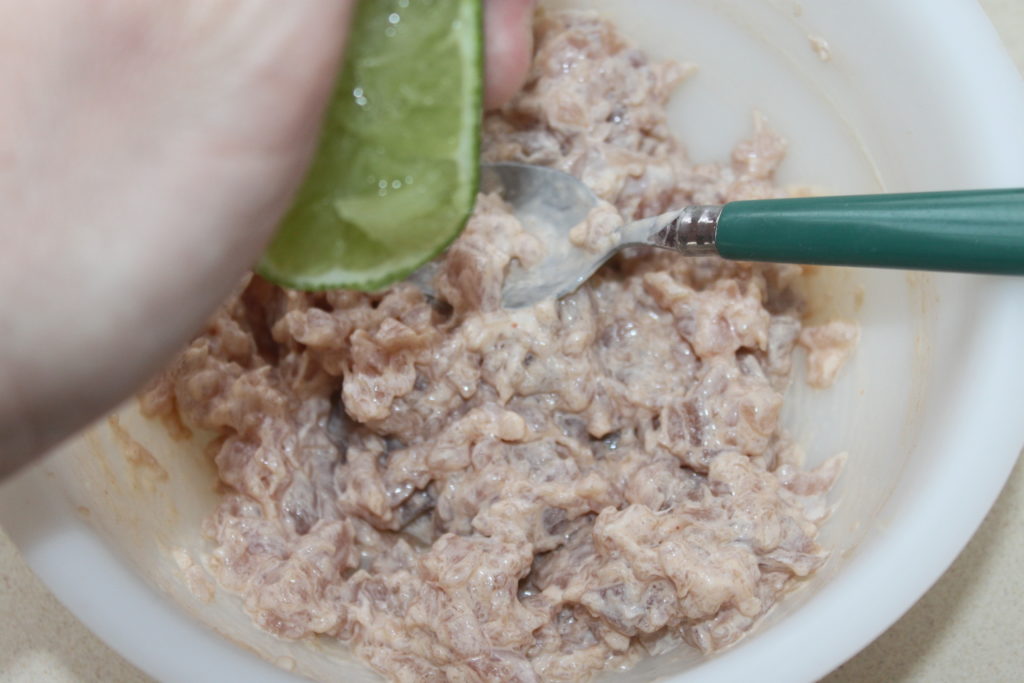
Add the chopped chives. Mix well, it’s ready!
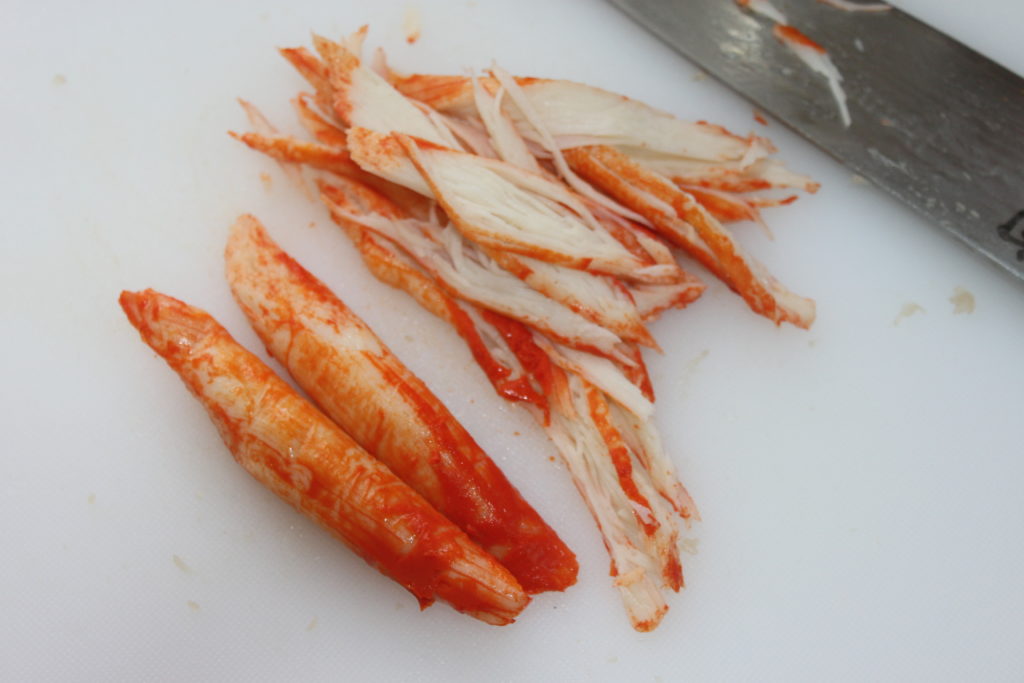
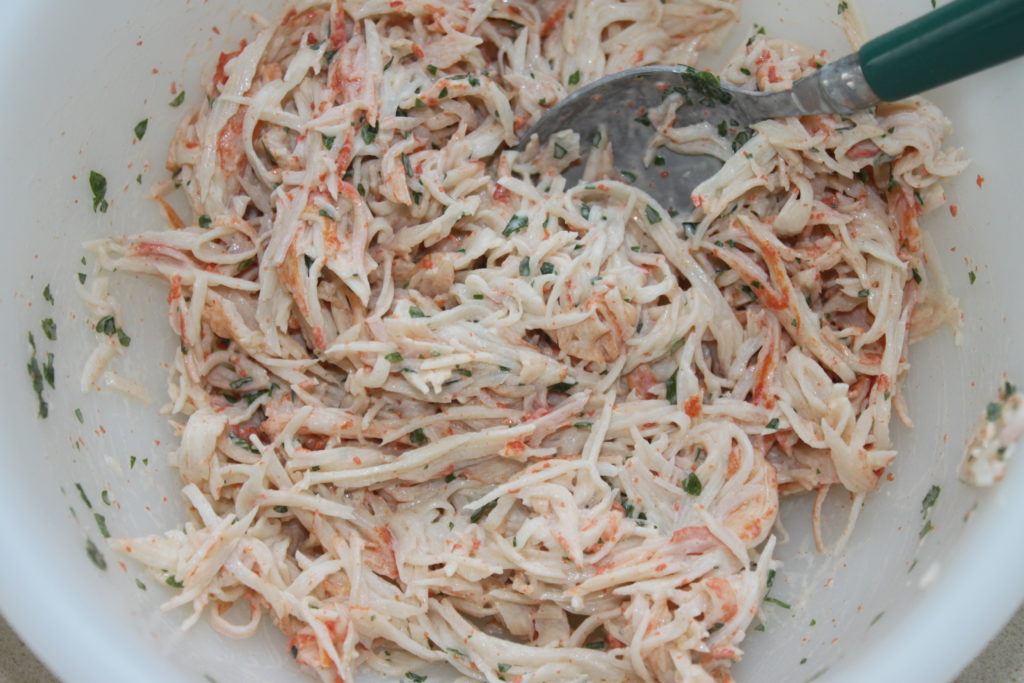
For the crab (fake) I took a good quality. Cut finely with a knife. I prefer this to taking already chopped crab which is often not as good and too big.
Put in a bowl with the mayonnaise, lime juice and parsley (here frozen parsley works great!).
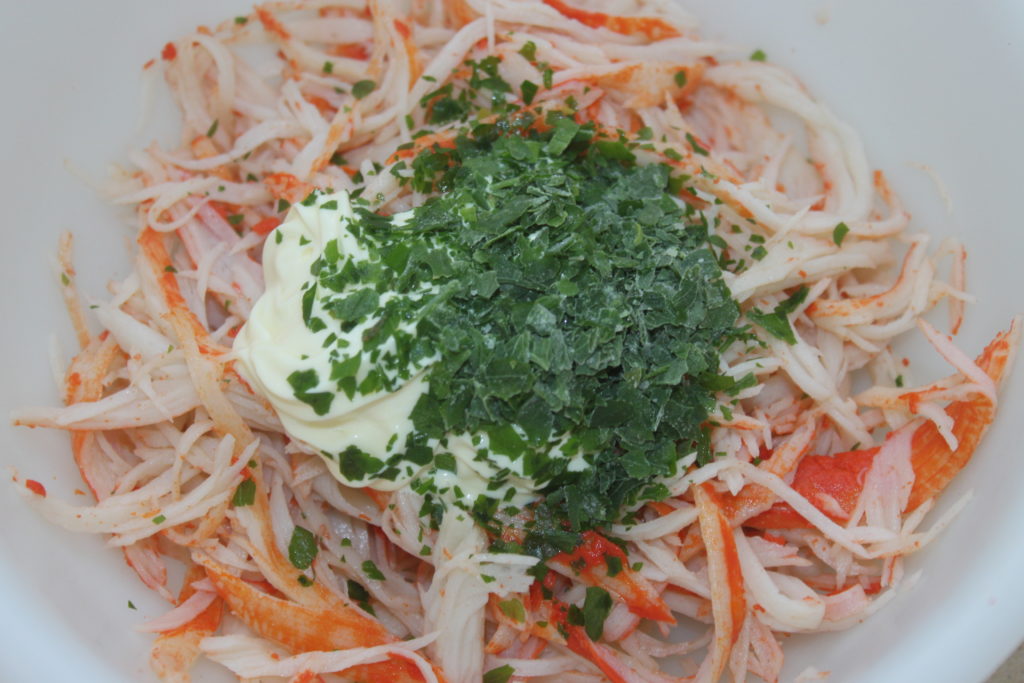
A little mix and it’s good!
Peel the avocados, cut them into quarters and then into slices.
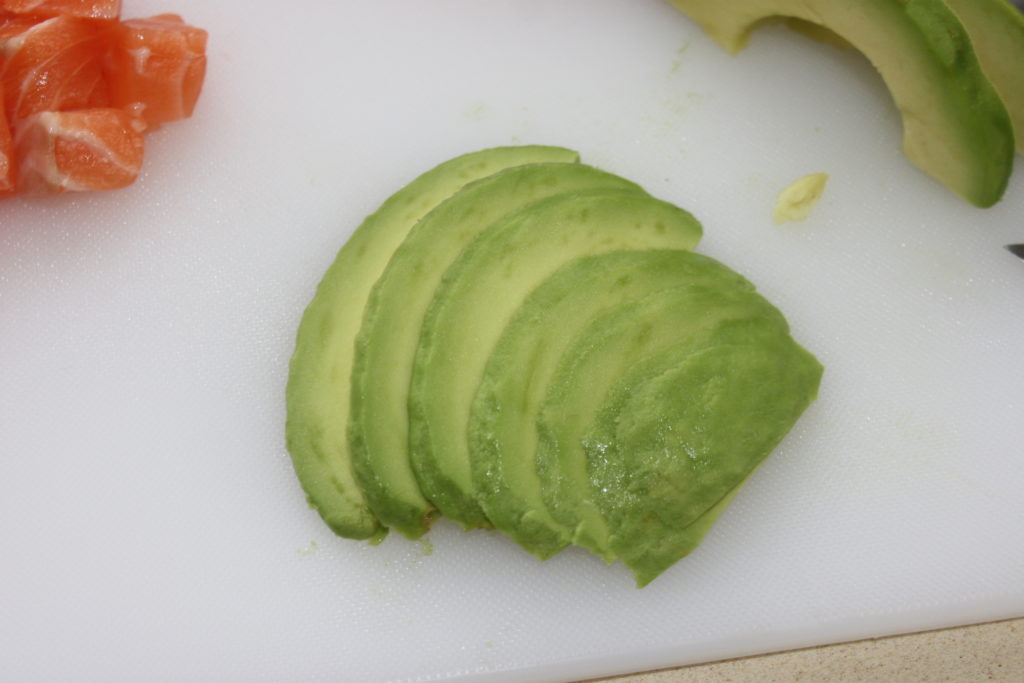
To serve, put a sticky rice cake, avocado and then the rest: tuna, crab and ending with salmon.
For the sauce, I made some more by mixing a little mayonnaise, sriracha and a little lime juice!
Putting a little on top, with some chives and fried onion, is a delight! You can also use plain rice instead of the glutinous rice cake (130g per person) or make a vinegared rice like for sushi (the recipe of my sweet sushi vinegar HERE).
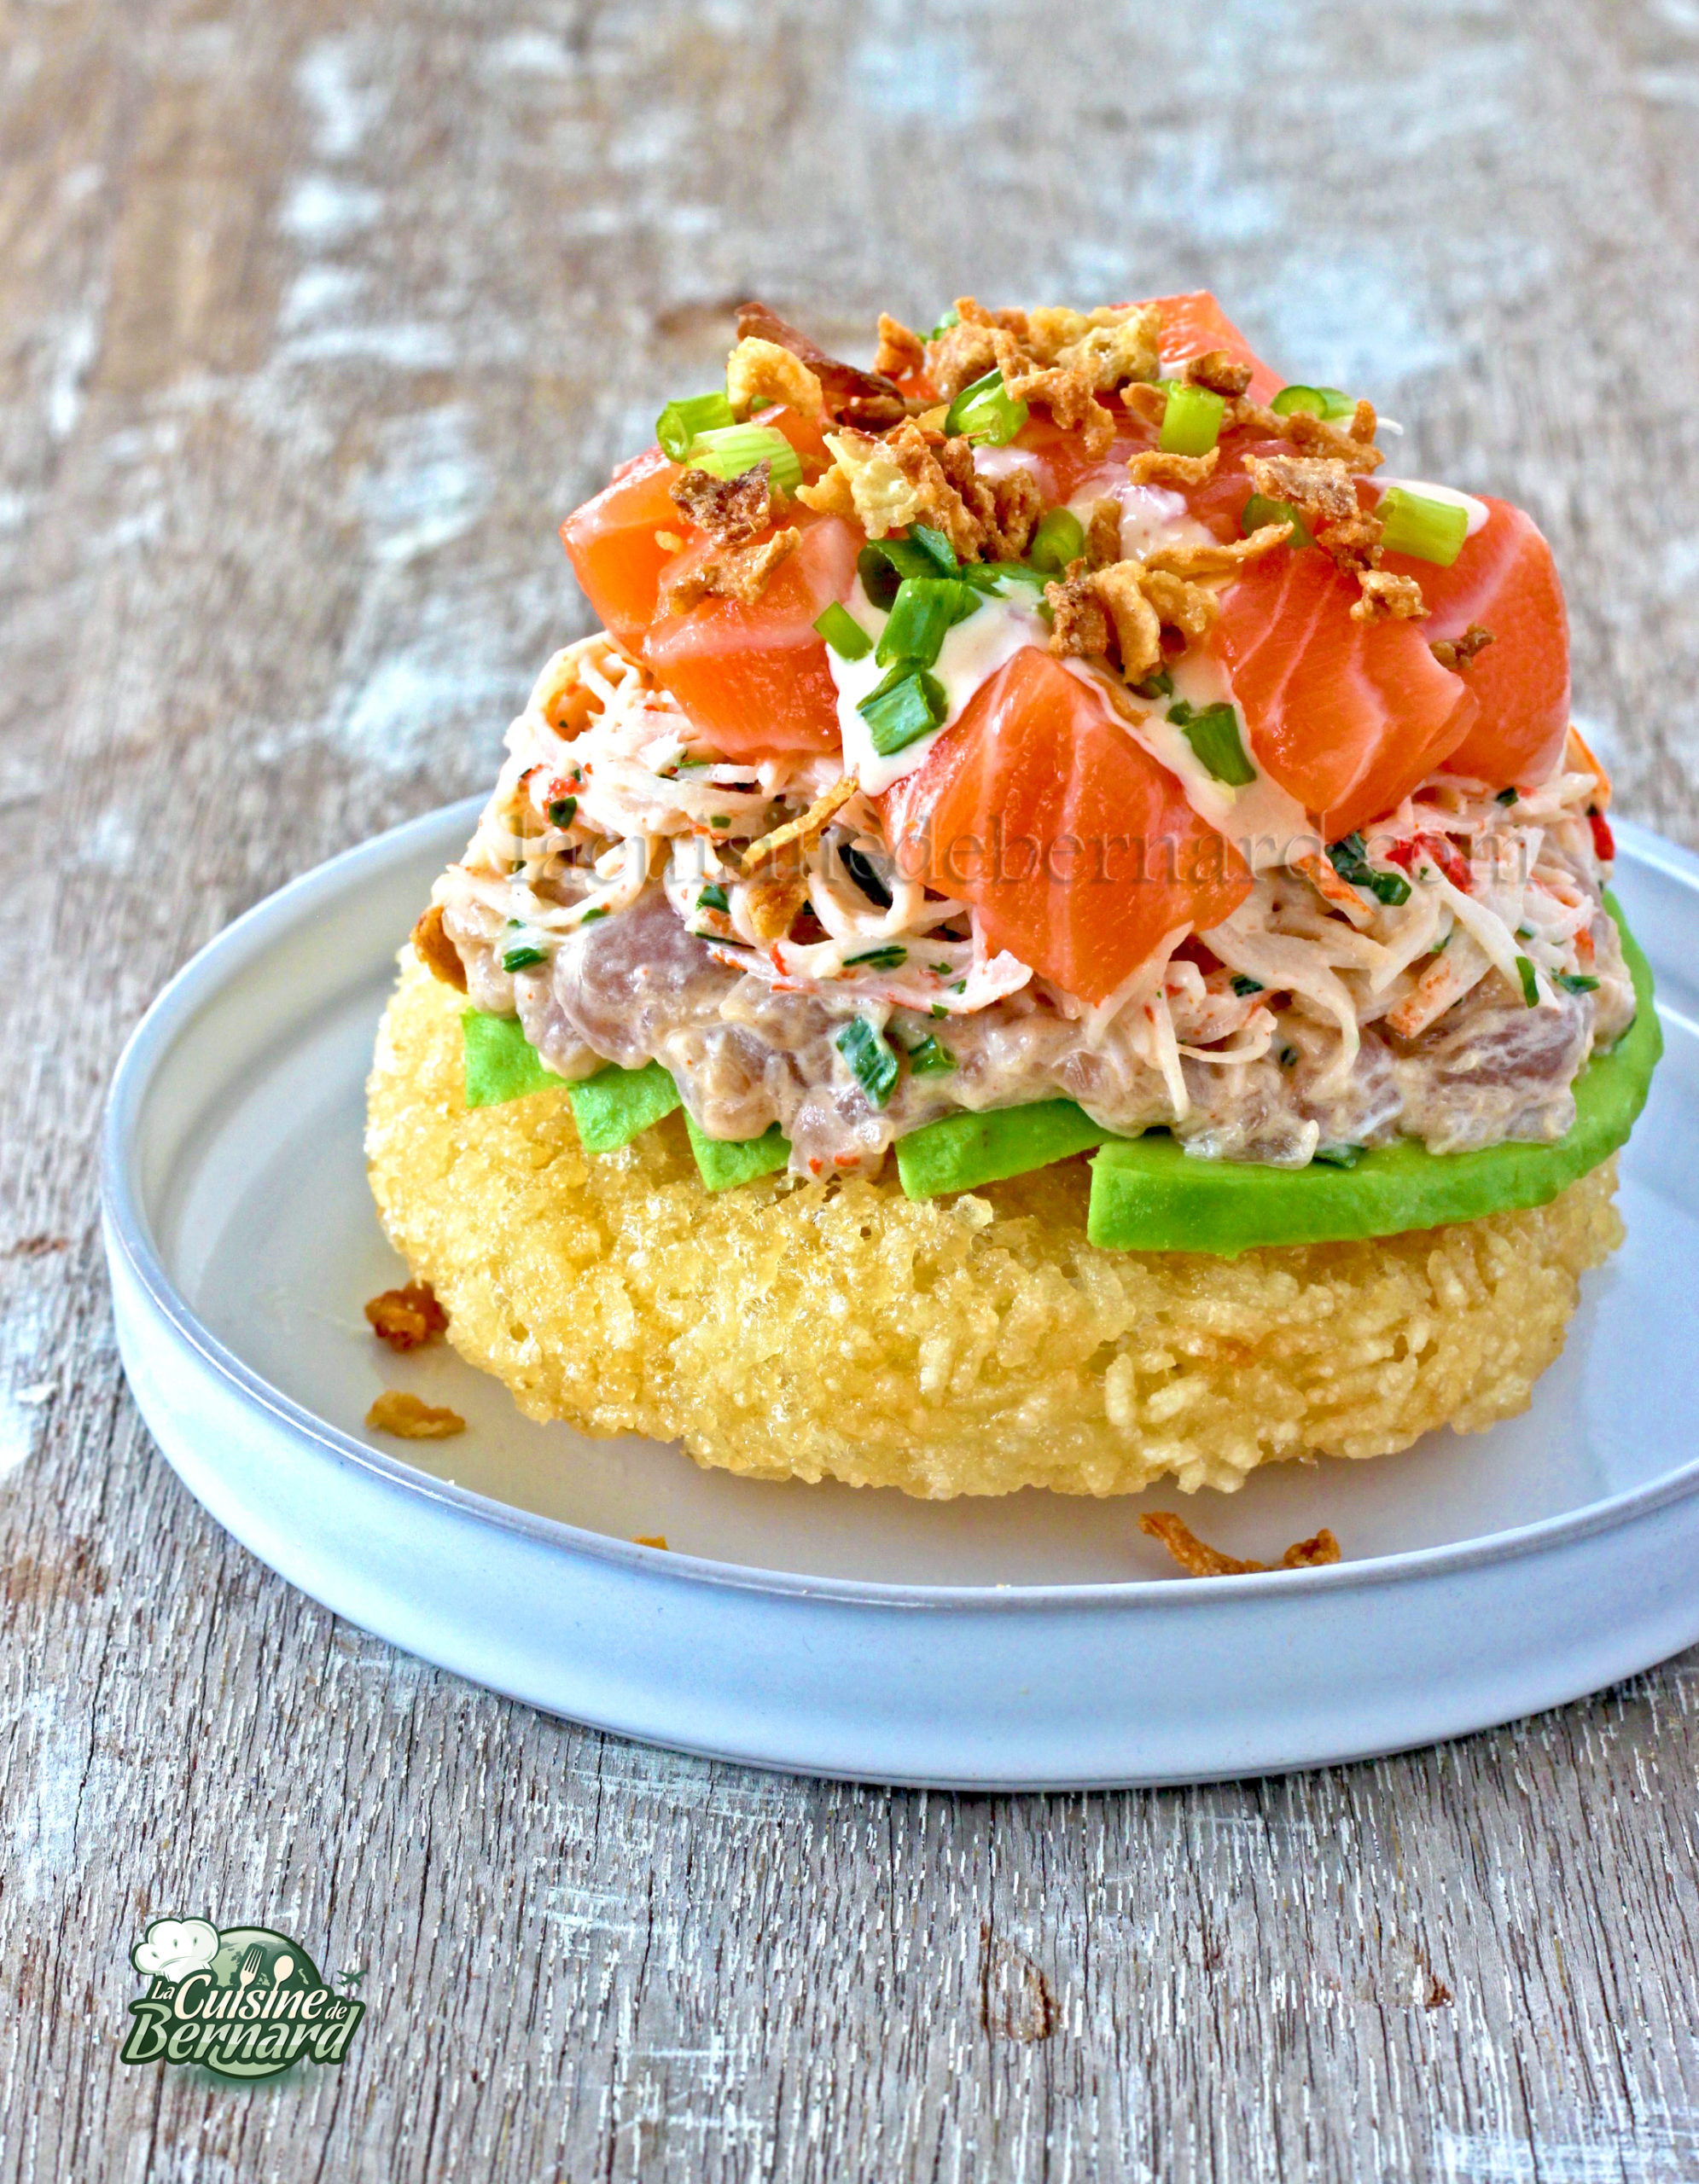
Crunchy sushi of sticky rice, salmon, spicy tuna and crab


As I travel much less than before, I look at my notebooks in which I wrote down the dishes I had tasted abroad. This dish of crispy wasabi prawns really stuck with me and I had tasted it in Shanghai some time ago. It took me a long time to find the right proportions and since I finally discovered the way to make fried food extra crispy, I am having fun making the delights I had in mind. It’s done with this dish which is very special. I recommend if you try it, maybe only start with half the proportions. The “sauce” that coats the shrimp is very very special. But a delight when you dare to venture there!
Ingredients for 4 to 6 people:
- 500g peeled and deveined raw prawns
For the wasabi coating sauce:
- 10g of wasabi powder with 15g of water or 25g of wasabi already ready in paste
- 115g of Japanese “kewpie” mayonnaise or equivalent brand
- 35g sweetened condensed milk
To coat the shrimp:
- 200g flour
- 230g of water
Then:
- 800g tapioca starch
If you like crispy dishes, try the extra crispy sesame chicken HERE !
Here are the rather special ingredients of this wasabi sauce. No, I’m not mistaken about them, there is sweetened condensed milk! Japanese mayonnaise can be found in Japanese or Asian grocery stores or on the internet. If you know me, I’m a fan of homemade mayonnaise that I’ve been making since my childhood, but if I put Japanese mayonnaise here, there’s a reason!


Mix the wasabi powder with the water or take the wasabi paste directly.
Mix well.
Add mayonnaise and sweetened condensed milk.
A little mixing and it’s already over. Set aside.
Mix flour and water in a container.
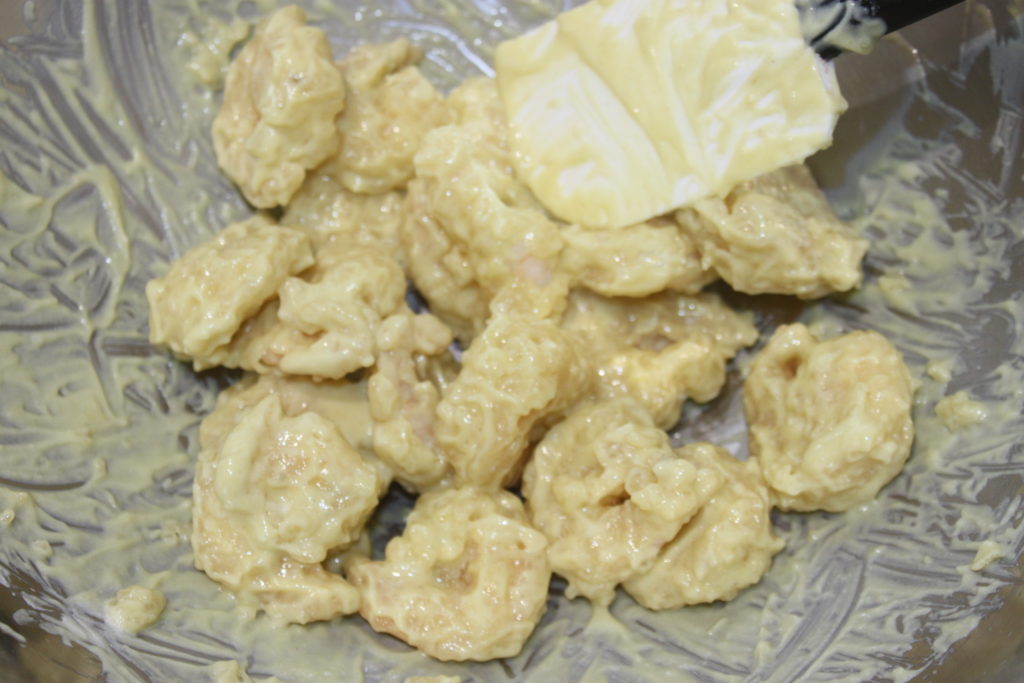
Add the deveined and shelled raw prawns.
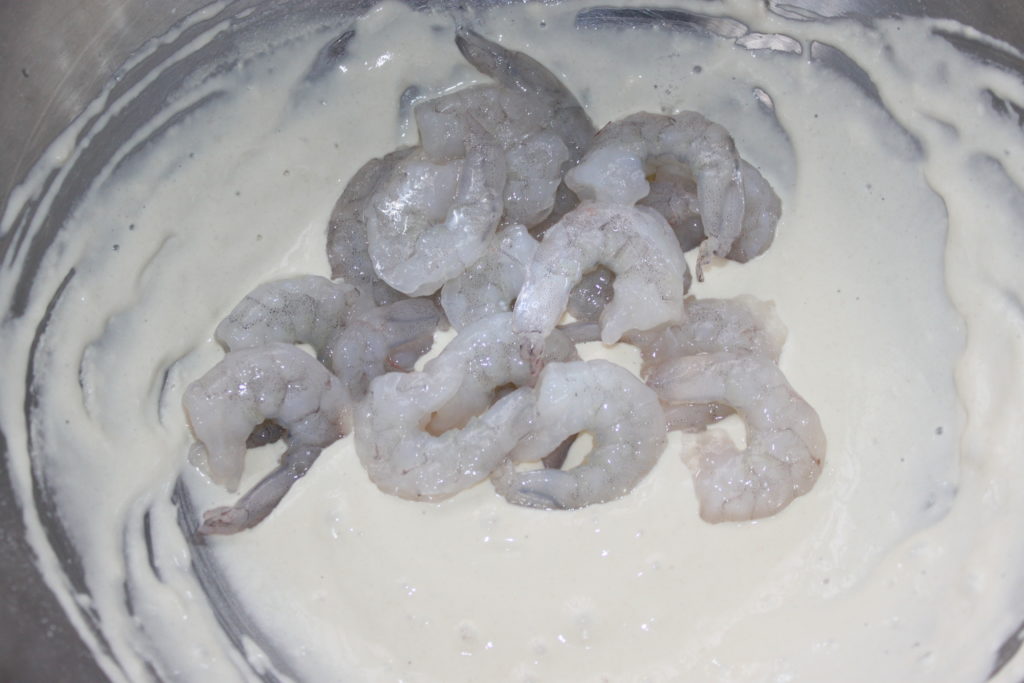
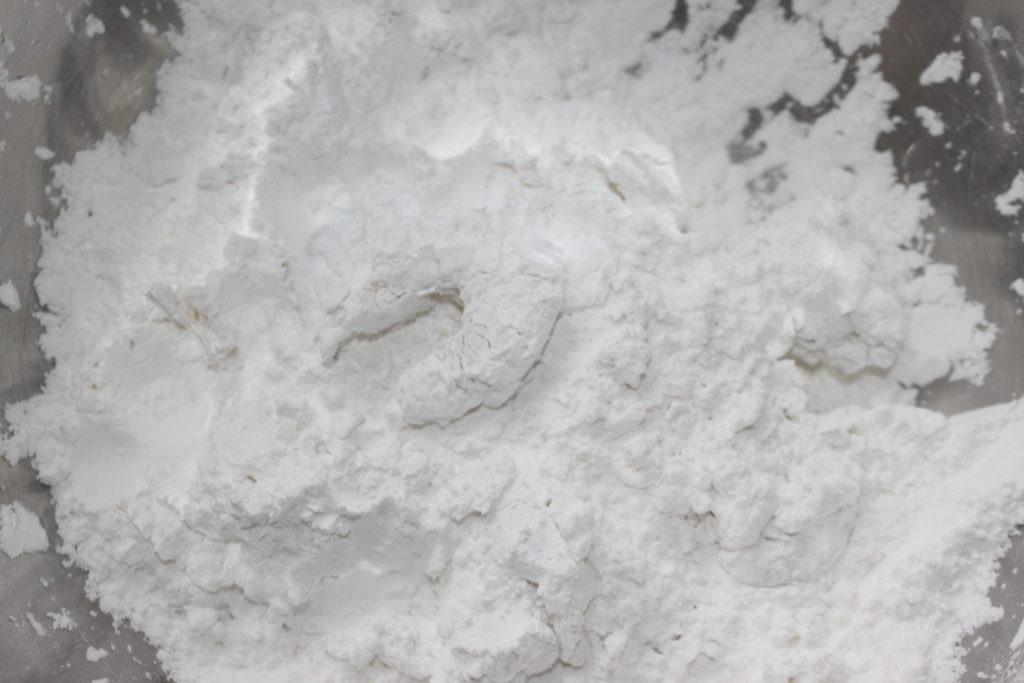
Mix everything well. In another container, put the tapioca starch. Put the prawns one by one in the starch, removing all the same the excess dough.
Even if it says flour on it, it is indeed starch (in fact, in English it says starch, starch).

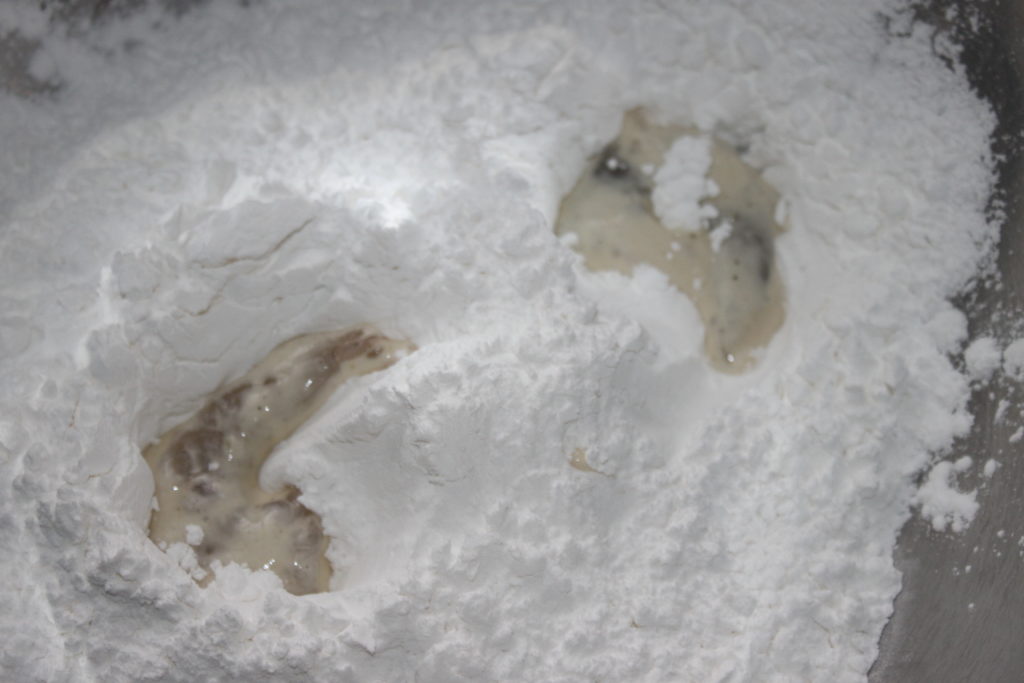
Then coat each shrimp with starch. Leave the prawns in the cornstarch by pushing them to the side of the bowl and then leave them in there for 15 minutes. The moisture from the shrimp will create a thicker layer of batter as the starch absorbs this moisture.
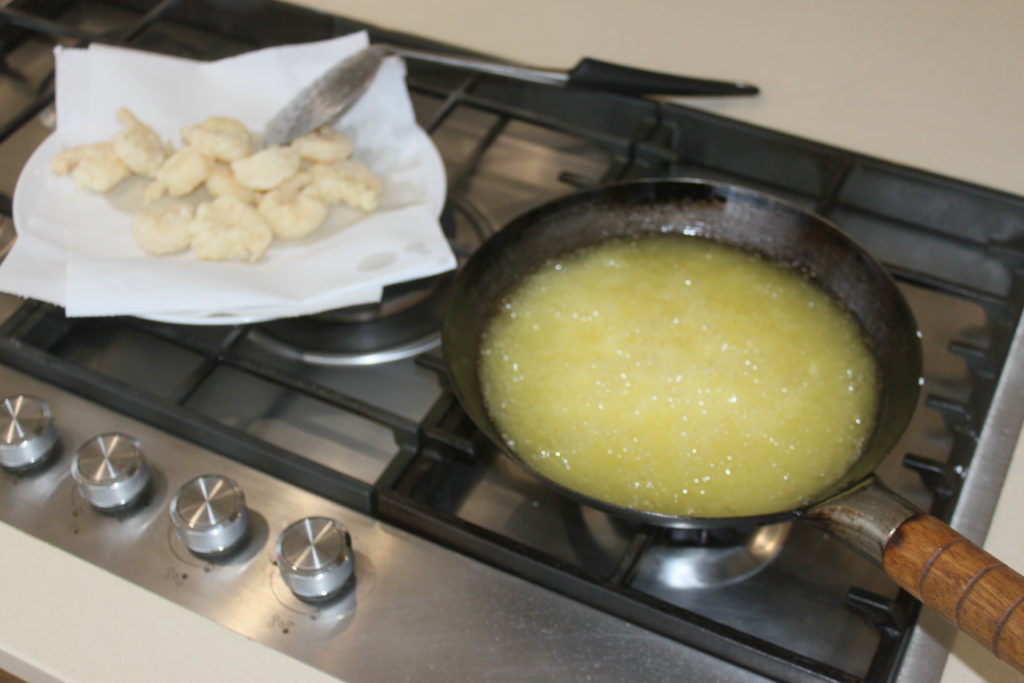
When you’re ready to eat, heat up a wok or a pan of oil (not a fryer!). The oil must be very hot, over 190°C. Put the prawns one by one. You will probably do several baths for all the shrimp.
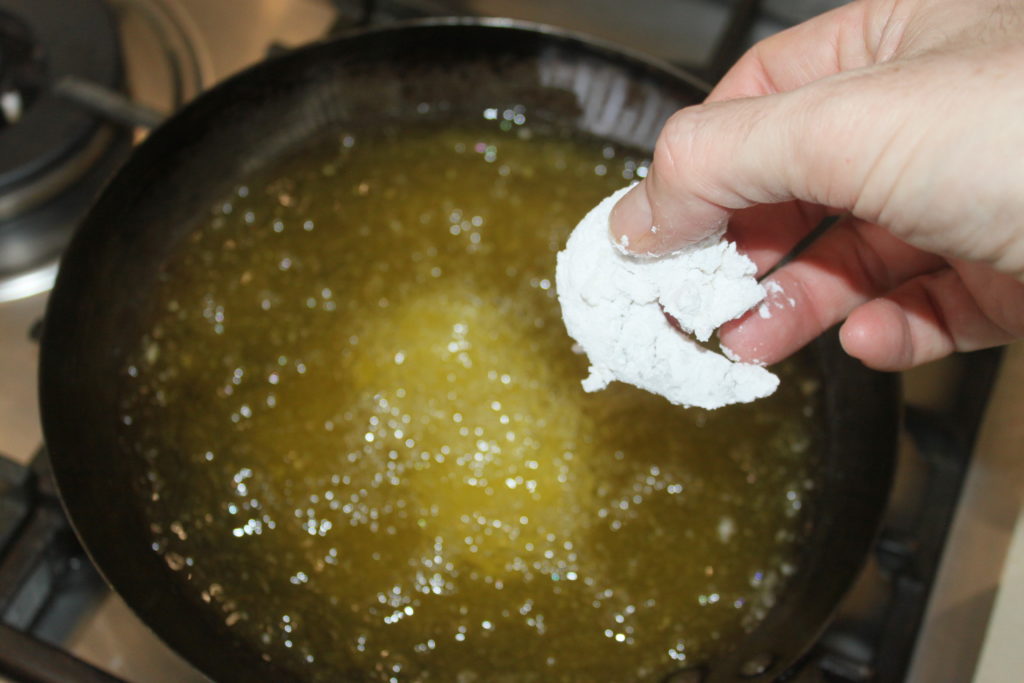
Let them cook for about a minute, no more otherwise the shrimp will overcook. But the superficial layer of dough will be very crispy!
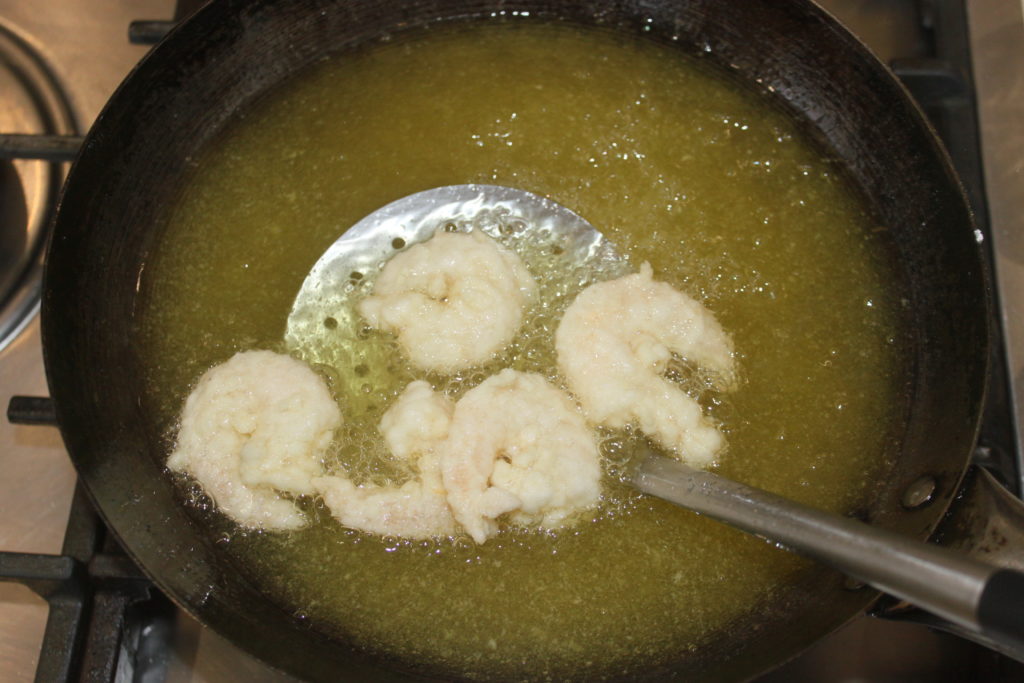
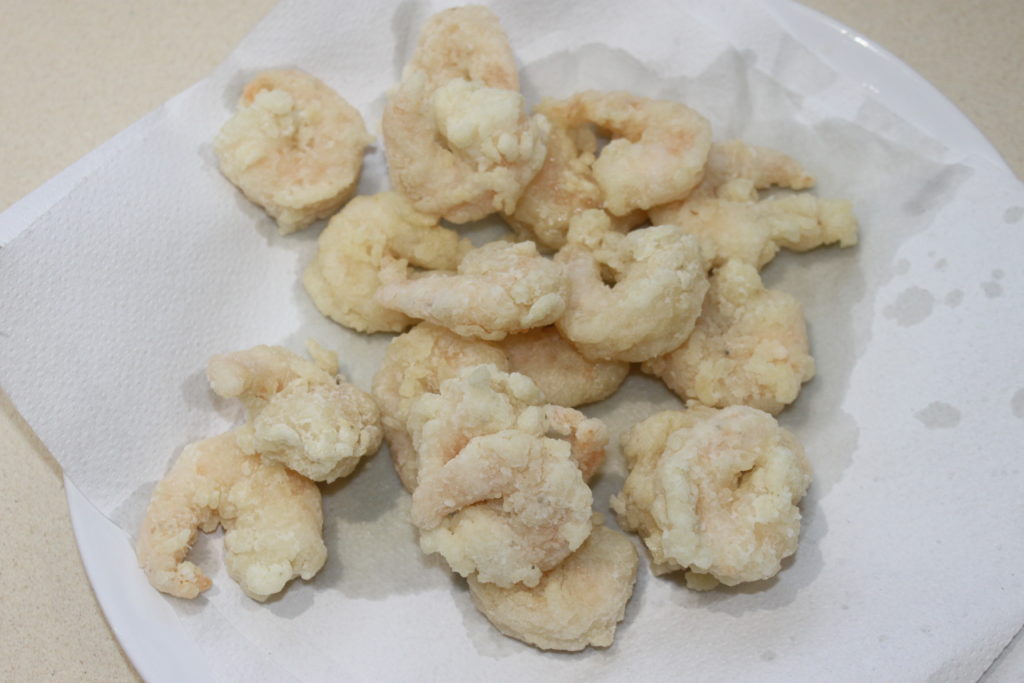
Let the shrimp rest on absorbent paper while cooking them all.
I can confirm that I only cook the shrimp once. If they were cooked again a second time, they would become overcooked!
Pour some of the sauce. You will surely not put everything, just enough to coat them well, but I did my calculations so that everything falls well as it should!
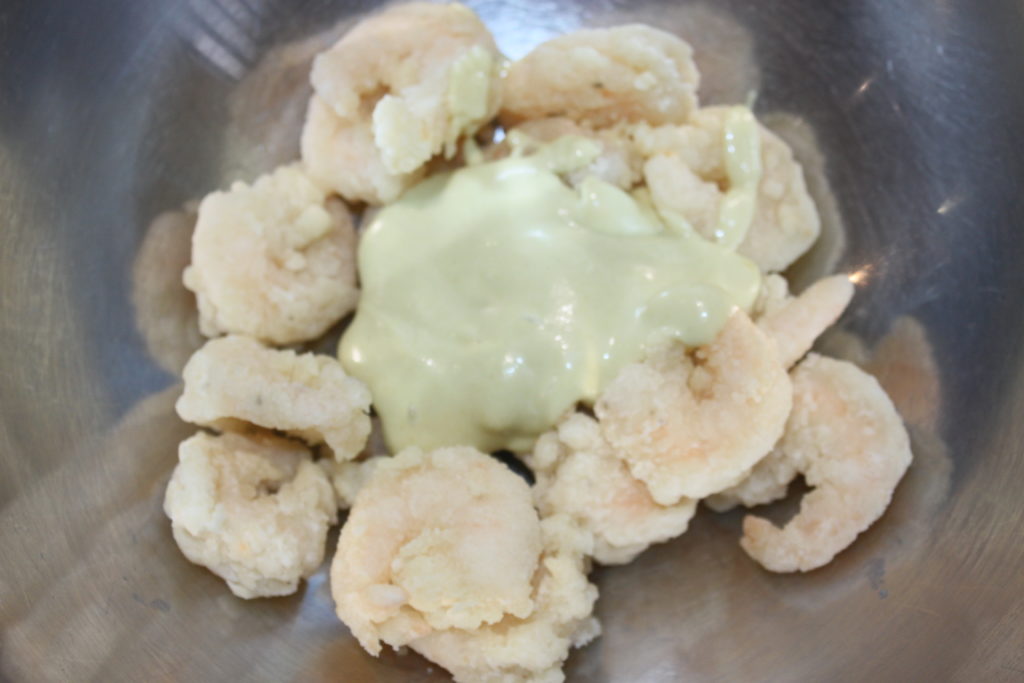
Mix well.
Then serve immediately. I put some wasabi sesame seeds here that I found in an Asian supermarket!

Wasabi Crispy Shrimp


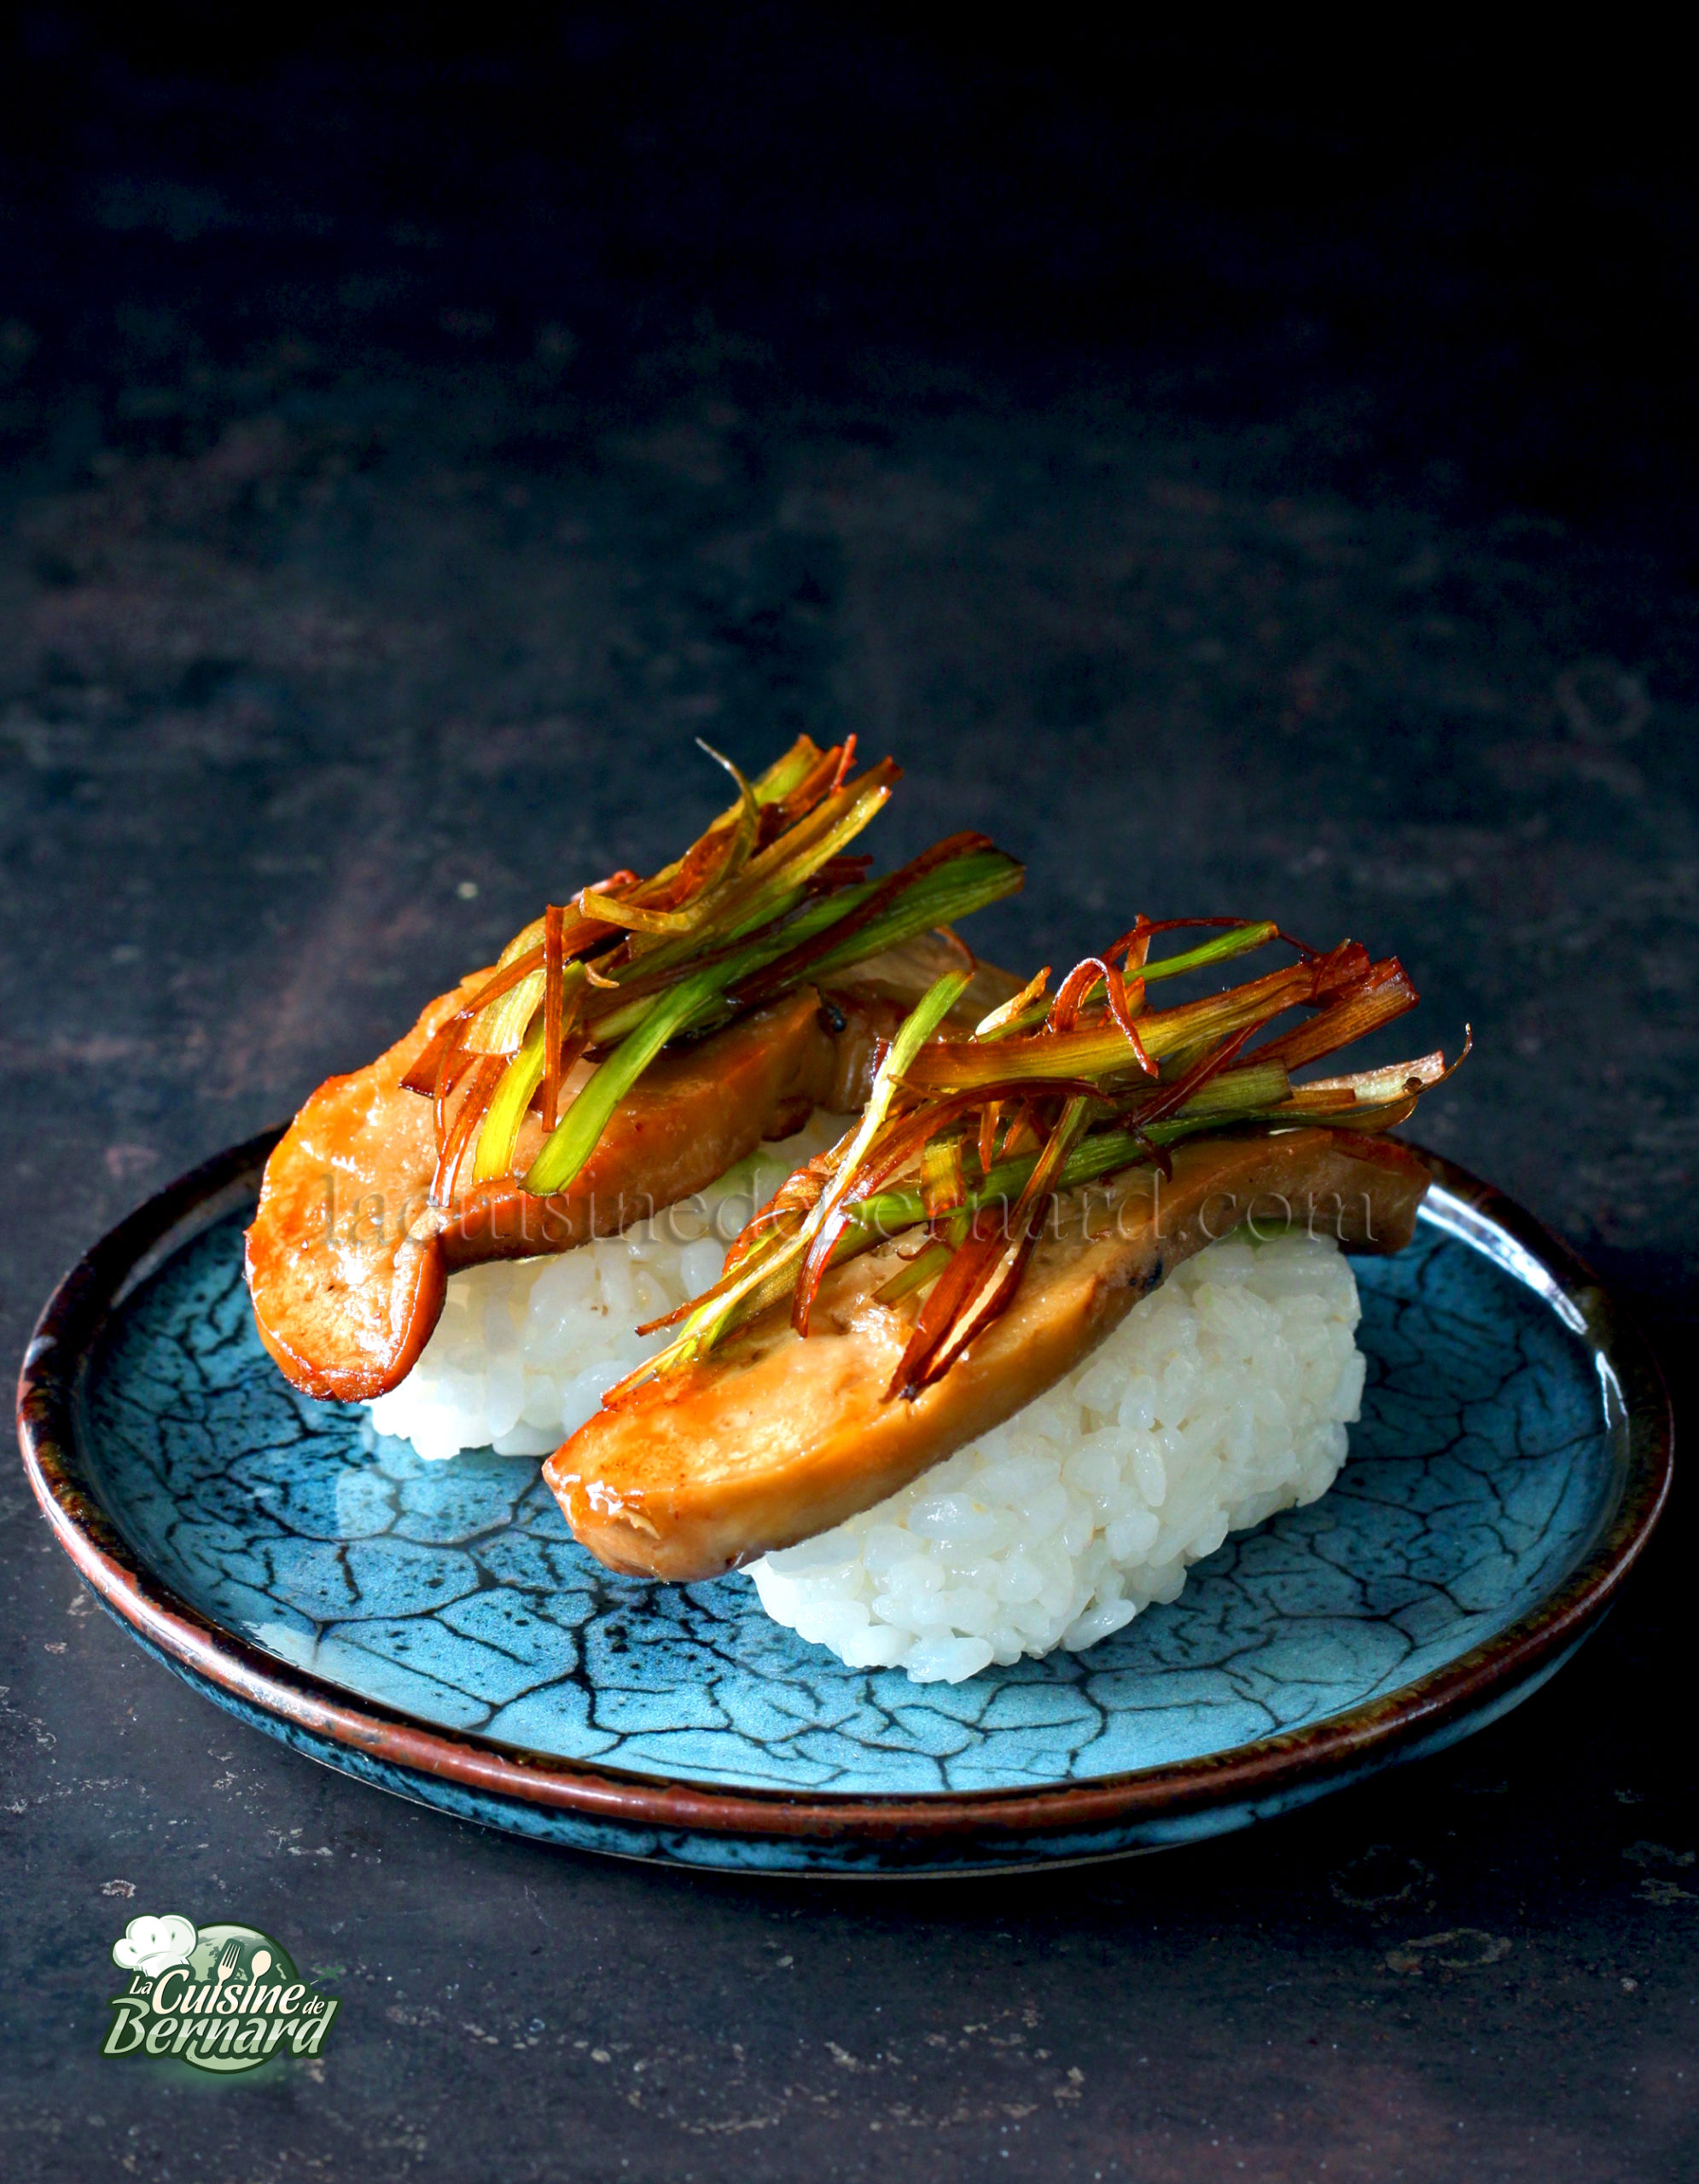
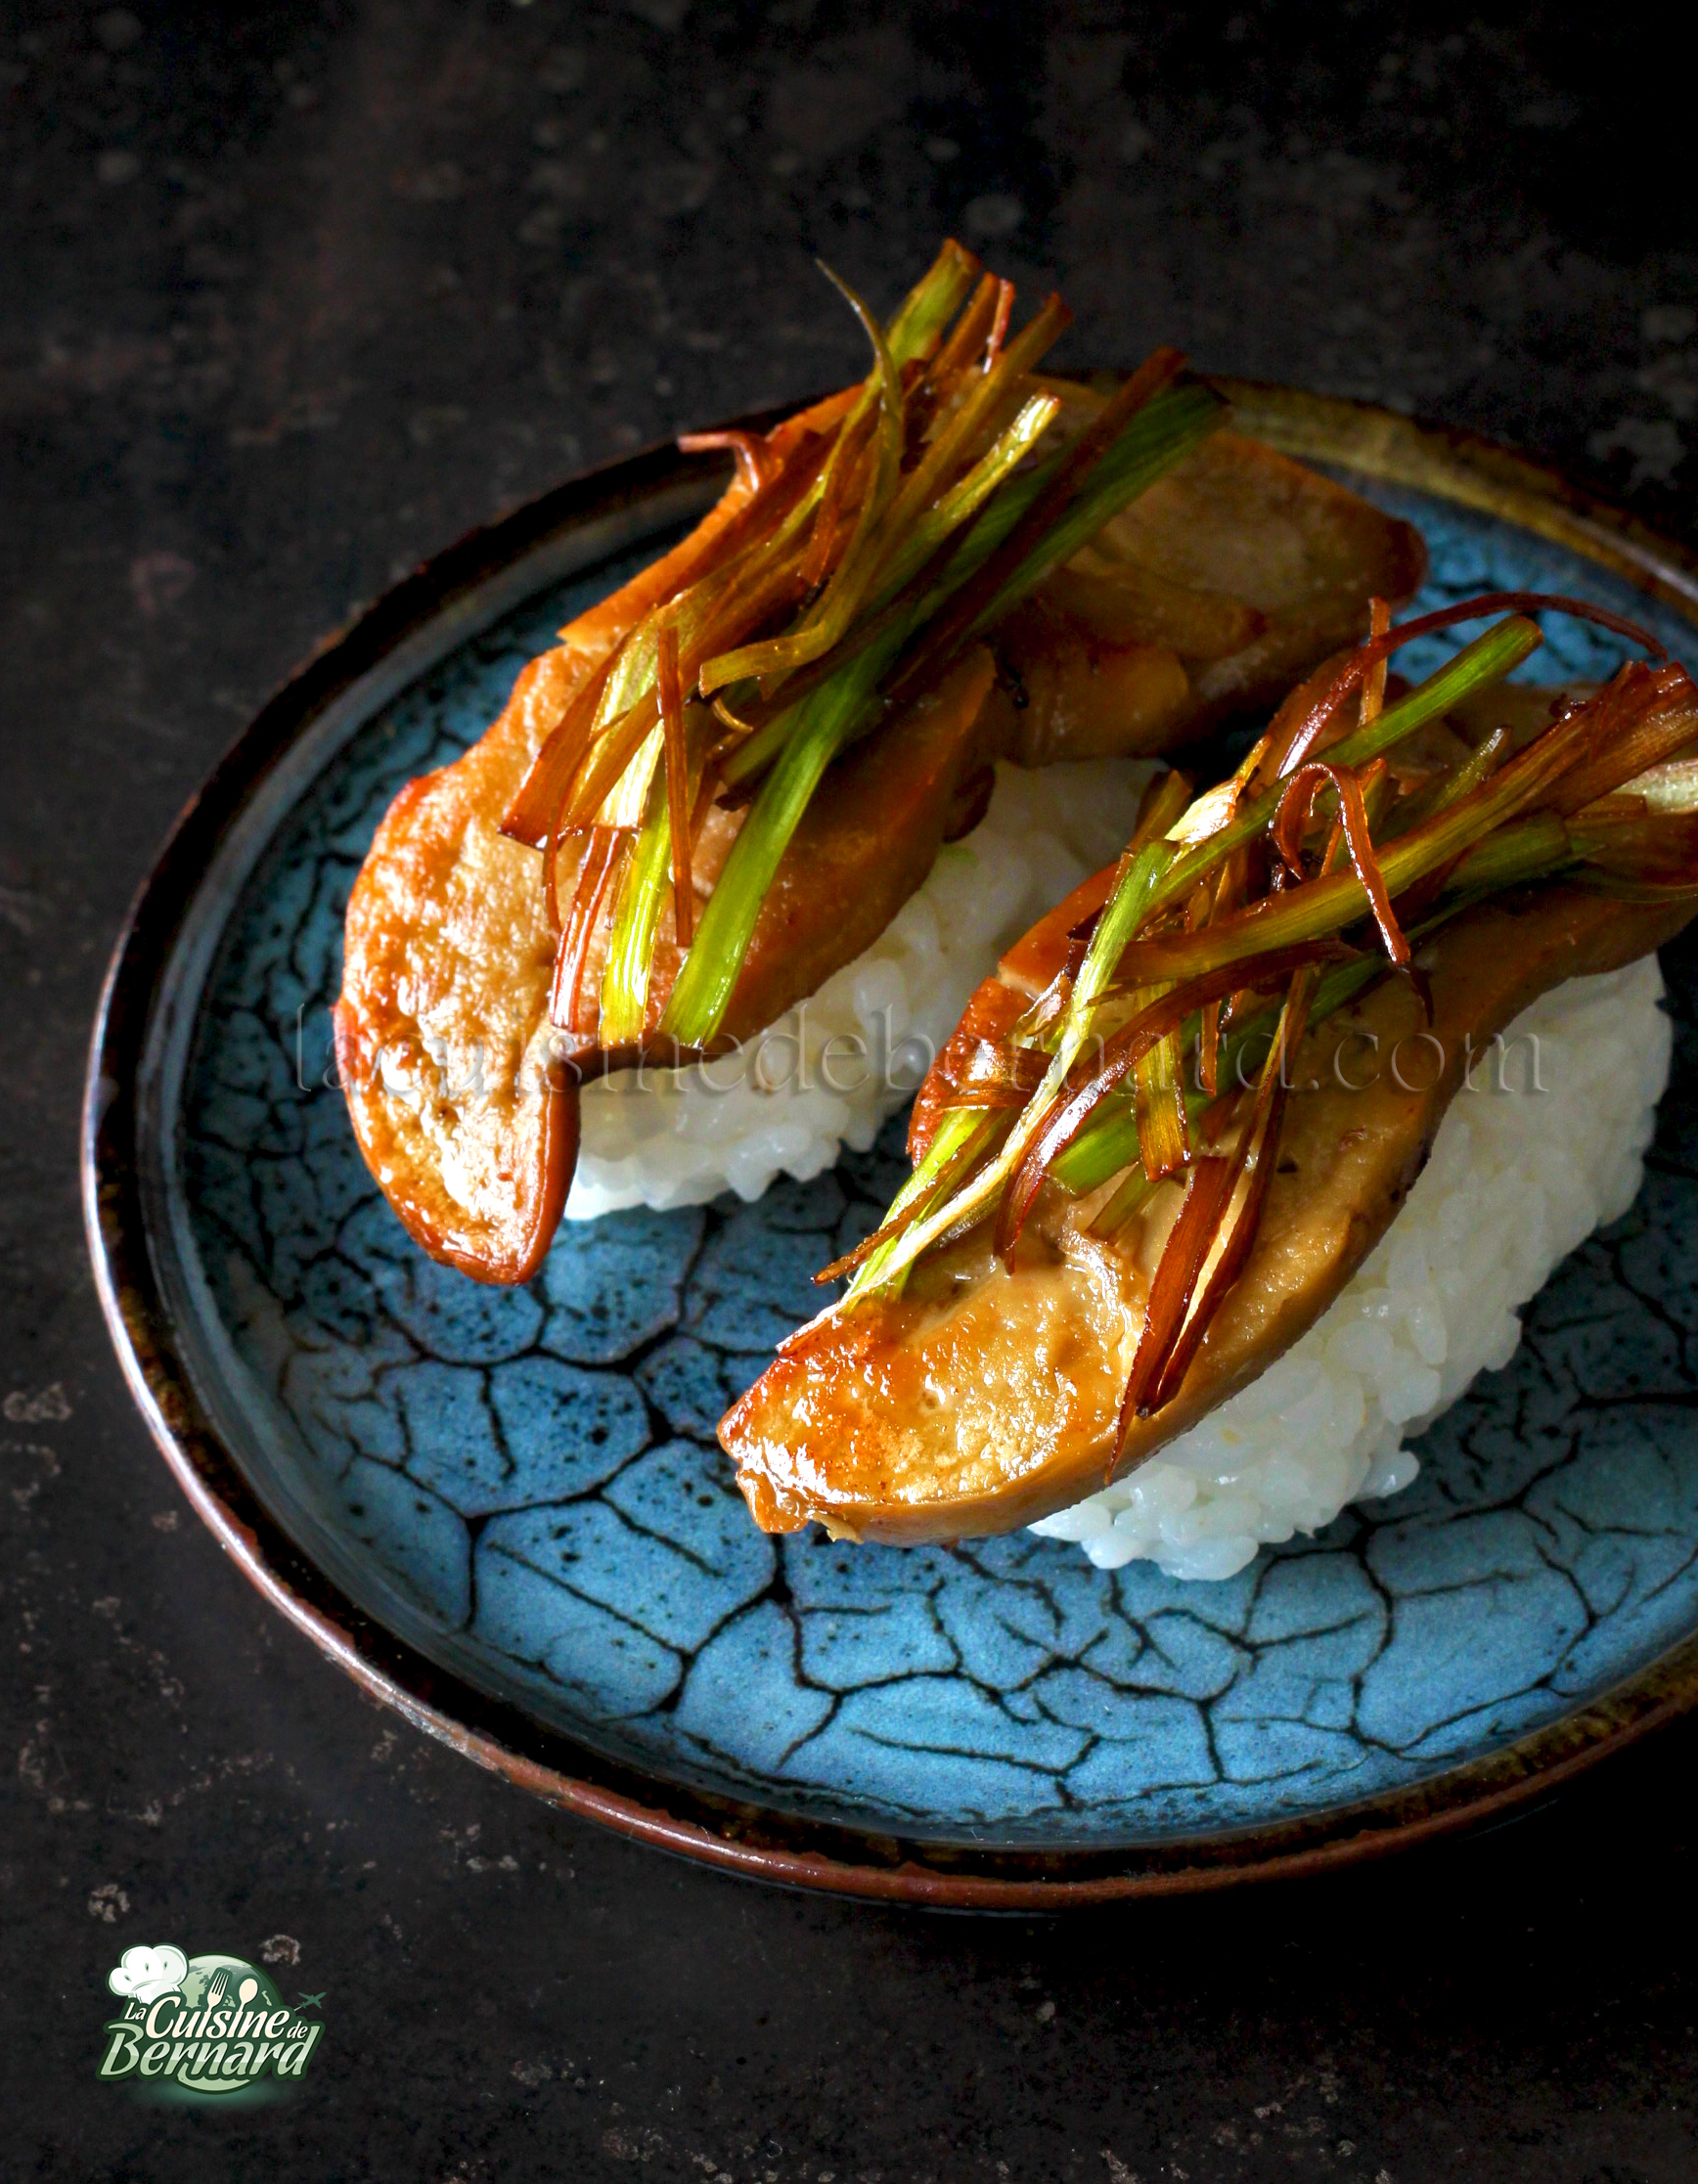
Some time ago, I often went to Asia, to Japan. I love the cuisine of almost all Asian countries so much! I think this comes across in my books and blog, but also in my workshops! It is not in Japan that I discovered these amazing sushi, but in China! I admit I was skeptical at first, but since I really like pan-fried foie gras, I wanted to try it. And I immediately loved it. The classic flavors of a sushi (the vinegared rice, the soy sauce that accompanies it, the wasabi that spices it up) are perfectly mixed with the foie gras, here hot and pan-fried. There is nothing traditional about this, I realize, but since I am unlikely to travel as much as I used to, and I had some raw foie gras in the freezer, I wanted to put this recipe on my blog.
For 4 people:
- 8 raw slices of foie gras
- a little wasabi
- 1 small leek
- frying oil
- classic salted soy sauce
For rice:
- 225g round rice or sushi rice
- 280g of water
For the sweet sushi vinegar:
- 25g of sugar
- 5g of mirin
- 35ml of rice vinegar or white vinegar
- 2g of salt
Start by cooking the sushi rice. Weigh it and rinse it in clear water for 1 minute in a sieve. Drain it and put it in the rice cooker with the 280ml (or grams it is the same) of water. Put it to cook. There will be more rice than necessary for the foie gras sushi , but you can make shirashi at the same time or make other sushi.
Meanwhile, prepare the sweet vinegar by mixing all the ingredients together.
Transfer the cooked rice to a container and pour in the sweet vinegar a little at a time. Mix gently so as not to break up the rice. When all the vinegar has been added, put a piece of cling film around it to prevent it from drying out.

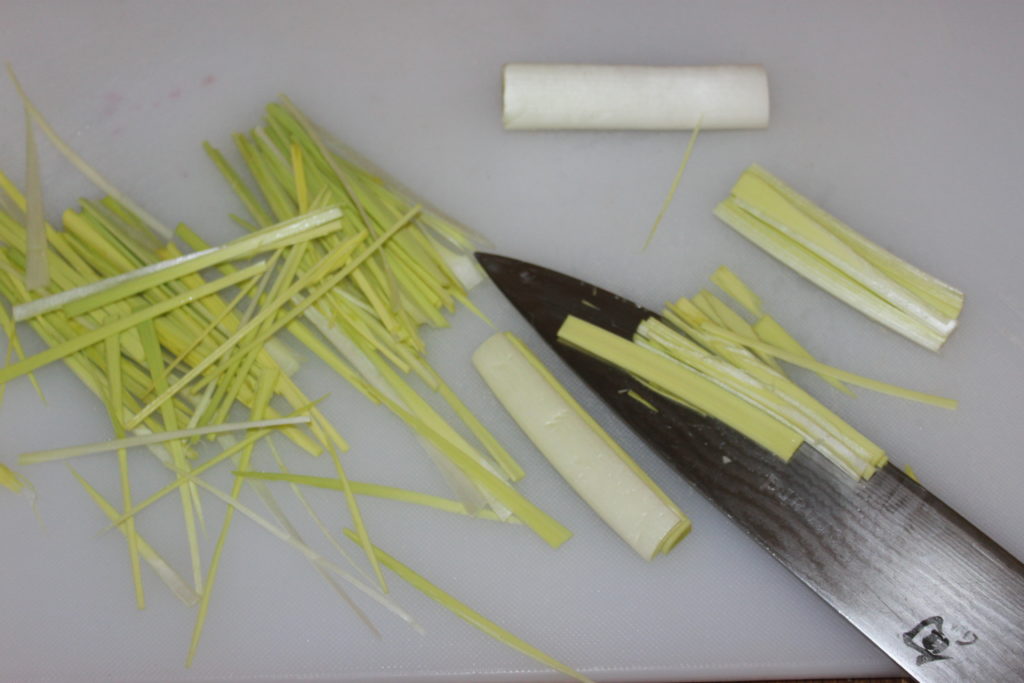
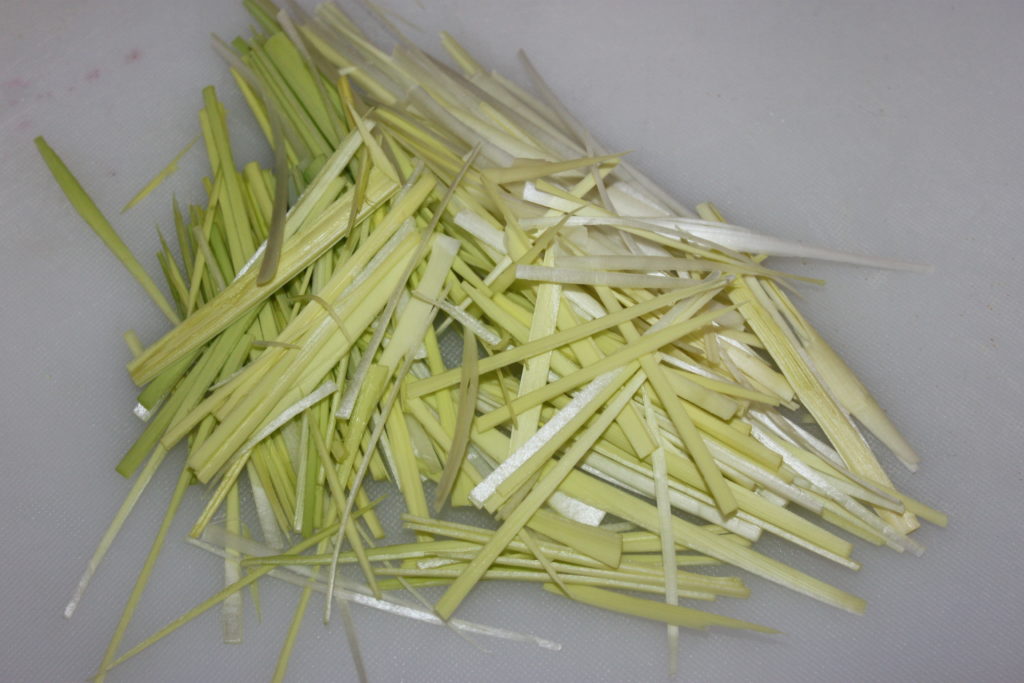
Prepare the leek.
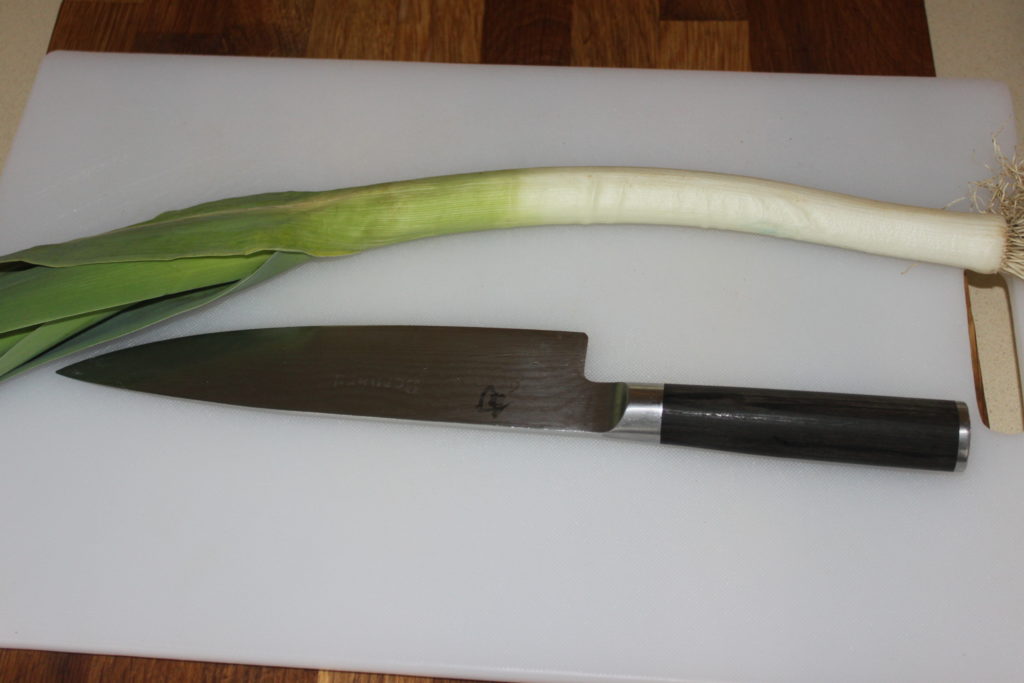
Cut the root and remove some of the green leaves. Wash and dry it, then cut it into 8cm pieces. Cut each piece in half lengthwise and slice finely.
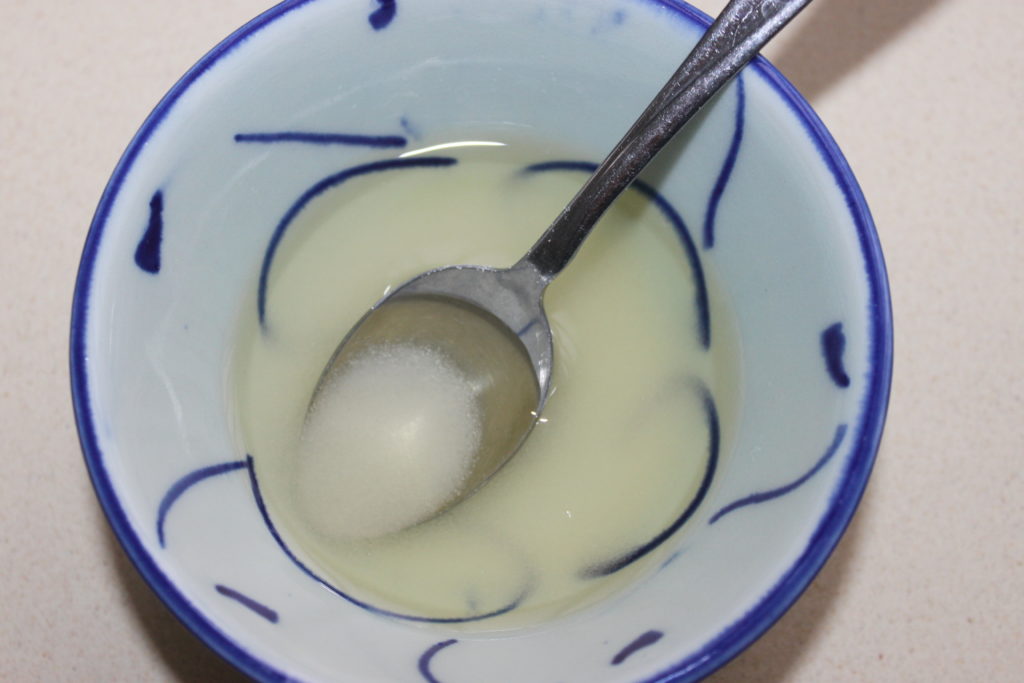
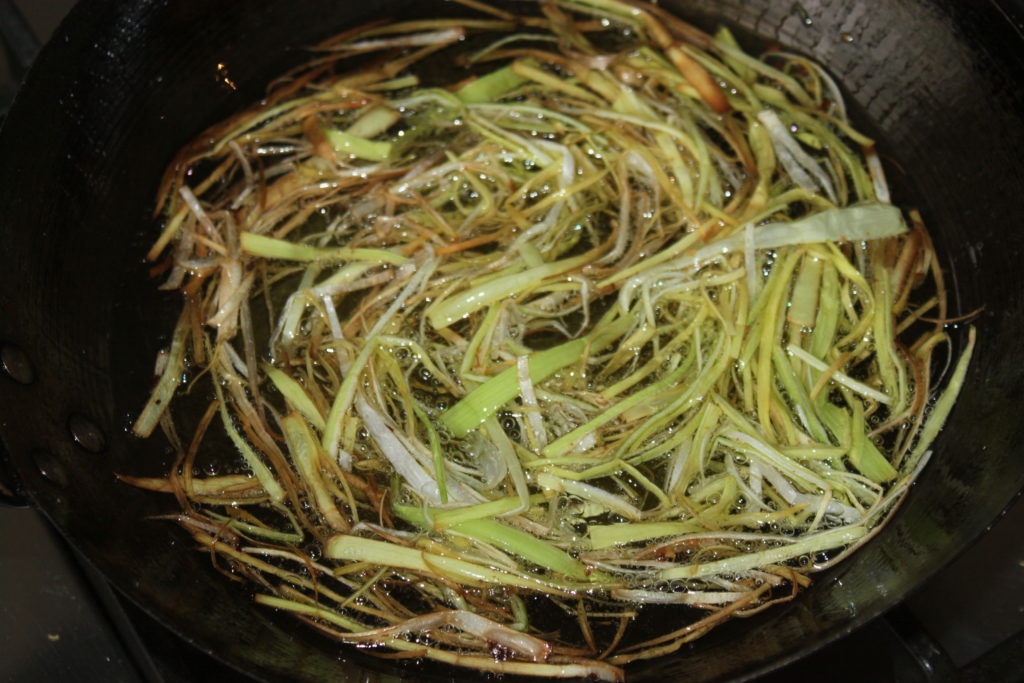
Heat a small pan or wok of oil to 180°C. Fry the leek until golden brown.
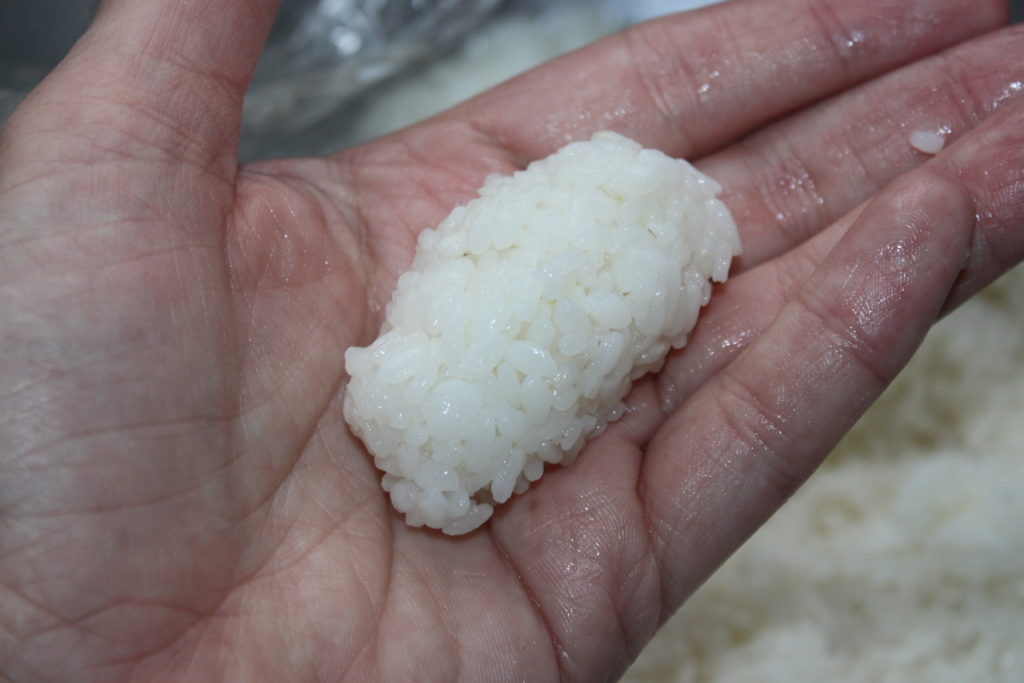
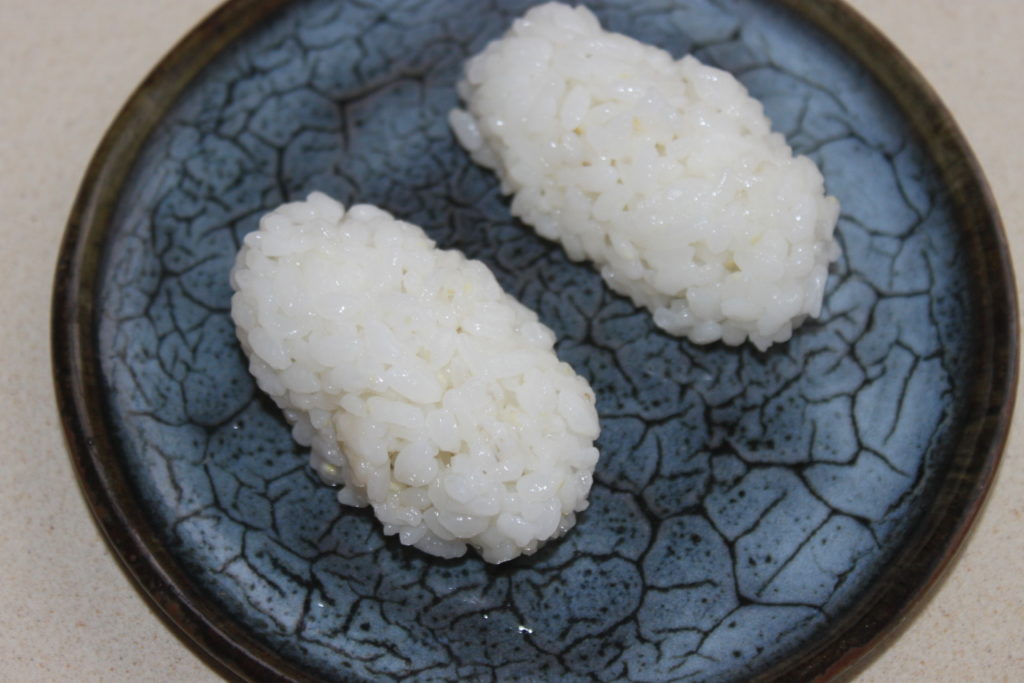
Prepare the rice. I make 25g dumplings, using a little water so that the rice doesn’t stick to my fingers. Shape the dumpling into a nice little sushi.
Place them on a plate as you go.
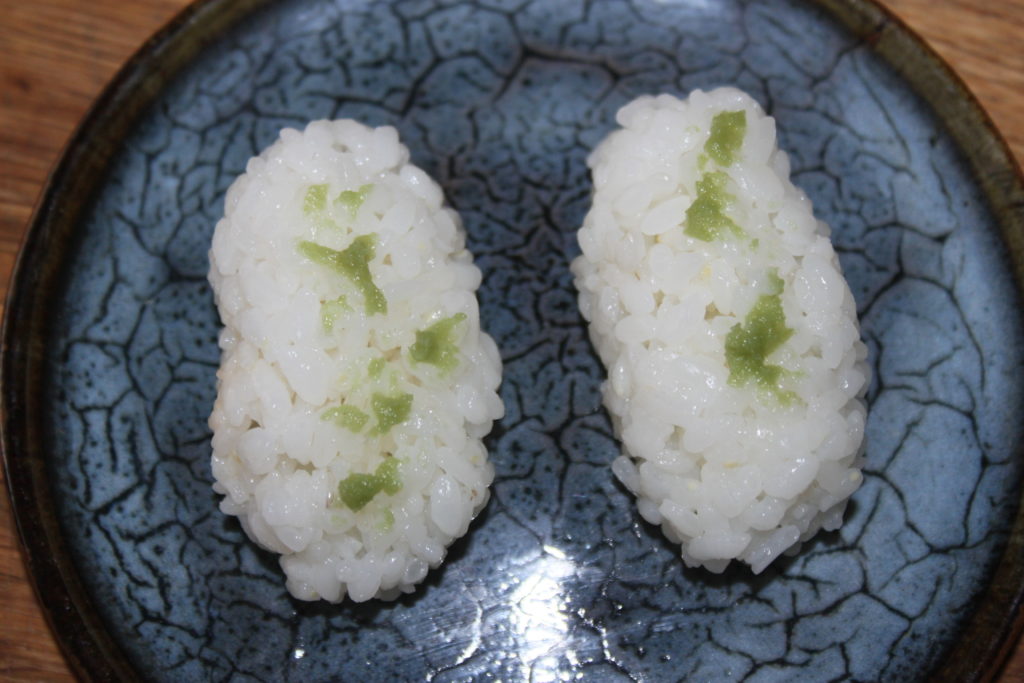
Put a little wasabi on top.
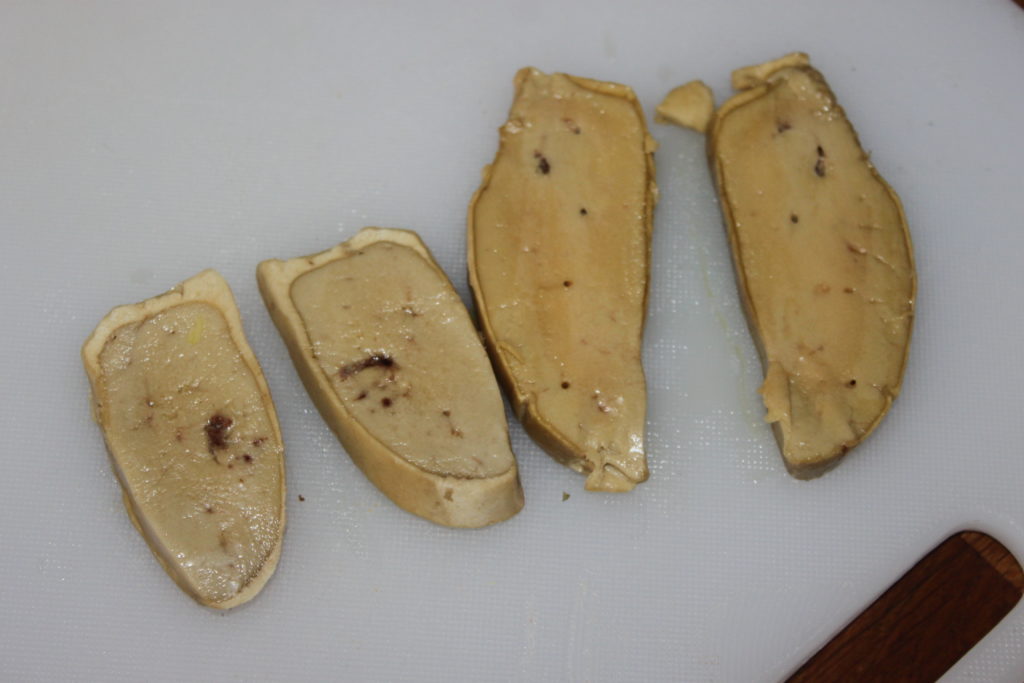
Cut the slices of raw foie gras. I had mine in the freezer for a while!
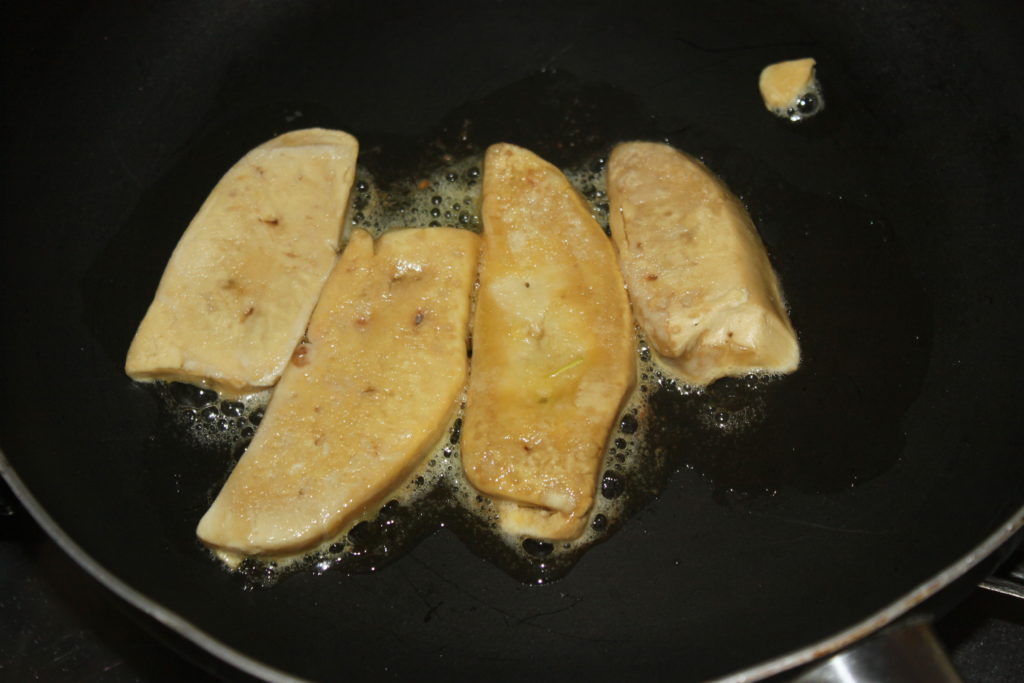
Fry it gently in a frying pan over moderate heat, without putting any fat on it, it will already give back quite a bit!
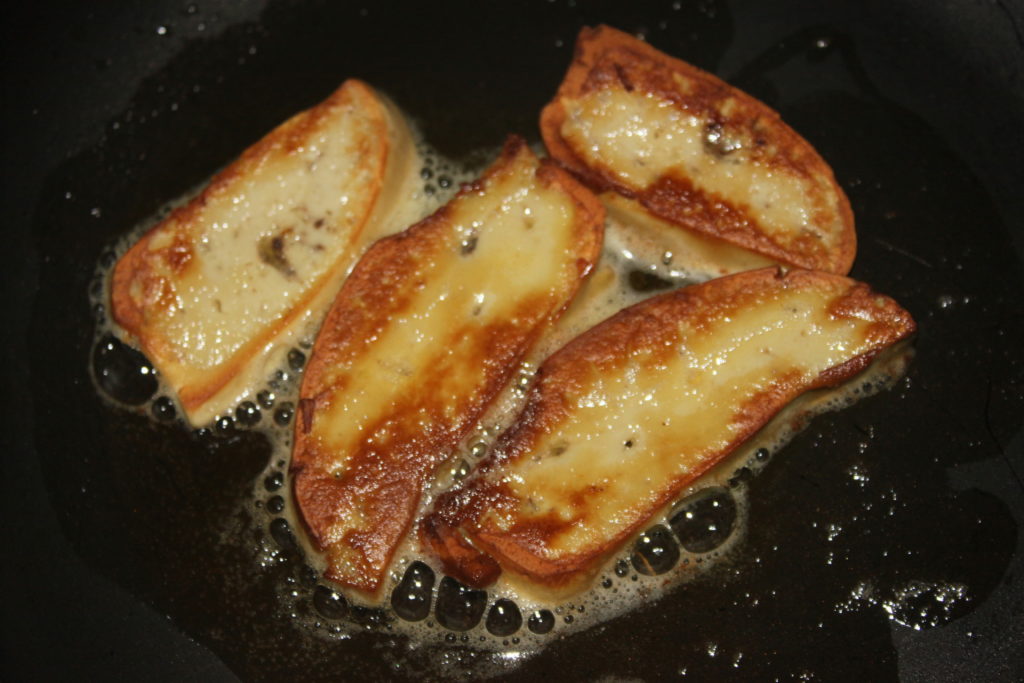
Turn over to color the other side.
When you come to the table (this dish does not wait!) put a slice of foie gras by sushi, a little fried leek, and the soy sauce at disposal!
Sushi with fried foie gras
Ingredients
- 8 slices foie gras
- 1 leek small
- frying oil
- salted soy sauce
For the rice
- 225 g sushi rice or round rice
- 280 g water
For the sweet sushi vinegar
- 25 g sugar
- 5 g mirin
- 35 ml rice vinegar or white vinegar
- 2 g salt
Instructions
- Start by cooking the sushi rice. Weigh it and rinse it with clear water for 1 minute in a sieve. Drain it and put it in the rice cooker with the 280ml (or grams it's the same) of water. Cook it. There will be more rice than needed for the foie gras sushi, but you can make shirashi at the same time or make other sushi.
- Meanwhile, prepare the sweet vinegar by mixing all the ingredients together.Transfer the cooked rice to a container and pour in the sweet vinegar a little at a time. Mix gently so as not to break up the rice. When all the vinegar has been added, put a piece of cling film around it to prevent it from drying out.
- Prepare the leek.
- Cut the root and remove some of the green leaves. Wash and dry the leek and cut it into 8cm pieces. Cut each section in half lengthwise and chop finely.
- Heat a small pan or wok of oil to 180°C. Fry the leek until golden brown.
- Prepare the rice. I make 25g dumplings, using a little water so that the rice doesn't stick to my fingers. Shape the dumpling into a nice little sushi.
- Put them on a plate as you go.
- Put a little wasabi on top.
- Cut the slices of raw foie gras. I had mine in the freezer for a while!
- Fry it gently in a frying pan over moderate heat, without putting any fat on it, it will already give back quite a bit!
- Turn to color the other side.
- When you come to the table (this dish doesn't wait!) put a slice of foie gras by sushi, a little fried leek, and the soy sauce at disposal!
Nutrition


I am delighted to have been contacted to make a recipe in partnership with the Irish counter. Already because I had the chance to go to Ireland for a culinary trip (HERE) and in addition I have a little family who lives in Dublin. I was asked to make a recipe with Irish lamb, which I had already discovered on the spot and it is true that it is very famous. I offer you this lamb sirloin gently cooked under vacuum, with an alternative solution if you do not have this possibility of cooking. The result is very tasty with an intensely flavored sauce, and I accompany this meat with oven-roasted vegetables and fried potatoes. You can find lamb meat here: www.boeuf-irlandais.fr/lagneau-irlandais/


J’adore faire des galettes des rois ! Et je m’amuse tous les ans depuis quelque temps à vous proposer une nouvelle recette. Évidemment pour les puristes, la version classique est aussi sur mon blog de cuisine. Je vous donne cette fois la version à la crème de marrons et brisures de marrons glacés. C’est une petite bombe, surtout avec une pâte feuilletée inversée maison qui n’est vraiment pas compliquée à faire malgré son nom qui fait peur !


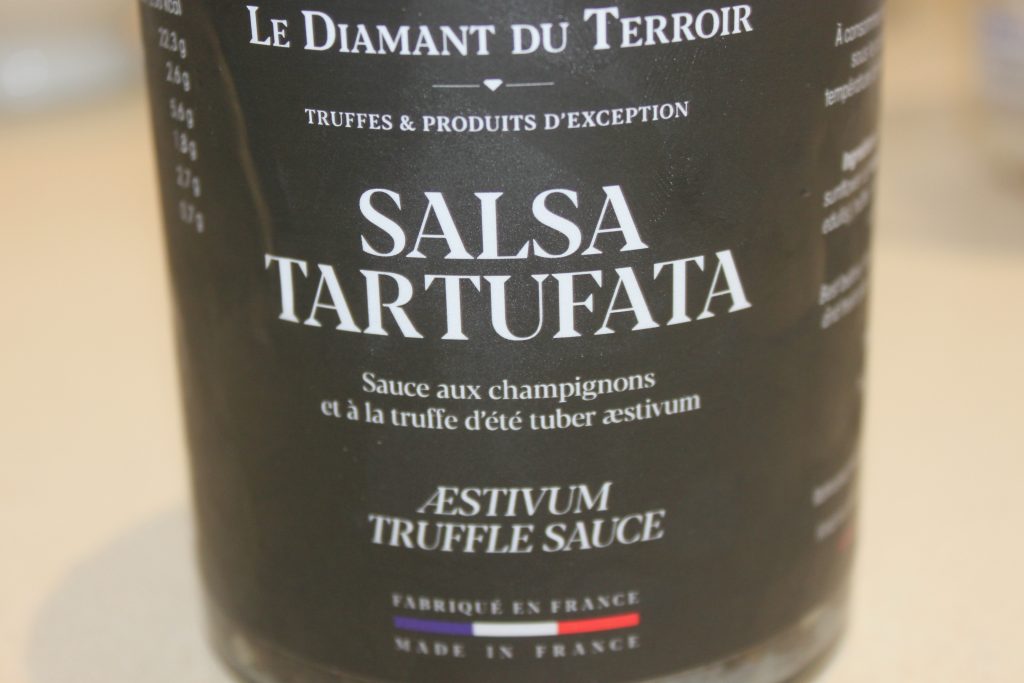
After the holidays, I had a jar of tartufata sauce left over, basically mushrooms with truffle oil. It’s super rich in taste and it’s a delight with lots of things. I suggest this association, rather than a real recipe, with Brillat-Savarin, this very creamy cheese and ham. This gives a perfect result: a crispy croque-monsieur on the outside and soft and melting on the inside, ideal for a quick meal with a good salad!
For 4 croque monsieurs:
- 8 slices of bread
- 50g semi-salted butter
- 4 tablespoons tartufata
- 8 slices of ham
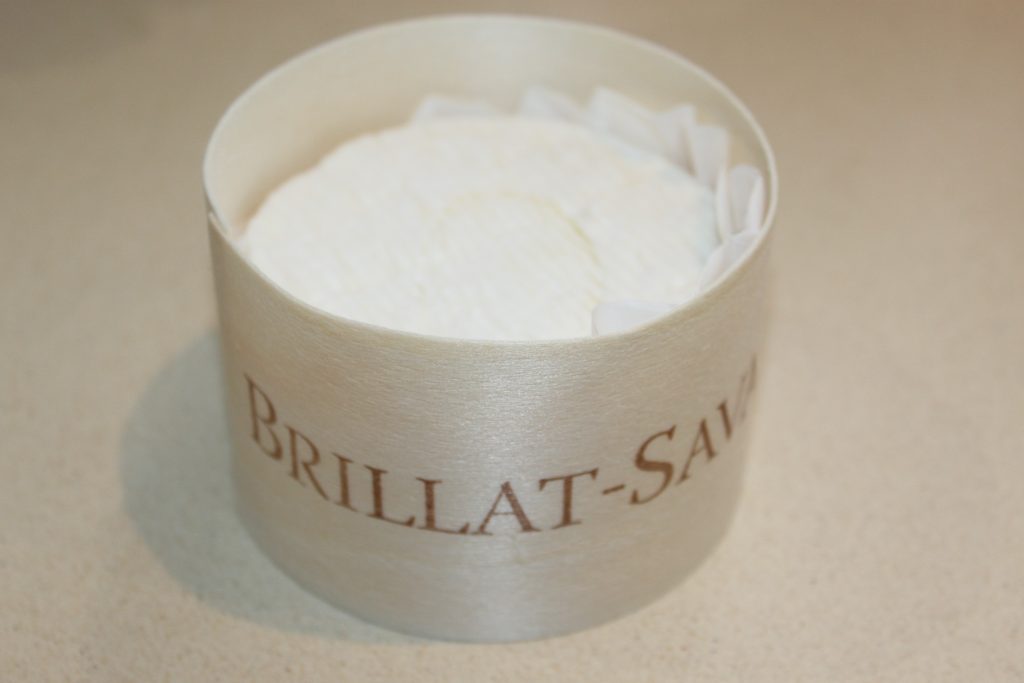
- 1 small Brillat-Savarin
- salt, pepper, chilli
Start by putting semi-salted butter on one side of the slices of bread. I started with soft butter then melted butter.
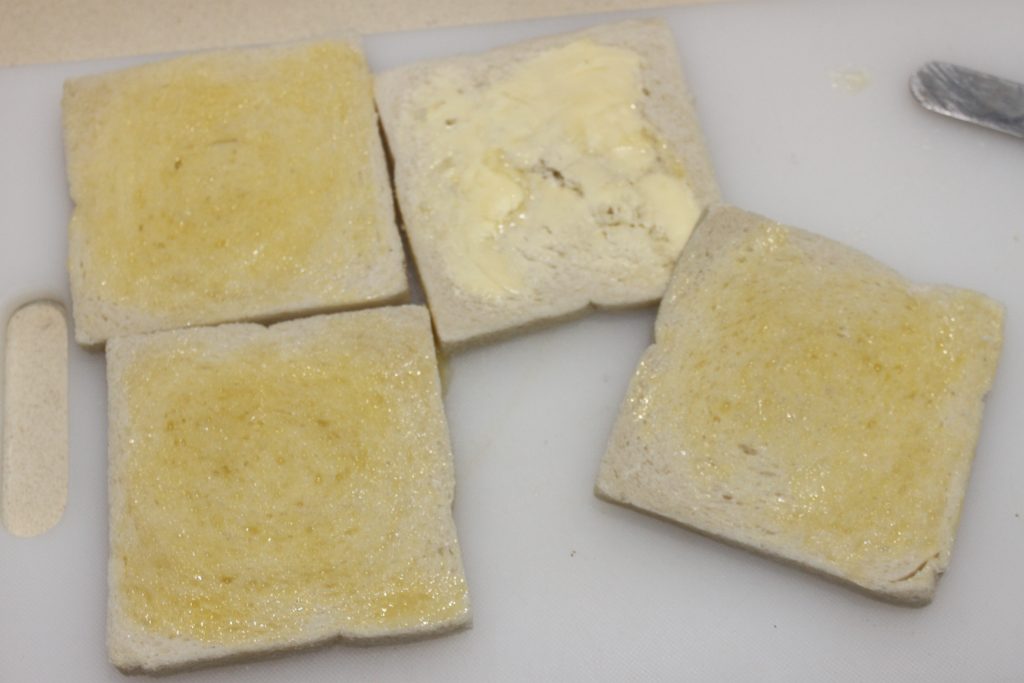
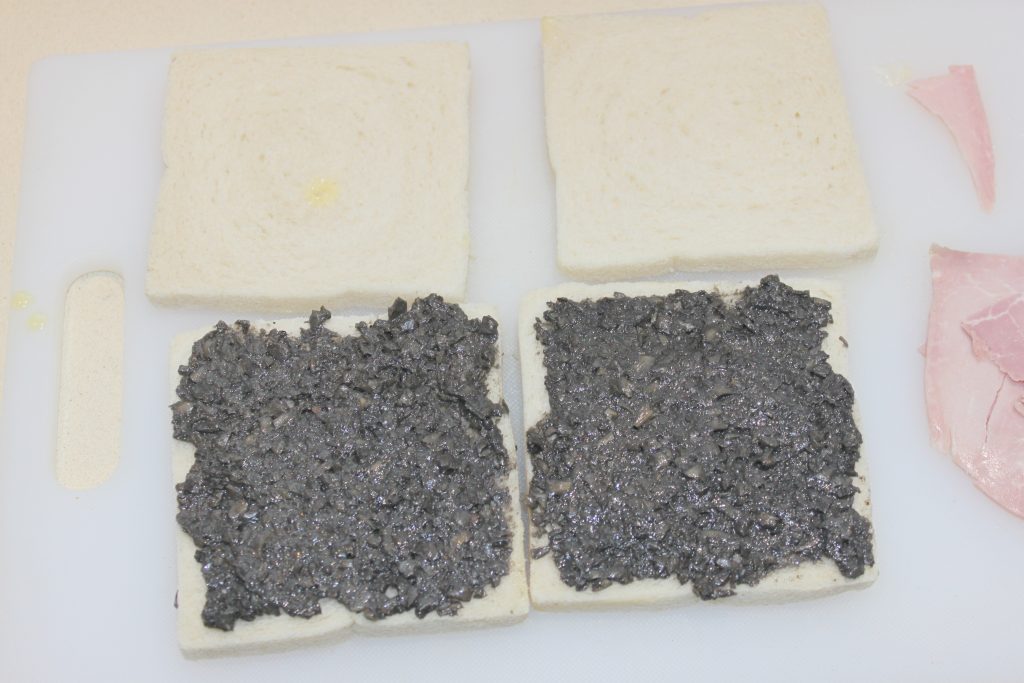
Turn the slices over so that the butter is on the outside. Here is the tartufata that we find quite easily. I had some parties left and I didn’t want to spoil it.
Add a heaping tablespoon per bite.
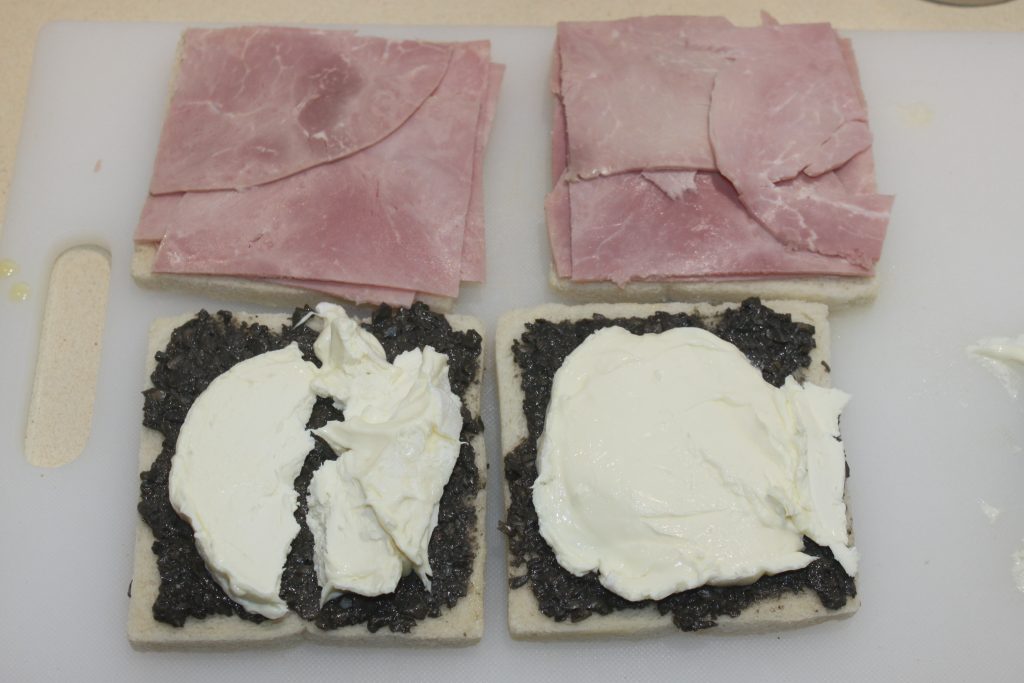
And here is the Brillat-Savarin.
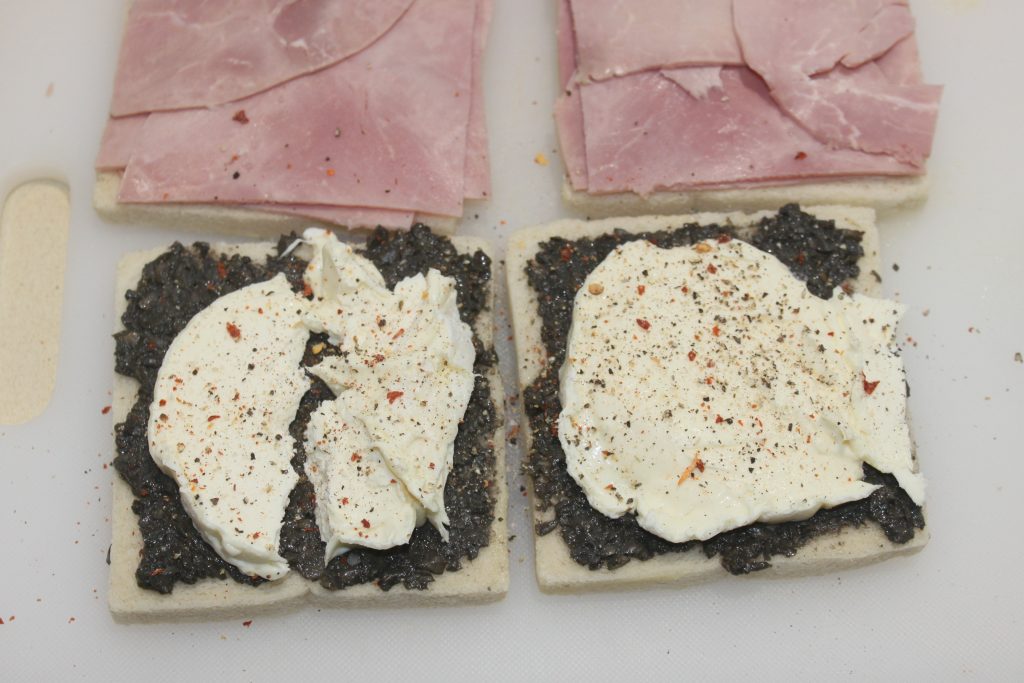
Cut the slices of ham (here without nitrite, even if I still find it very pink!) in 4 then put 2 slices per croque, so 8 quarters, the cut facing out so that it does not overflow. Put a good piece of Brillat-Savarin on the tartufata.
Salt, pepper to your taste (here I put a little pepper).
And hop to cook in the croque monsieur machine or in the pan.
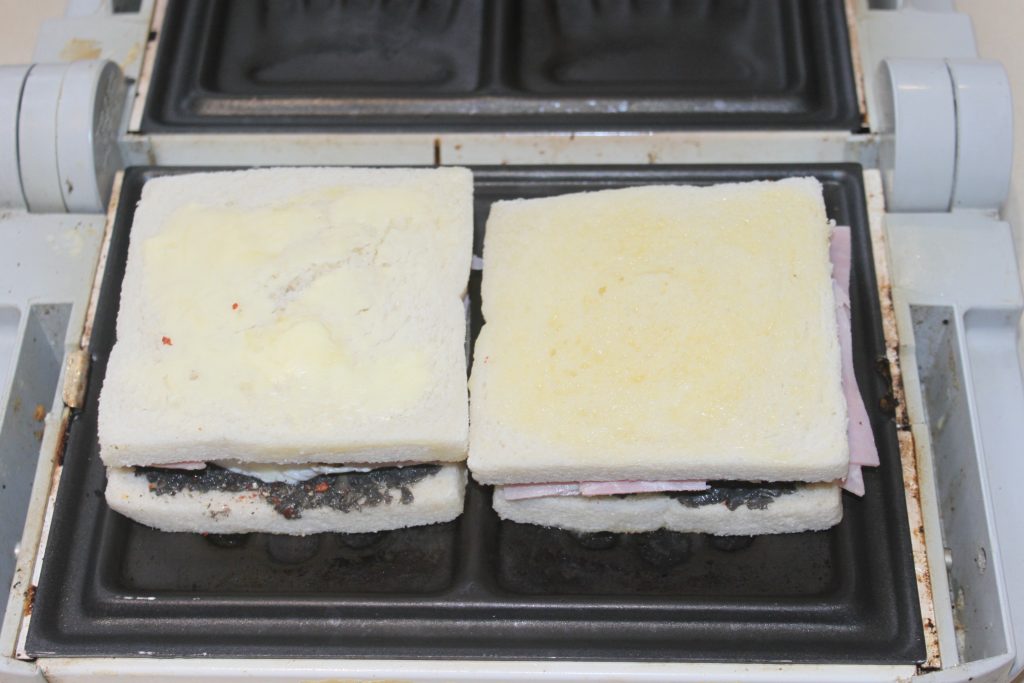
Allow to cook until nicely browned.
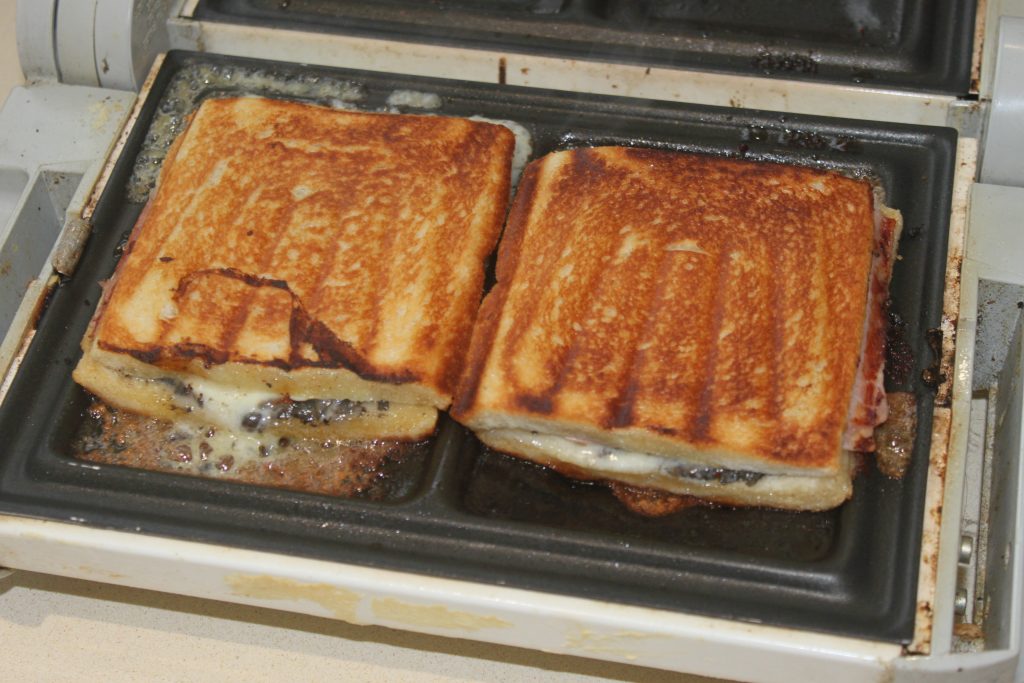
Serve immediately with a good salad or a bowl of soup!
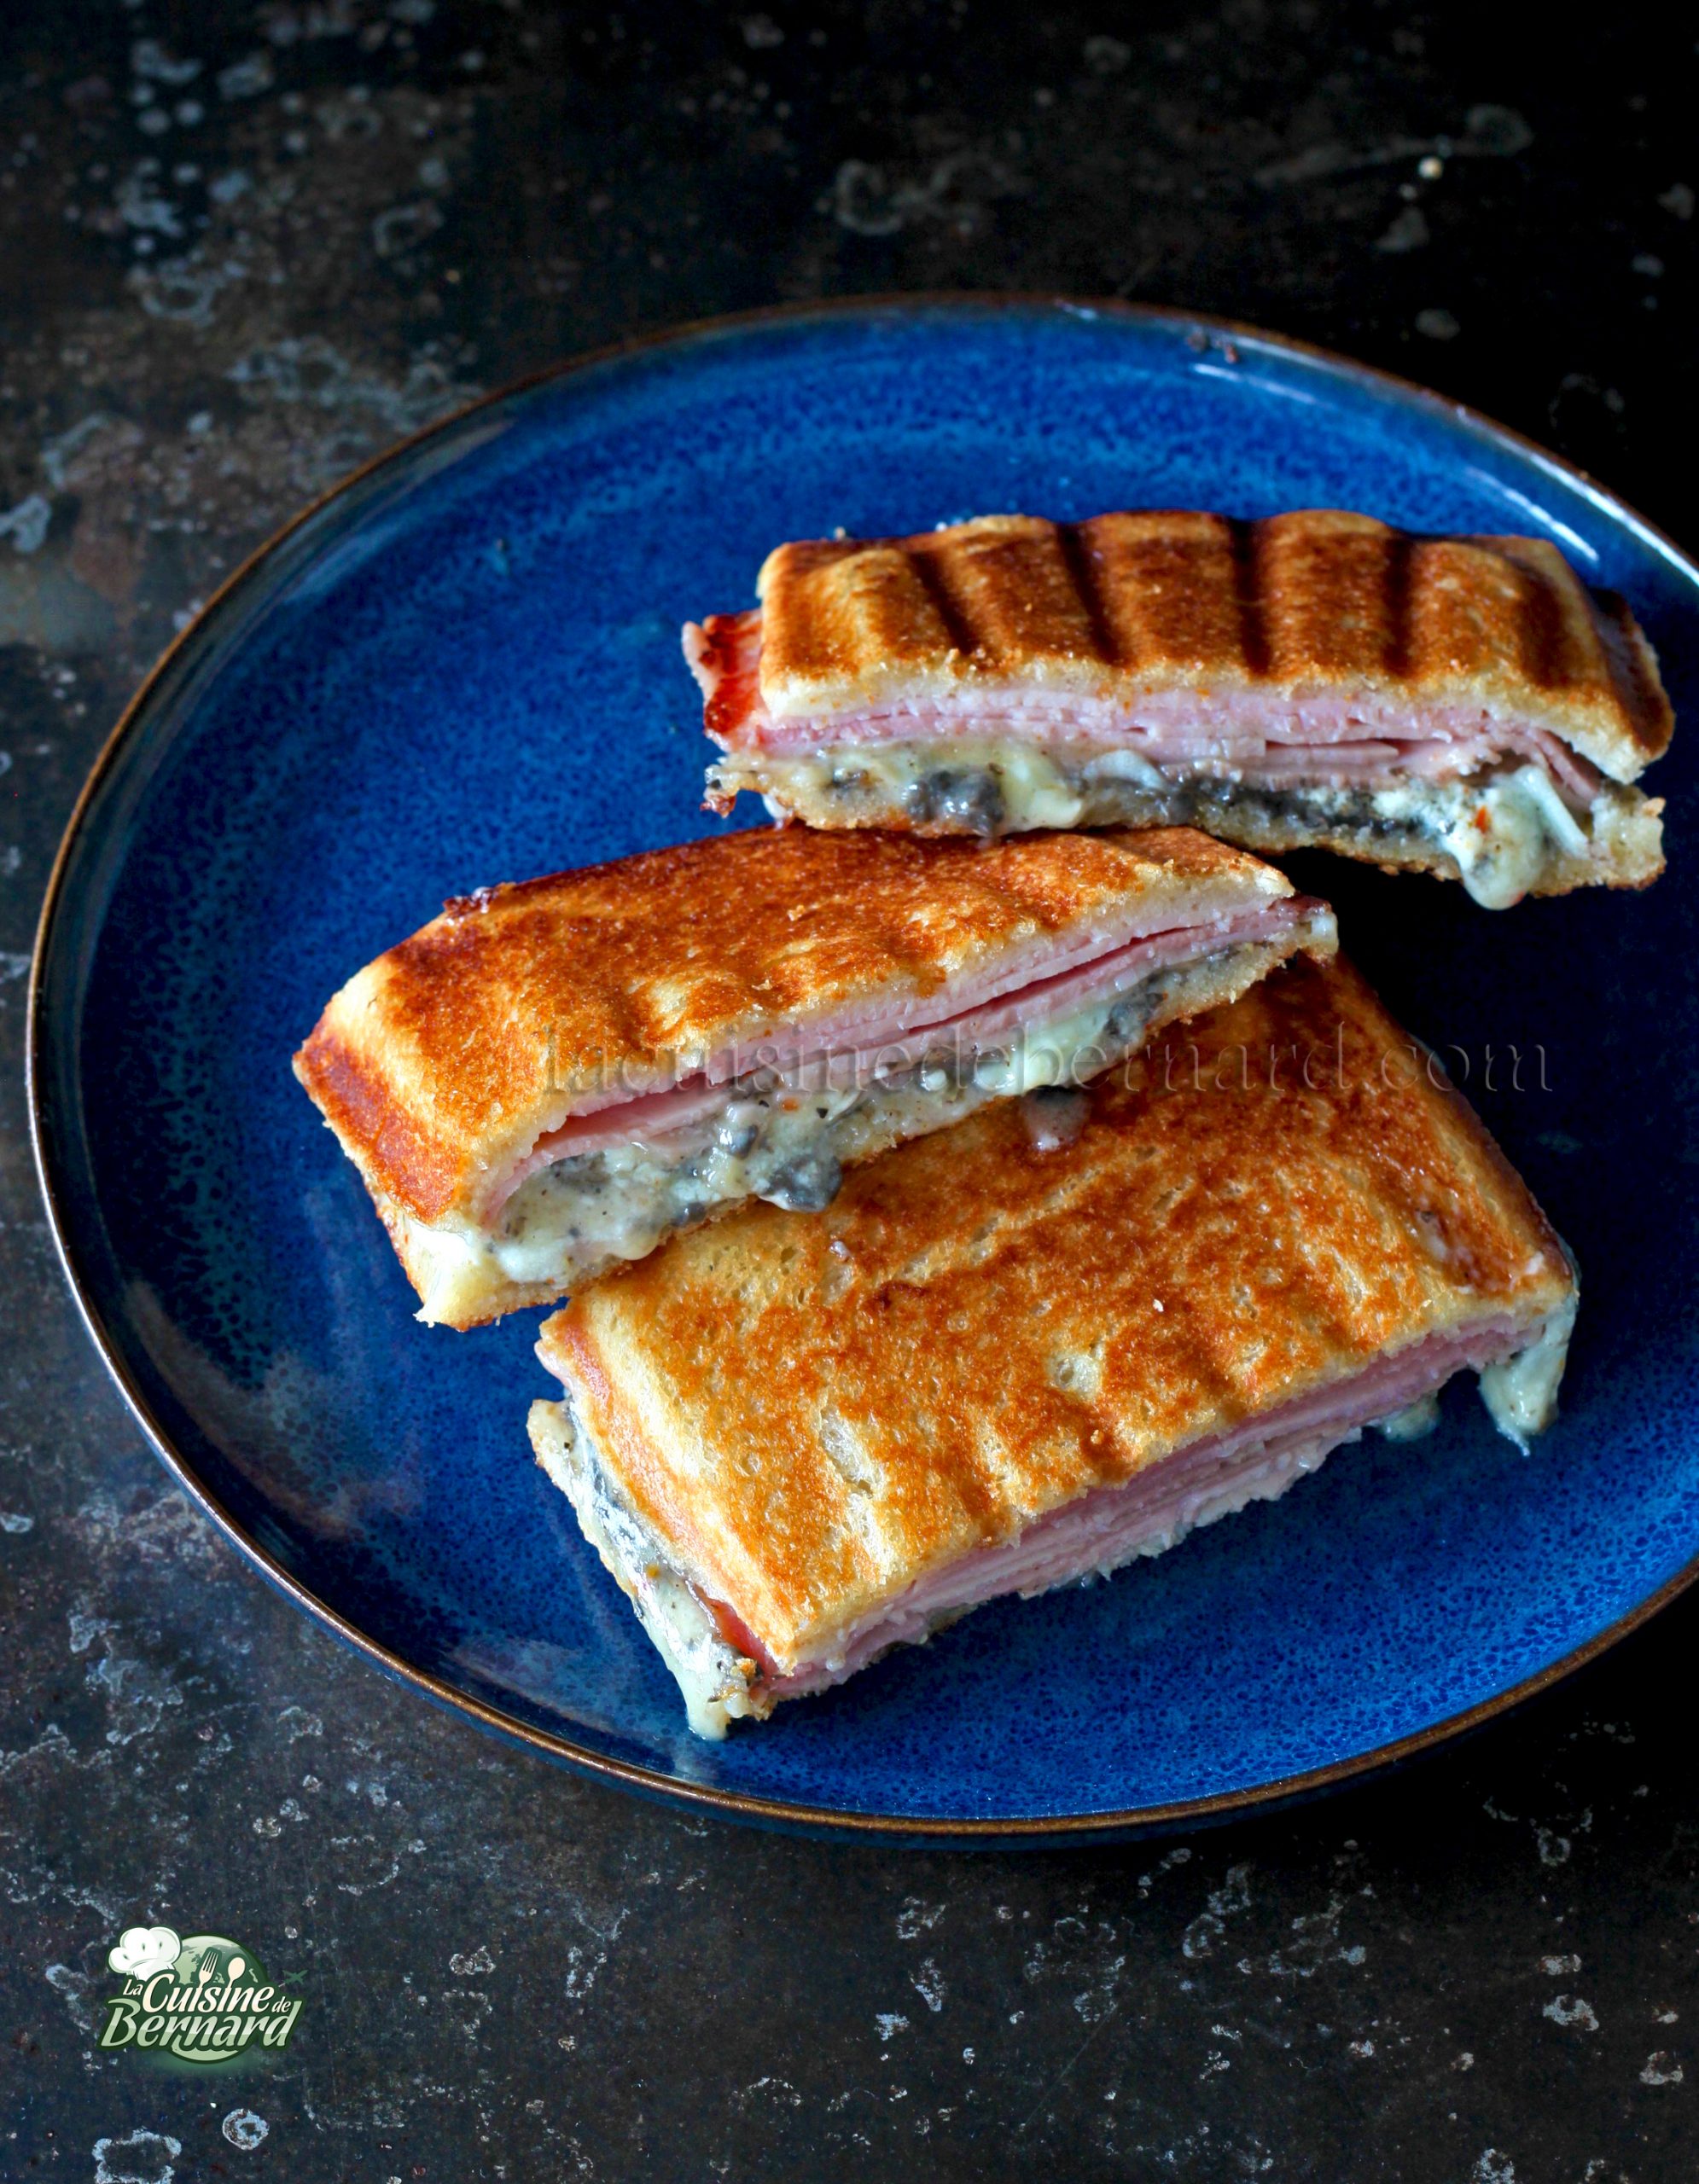

Croque-monsieur Brillat-Savarin, ham and tartufata


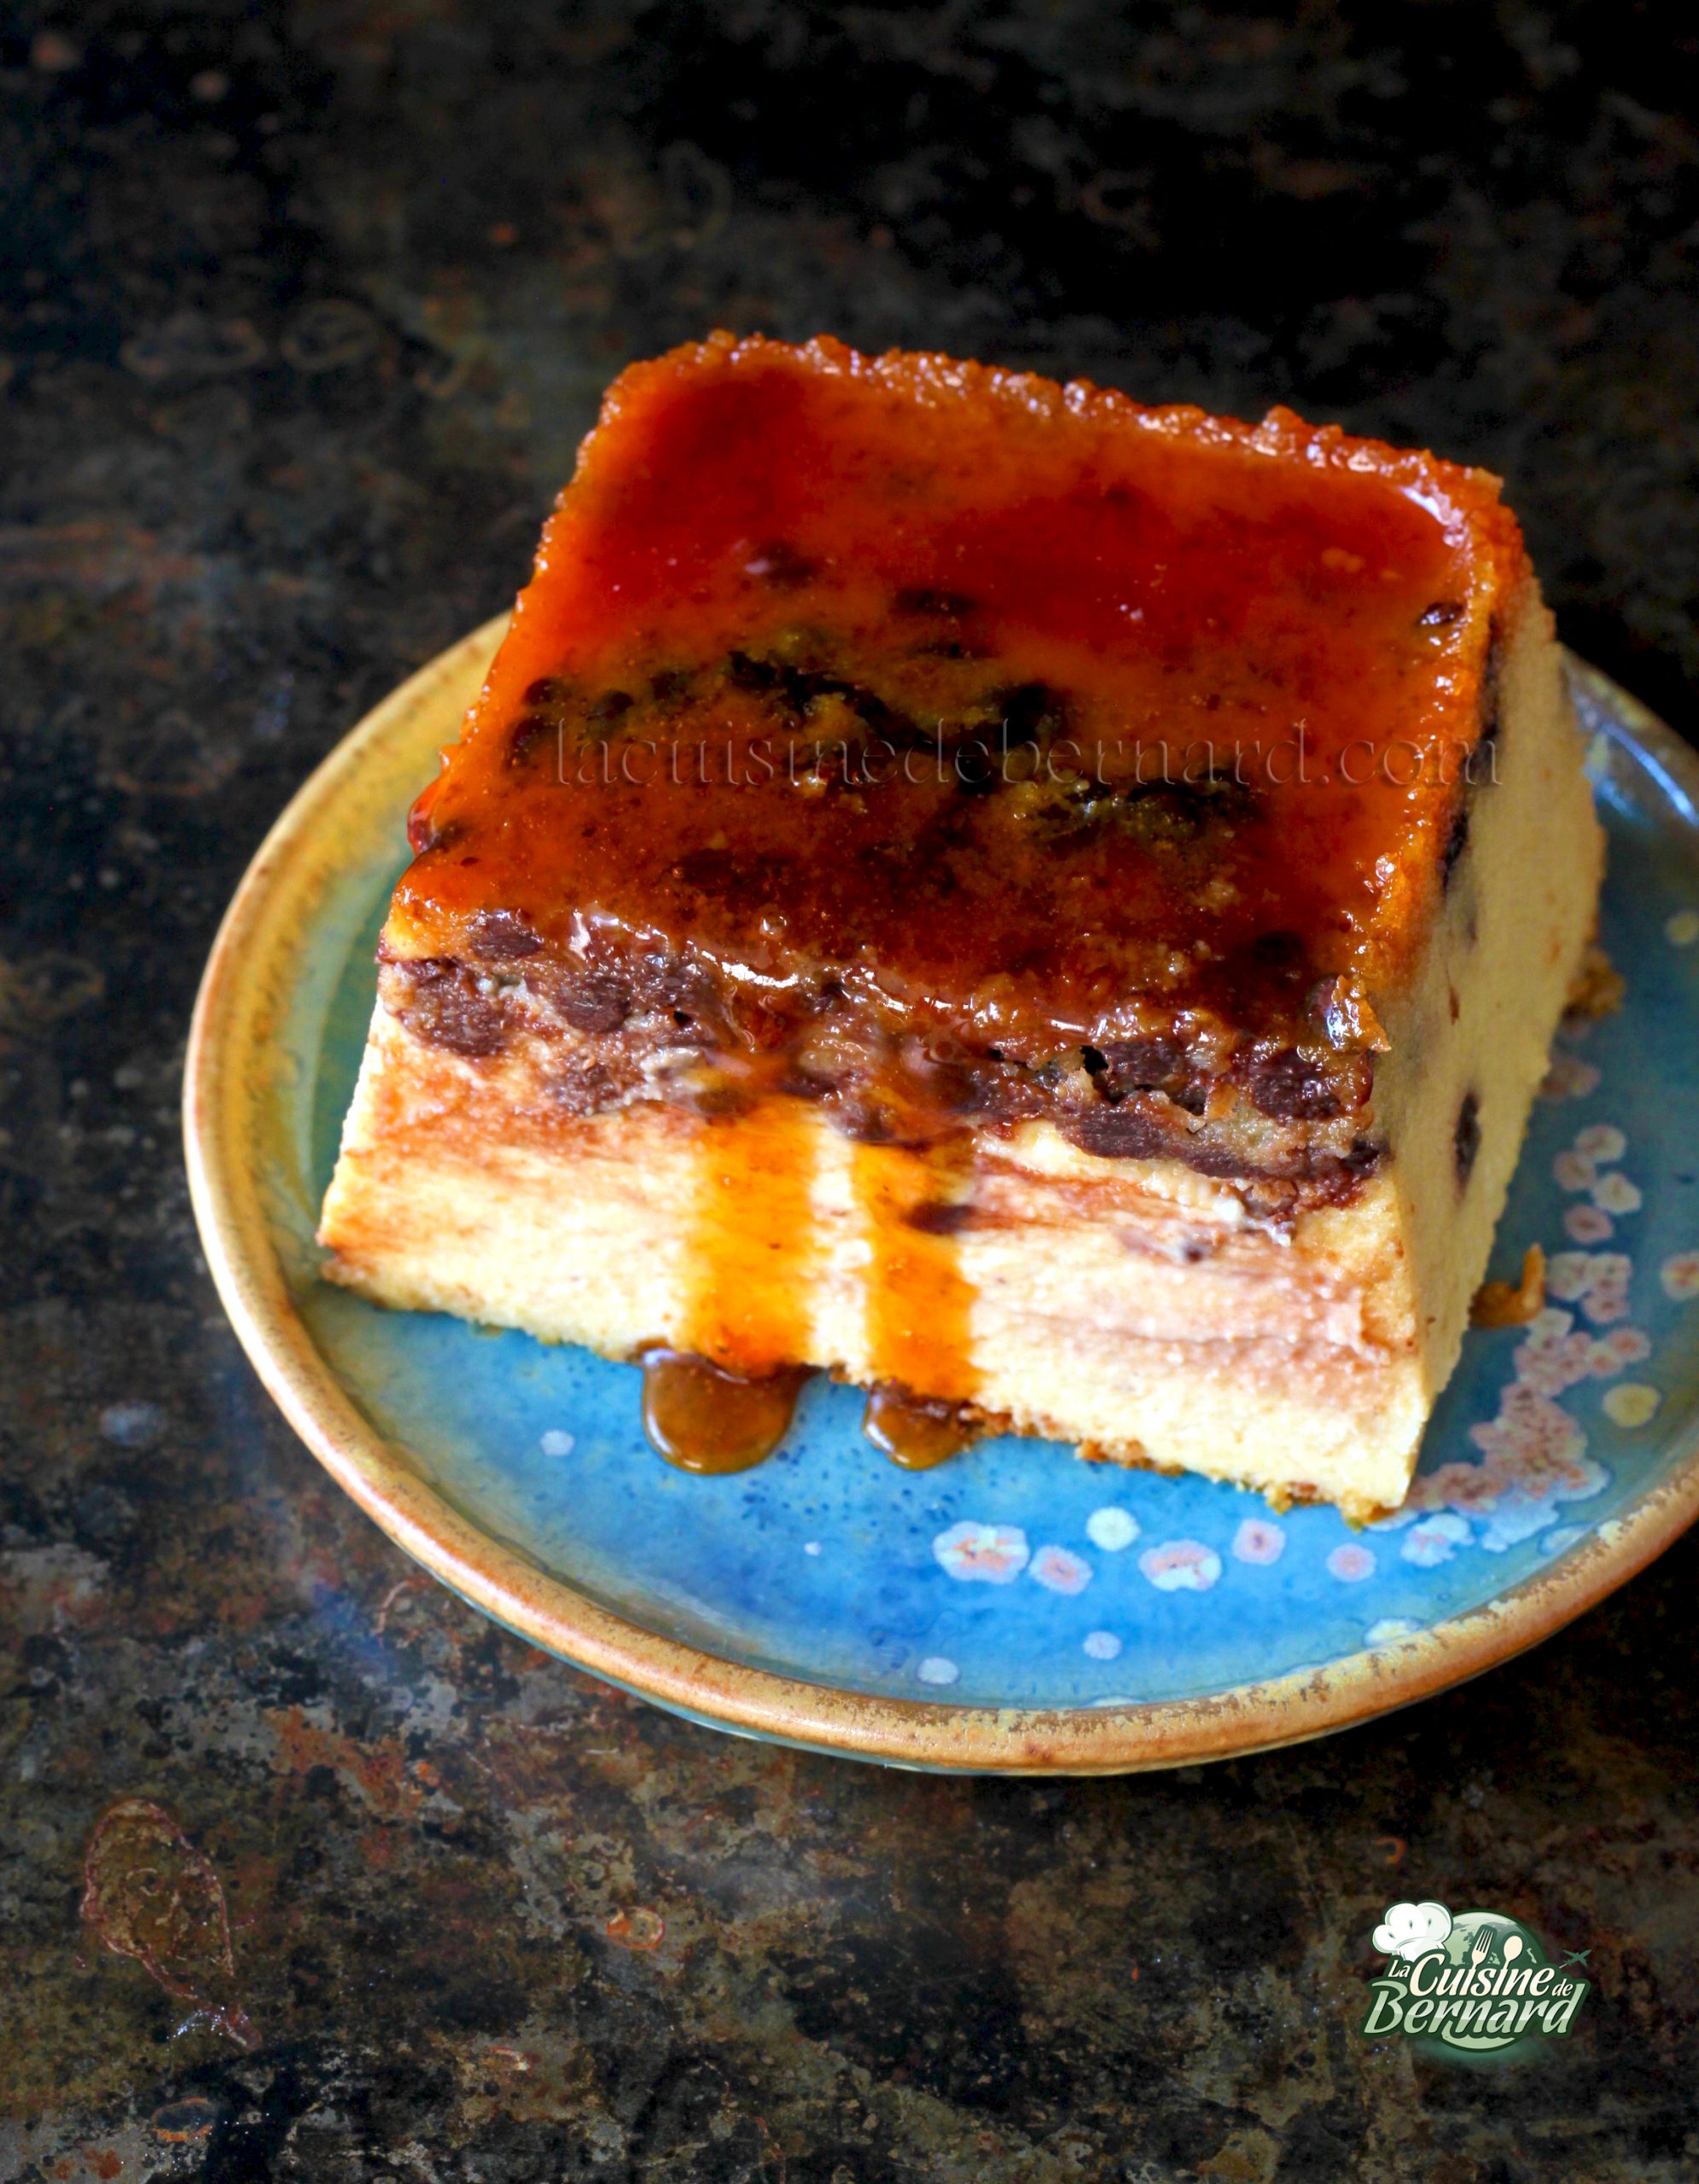
I recently went to Bologna and I had tasted an amaretti pudding there which I really enjoyed. It’s a bit like an egg custard, but with more powdered amaretti, amaretto liqueur and here a few dark chocolate chips. A real dense and melting delight at the same time, especially when tasted chilled. A very original recipe that I propose to you today!
For a 25cm long cake tin:
For the caramel
- 80g of sugar
For the pudding:
- 190g amaretti
- 60g icing sugar
- 3 eggs
- 2 egg yolks
- 150ml whole milk
- 350ml full cream
- 2 spoonfuls of “amaretto” liqueur with bitter almonds
- 80g small dark chocolate chips
Start by preparing the dry caramel. Pour a tablespoon of sugar into a saucepan over medium heat. When the sugar melts, add a little more sugar and shake the pan to distribute it.
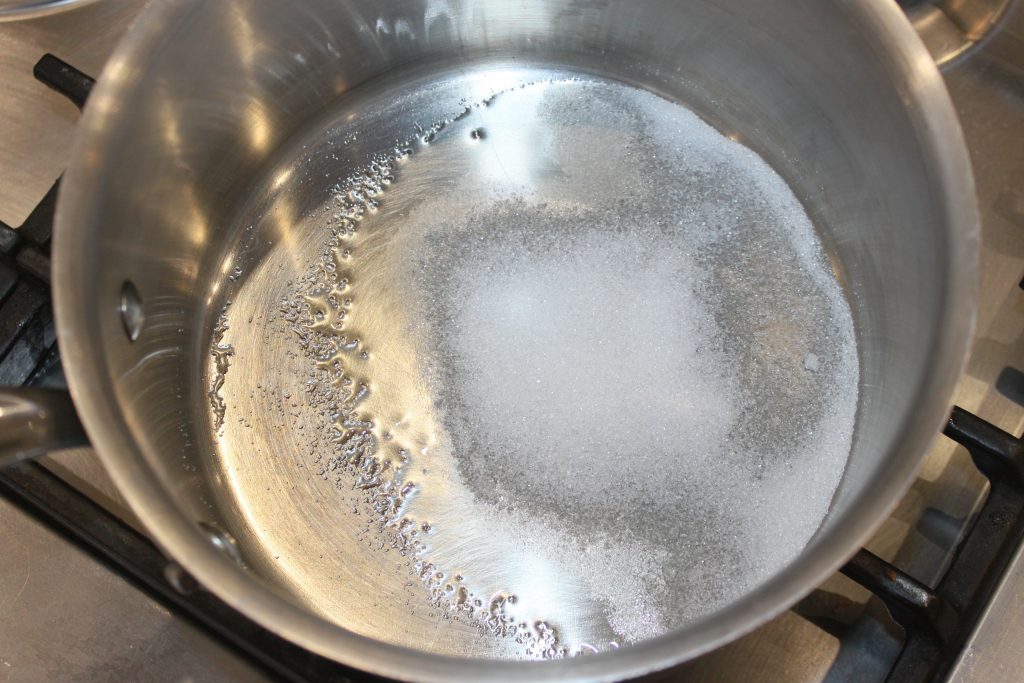
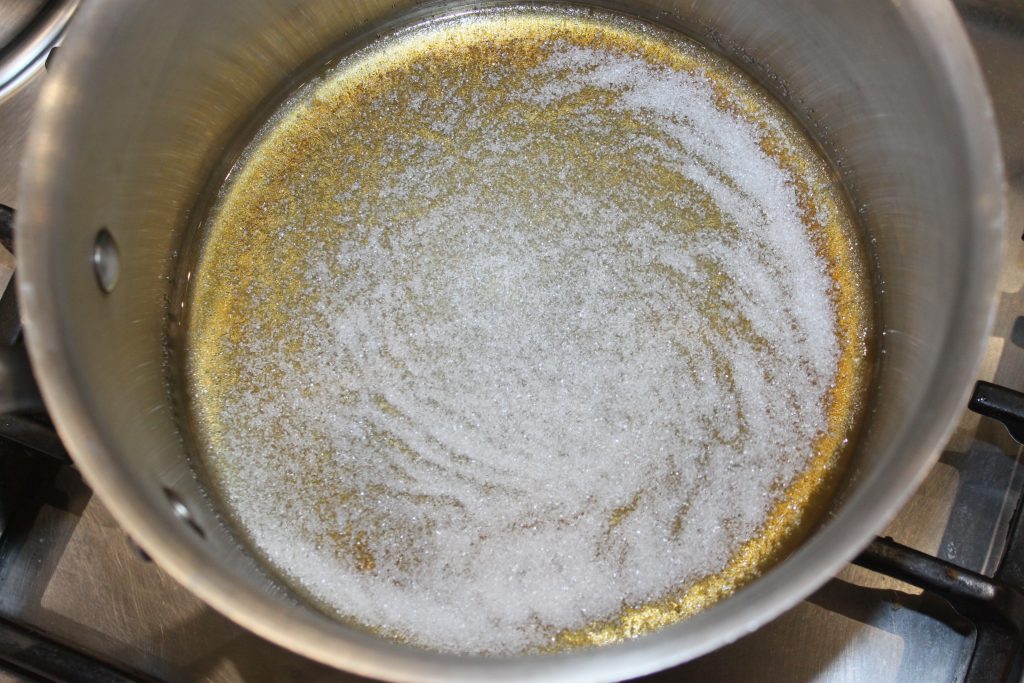
When everything is nicely colored, add another spoonful of sugar to gradually caramelize.
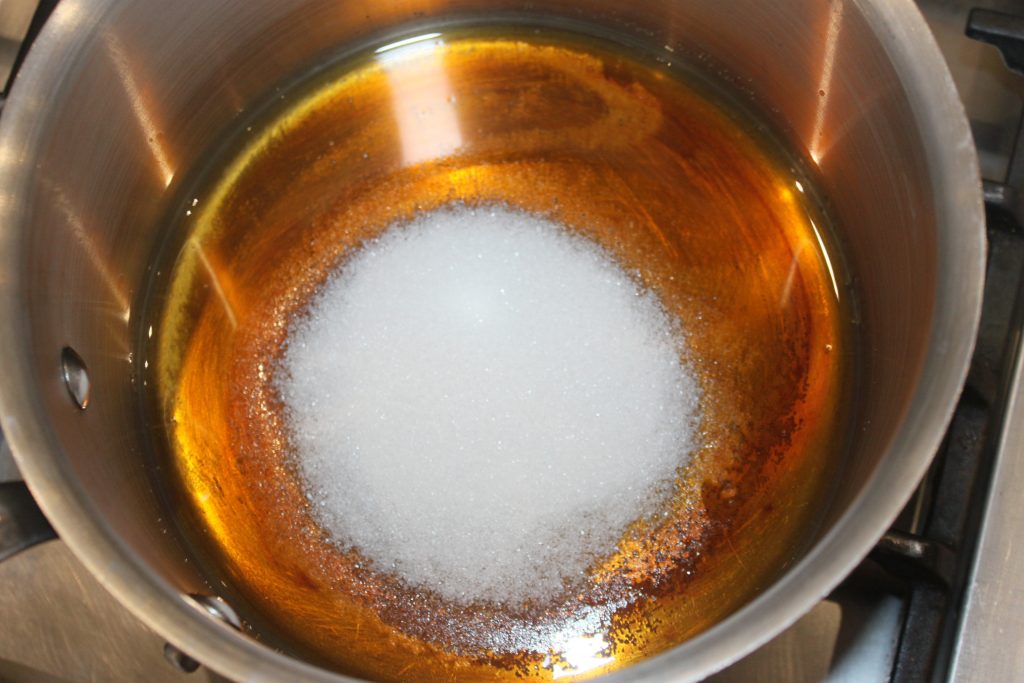
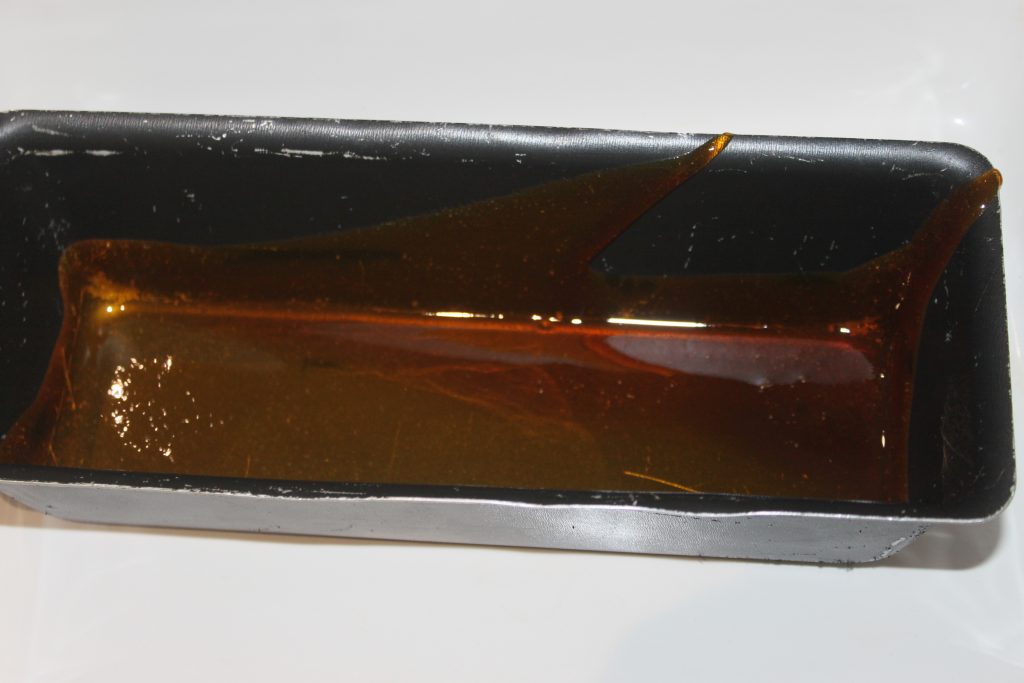
When all the sugar has melted and is caramelized, pour into the mold.

With gloves, distribute the caramel in the mold by going up a little and removing the excess if necessary in the pan.
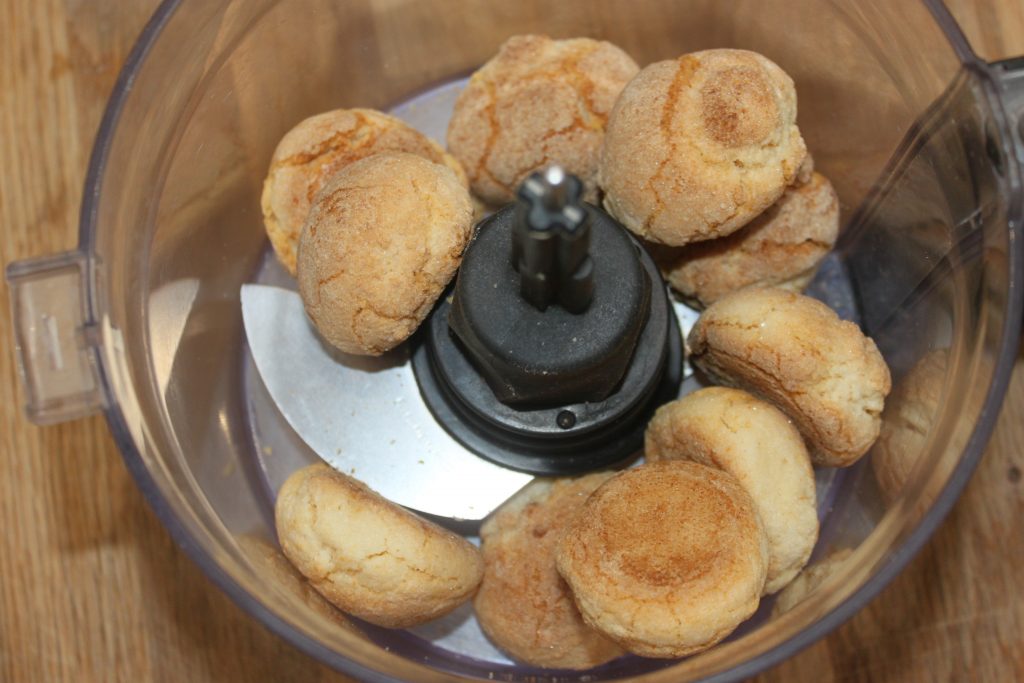
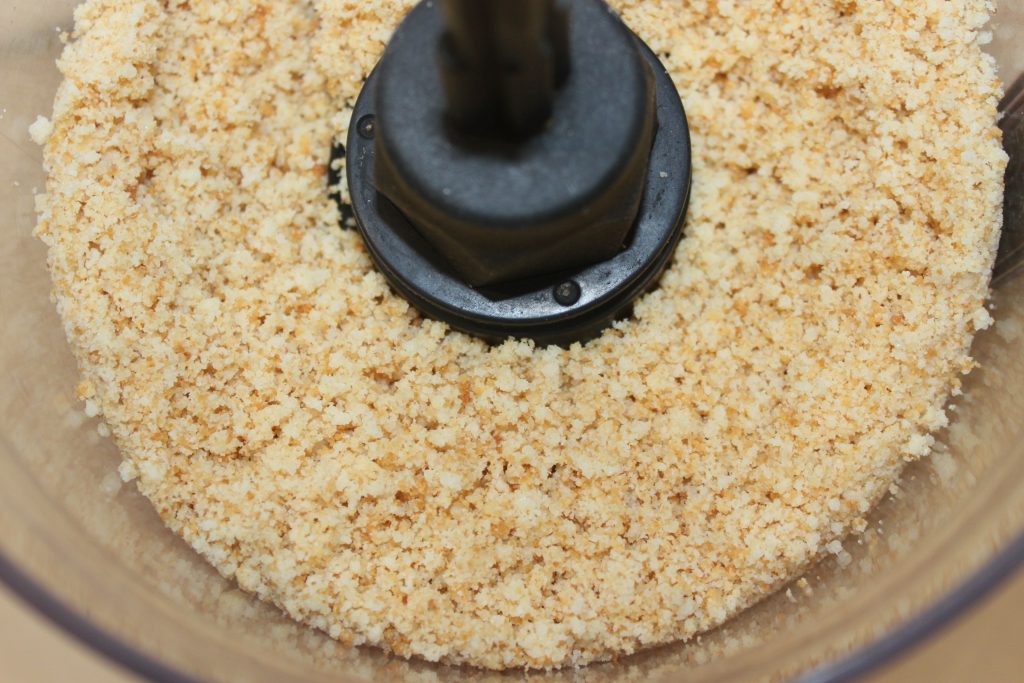
Put the amaretti in a blender to reduce them to powder.
In a container, put the three eggs, the two yolks and the icing sugar.
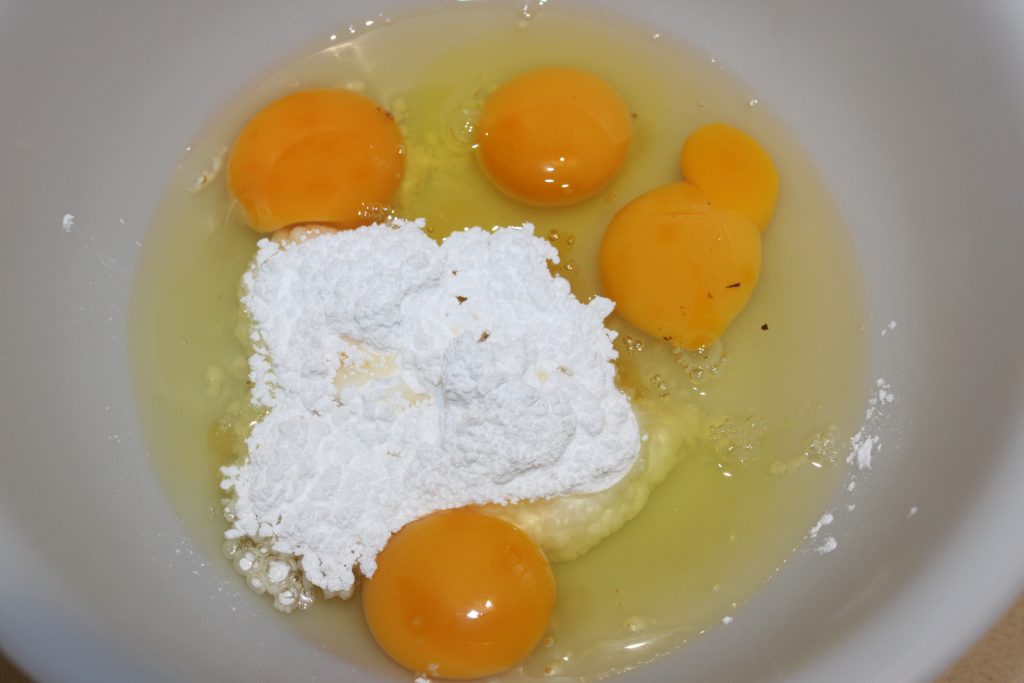
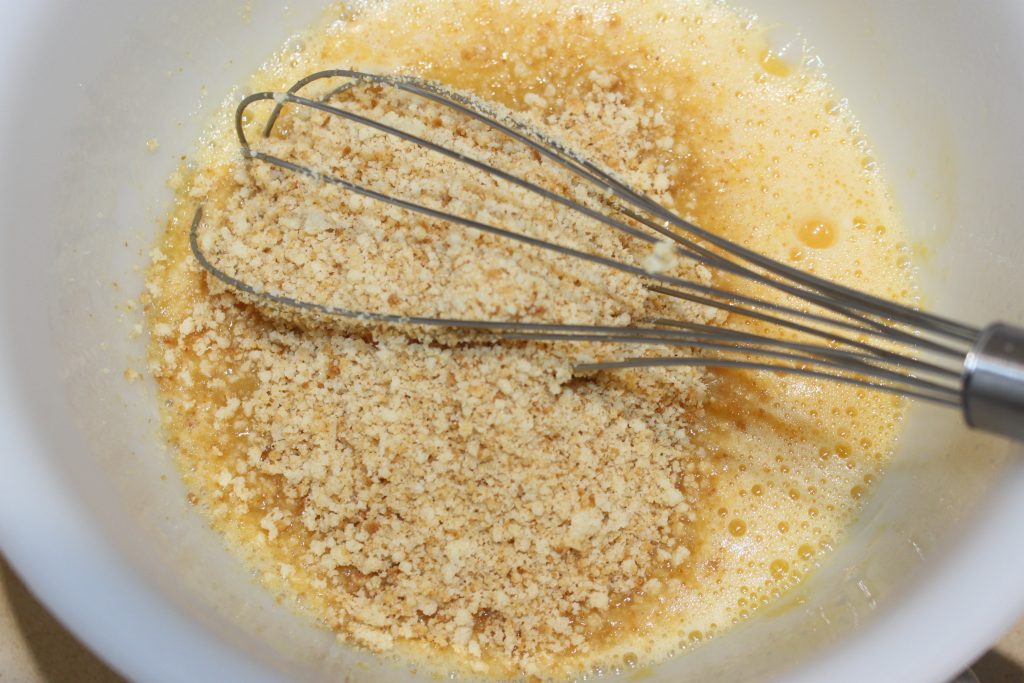
Whisk vigorously then add the powdered amaretti.
Mix then pour in the milk and cream.
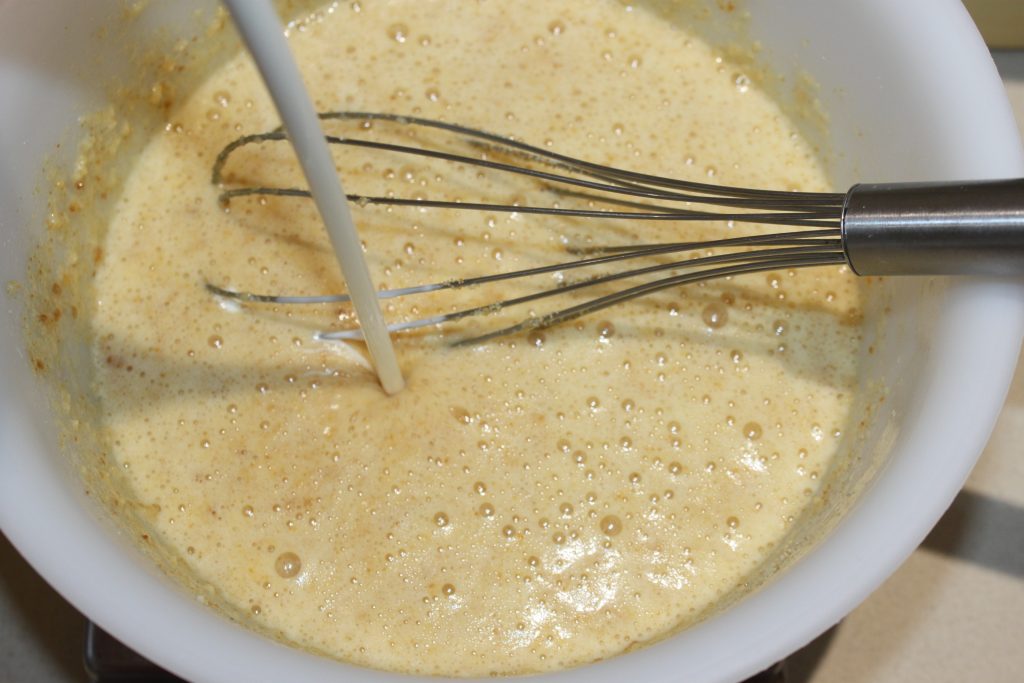
Not to mention the amaretto liqueur!

Pour into the mould.
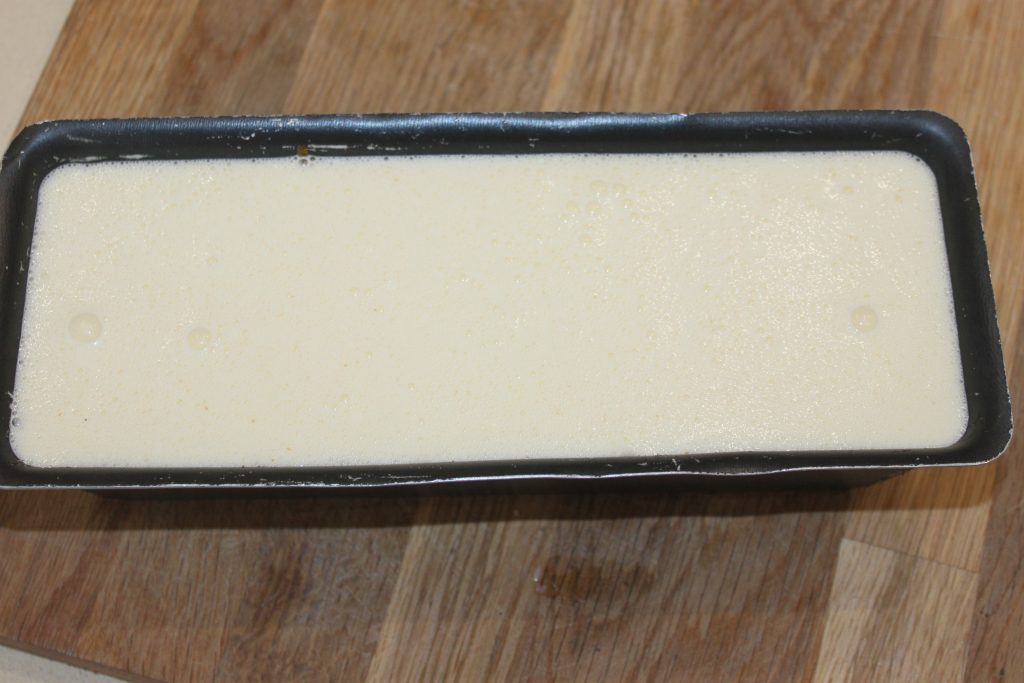
Place the mold in a baking dish and sprinkle with dark chocolate chips. Some will float and others will fall! Fill the dish below with boiling water, this way the pudding will cook in a bain-marie!

Bake for 1 hour at 170°C on a rotating heat.

Leave to cool to room temperature then refrigerate for at least 4 hours. Place the mold in a bath of hot water, gently run a knife around the edge of the pudding then unmold in a dish.
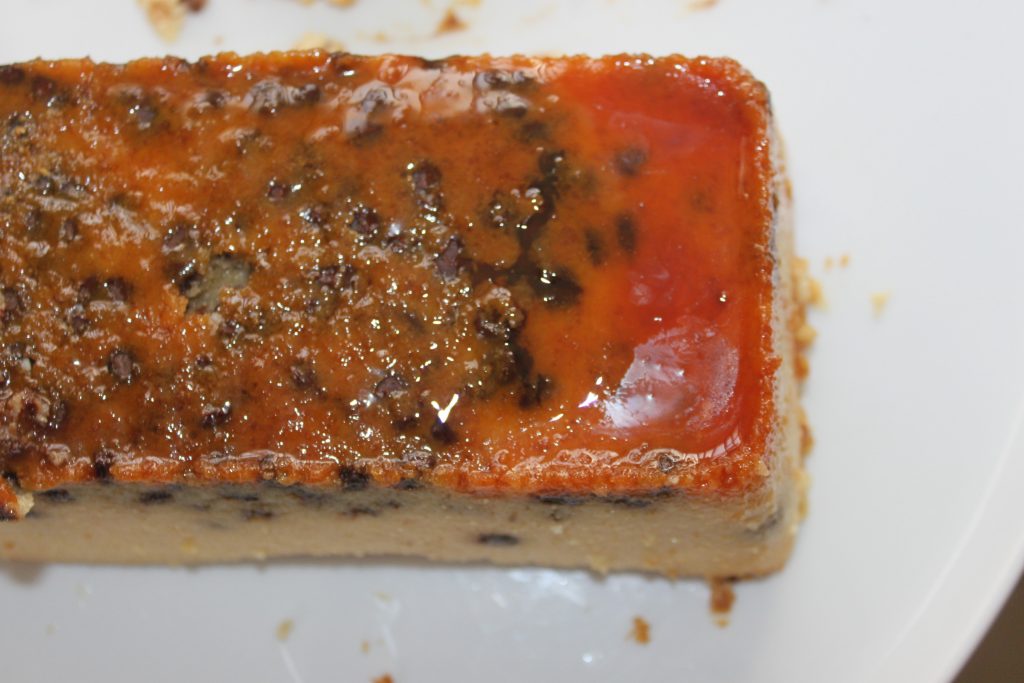
Refrigerate until ready to serve!