

During confinement, there is nothing like cooking for yourself and/or your family. Of course, if this goes on too long, we’ll all gain weight! But anyway, I suggest this double chocolate cake, because there is some in the dough and more in chips. A bit like the ultimate chocolate cake I’ve already proposed on the blog, but the result is different. Already here, there is almond powder. And the cake is at the end, much less puffed up and gives a more “square” result, with as always slices that cut perfectly! Also enjoy the video recipe (even if the quality is not great!).

Recette pour un cake double-chocolat de 24cm :
- 200g of semi-salted butter
- 115g of dark chocolate
- 180g of sugar
- 4 eggs
- 80g of almond powder
- 150g flour
- 2g of yeast
- 1/2 teaspoon of liquid vanilla
- 150g of dark chocolate chips
Instructions :
Melt the chocolate with the butter.

When everything is well melted, add the sugar.

And the egg yolks.

Almond powder.

Flour, baking powder and liquid vanilla.

Beat the egg whites until stiff.

Add them gradually as for a mousse.

Finish with the sprinkles and mix gently and thoroughly.


Pour into a 24cm pan, lined with parchment paper.

Bake for 15 minutes at 160°C, then 1h20 at 145°C. The core of the cake should be cooked and a blade stuck in it should come out dry.

Turn out and let cool to room temperature. I find it better the next day left overnight in the refrigerator.
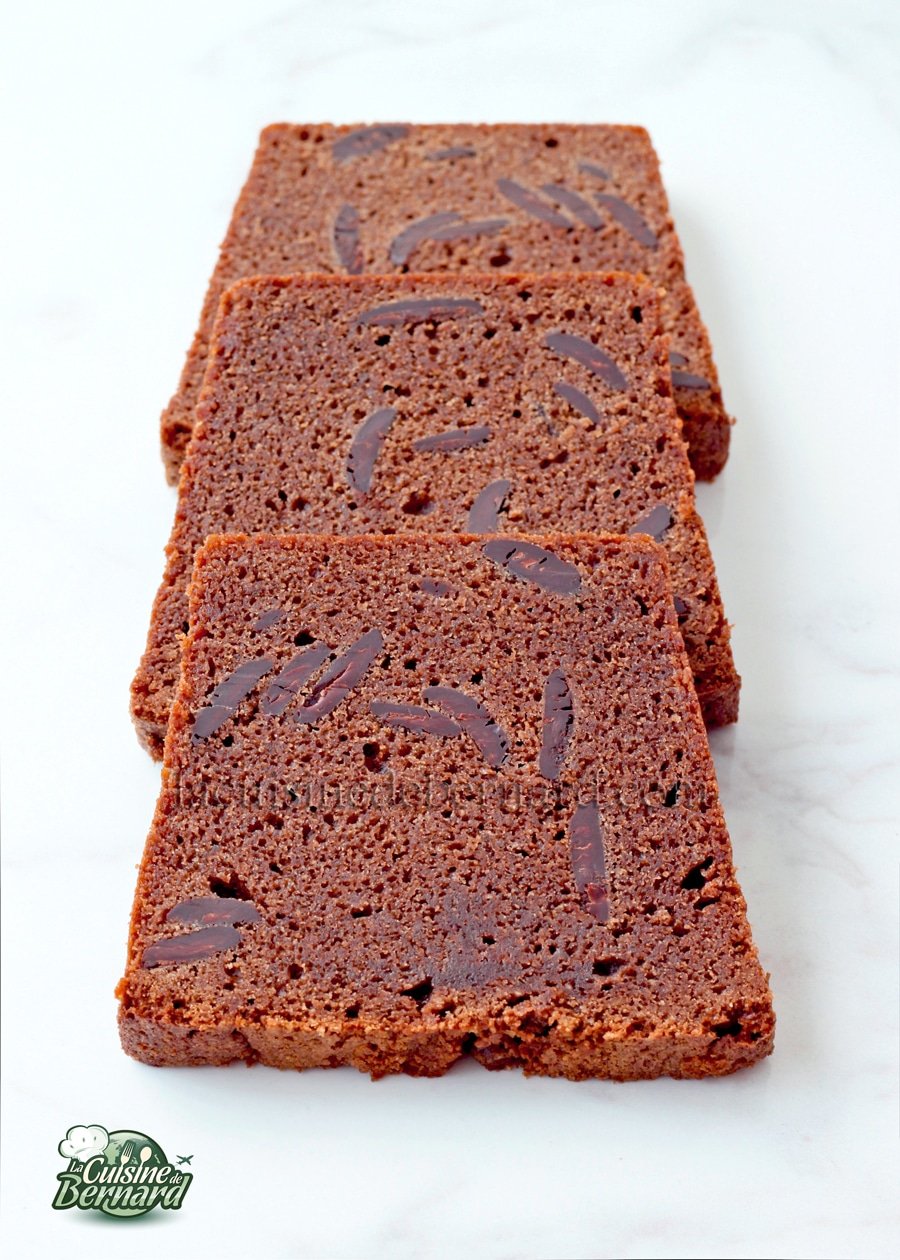
Double chocolate cake

Here is the recipe from my facebook live on Wednesday March 18th. A simple recipe, easy and quick to prepare, less traditional than what I usually do. You can also find a recipe for a more traditional dal on the blog, but I guarantee that this one is very tasty. I also put you the replay of the facebook live, but the video is not of good quality, internet is a bit slow at the moment with the worldwide confinement!

Recette du Dal expres lentilles corail pour 4 personnes :
- 500g of coral lentils
- 4 tablespoons of oil
- 1 white onion, peeled and cut into small pieces
- 4-5 cloves of garlic
- 1 1/2 teaspoons yellow curry powder
- 1 teaspoon of garam massala
- 1 pinch of hot pepper
- 400g of liquid coconut milk
- salt
- fried cilantro and onions to serve
Instructions :
First, cook the coral lentils in boiling water for 2.5 minutes. Yes, that’s it!
Drain them well and then pour the oil into the pan. Add finely chopped onion and crushed cloves with a garlic press. Cook for 3-4 minutes over moderate heat. Add the lentils, spices and coconut milk. Mix well, cook for another 8-10 minutes, stirring occasionally. Serve with white rice, chopped coriander and fried onions.
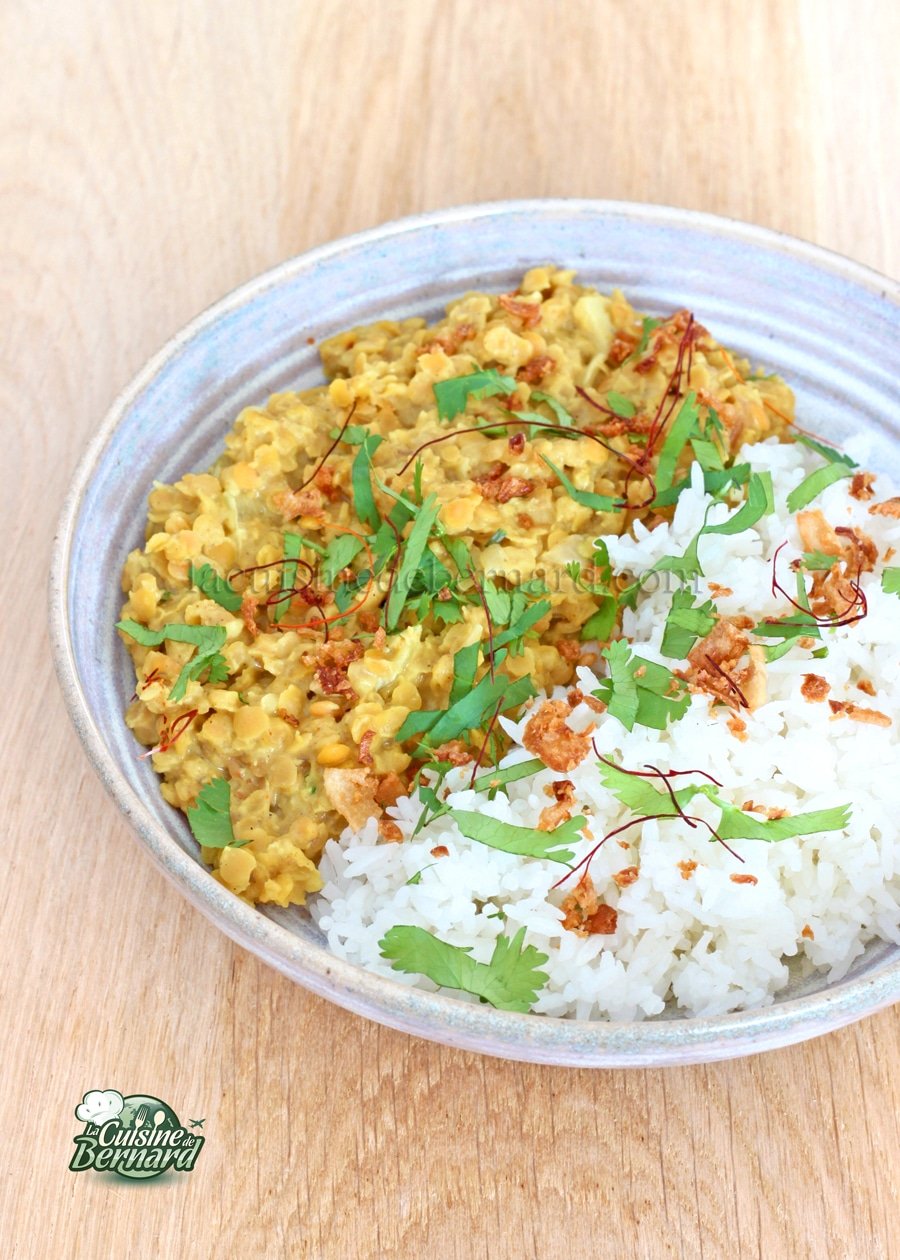
Coral lentil dal express

Here is a crab curry that is quite different from the creamy curries I usually post or those I make during my Thai cooking workshops. However it is a curry that exists in Thailand and that I tasted several times in Bangkok. It is very different because on the one hand it is not made with curry paste, but with curry powder, and yellow Madras to boot. Then there is egg in the coconut milk, which gives a texture approaching a very soft flank. It cooks directly in the pan, in which it caramelizes slightly underneath and is served as is. Then simply place the curry on top and serve directly with a spoon. A delight and above all ultra-easy to make!
Pour CURRY MOELLEUX JAUNE AU CRABE 2 personnes :
- 400g of coconut milk
- 2 teaspoons of yellow madras curry
- 1 teaspoon of nuoc mam
- 1 teaspoon of brown sugar
- 50g of egg
- 150g of crab meat
- 1 spring onion (or chives) to serve
Instructions :
First, mix the coconut milk, yellow curry, sugar and nuoc mam.

I do it in a wok but you can do it in a pan. Weigh the wok containing the coconut milk. You will see why. Let it boil and then weigh it again from time to time. You must lose 150g in total since the beginning of the operation. The water in the coconut milk will evaporate. By weighing the entire wok at the beginning and during cooking, you will know exactly when you have lost the 150g.
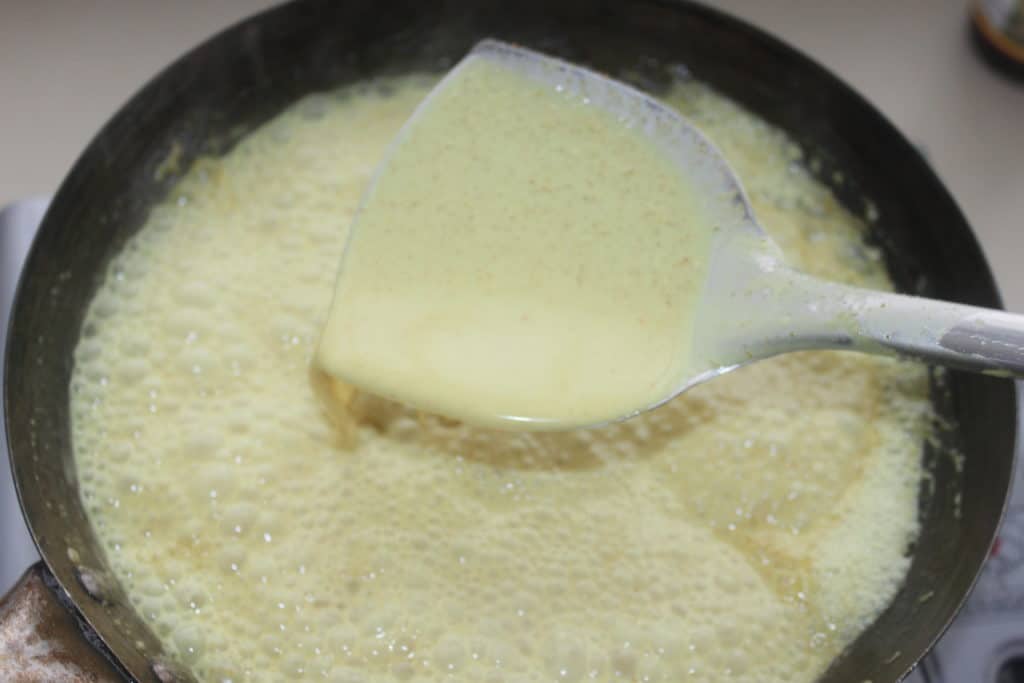
When 150g of water have evaporated, pour the sauce obtained into a container and let it cool. Scrape the sauce well into the wok or pan. After 10 minutes, add the 50g of egg and mix thoroughly.

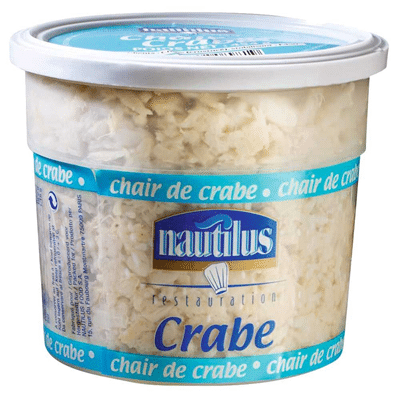
For the crab, I take the nautilus crab meat at metro. If you don’t have access to this store through yourself or friends, you can get classic crab meat, but the best you can get.
Pour 150g into a small 20cm pan. I took here a cast iron pan.

Cook for 2-3 minutes and then pour the sauce over.

Cover the crabmeat well, then put a lid on it and let it cook over low heat.

The curry is ready when the center is still shaking. The underside of the curry will color deliciously and give delicious flavors. It almost caramelizes on the bottom and sides. Serve with white rice.

Here is a very classic recipe to accommodate the lotus roots still sometimes very unknown in our countries. You have to like the slightly crunchy texture, but this version will allow a simple approach. The dish is ready in 25 minutes and gives an amazing visual. Serve as an accompaniment to a Chinese dish or simply with rice.
Recette :
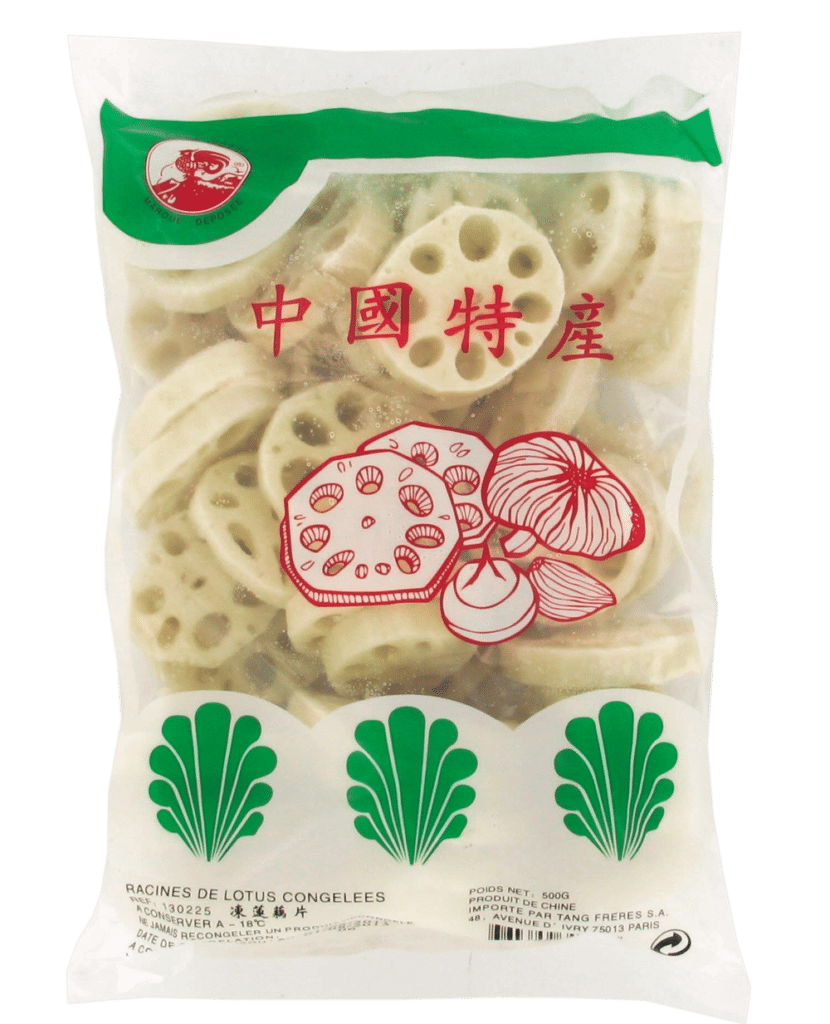
- 500g of lotus roots (frozen is fine!)
- 50g of sugar
- 1 tablespoon of rice vinegar or alcohol
- 2 tablespoons of clear soy sauce
- 1 tablespoon of dark soy sauce
- 1 tablespoon of neutral oil
- 1 clove garlic, finely peeled and chopped
- 2 tablespoons of toasted sesame oil
- salt, pepper, sesame seeds
Instructions :
First, make a dry caramel with the sugar. Put half the sugar in a saucepan or wok over moderate heat.

When the sugar melts, add the other half of the sugar and shake the pan.

When the caramel is done, pour in water.

The caramel will harden immediately and then completely dissolve.

For the recipe, I used frozen roots. They are already peeled and we have 500g of them, whereas with a fresh root, I find that I make too much. But it will be enough to peel and slice.
Pour them into the pan (or wok).

Pour enough water to cover them and then add the rest of the ingredients except for the sesame oil, which will be added at the end.

Let boil over moderate heat.

All the juice must be evaporated. In a wok the end of cooking is easier because you can shake to coat the thickening sauce.

Add salt and pepper to taste and then add the toasted sesame oil. Serve as a side dish or with rice. Sprinkle with a little sesame seeds (toasted or not).
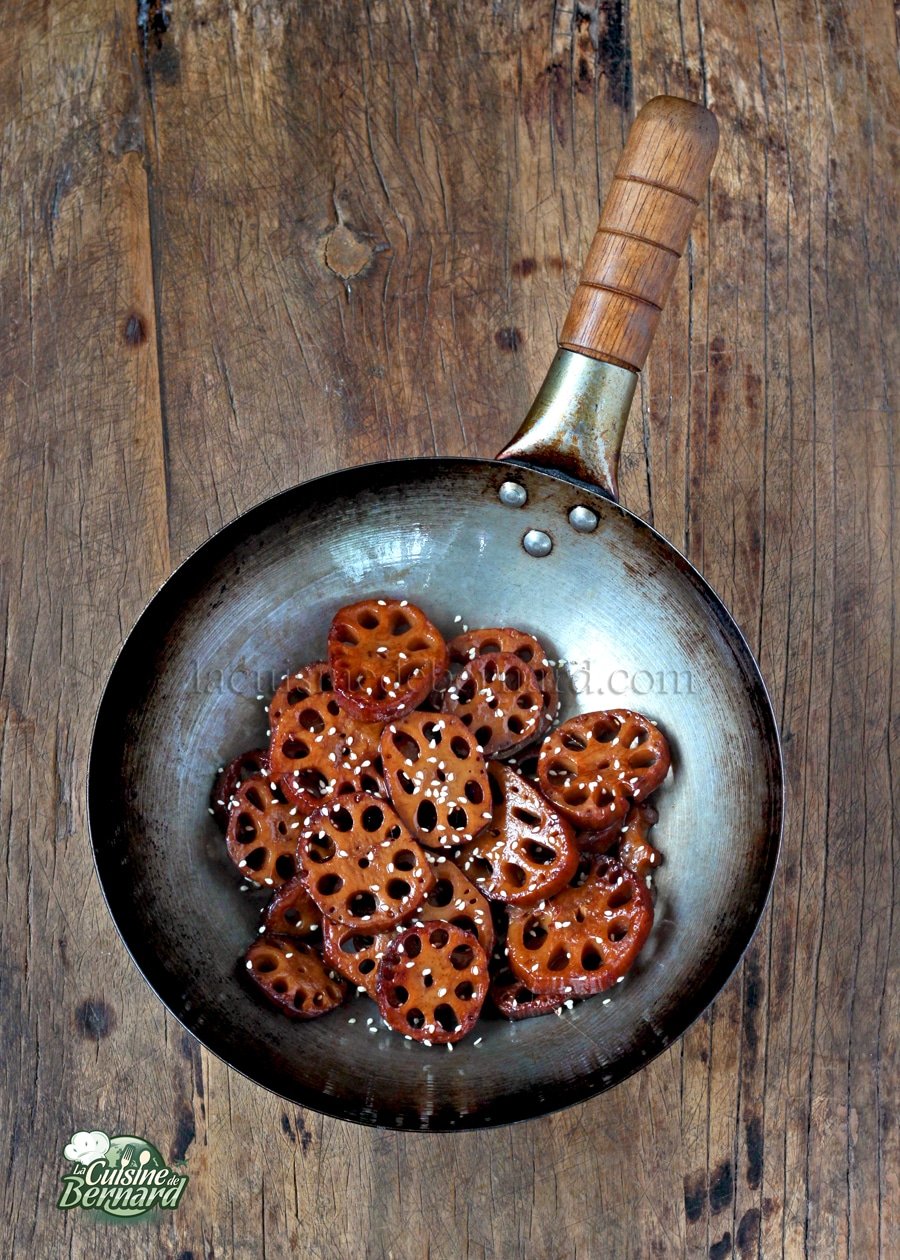
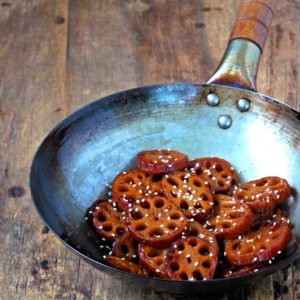
Braised and caramelized lotus roots


Hello to all! I do it very rarely, but today I’ll put a spotlight on the site www.epicerie-quebecoise.com
This is not a sponsored article! Just a little push. I’ve been going to Perigueux every other year for the cookbook fair since I started putting out books in 2014. I can’t wait to go back this year! I met Maryse and Olivier there, whom I like very much, through their restaurant Le Café Louise. Olivier’s cousin opened the Quebec grocery store and since I love Quebec, he kindly introduced me to a few products from his store.
Founded in the spring of 2019 by three Frenchmen in love with Quebec, l’Epicerie Québécoise is an online store specializing in the gastronomy of la Belle Province. Their selection is essentially composed of rare or unpublished products in France, made in an artisanal and/or organic way. They are also certified organic importer-distributor by Alpes Contrôles, which guarantees the quality and safety of the products they offer.
Eric, Mirko and Jérôme, the founders of the site, began their adventure with Quebec some twenty years ago by organizing La Semaine Québécoise in Chamonix Mont-Blanc, a cultural festival designed to promote Quebec’s music, art and gastronomy to the French public. Since then, they return regularly, for trips or sports excursions, and more recently with the idea of creating this online store. For several weeks, they set out to meet their future producer partners, to taste their products and learn about their stories. This is part of their approach: to establish privileged relationships, to propose quality products, to support artisanal production, to make discover the wealth of a region.
L’Epicerie Québécoise offers a selection of carefully chosen products, from the most traditional to the most confidential. You will find, for example, an organic and medal-winning maple syrup from the Caséal brand, but also many lesser-known but equally tasty derivatives: maple caramel, maple butter, maple sugar, maple jelly… And even maple water, appreciated by athletes for its nutrients that promote recovery. On the savory side, we discover camelina oil, a very balanced oil produced in a totally eco-responsible way, or garlic flower, a new condiment perfect for seasoning many dishes in summer and winter. Cirka spirits are also part of the catalog, a medal-winning Vodka and Gin, very aromatic, distributed only at Epicerie Québécoise.
Note that products such as maple syrup, garlic flower or camelina oil are available in containers adapted to professional customers such as restaurants or hotels.
For the site: www.epicerie-quebecoise.com


Une jolie tarte de saison à l’orange sanguine avec des suprêmes pour la décoration. J’ajoute dans ma crème, un peu de jus de citron vert et quelques framboises pour relever le tout et je verse le tout dans un fond de tarte cuite à blanc. Le résultat est crémeux et juteux, bien que croustillant à la fois ! Un vrai délice bien frais. Je vous conseille de la préparer la veille pour qu’elle soit bien froide et de la servir avec une chantilly au citron vert…
Recette pour une TARTE À L’ORANGE SANGUINE de 22 cm :
Une pâte sablée précuite
Crème à l’orange sanguine :
- 350g de jus d’orange sanguine (4 à 5 oranges)
- 50g de jus de citron vert
- 200g de sucre
- 8 framboises (surgelées c’est parfait !)
- 40g de maïzena
- 125g de jaune d’œuf
- 100g de beurre doux
- 1/2 feuille de gélatine trempée dans de l’eau
- Suprêmes d’oranges sanguines pour le dessus de la tarte (4 à 5 oranges)
Instructions :
Faites cuire la pâte à tarte à blanc. Je vous explique tout dans mes recettes de tartes comme ICI ! Par contre j’ai utilisé ma recette de sablés crousti-fondants au beurre noisette (recette ICI). Mais vous pouvez faire cela avec une pâte classique comme dans la première recette proposée. La pâte doit être bien dorée.

Pressez les oranges sanguines pour avoir 350g de jus


Versez dans la casserole et ajoutez le jus de citron vert.

Versez la moitié du sucre.

Et les framboises surgelées.

Faites chauffer sur feu doux.

Mélangez à part dans un récipient, les jaunes, la maïzena et le reste du sucre. Quand le liquide frémit, versez dans le récipient tout en mélangeant.

Remettez sur feu moyen et mélangez sans arrêter jusqu’à ce que la crème épaississe.

Coupez le feu et ajoutez le beurre en morceau. Mélangez bien pour l’incorporer tandis qu’il fond. Ajoutez aussi la demi-feuille de gélatine essorée et mélangez soigneusement.


Versez dans le fond de pâte précuite.

Laissez refroidir à température ambiante puis mettez au frais.
Préparez les suprêmes d’oranges sanguines que vous disposerez sur le dessus de la tarte. Vous pourrez servir avec une chantilly avec 150g de mascarpone et 150g de crème liquide entière bien froide, avec 30g de sucre glace et le zeste d’un citron vert.

Servez la tarte bien fraiche !

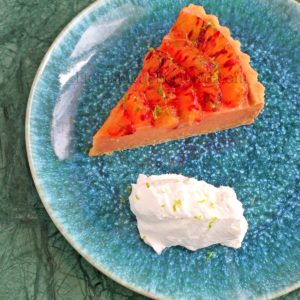
Blood orange pie


I love experimenting with shortbread doughs and if you look in my cooking blog, you’ll find lots of them! Here, the fact of making a hazelnut butter, changes completely the taste and the texture of the shortbread. With a touch of vanilla and salt, they are irresistible! The texture is a bit similar to the montecaos I had previously posted. These shortbread will keep for a very long time without any problem in an airtight box.
Ingrédients :
- 230g of soft butter
- 120g of caster sugar
- 315g of T55 flour
- 1 teaspoon of liquid vanilla
- 1/4 teaspoon of salt
- a little pink salt for the top of the shortbread
Instructions :
Put the butter in a saucepan over moderate heat.

Bring it to a boil.


And let it turn a beautiful amber color. Then pour it into a container.

Let stand 20 minutes before adding vanilla, sugar, salt and flour.

Blend quickly with a spoon or food processor. When the dough is homogeneous, it is ready!

Make 20g balls and flatten them slightly. Put a little salt on top.

Bake for 20 minutes at 170°C.

Let cool completely, then store in an airtight box.


Je reviens d’un nouveau petit séjour à Venise et il y avait plein de frittelle partout pour la saison du carnaval. Ce sont des beignets, un peu comme des “pets de nonne” garnis ici d’un incroyable sabayon au marsala. Alors attention, ce n’est pas une recette pour les enfants : il y a du rhum dans la pâte, ainsi que des zestes d’orange et de citron, et le sabayon est au marsala sec et sent bien l’alcool ! Un délice incroyable à réserver pour les grandes personnes !!
Recette des FRITTELLES AU SABAYON AU MARSALA :
Crème au marsala :
- 375g de marsala sec
- 100g d’eau
- 200g de sucre
- 150g de jaune d’œuf
- 50g de maïzena
Pâte à fritelle :
- 250g d’eau
- 40g de beurre
- 25g de sucre
- 200g de farine
- 275g d’œuf
- 15g de rhum
- 3 g de levure
- le zeste d’un demi-citron
- le zeste d’une demi-orange
- 75g de raisins secs
Instructions :
Préparez d’abord le sabayon. Versez les jaunes la maïzena et le sucre dans un récipient.

Mélangez soigneusement.

Pour la recette il vous faudra du marsala sec !

Versez le marsala et l’eau.

Mélangez bien puis versez dans une casserole.

Portez à ébullition puis reversez dans un récipient. Mettez un film étirable au contact. Laissez refroidir à température ambiante puis mettez au frais.

Pour la pâte à frittelle. Mettez l’eau, le sucre et le beurre dans une casserole et portez à ébullition.

Ajoutez la farine et mélangez vivement avec la cuillère.

Faites “sécher” la pâte pendant une minute sur feu modéré.

Versez-la ensuite dans un récipient ou le bol d’un robot. Versez le rhum.

Et un tiers des œufs. Il faut les peser !

Mélangez avec la feuille de votre robot ou à la cuillère. Quand le premier tiers des œufs est incorporé, ajoutez un deuxième et ainsi de suite.

Quand la pâte est homogène, ajoutez les zestes d’orange et citron.

La levure chimique.

Les raisins secs (je les ai faits gonfler dans du rhum avant !).

Mélangez cette fois soigneusement à la cuillère ou spatule.

Faites chauffer une casserole d’huile puis quand elle est bien chaude (180°C) mettez une bonne cuillerée à café de pâte (je m’aide avec une deuxième cuillère).

Versez dans l’huile chaude 3-4 cuillerées de pâte.

Les frittelle vont gonfler.

Beaucoup !

Puis quand ça s’arrête, c’est que c’est bon. Il faudra sans doute les retourner de temps en temps.

Mettez-les ensuite dans un récipient avec du sucre en poudre.

Versez le sabayon dans un poche munie d’une douille à fourrer les choux. Je mélange juste un peu le sabayon à la sortie du réfrigérateur pour le lisser.

Puis garnissez les frittelle. Ne les remplissez pas totalement !

À déguster assez rapidement…


These cookies taste totally amazing and addictive! I put in it, hazelnut butter, that is to say a butter that I cook until it has a nice dark color, coffee powder, hazelnut powder and finally dark chocolate. The whole thing gives a very particular and unusual flavor, but completely coherent. They are ready very quickly, even though I let the dough cool at some point. A nice change from the more traditional cookies!
Recette pour 12 cookies :
- 125g of butter
- 165g of sugar
- 2g instant coffee powder (one stick)
- 1/2 teaspoon of liquid vanilla
- 2 good pinches of salt
- 1 egg
- 225g of flour
- 50g of hazelnut powder
- 100g of dark chocolate in chunk
Instructions :
First, cook the butter in a saucepan to obtain a well-colored hazelnut butter.

It will first boil and then become colored.

Pour the sugar, salt and instant coffee powder into a container.

Pour in the hazelnut butter and liquid vanilla.

Mix well and let cool for 15 minutes before adding the egg.

Mix and then pour in the flour and hazelnut powder.

Finish with the chunks.

Make flattened dumplings of 55g each and put them on a baking paper.

Bake for 13-14 minutes at 170°C.

Let cool before devouring!


Hazelnut butter cookies, coffee, hazelnut and chocolate

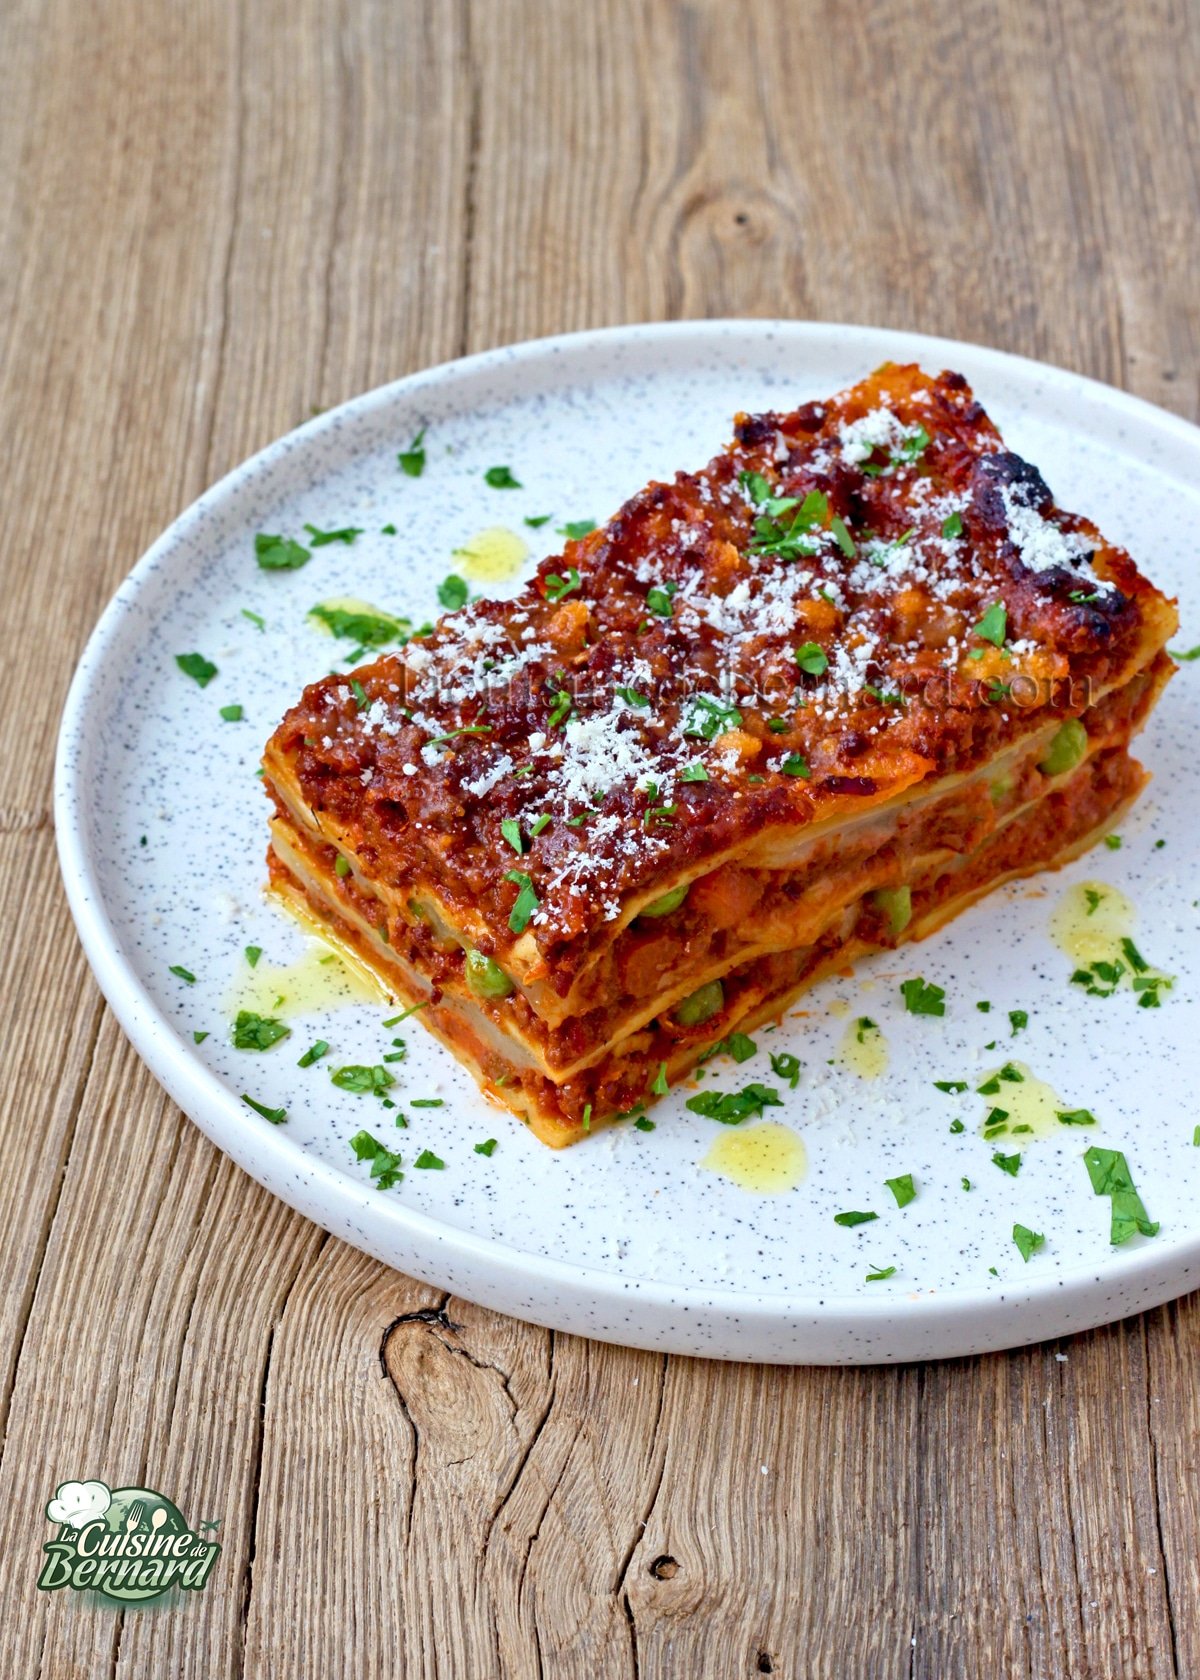
I’ve just returned from another short stay in Italy. I always enjoy it! I had a really delicious lasagna and I wanted to share my version with you. It takes a bit of time, as I make it the day before, with a long cooking time for the Bolognese stew. But the result is worth it. I made everything homemade, even the pasta, which is very easy with a rolling mill, but you can of course put ready-made lasagna in it. The result is extremely tasty and creamy, with a little cheese inside. I had already proposed you the real ragout à la bolognaise, that I modify here a little to stick to the idea of lasagna that I had in mind!
Recette pour 6 personnes :
Stew bolognese :
- 25g of butter
- 3 tablespoons of olive oil
- 1 onion
- 3 cloves of garlic
- 150g of pancetta
- 2 stalks of celery
- 2 carrots
- 15cl of white wine
- 750g of ground beef
- 800g of passata (tomato coulis)
- 2 level teaspoons of sugar
- 150ml full cream
- 1 liter of water
- salt pepper
1 recipe for fresh egg pasta(recipe here)
For lasagna :
- 150 peas (frozen works great!)
- 200g of mozzarella
- 125g of grated parmesan cheese
Instructions :
I invite you to also see the traditional Bologna stew HERE. Below I modify it a bit and move away from the original recipe!
Start by putting the butter, olive oil, peeled and chopped onion and chopped garlic in a large pot.

Cut the pancetta into pieces.


Add it to the casserole.

Let it cook slowly. In the meantime, cut the celery stalks into small pieces, not too small.


Peeled carrots.


It’s already starting to smell divine!

Pour in the white wine.

And the minced meat.

Cook until all the liquid has evaporated and the fat has come out.

Pour the passata.

Add the sugar and full cream.


Mix. Pour in the water. Now it’s off to a 5 hour bake, or even 6 or 7 hours if you can.

The sauce will render fat (but that’s the good part!). Season with salt and pepper.

For me, it’s 7 hours of cooking the first day, then I do another hour of cooking the next day. Be sure to keep an eye on the bottom to make sure it doesn’t run out of water. Then, when you have cooked the whole thing for 6 or 7 hours, reduce and evaporate the water to have a relatively consistent sauce.

For me, when I see the bottom of the casserole with the spoon, it’s good! Taste for salt and pepper.

I also make my own lasagna. The advantage is that they don’t have to be perfect, because you cut them in the dish. My recipe is here!


I put the dough in cling film and chill for an hour before rolling it out.

I go to number 3 on my rolling mill. Then I let the lasagna dry completely.

Here on the picture, they are perfectly dry. But you can also make the dish without drying the lasagna. It’s just that this way, they keep for a very long time!

The same day (or you can skip this step if the lasagna has not been dried), cook the lasagna in boiling salted water for 30 seconds, just to soften it.

In the baking dish (I made two small ones) put a layer of lasagna in the bottom.

Pour in one third of the stew. and spread it over the layer of pasta.

Scatter peas.

Place a few slices of mozzarella and sprinkle with grated parmesan.

Replace a layer of dough and repeat the same operation with ragout, peas, mozzarella and parmesan. A final layer of pasta and a final layer of stew, this time without peas or mozzarella. Simply sprinkle with grated Parmesan cheese. Pepper also on top.

Bake for 35 minutes at 185°C.

Slice and serve with a little grated parmesan cheese and finely chopped flat leaf parsley!