


It had been a while since I had made a savory pie. I also like to make thick pies, giving high slices that you just want to bite into. Here is a new one, with a simple and generous taste, with leeks, chorizo and goat’s cheese that will reduce the spiciness. It’s up to you to choose the chorizo you like, mild, spicy or extra-strong! To be devoured in all ways: cold, lukewarm or hot.
For a tart 20cm in diameter by 4.5 in height
For the dough:
- 400g flour
- 15g of sugar
- 280g semi-salted butter
- 1 egg
For the goat cheese chorizo leek migaine
- 5 medium sized leeks
- 125g chorizo, spicy of your choice
- 375g full cream
- 3 eggs
- 150g goat cheese
- salt pepper
For the dough, I almost make the one for my creamy chicken empadas. The recipe is HERE and you can freeze the leftovers. I add here 15g more sugar, which will color the dough. You can do without it!
Mix the flour and semi-salted butter until you obtain a fine powder.

Add the egg and mix until you have a smooth paste. That’s all !

Do not put the dough in the fridge, but simply in stretch film. It spreads well at room temperature.

Remove the root of the leeks and part of the green. Wash them well.

Remove the skin from the chorizo and cut it into small pieces.

Put it in a large enough frying pan and let it cook so that it renders its fat well and takes on a slight color. Cut the leeks in 4 lengthways and then into small pieces.


Add the leeks and cook for about 15 minutes, stirring occasionally, over moderate heat.

There the leeks are not yet cooked. You will see two photos below of their appearance.

Meanwhile mix the cream, eggs, salt and pepper to taste.

Add the cooked leeks and mix immediately.

Cut the goat cheese into pieces and pour it into the migaine.


And There you go !

For the dough, spread it lightly floured on a sheet of parchment paper. Place the dough in the dessert ring then cut off the excess. I use here a circle of 20cm by 4.5 in height.

Leave everything on a baking sheet lined with parchment paper. Pour the leek migaine.

Bake for 1h15 at 170°C. Check and adapt the cooking to your oven!

Let cool before serving with a good salad. It will also be delicious cold!


Leek, chorizo and goat cheese tart


De gros sablés bien croustillants, avec plein de chocolat au lait, des pignons de pin et des noisettes en poudre. Une véritable gourmandise irrésistible à mes yeux. Un seul suffira. Vous pourrez aussi les couper en tranches avant de les congeler crus, puis de les cuire à la demande.
Recette SABLÉS CHOCOLAT AU LAIT, NOISETTES ET PIGNONS:
- 120g de sucre roux
- 200g de beurre demi-sel
- 25g d’œuf
- 75g de noisettes en poudre
- 250g de farine
- 100g de pignons
- 200g de petites pépites de chocolat au lait
Instructions:
Mélangez le sucre et le beurre.

Versez les 25g d’œuf (battez en omelette un petit œuf et pesez la quantité souhaitée).

Mélangez puis versez la farine et la noisette en poudre.

Mélangez de nouveau puis ajoutez les pignons et les pépites.

Mélangez pour bien les disperser.

Roulez en un boudin de 6-7 cm de diamètre. Emballez-le dans du film étirable puis mettez au frais au moins 1 heure.

Coupez des tranches d’un centimètre d’épaisseur.

Posez des tranches sur une plaque à pâtisserie recouverte de papier sulfurisé.


Faites cuire 25 minutes à 160°C.

Laissez-les complètement refroidir avant de croquer dedans !


Milk chocolate, hazelnut and pine nut shortbread


Here is a recipe from Wales. These cakes are pan-fried and ready in 15-20 minutes maximum. A childish simplicity for a very tasty result. They are delicious for breakfast with butter, jam or the famous clotted cream, or for a snack with a hot tea. For a change from scones!
Recette pour une quinzaine de welsh cakes :
- 250g of T55 flour
- 3g of baking powder
- 125g of sweet or semi-salted butter or half and half
- 50g of sugar
- a good pinch of 4 spices
- 75g of raisins
- 1 egg of 50g
- 15-20g of milk
- melted butter for cooking
Instructions :
Put the flour, baking powder, sugar and cold butter cut into small pieces.

Don’t forget the right amount of spice.

Blend until you have a powder that resembles grated parmesan. Use the leaf utensil of your food processor.

Add the raisins.

Mix a little and then pour in the 50g of egg and the milk.

Mix again until you have a nice smooth paste.

Roll out the dough to 5mm on a lightly floured work surface.

Cut 6cm circles, fluted or smooth, or even with a glass!

Heat a skillet over low/moderate heat with a little butter. Place a few welsh cakes on top.

Pour melted butter on top immediately.

Let the underside colour before turning over.

Both sides should be nicely colored.

You can sift them through powdered sugar as they come out of the oven.

Serve warm, with jam, butter or delicious clotted cream.


Big shortbread, full of chocolate, crispy and melting at the same time! They look like cookies, but they’re not. The texture is really that of a shortbread or shortcake, more crunchy than the cookie. There are no eggs or vanilla. And I put a huge dose of chocolate: it’s half the weight of these little cakes! For lovers of good things and especially of chocolate (dark or milk!).
Recipe for 12 shortbread of 50g :
- 50g of sugar
- 60g semi-salted butter
- 50g of soft butter
- 140g of flour
- 300g of chocolate chips of your choice
Put the sugar and butters in a bowl or the bowl of your food processor.

Blend to a smooth texture.

Pour in the flour and mix until you have a dough.


Add the 300g of nuggets. That’s a lot! Take small nuggets.

Stir again to distribute the chocolate evenly.

Weigh 50g balls.

Shape the shortbread into the shape you want, knowing that they hardly move during baking.

Place the 12 shortbread cookies on a baking sheet lined with parchment paper.

Bake at 160°C on fan heat for 20 minutes.

Let cool before tasting! They are to die for!


J’adore les sablés, mais surtout quand ils sont trop grands pour être mangés seuls. J’avais proposé la recette des broyés du Poitou dans mon premier livre “Mes desserts” édité chez Flammarion. Cette fois je vous donne une adaptation aux noix, bien craquante à souhait. J’ajoute un peu d’huile de noix, qui vient parfumer à merveille ce gros et généreux broyé.
Recette pour un Broyé du Poitou :
- 120g de beurre demi-sel
- 10g d’huile de noix
- 120g de sucre semoule
- 30g d’œuf
- 250g de farine T55
- 50g de noix en poudre
Instructions :
J’ai pris une photo du beurre, car j’adoooooore le beurre.

Mettez le beurre, l’huile de noix et le sucre dans le récipient de votre robot. Quoi de mieux que de l’huile de noix pour bien parfumer le sablé !

Mélangez jusqu’à avoir une pâte homogène.
Ajoutez les 30g d’œuf. Pour cela, battez un œuf en omelette et pesez la quantité nécessaire. Gardez le reste pour la dorure.

Mélangez de nouveau. Mixez les 50g de noix pour obtenir une poudre.


Ajoutez la farine dans le récipient avec la poudre de noix.

Mélangez jusqu’à avoir une pâte homogène.

Étalez la pâte sur un papier sulfurisé en un diamètre d’environ 25cm.Cela donnera une épaisseur d’environ 4mm.

Coupez avec un cercle ou même une assiette et un couteau. J’ai pris ici un cercle de 20cm. Gardez les chutes pour les cuire plus tard. Vous pouvez aussi étaler de nouveau les chutes ensemble pour recouper des sablés plus petits.

Pincez la pâte avec les doigts sur tout le pourtour du grand sablé.


Passez de l’oeuf battu sur toute la surface.

Mettez au frais 30 minutes pour sécher un peu la dorure. Rayez la pâte avec une fourchette.

Faites cuire ensuite à 175° dans un four préchauffé et ventilé, pendant 20 minutes environ. Ajustez la cuisson à votre propre four.

À déguster quand le sablé a eu au moins le temps de tiédir !


Broyé du Poitou with Nuts

I had tasted these inverted makis in a “fusion” restaurant in Santiago, Chile with two friends. Although not very traditional, they were really delicious. I had proposed you on the blog, Japanese makis with chilli salmon (recipe HERE) and Korean gimbaps with chicken (recipe THERE). Two similar techniques, but with vinegar rice for the first and sesame oil rice for the second. As we are clearly on the “fusion food” here, I wanted to test a rice both vinegared (in lesser proportions) and with sesame oil. The result is perfect for me. Here with crispy shrimp and cooked and smoked salmon, the makis are rich but decadent and appetizing.
Recette pour 5 rouleaux de makis (pour 4 personnes) :
Rice:
- 340g of round rice
- 425g of water
- 10g sesame oil
- 5g of salt
- 15g of sugar
- 5g of mirin
- 20g of white vinegar
Samurai sauce:
- 1 egg yolk
- 25g of mustard
- 160g of oil
- 50g of ketchup
- 5g of chili paste or tabasco
- 50g of cream
- 1 teaspoon turmeric powder
- salt, chili powder
For the rest :
- 1 salmon steak
- 1 lawyer
- 5 sheets of nori for maki
- 10 crispy shrimp (see my recipe HERE)
- 5 to 10 slices of smoked salmon (depending on their size!)
Instructions :
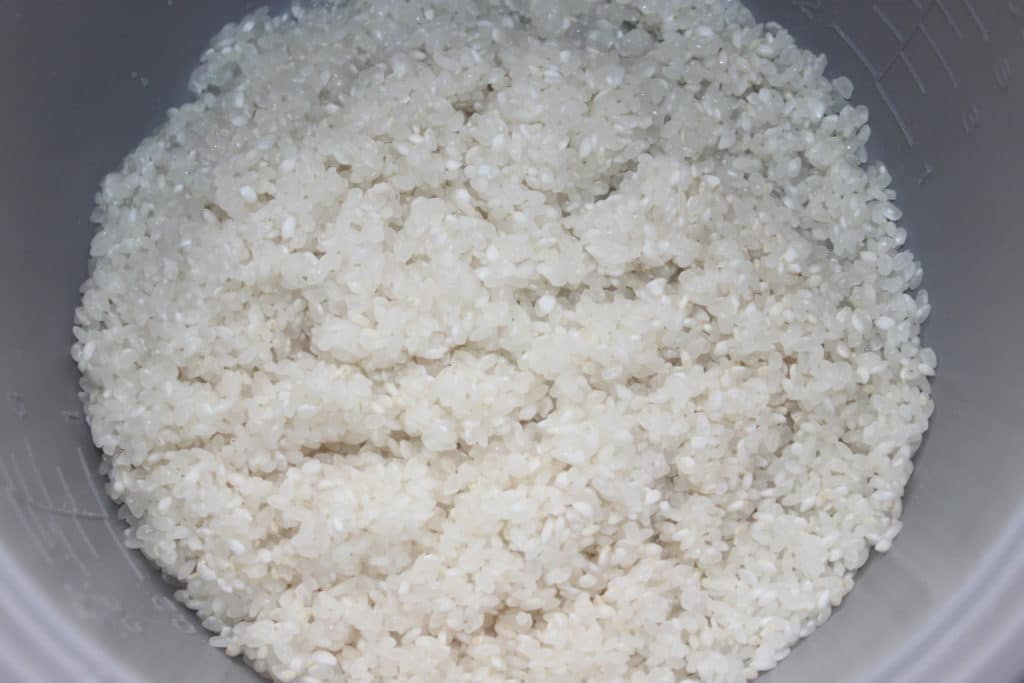
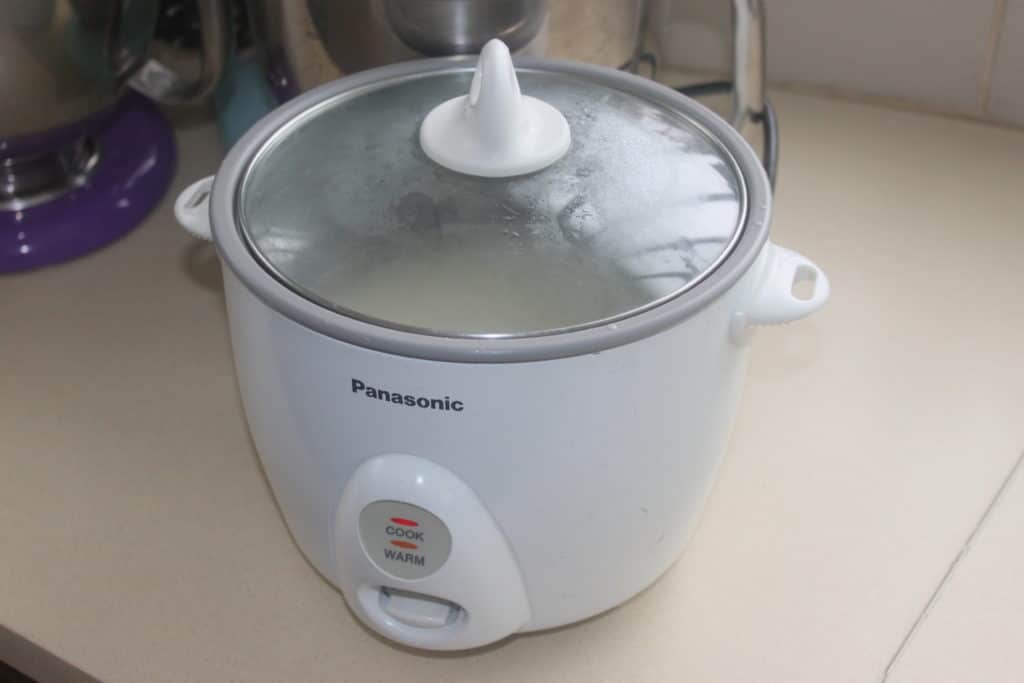
First, prepare the round rice. Sushi rice is a round rice, and frankly you will not see any difference. And as the round rice is cheaper… Rinse it with clean water for 2 minutes and then drain it. Pour it into the rice cooker and add the 425g of water for perfect cooking. You can also do the same thing in a saucepan with a lid over low heat until the water is completely absorbed.
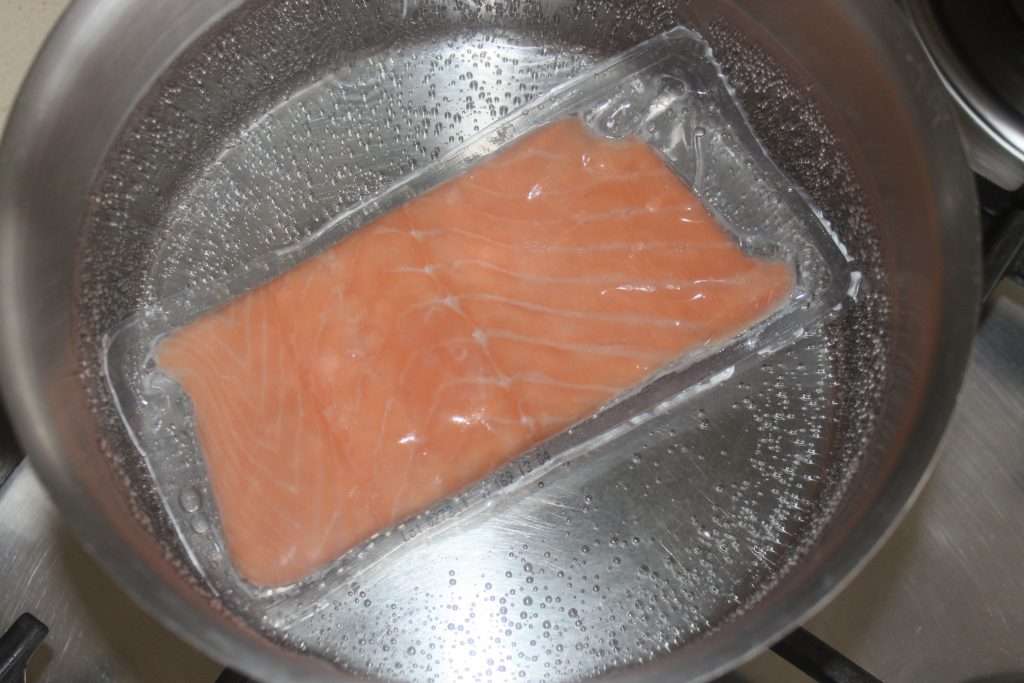
Meanwhile, cook the salmon steak in boiling water for 7 minutes. I took a vacuum-packed salmon here that does the job perfectly.
While all this is cooking, make the samurai sauce. Pour the egg yolk, mustard and a little of the 160g of oil into a bowl.
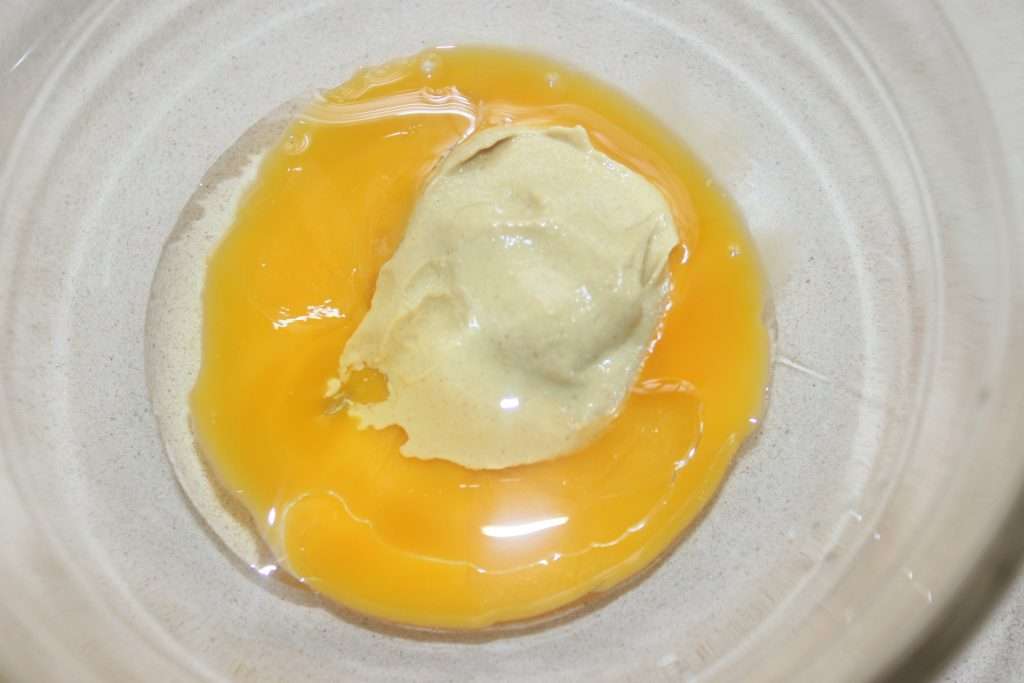
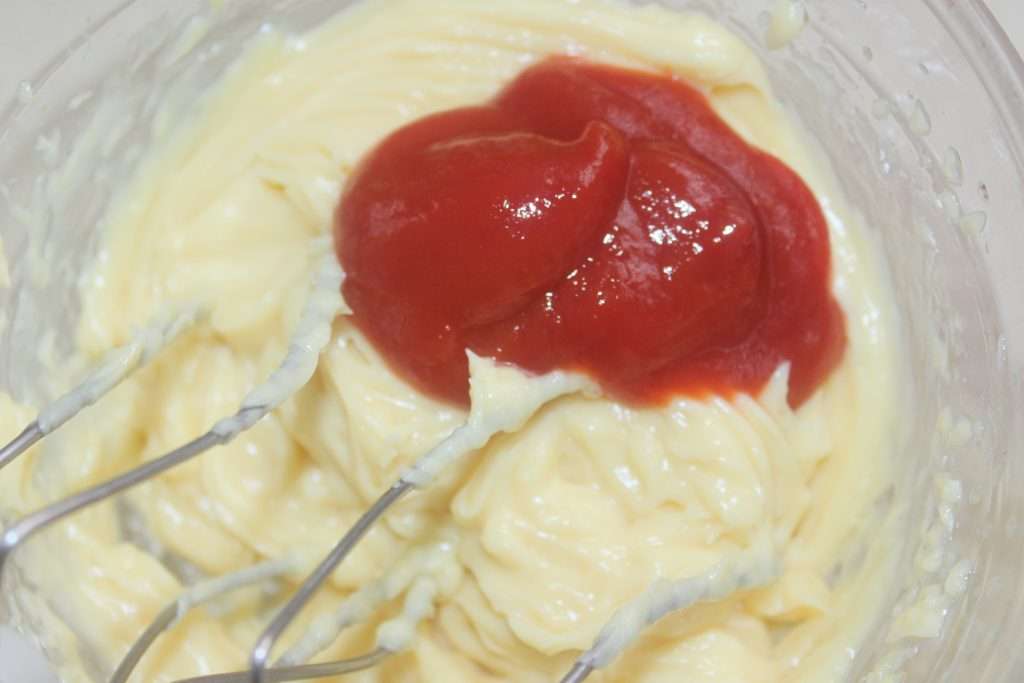
Whisk at high speed, adding the remaining oil in a stream to make a mayonnaise.

Add the ketchup.
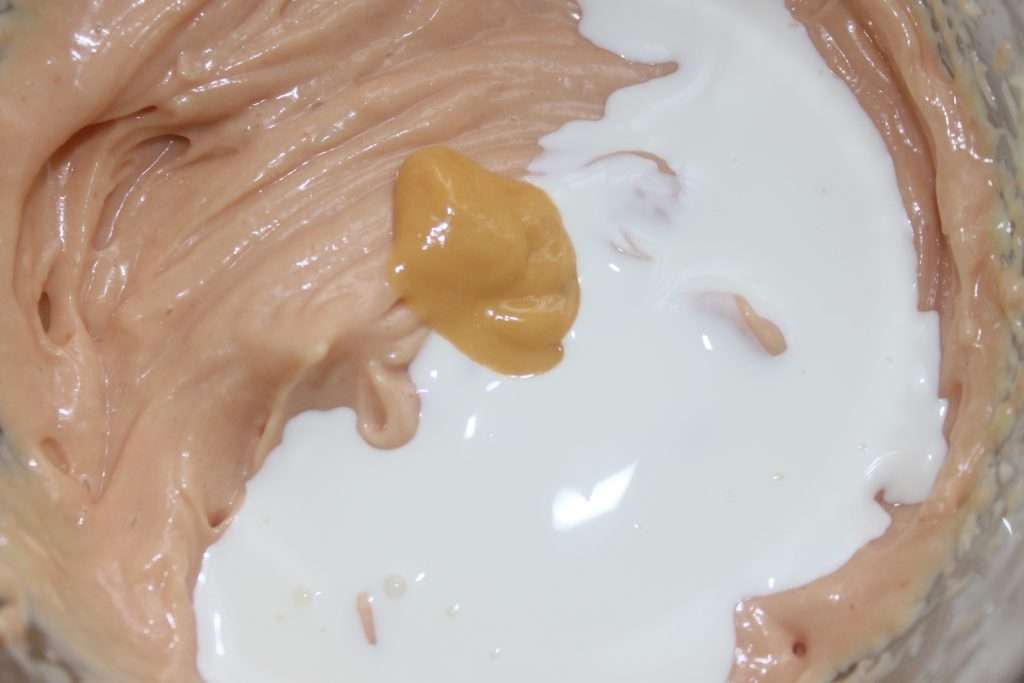
The chili cream (or tabasco) and the cream.
Finish with turmeric, a little chili powder and salt to taste.
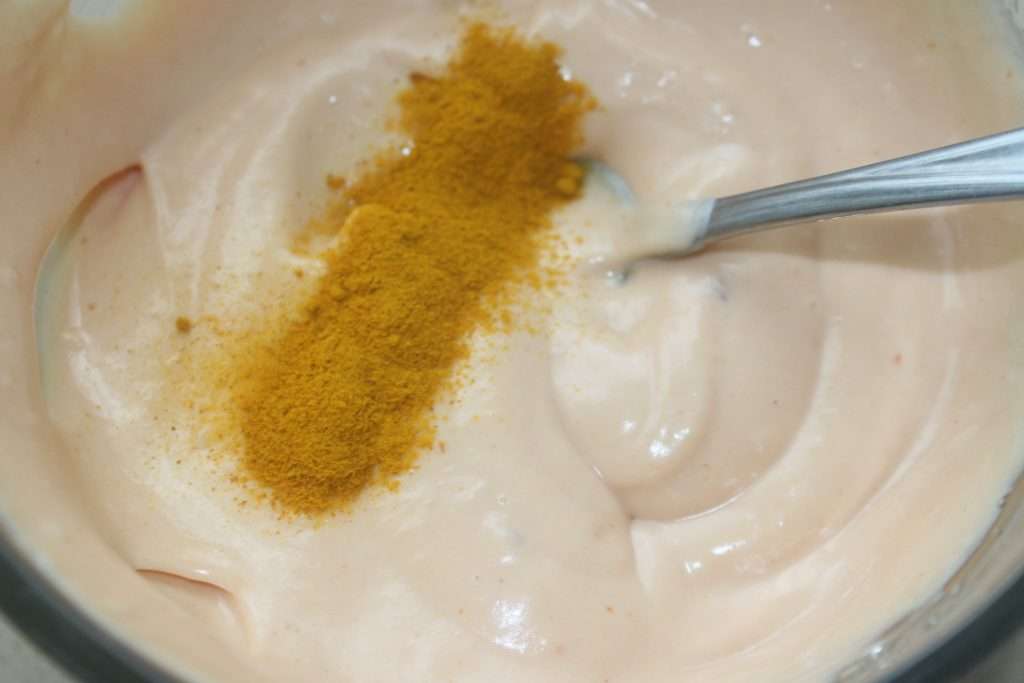

The sauce is ready.

When the salmon is cooked, flake it with a fork and add two teaspoons of sauce.
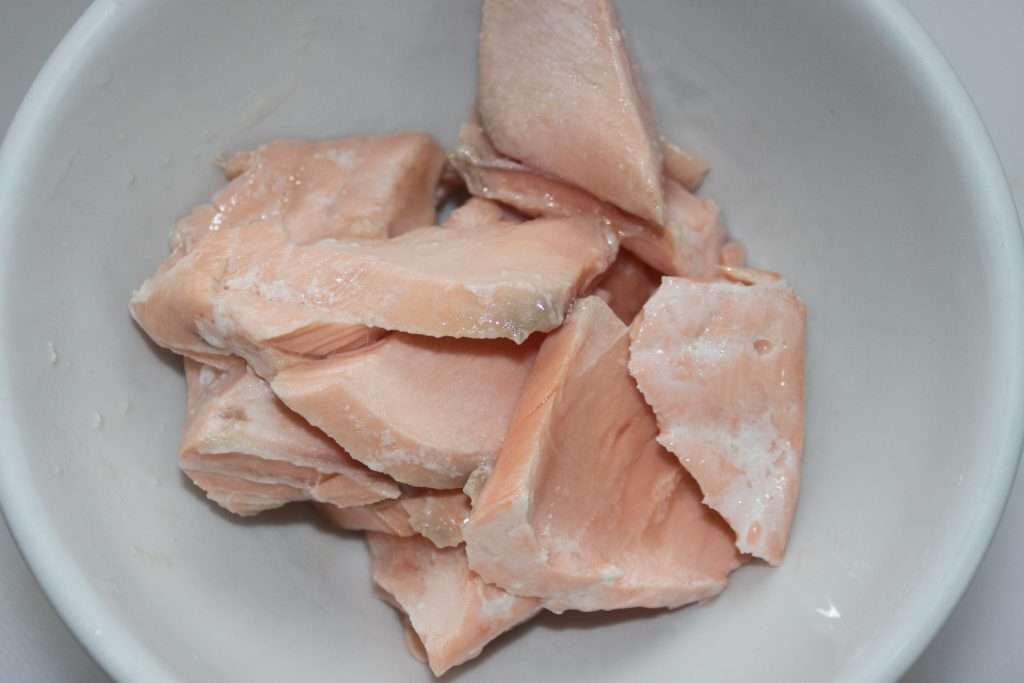
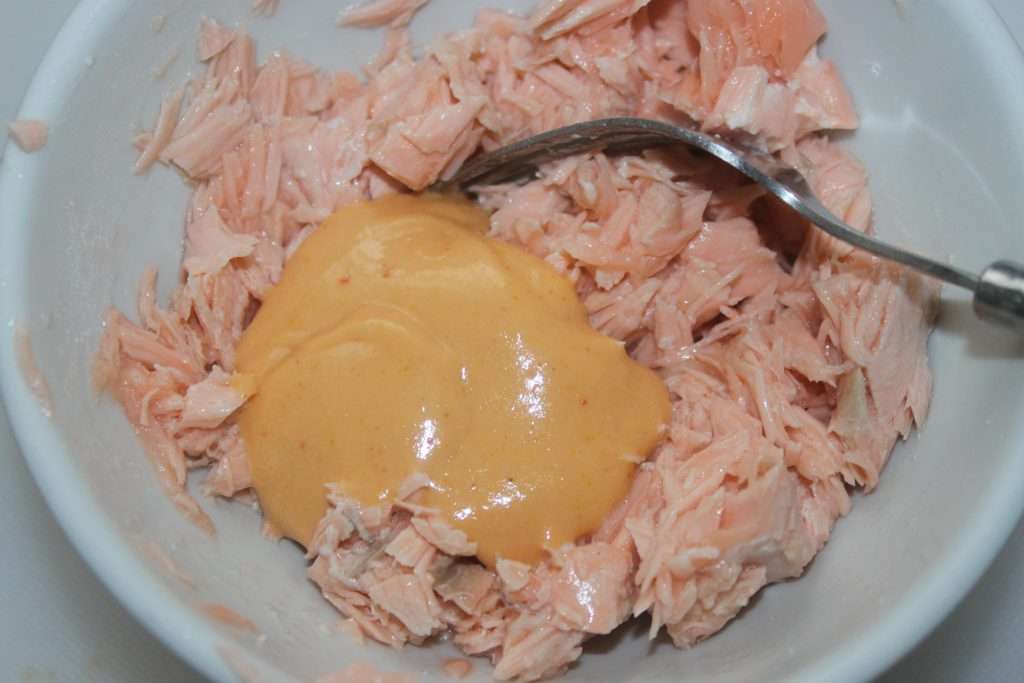
Mix well and set aside.

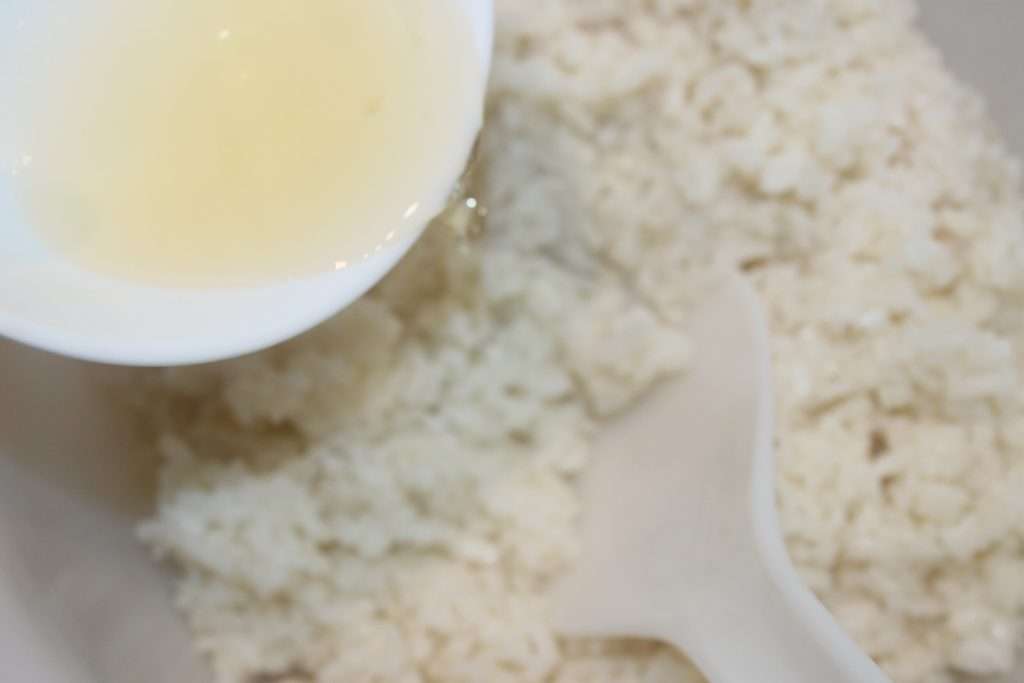
When the rice is cooked, pour it into a bowl and add the sesame oil, mixing gently. In a small bowl, combine salt, sugar, mirin and vinegar. Pour into the rice and mix.
While the rice is cooling, heat the crispy shrimp in the oven at 150°C for 10 minutes. Cut the avocado into 4 wedges, then each wedge into 3.

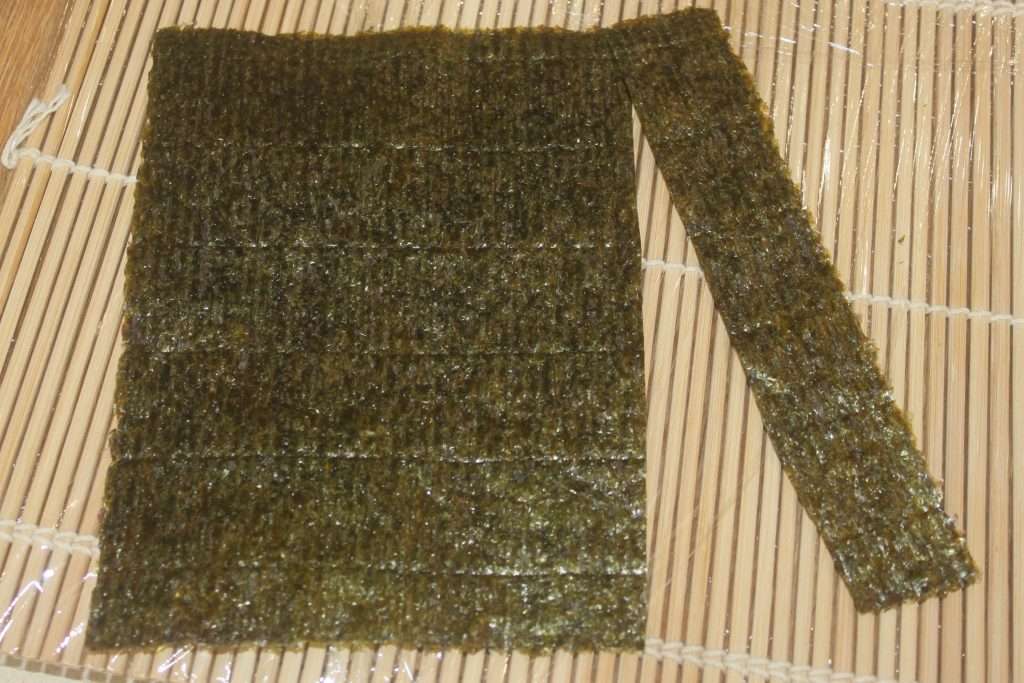
For the leaves, cut them so that they are 20cm by 15cm.
Pour 150g of cooked and warmed rice. You’ll notice that this time I’m using a bamboo mat wrapped in cling film.
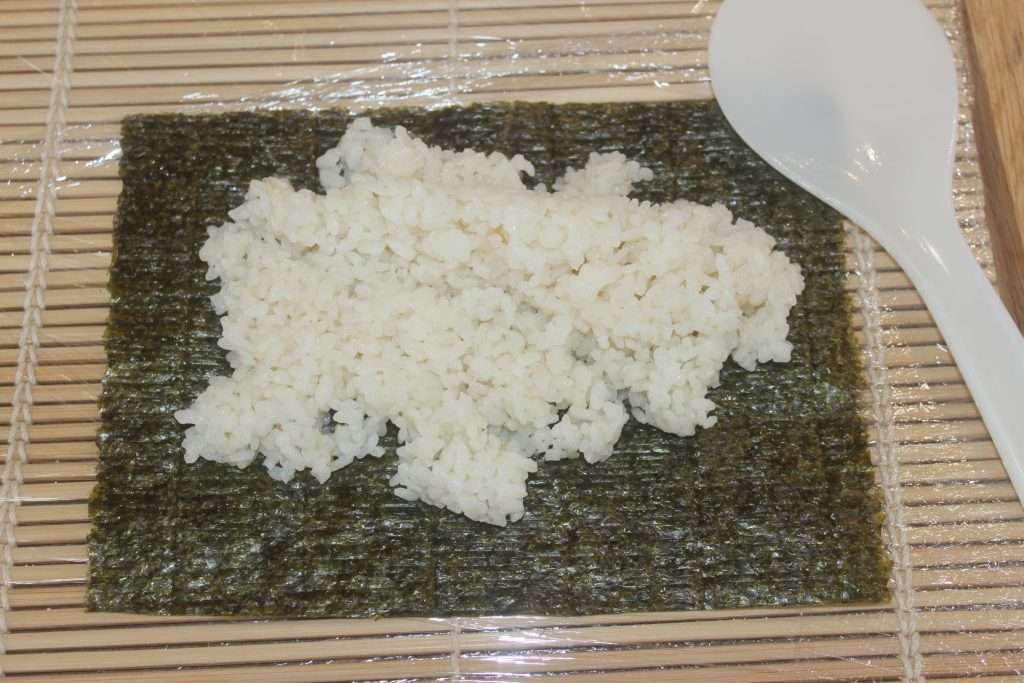
Spread it over the entire surface.
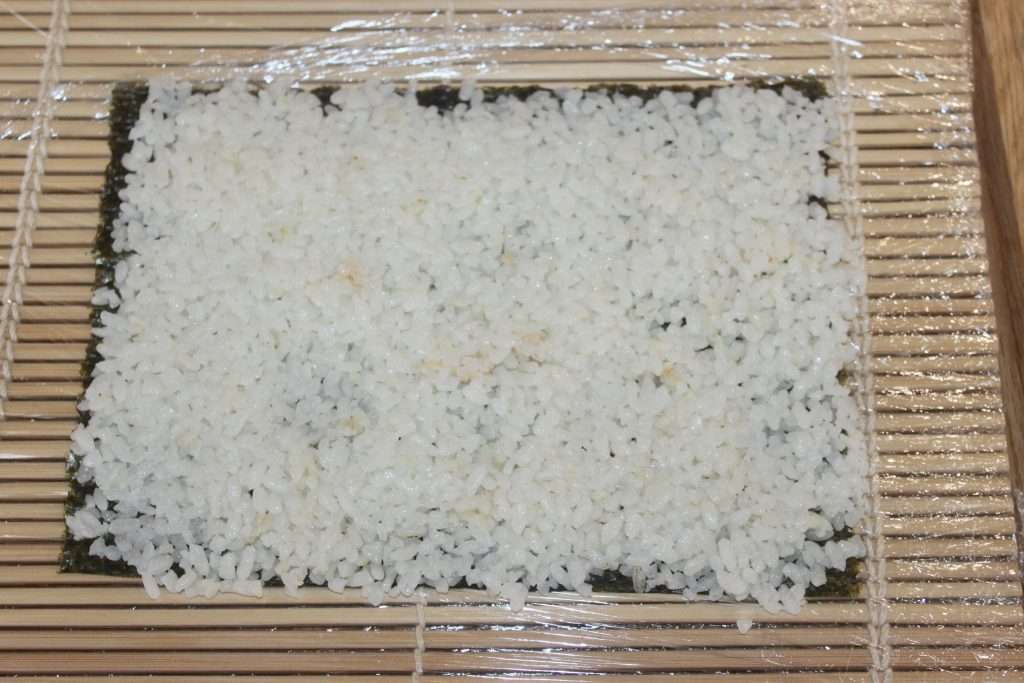
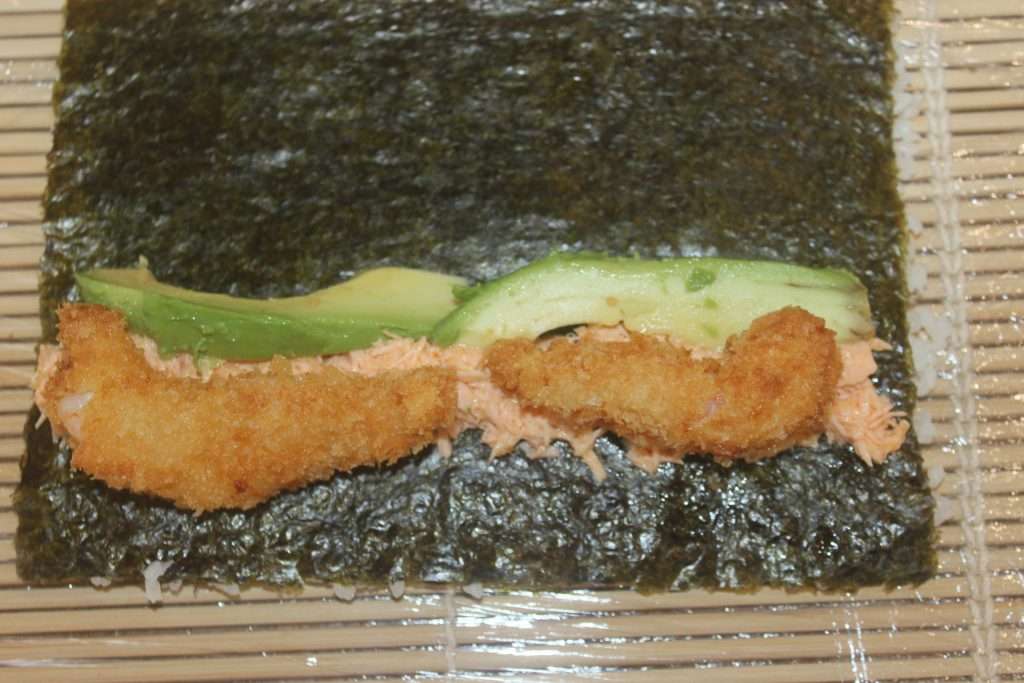
Turn the sheet over gently and press again. The rice is against the stretch film. Add two teaspoons of cooked salmon and two slices of avocado.

Also place two crispy shrimp on top.
Start to roll up tightly, using the mat if necessary.
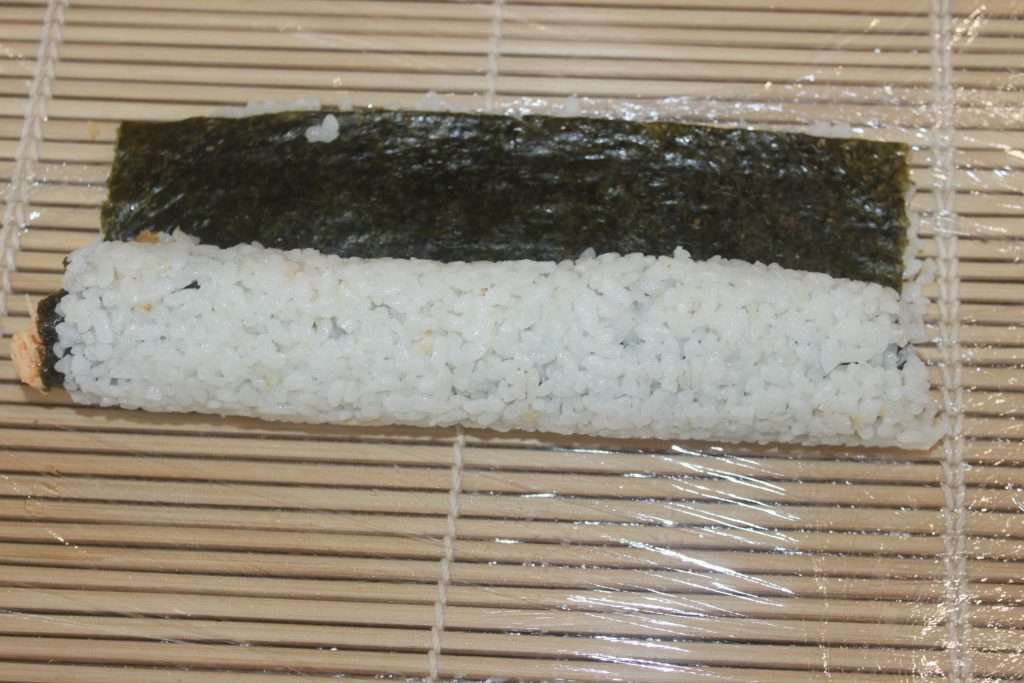
And There you go !
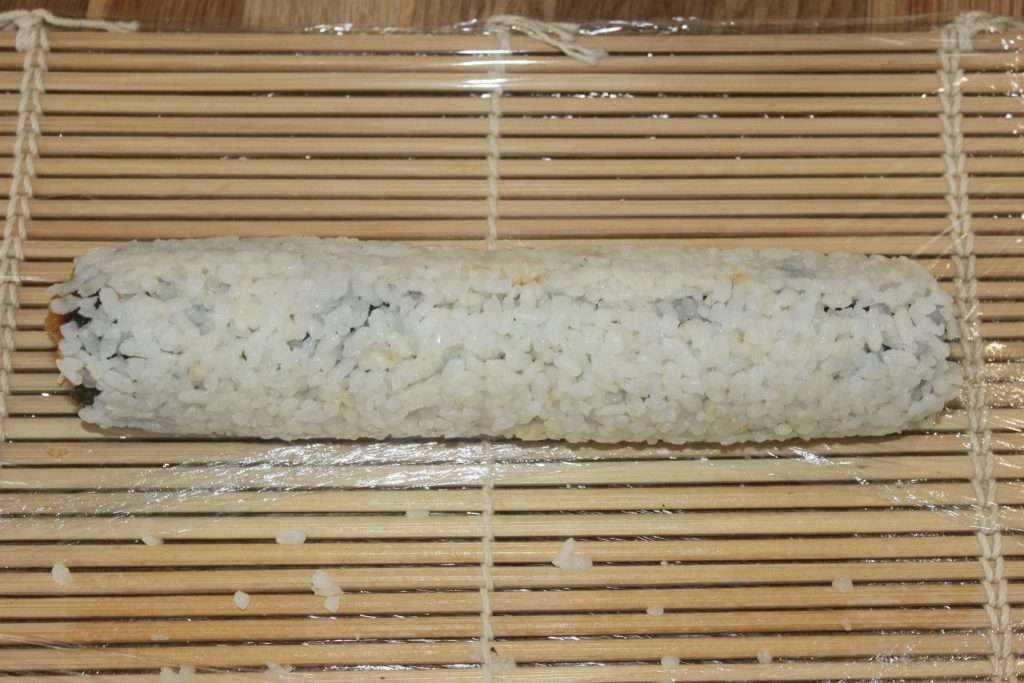
Do the same for the other 4 rolls. Wrap the top with one or two slices of smoked salmon.

Then with a very good knife, cut each roll in half, then each half into five.

To be enjoyed without delay with soy sauce and samurai sauce!


Avocado, salmon and Samurai sauce inverted Makis

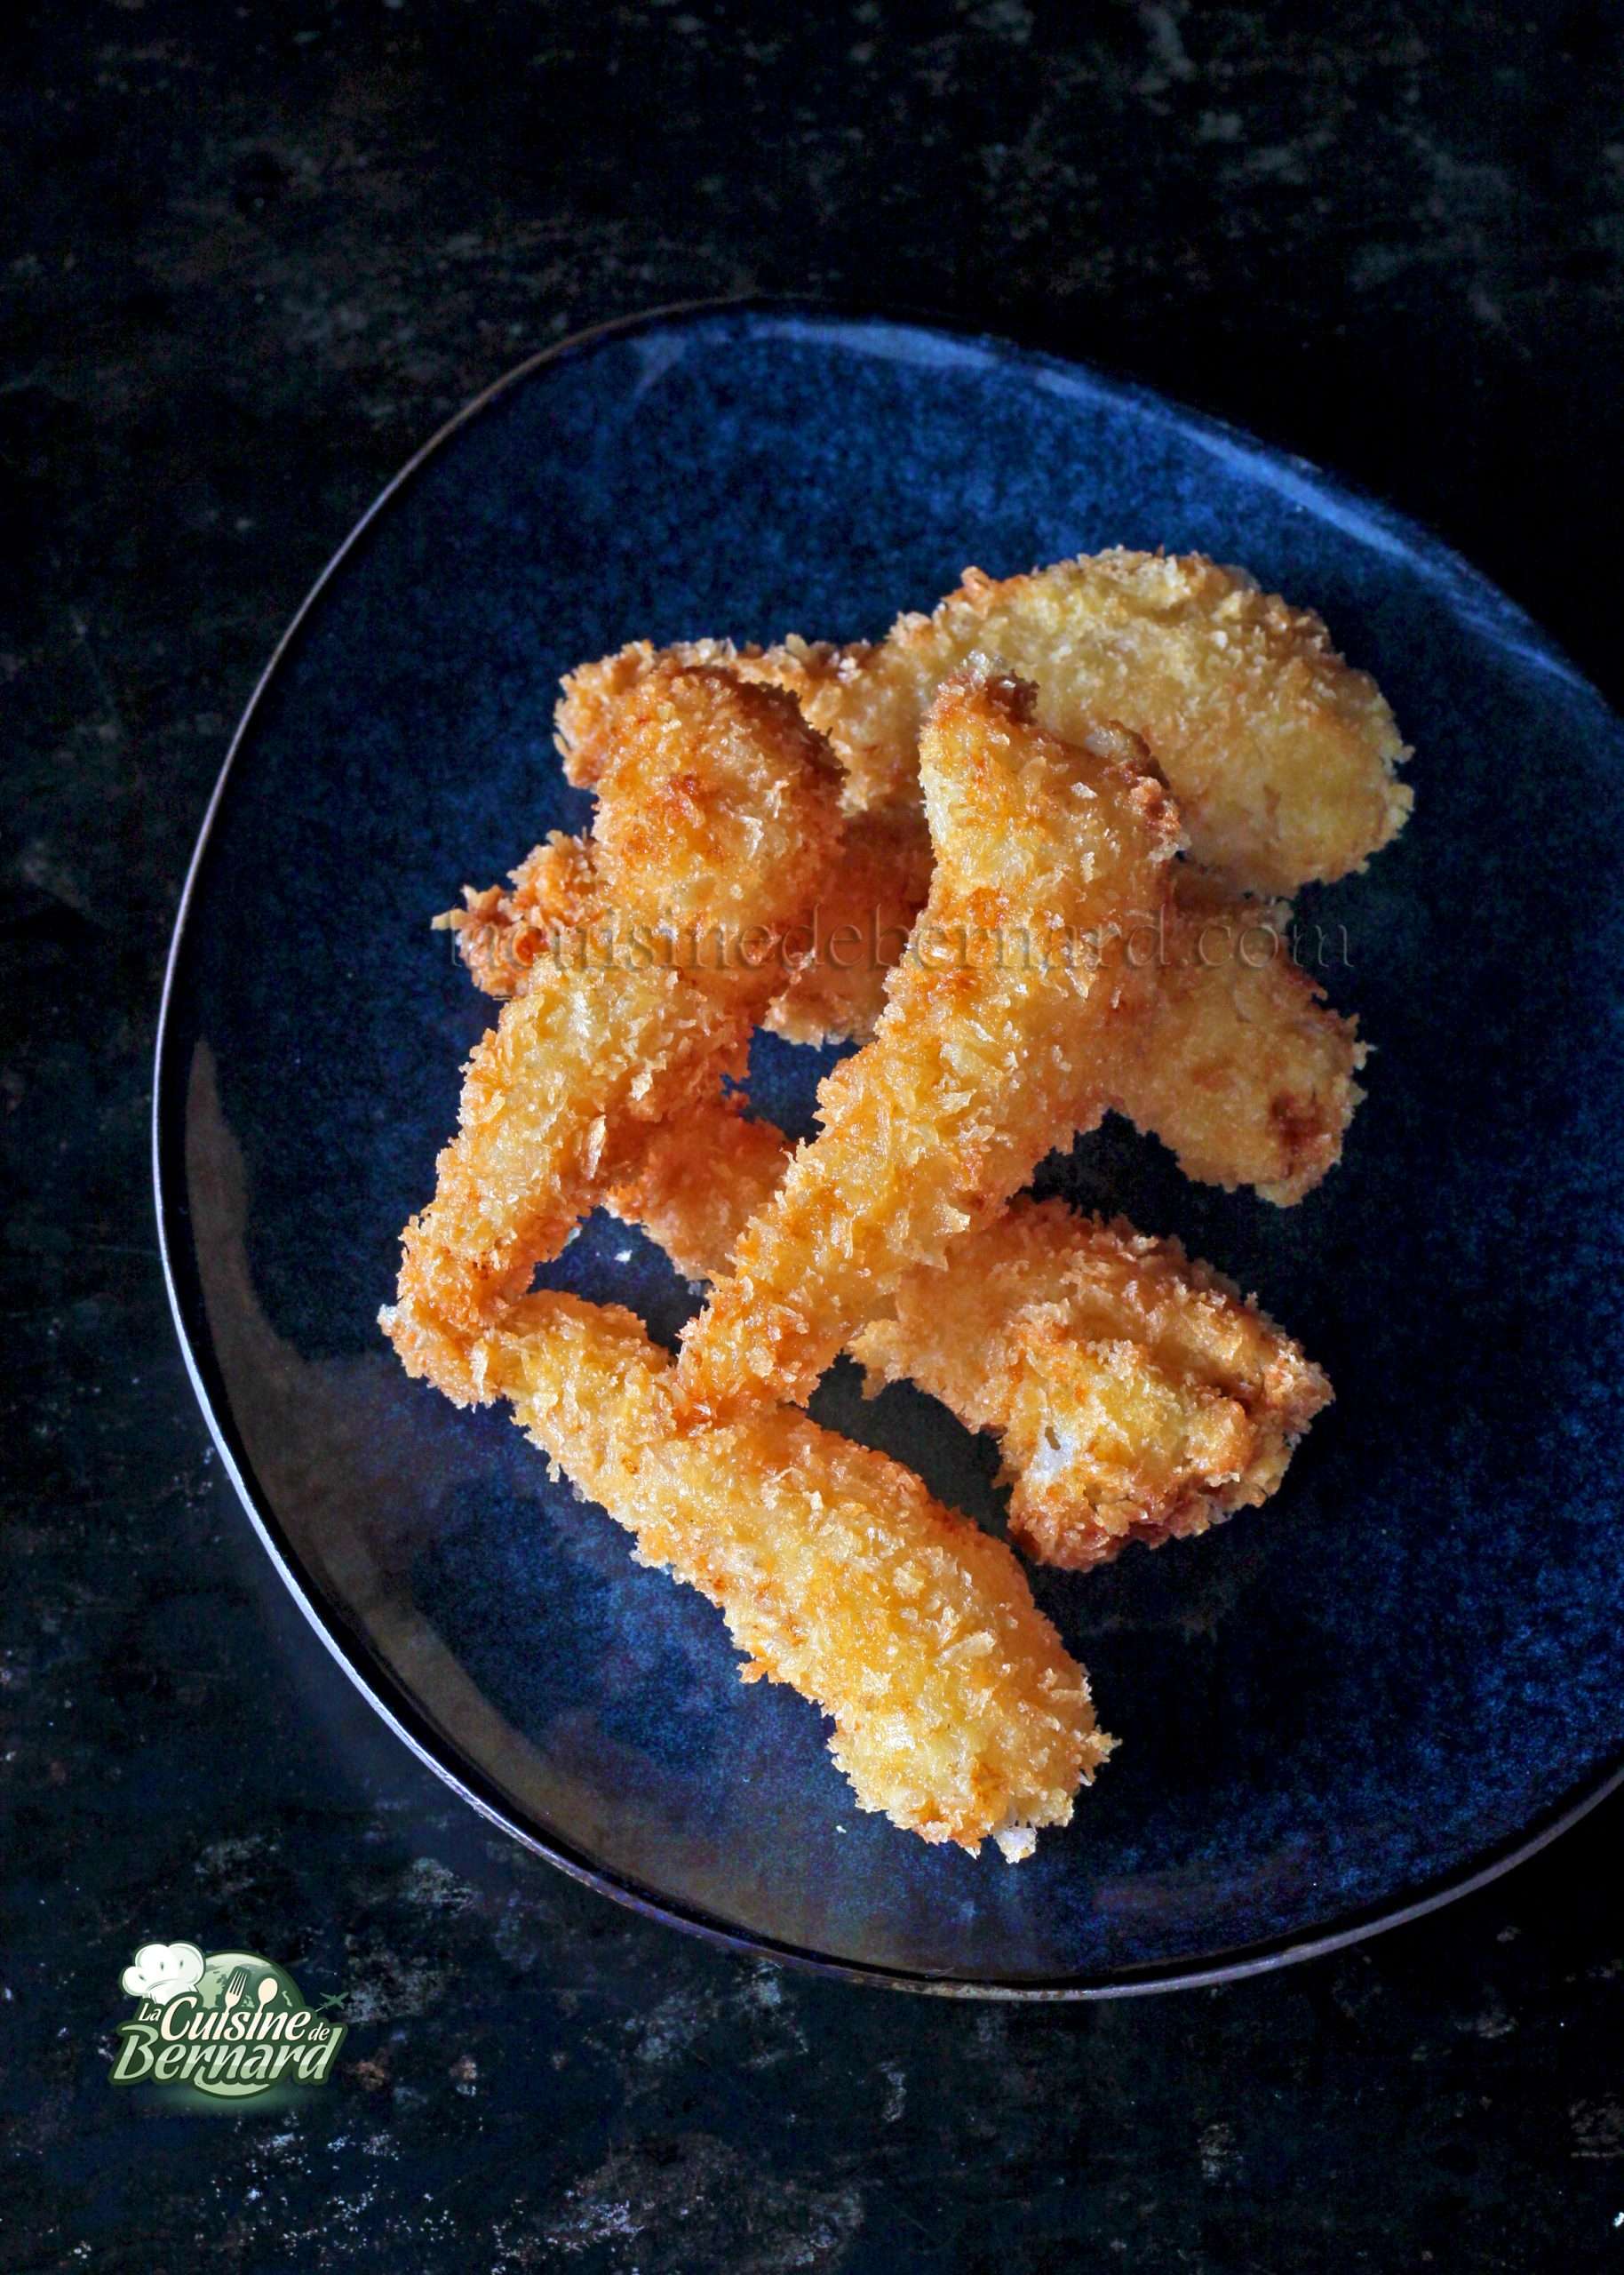
Here’s a simple recipe for crispy, golden shrimp. They are perfect as is with the sauce of your choice, or to incorporate into another recipe that I will tell you about very soon here on my cooking blog!
Recette des Crevettes croustillantes :
- a dozen large shrimp, peeled and deveined
- 12 wooden skewers
- 1 beaten egg
- a bowl of flour
- a bowl of fermented milk
- a large bowl of panko or breadcrumbs
- frying oil
Instructions :
Here are the raw shrimps. Take the size you want.

Prick the shrimp into a straight shape. You can then cut the wood to avoid having a too big stem.

To make a nice crispy crust, here are the egg, flour, fermented milk (or ribot milk) and panko, the Japanese bread crumbs.

Dip a shrimp in the egg and then remove the excess.

Then in the flour.

Dip into the fermented milk. Do not replace here with regular milk. Put the thicker fermented milk that will cover the shrimp.

And hop in the breadcrumbs.

Heat a small pan of oil to 180°C. You need at least 2-3 cm of oil. Fry the shrimp. Without a thermometer, if it’s bubbling right away it’s fine, if it’s coloring too quickly it’s too hot, if it’s not happening it’s not hot enough. Logical in short!

Put the shrimp on a paper towel and brown them well.

Hold the shrimp firmly and remove the spike. If you don’t hold on tight, the shrimp will come out of its golden crust.

You can either eat them right away, or freeze them in an airtight box. We will use these shrimp in a future recipe!


Crispy shrimp


Generous doughnuts, soft and filled with blueberries, not too sweet! If this makes you want to, I’ll tell you all my secrets. I start with a yudane paste that will give an incredible texture, then I offer a filling with a consistency that holds together perfectly, without being a very sweet jam. Of course you can vary the fruits at will and even put some spread on it…
Recette pour une douzaine de beignets :
For the yudane:
- 50g of flour
- 55g boiling water
For the dough:
- 455g of flour
- 1 packet of dehydrated baker’s yeast (6g) or 20g of fresh yeast
- 55g of sugar
- 1/2 teaspoon of salt
- 1 egg
- 240g of fermented milk or ribot milk
- 55g of butter at room temperature
- the yudane
- Oil for frying and powdered sugar for the top
For blueberry filling:
- 400g of fresh or frozen blueberries
- 220g of sugar
- 40g of cornstarch
- 240g (ml) of water
Instructions :
To find out what Yudane is, check out my recipe HERE.
Prepare the dough ideally the day before. Make the yudane at least 2 hours before making the dough. Pour the boiling water over the flour.

Mix with a spoon.

Then knead the dough on an unfloured work surface until it is smooth.

Put the yudane in cling film and cool. Put the flour, yeast, sugar and salt in the bowl of your food processor.

Mix and add the egg and fermented milk.

Knead with the hook for 7-8 minutes before adding the butter and cold yudane.


Knead again for 7-8 minutes until you have a nice smooth dough.

Cover with cling film. Chill overnight. The dough can be stored in the refrigerator for up to 3 days. It will puff up nicely (in the photo, I removed the cling film).

Roll out the dough on a floured work surface to a thickness of 6-7 mm. Cut with a cookie cutter. Here I took 8cm of diameter.

Place on a baking sheet lined with parchment paper.

Oil the surface with a brush to avoid drying out, then let it grow for an hour at room temperature.

Meanwhile, prepare the blueberry filling. Pour the sugar and cornstarch into a saucepan.

Mix well then pour in the water while mixing.

Add the blueberries.

Bring to a boil over low heat.

When it boils, let it boil for 3 minutes. The sauce thickens thanks to the cornstarch.

Let cool completely.

Put a good 3 centimeters of oil in a frying pan (not too big) and heat the oil. Put in a few doughnuts. If the dough browns too quickly, turn down the heat. The dough will puff up nicely.

Cook on both sides and cool on paper towels.

Pour the cooled filling into a pastry bag fitted with a piping bag large enough to hold the blueberries.

Push the sleeve into a doughnut and bake.

Put sugar in a small container and roll the doughnuts in it. To be enjoyed warm or cool!

Pétrissez avec le crochet pendant 7-8 minutes avant d’ajouter le beurre et le yudane froid.

Blueberry Doughnuts


To some, this may sound crazy, but I am a fan of Brussels sprouts! Not the traumatic ones from our childhood canteen, eh! But the home-cooked ones. I love them no matter how they are cooked. I start with baked cabbage, served with a delicious little tahini sauce. Simple efficient and good!
CHOUX DE BRUXELLES AU FOUR :
Recipe for 4 people:
- 1 kg of brussels sprouts
- olive oil
- salt, pepper, paprika, chilli, sesame
Tahini sauce :
- 135g of tahini (sesame paste)
- 15g of white vinegar
- 10g of balsamic vinegar
- 20g honey or agave syrup
- 15ml olive oil
- 100ml of water
- 1 clove of garlic
- salt pepper
Instructions :
Start by rinsing the Brussels sprouts.

Cut the base a little and remove the damaged leaves. You will have newborns!


Cut them in half.

Place them on a baking sheet.

Sprinkle with olive oil, salt and pepper to taste. I also add a little paprika and chilli.

Bake for 30 minutes at 180°C on a convection oven.
Meanwhile, make the sauce. Mix all ingredients together.

Add one peeled garlic clove, pressed with a garlic press.

Add salt and pepper to taste and, if you have any, a little sesame seeds. But also spice it up a bit!

Taste and adjust to your taste!

Serve the cabbage with the sauce.


De drôles de sablés avec une jolie forme en spirale, tout cela sans ustensile particulier. Vous les façonnerez à la main. C’est un peu de travail et vous recommencerez sans doute plusieurs fois pour obtenir un beau dessin. Mais c’est assez amusant à faire, surtout si vous voulez initier vos enfants à la cuisine. Et en plus, ils seront très bons !
Recette pour une trentaine de sablés :
- 250g de beurre demi-sel fondu
- 95g d’huile neutre
- 160g de sucre glace
- 1 sachet de sucre vanillé
- 1 œuf
- 590g de farine
- 1/4 de cuillerée à café de bicarbonate de sodium
- 5 cuillerées à café de cacao non sucré en poudre
Instructions :
Mélangez dans un récipient, le beurre fondu, l’huile, le sucre glace, le sucre vanillé et l’œuf. Mélangez bien pour avoir une crème homogène.

Ajoutez alors la farine et le bicarbonate.

La pâte est déjà prête.

Divisez la pâte en trois parts égales. Dans une part, ne mettez rien, dans une autre mettez une cuillerée à café de cacao, et dans la dernière, 4 cuillerées à café de cacao. Mélangez bien le cacao à la part de pâte concernée.

Vous avez alors 3 boules de couleurs différentes.

Pesez des boulettes de 5g dans les trois pâtes. Roulez bien entre vos mains.

Prenez 2 boulettes natures, 2 au cacao clair et 2 au cacao plus foncé. Mettez les en couronne de cette façon. Si cela vous semble trop compliqué, vous pouvez ne mettre que 3 boules au total au lieu de 6, en les pesant chacune à 10g au lieu de 5g. Vous aurez donc juste 3 spirales au lieu des 6 que je fais ici. Au goût, évidemment, cela ne change rien !

Mettez dans la paume de votre main. Puis avec l’autre main, façonnez en tournant continuellement pour former la spirale.

Cela demande peut être un peu d’entrainement, mais vous y arriverez.

Certains sablés seront sans doute plus beaux que d’autres.


Faites cuire à 165°C pendant 15 à 20 minutes puis laissez refroidir sur une grille à pâtisserie. À conserver en boite hermétique.